Image0159.jpg

Bravo (Classic) Van with a difference!!!.

Introduction

Heres the replacement for my highly abused yet extremely reliable Bravo.... Another Bravo (y) I'm moving up a year here :D Not going to be bitten like the last time, this is going to have a strip down and re-rustproof with a few bits to be thrown in too (copper lines all round are in the plans). Most importantly, this car is going to be converted to a van and painted black with some "toys" installed... More pics soon! :)

Image0159.jpg
  • Like
Reactions: Joshhh
Re: Van with a difference!!!

My current daily hack has some toys that will be transferred over eg the novelty horns, polys, 6 speed box, sound system etc. I also fully intend on putting an emergency hardwire in the sill to open the window with a battery (i have been locked out before), the subs will be installed with a quick release if necessary. Those are just some of the plans/toys ill think of others as i go along! Oh and the gearknob is a must :D
 
Re: Van with a difference!!!

Right an update, even if its only a slight one!

Havnt had much time to work with this car (putting all my effort into my temp daily runner) but i did get some stuff done :)

Engine needs removing
Image02121.jpg

Whoever maintained this car hadnt a clue!! :yuck:
Image02131.jpg

Now I have a few tbs lying about. Just have to get one, clean it a bit, sand it...
Image0207.jpg

... and hey presto, smoothed and polished (y)
Image02181.jpg

I bloody hate these interiors :mad:
Image02141.jpg

Its very straight to be fair
Image02151.jpg

Now whats missing in this photo..
Image02161.jpg

Now the windows have to go (y)
Image02171.jpg

(That Seicento is a brilliant little car!!) And thats it for the moment, blast the lack of time (n) I may have it going for the next update :D
 
Re: Van with a difference!!!

It will be like my last Bravo but with a few major differences eg relocation of the battery, van conversion etc. The engine is totaled along with the box, Ill be using the one from my old Bravo in it. Then hopefully the one in my garage will be put in its place in due time (finances permitting) Hoping it all goes to plan! (y)
 
Re: Van with a difference!!!

Ive just realised, the way the car is parked looks kinda fimiliar...

Image0159.jpg
Image412.jpg

Coincidence....?? :D

Image00891.jpg

(I couldnt resist, I miss my Bravo quite alot :cry::cry::cry:)

Not realy an update but I did get some stuff done in half an hour, seating for one and no friendly plastic guards atall (y)

Image0219.jpg

But I need more time! What will be done for the next update I wonder.... :yum:
 
Re: Van with a difference!!!

what did you use to clean + polish the TB with?

To clean: Standard cellulose thinners on a rag

To smooth: P60 + P400 grit sand paper

To polish: P1800 wet and dry + lots and lots of patience!!! (y)

Ive did this before on my old Bravo and it worked very well (the difference was instantly noticable, much better response and sound). Why did I do this again when I already had one done before? To see if I could still do it :p
 
Re: Van with a difference!!!

cheers for that,ill take note of what i need :)

Ive never done anything like that but have always wanted to,and tbh it could do with a good clean anyway (even if i dont smooth/polish it).

may aswell give it a go end of month as itll be coming off the rd then.

Cheers (y)
Mike
 
Re: Van with a difference!!!

ooh great, thanks Mal..i might try that myself, i could do with more response low down:)
how long roughly did it take ? cause i think i might do it this sunday:cool:

and mike when i took my tb off, without polishing it, it still came up really nice...and theres normally quite a bit of greasy oil inside too..tis good to clean it out once in a while :)
 
Re: Van with a difference!!!

cheers for that,ill take note of what i need :)

Ive never done anything like that but have always wanted to,and tbh it could do with a good clean anyway (even if i dont smooth/polish it).

may aswell give it a go end of month as itll be coming off the rd then.

Cheers (y)
Mike

Your best bet is to clean it up realy well first then take it in small steps on how much to take off and trial running it. Its alright for me that has 5 to play with for the one car, if you get another tb first and experiment that would be the way to go. If it goes wrong the car wont run right atall, it will be getting the wrong amount of air and totally wrong airflow, trust me ive been there...!

ooh great, thanks Mal..i might try that myself, i could do with more response low down:)
how long roughly did it take ? cause i think i might do it this sunday:cool:

Im afraid to say it took over 5 hours to do the sanding....!!! :eek: A good clean is a good start though and dosent take that long (y)
 
Re: Van with a difference!!!

Update time :) Be warned I got pic heavy!! :devil:

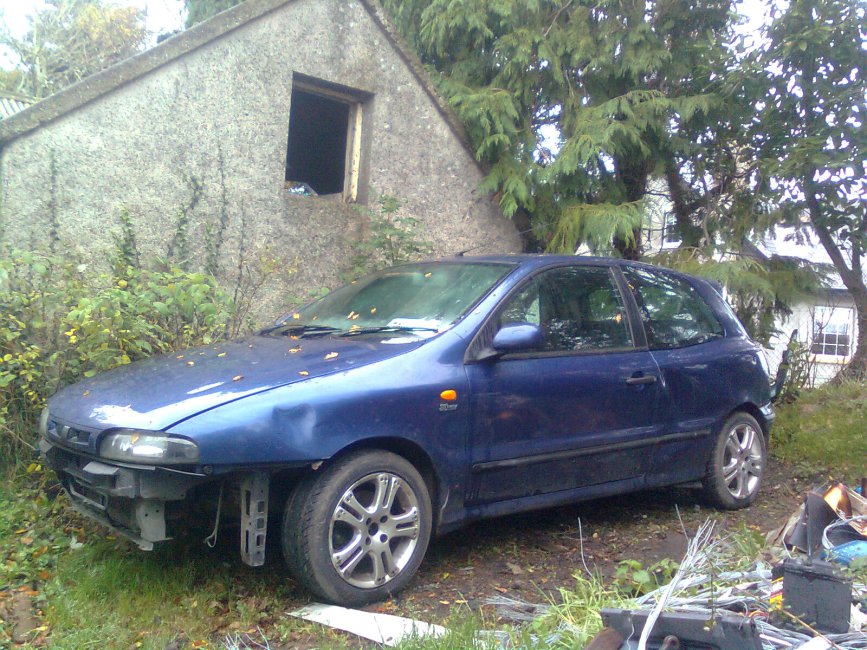
First things first, the car is still not running but I felt I had to share this with everyone here :)

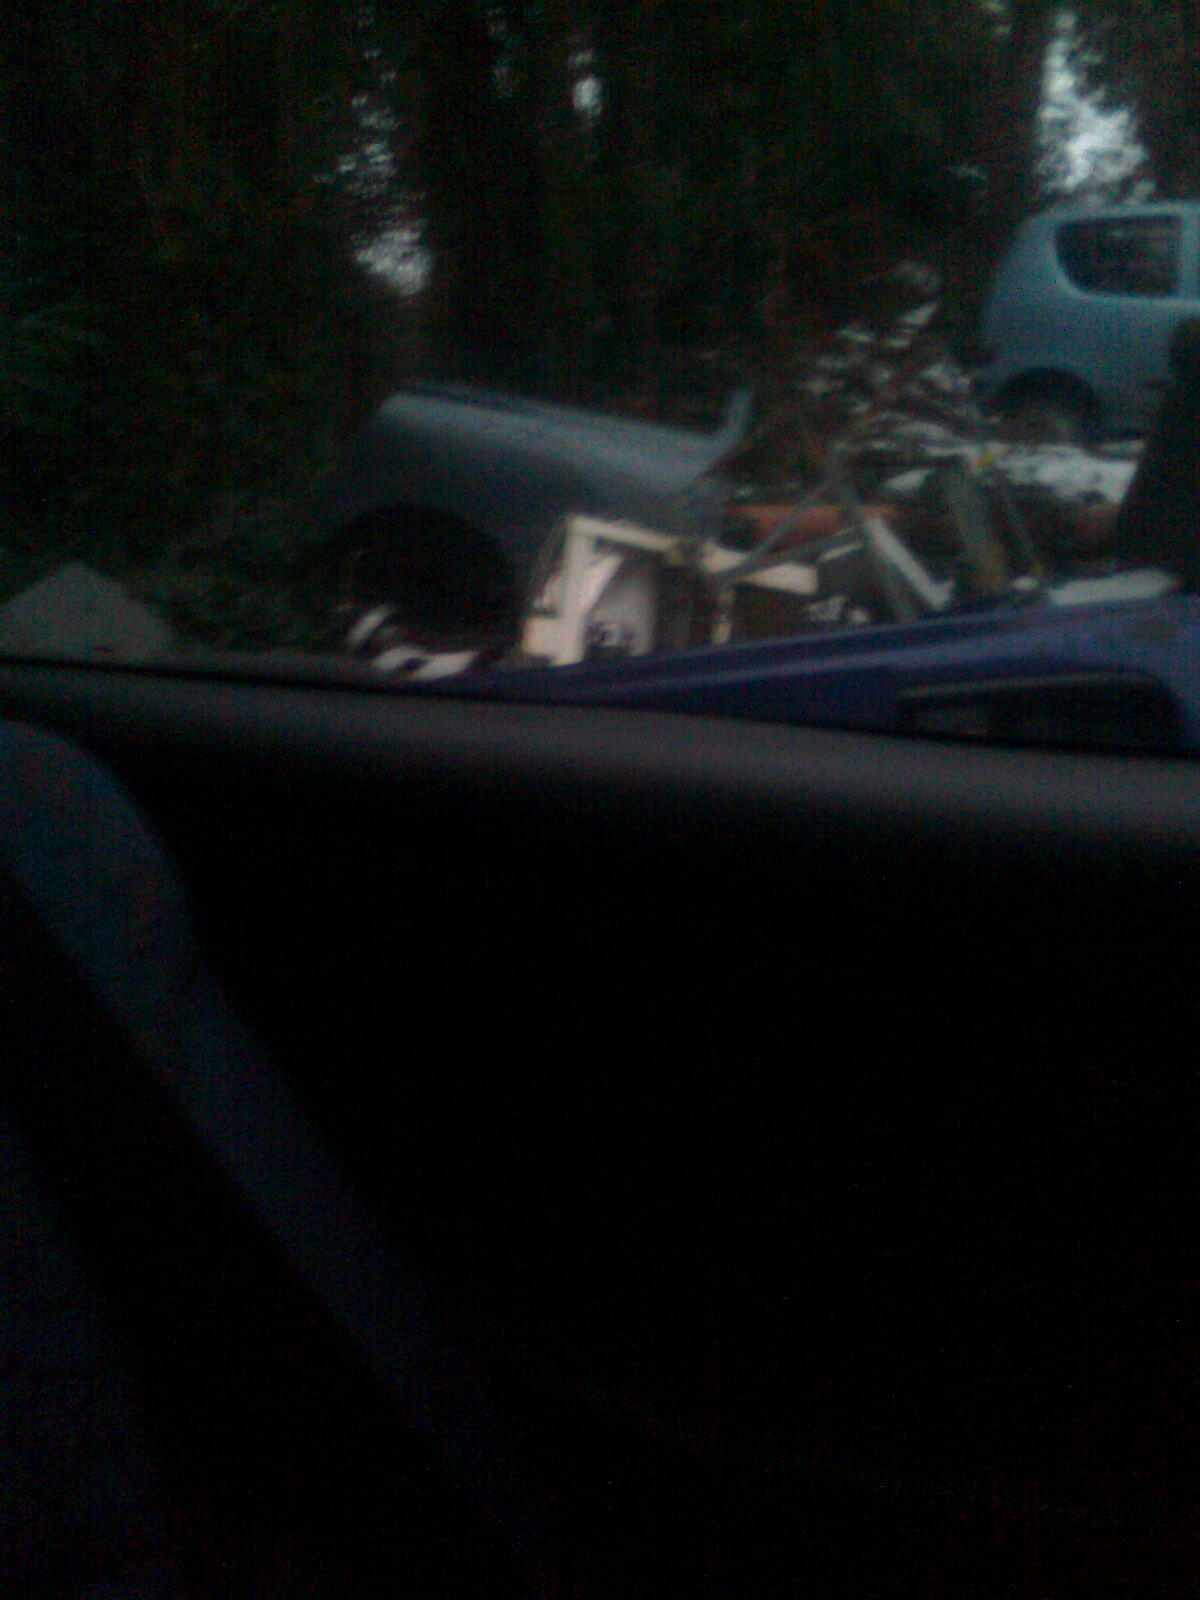
To begin with the car had to be relocated for the space to whip the engine out
Image02271.jpg

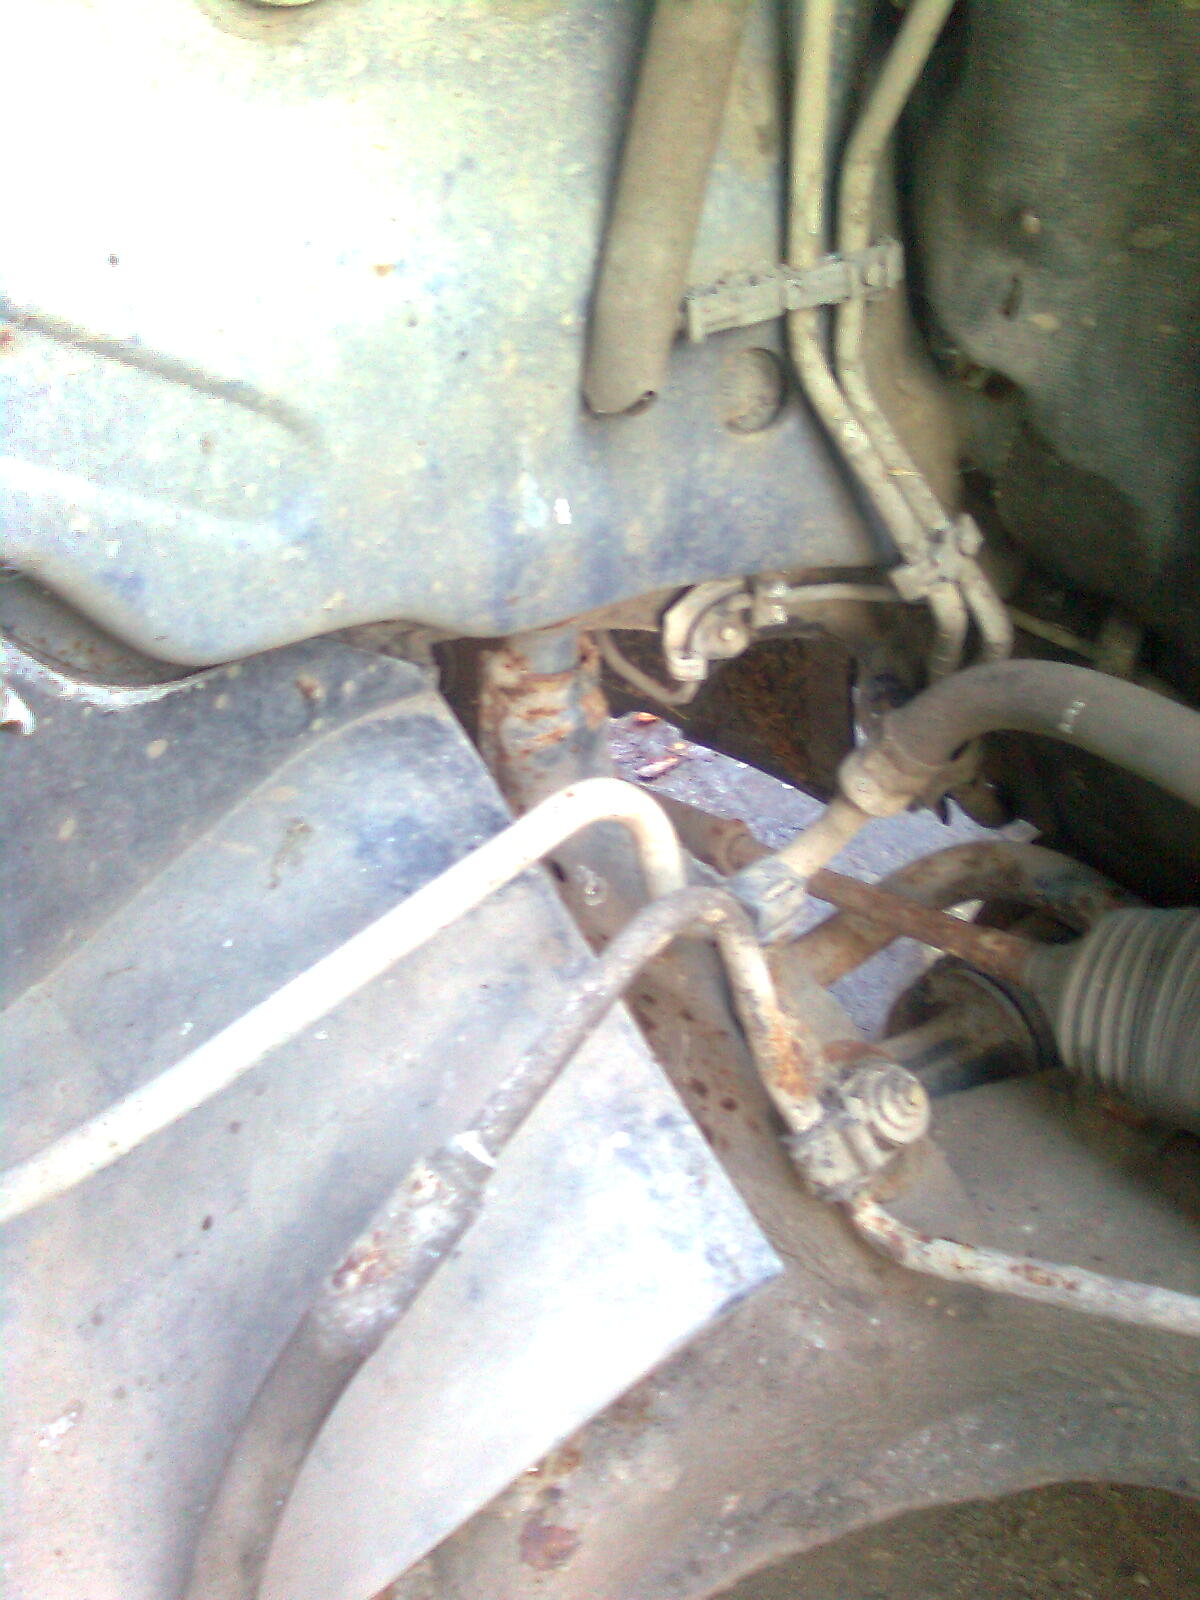
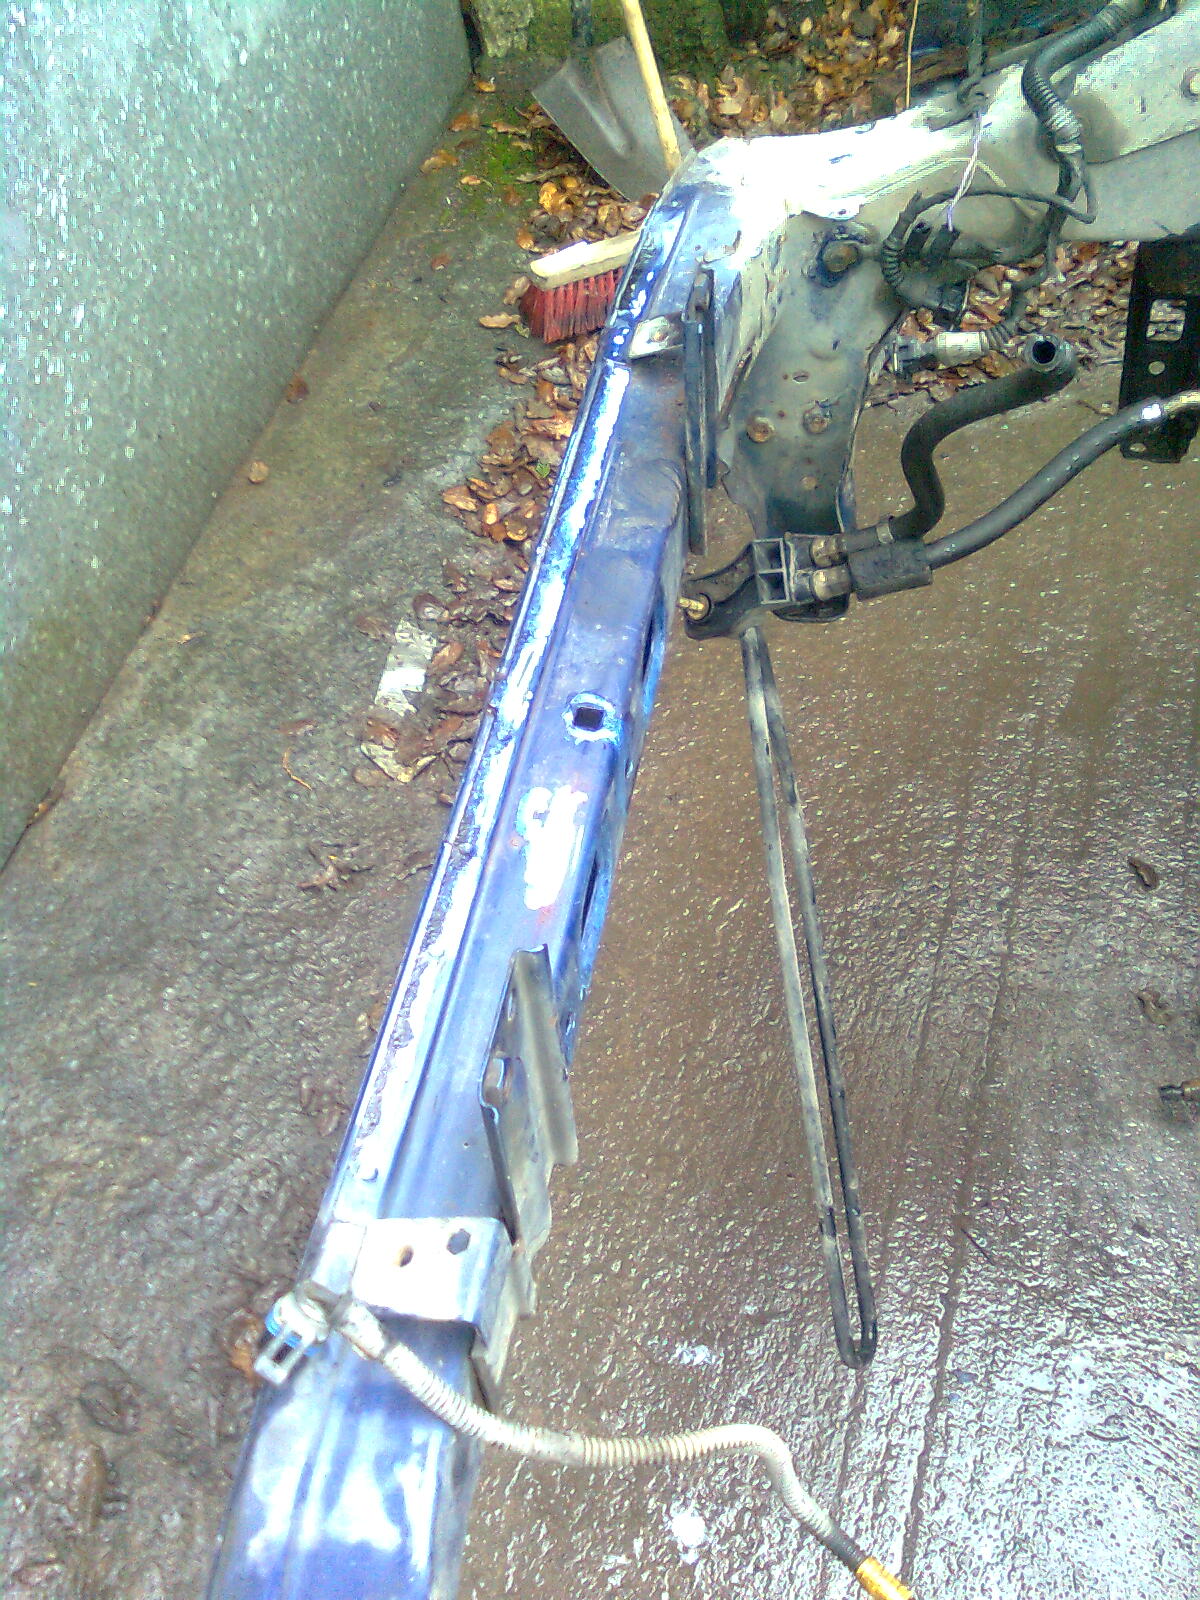
Note the comedy ride height. Its abnormally high....
Image02281.jpg

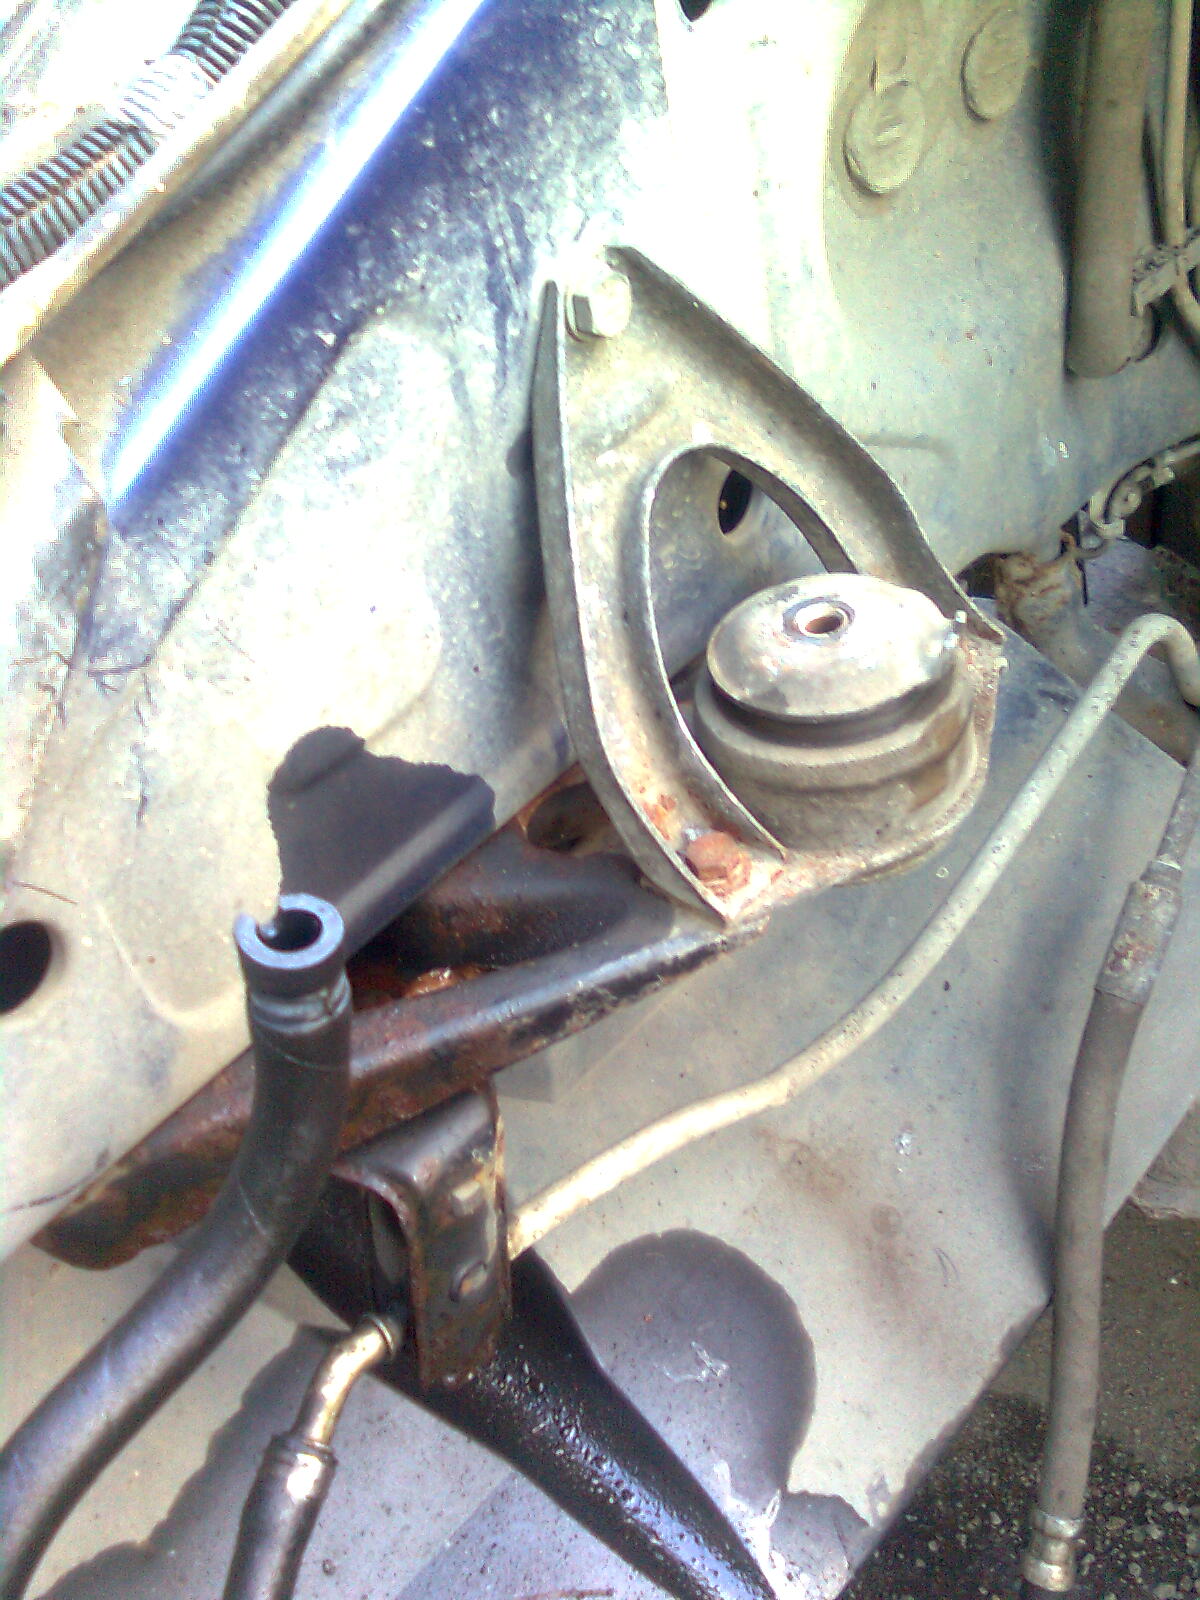
About 20 minutes later: Progress
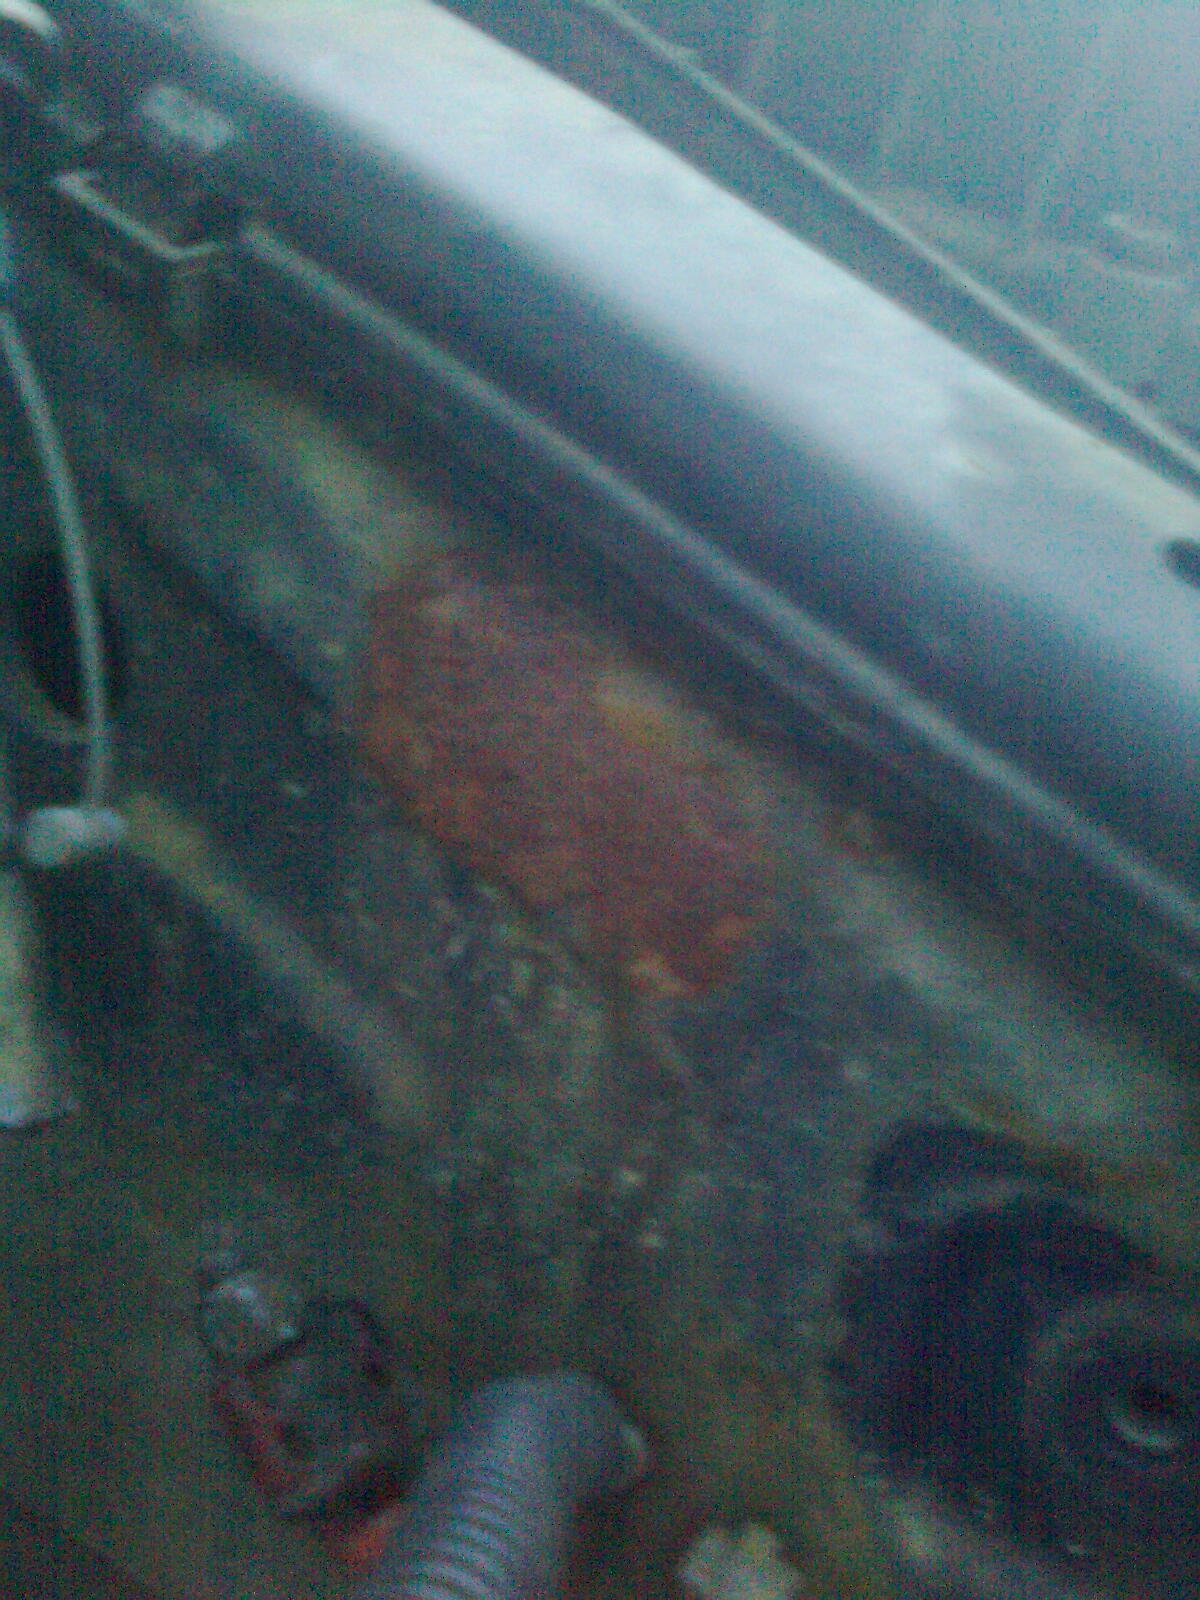
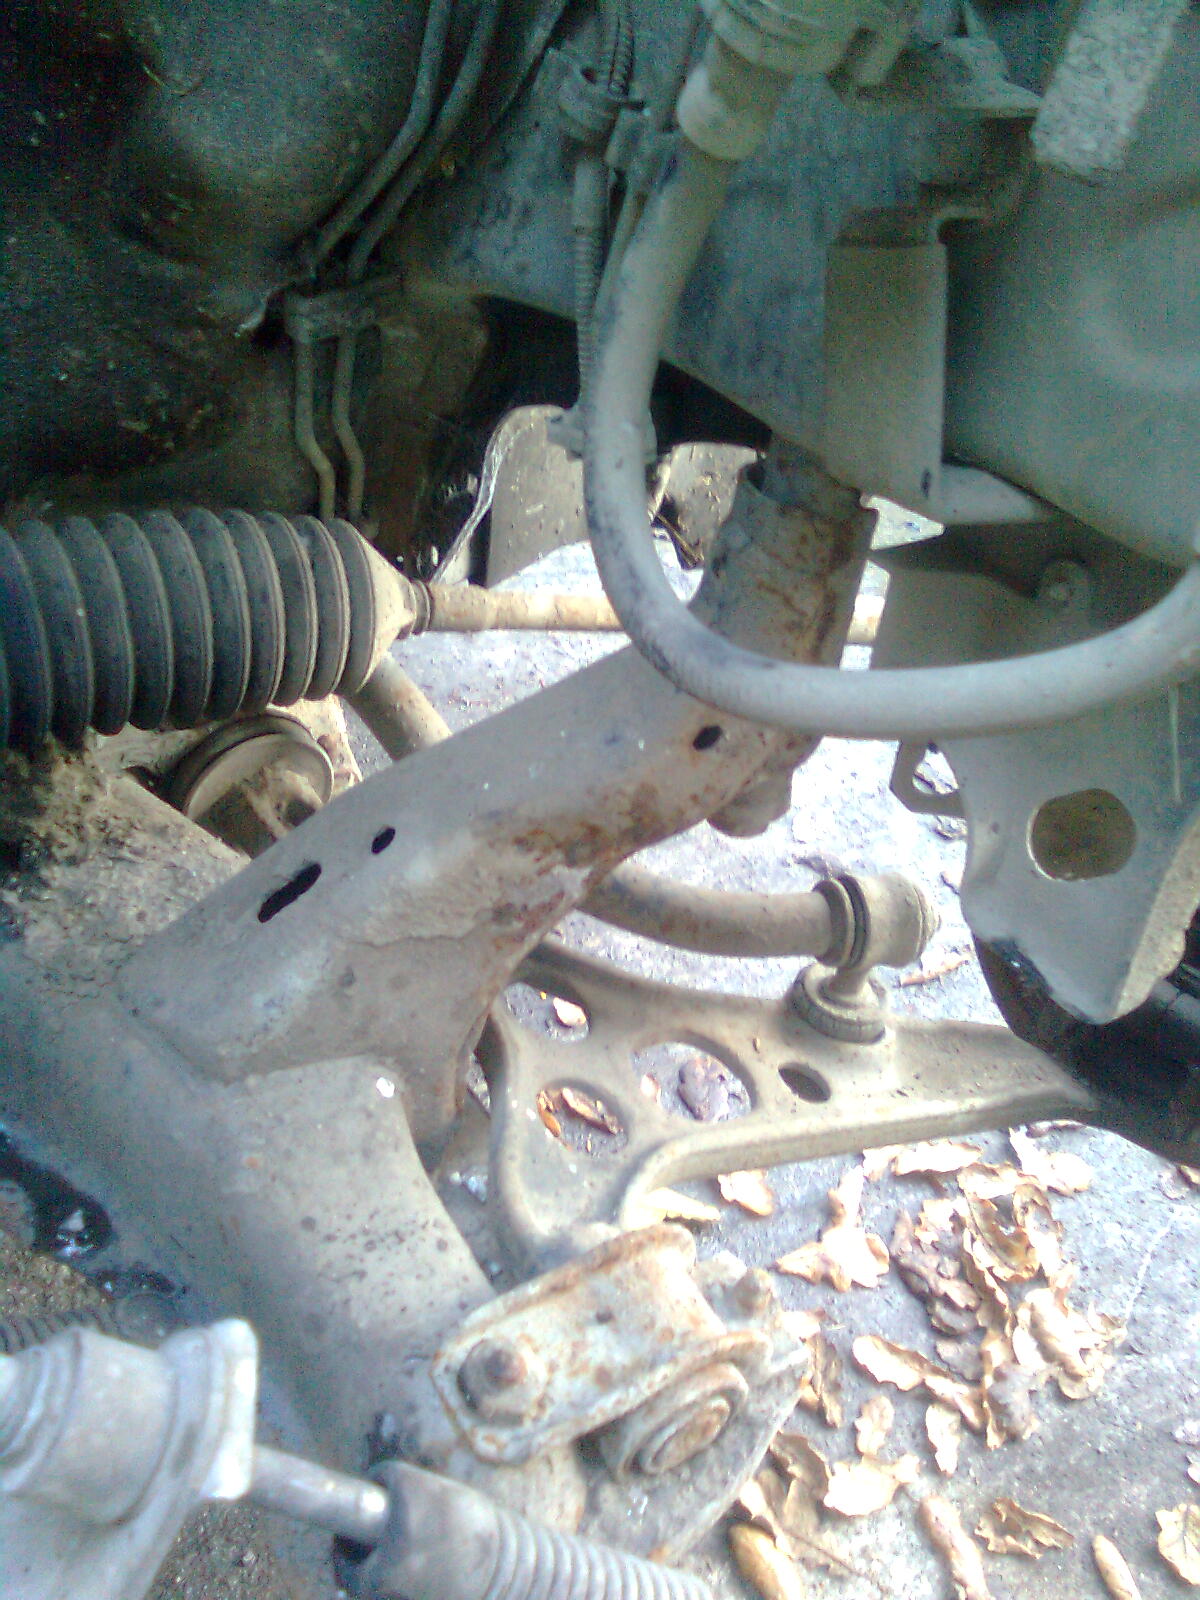
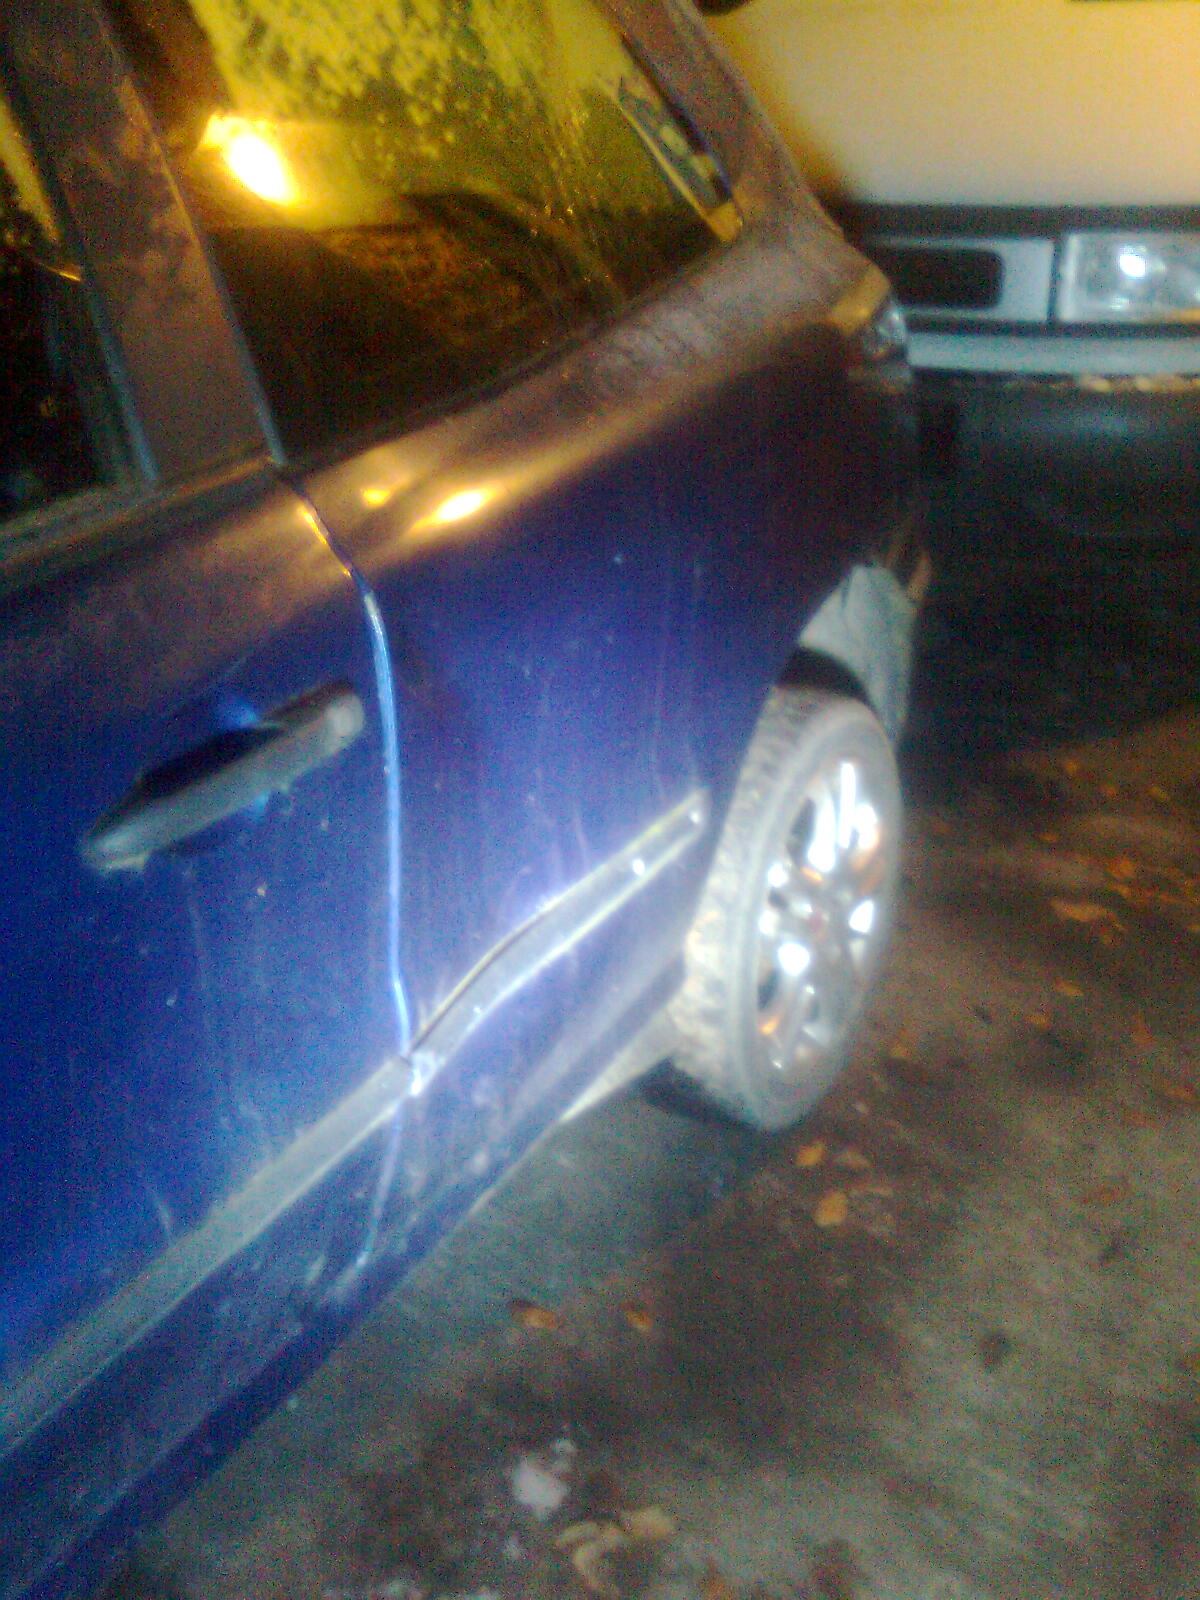
 (y)
Image02311.jpg

Wait a minute...
Image02341.jpg

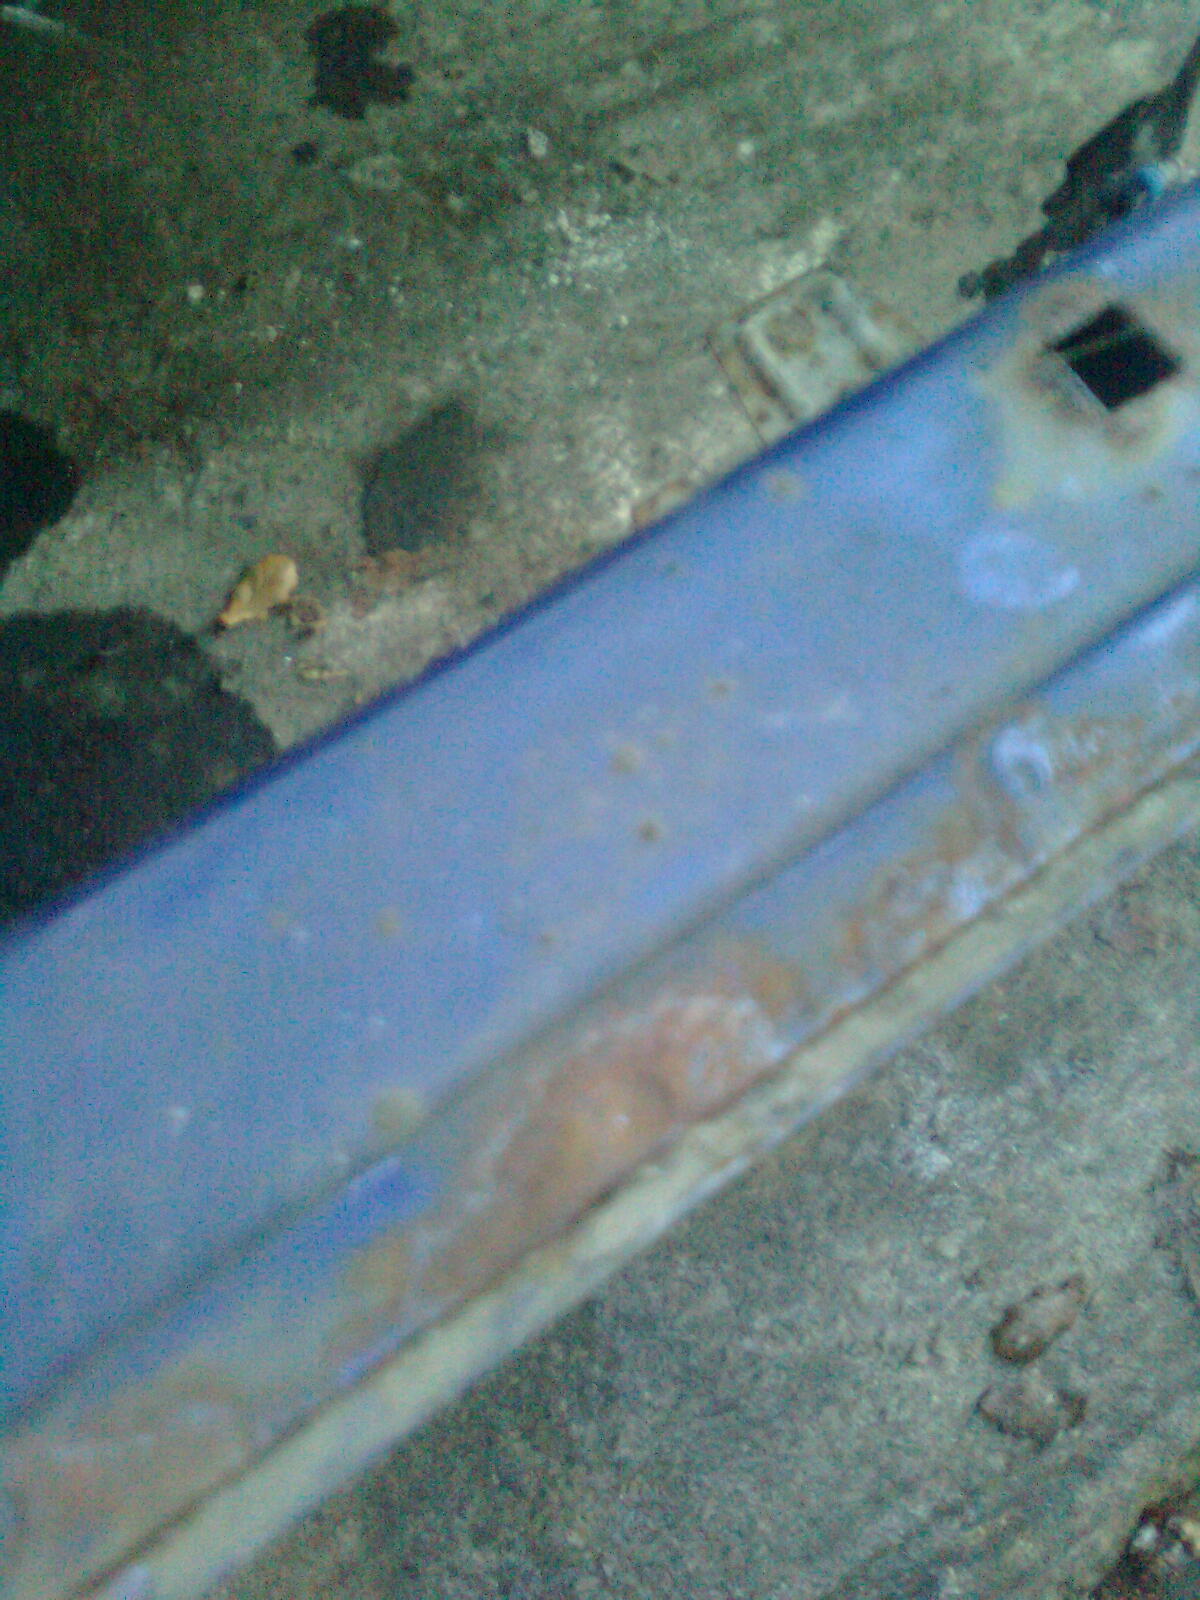
And that shouldnt be rusty either...
Image02351.jpg

Ah not to worry, some hammerite will sort that :) 
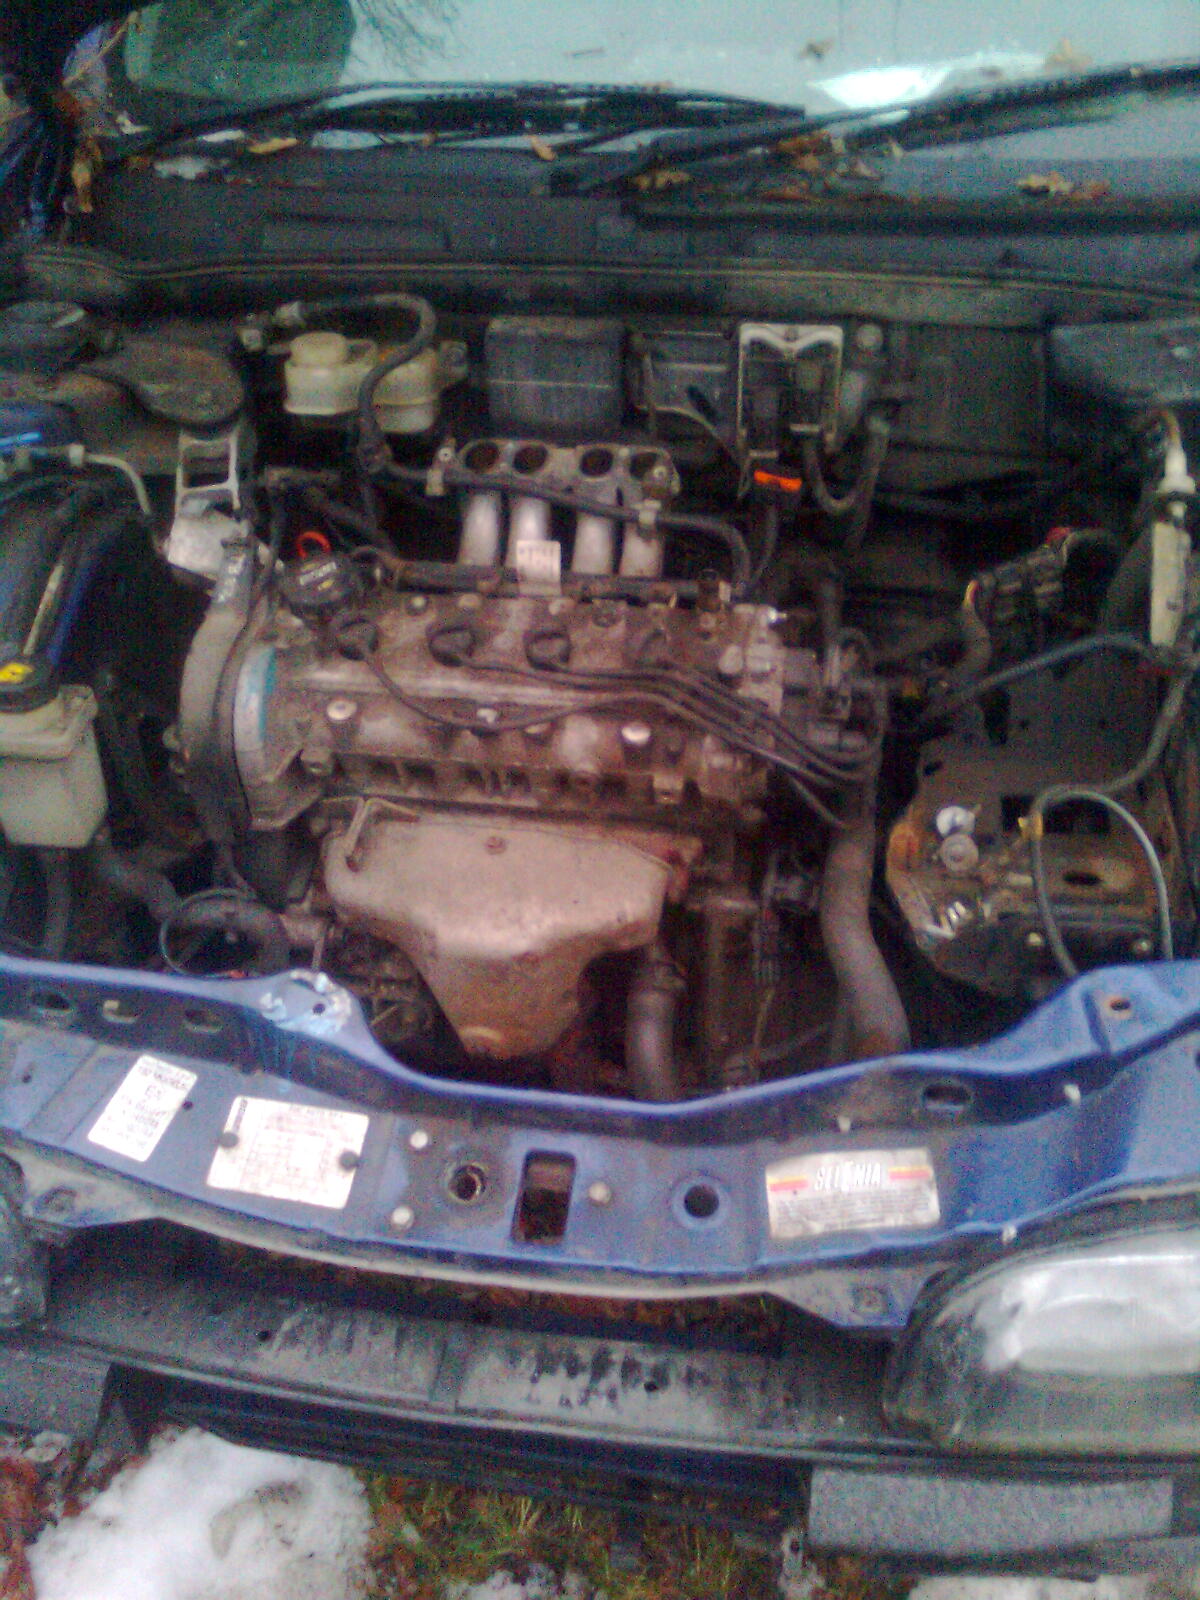
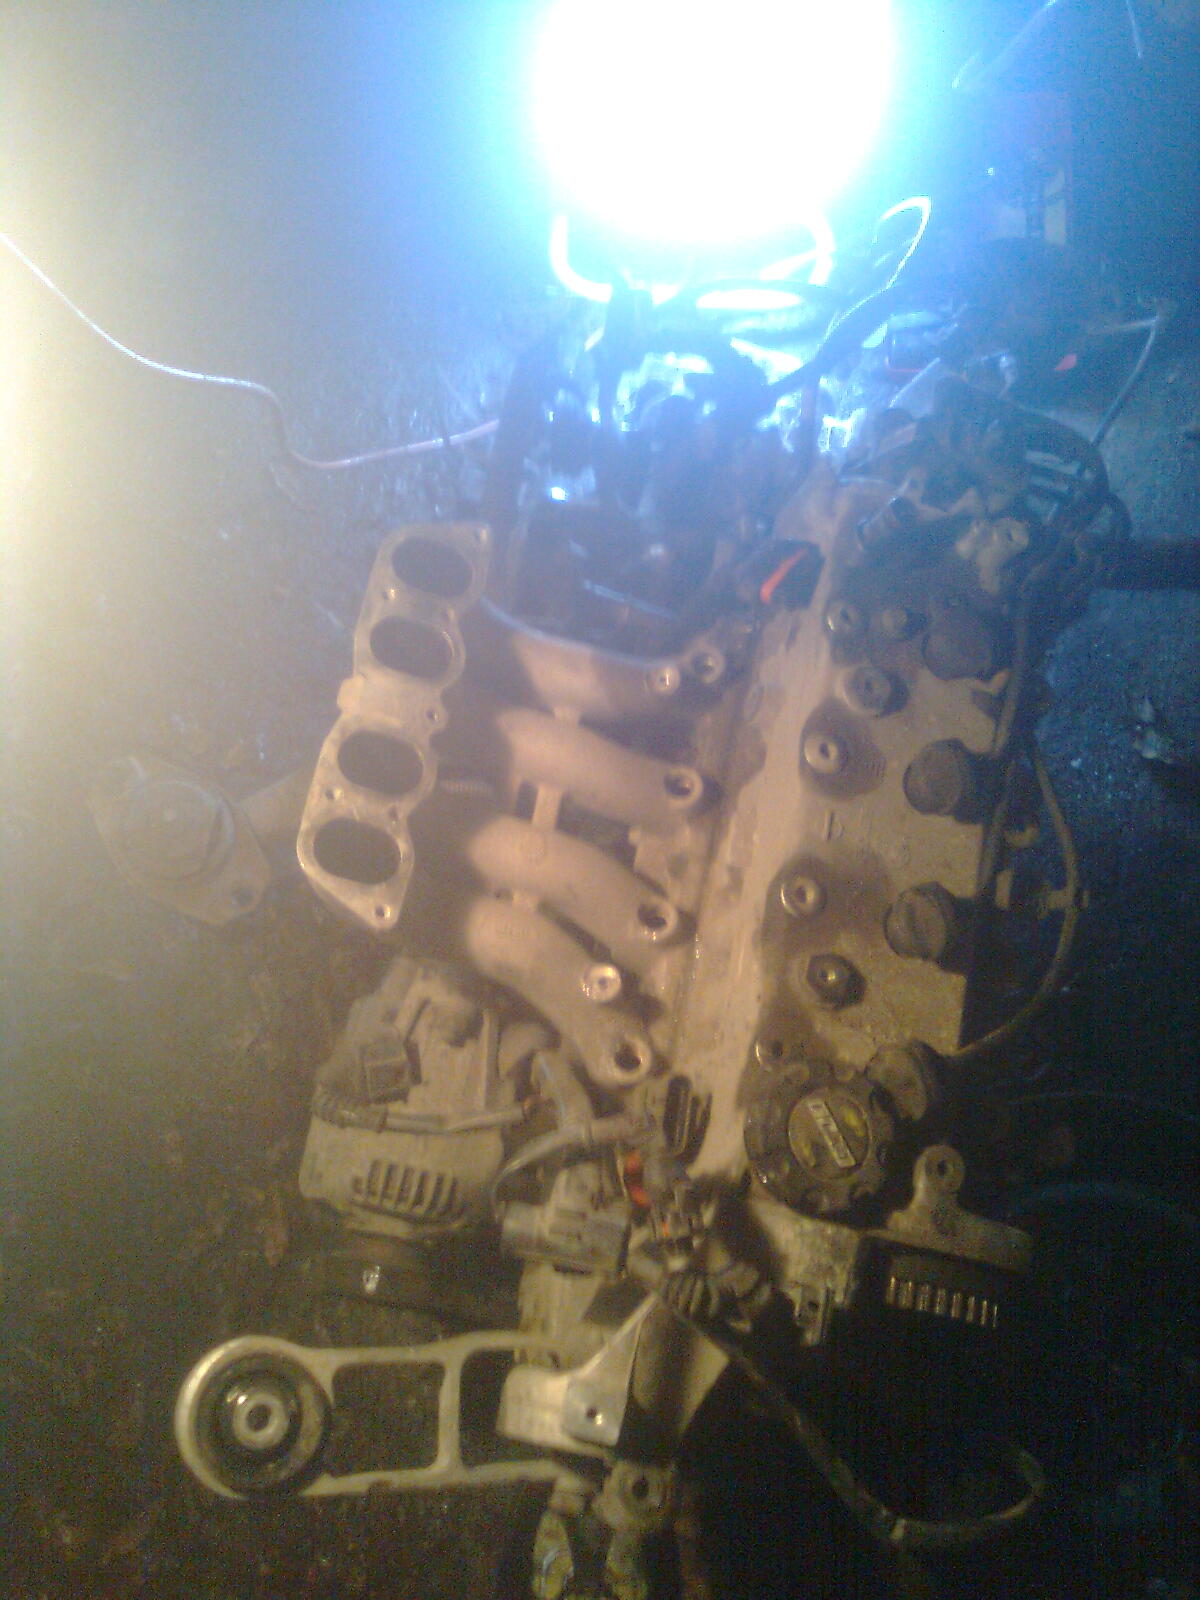
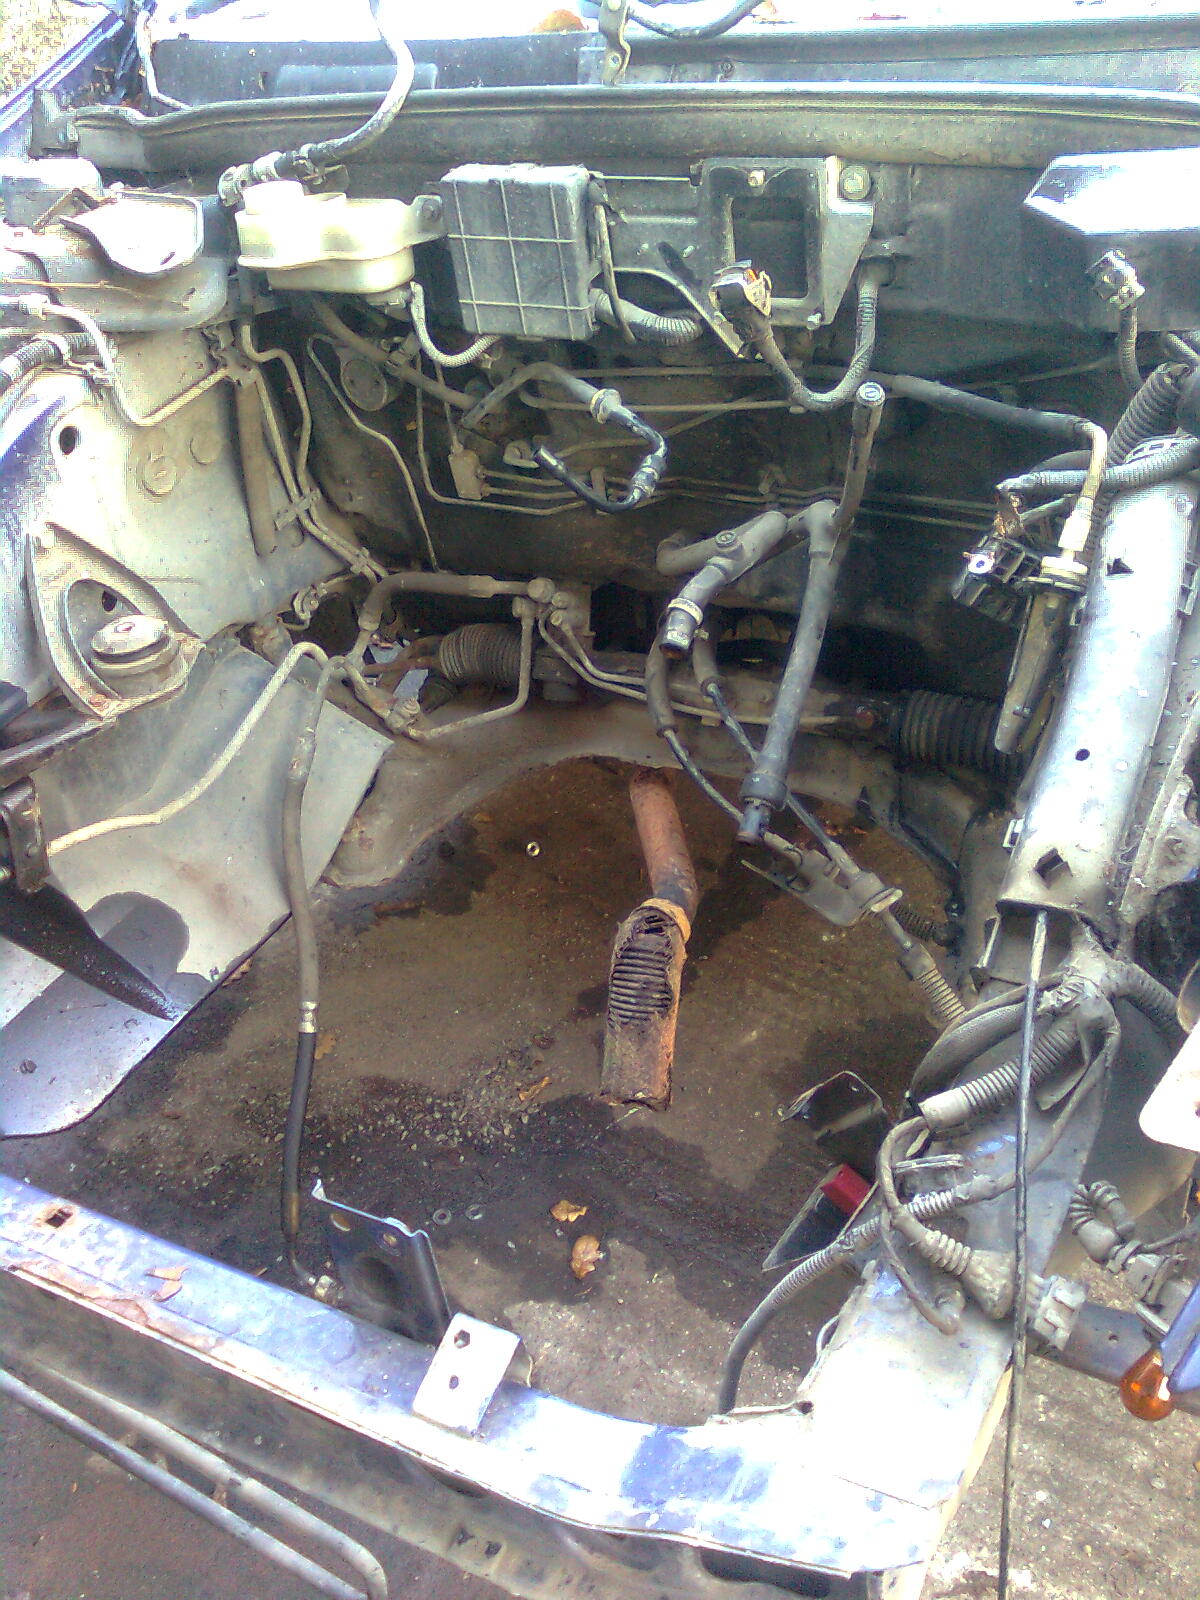
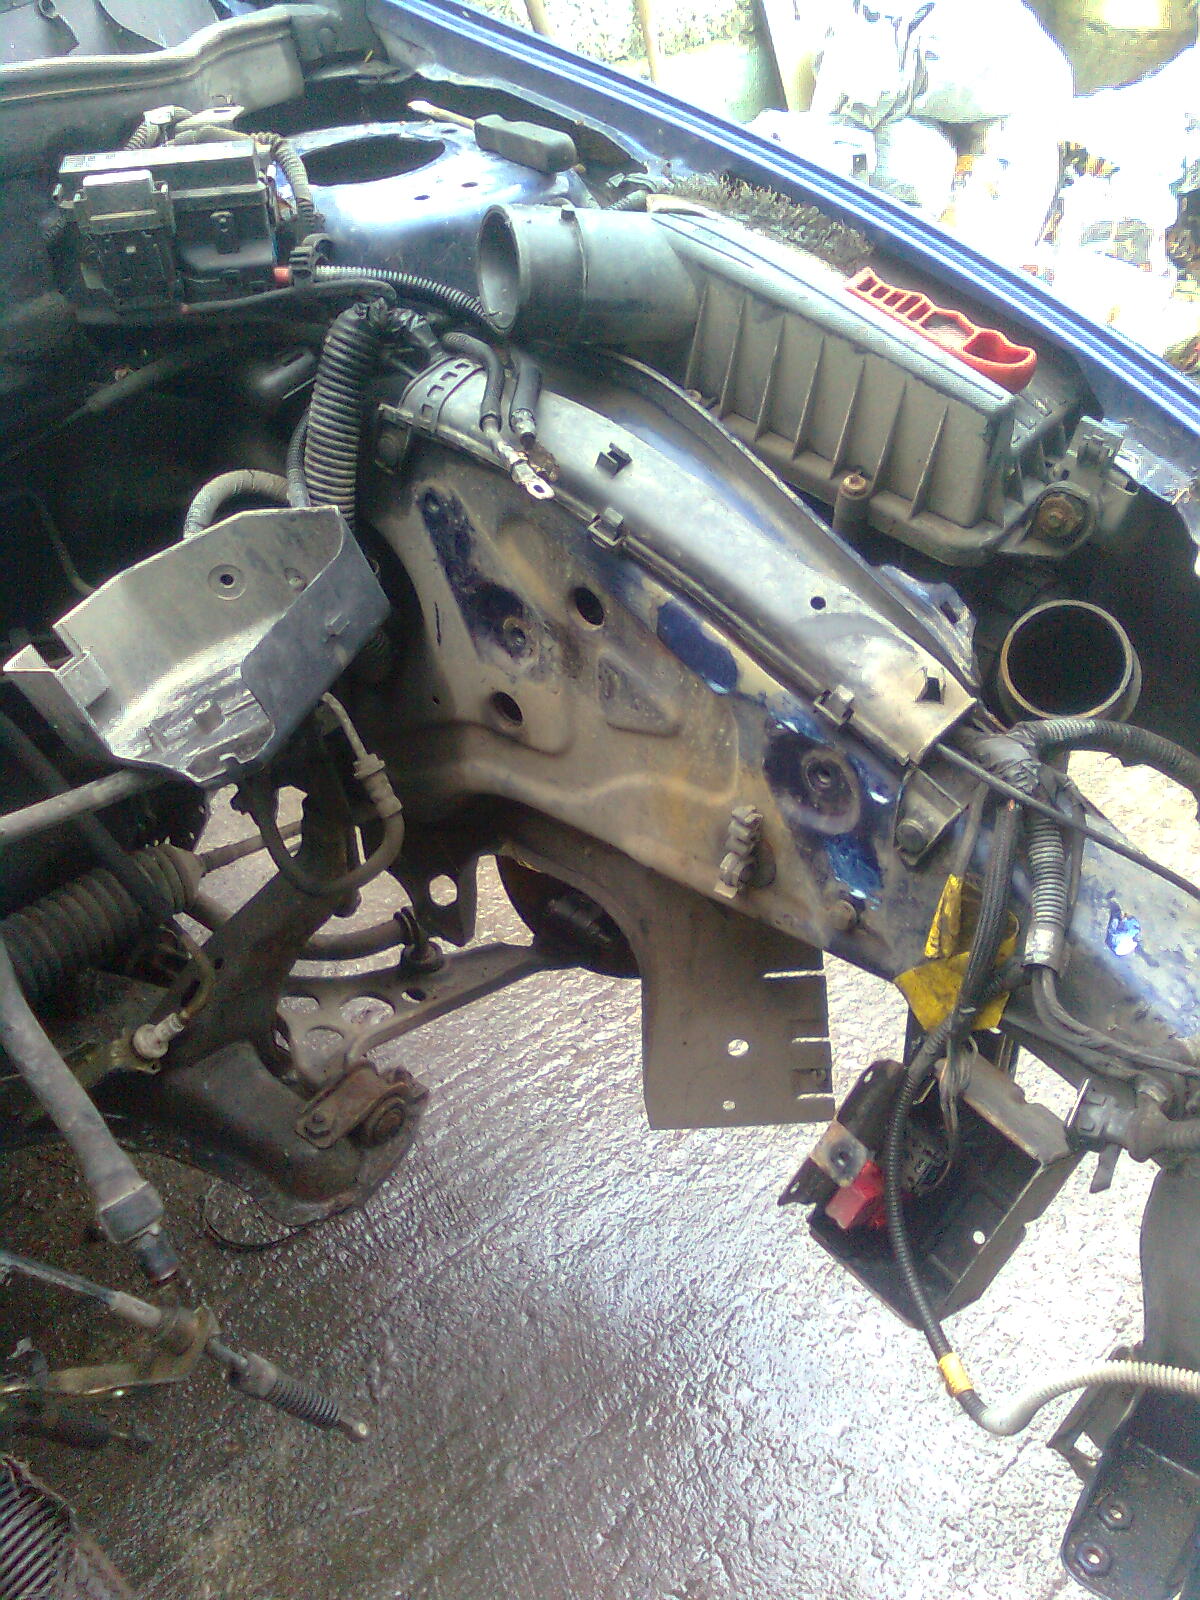
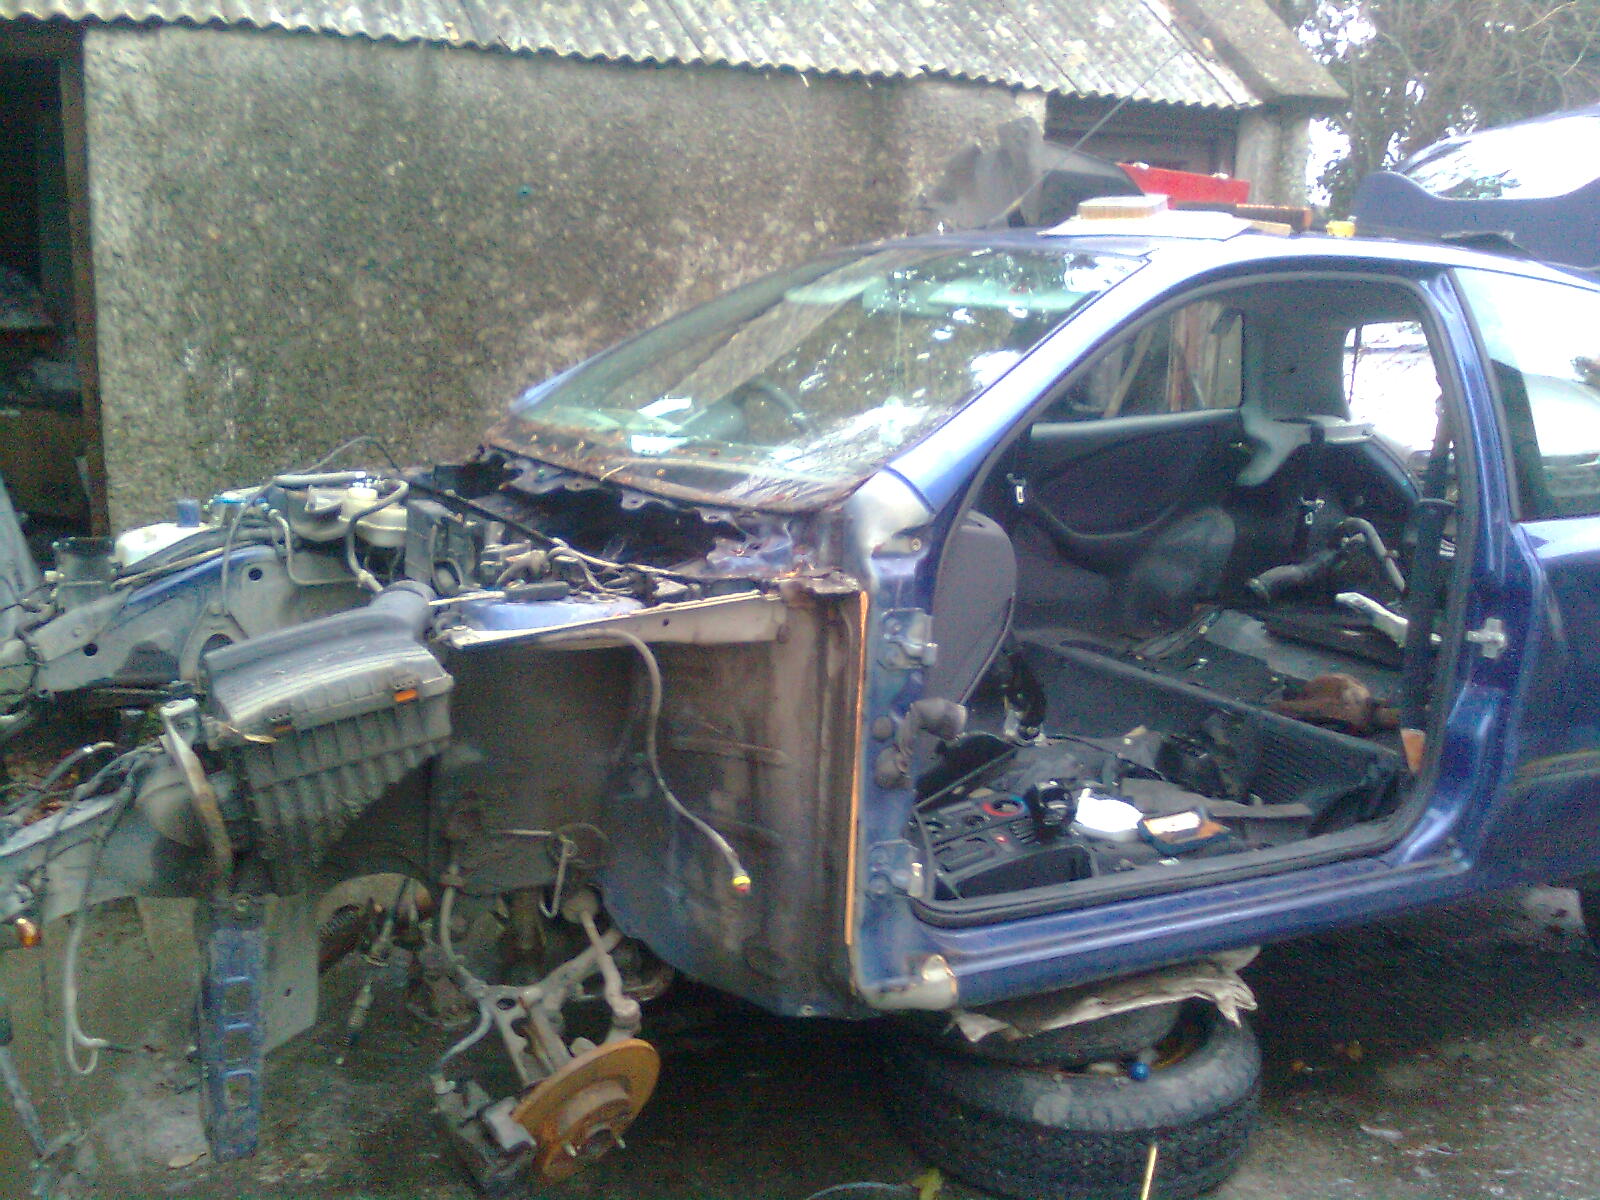
The engines ready to come out :) 
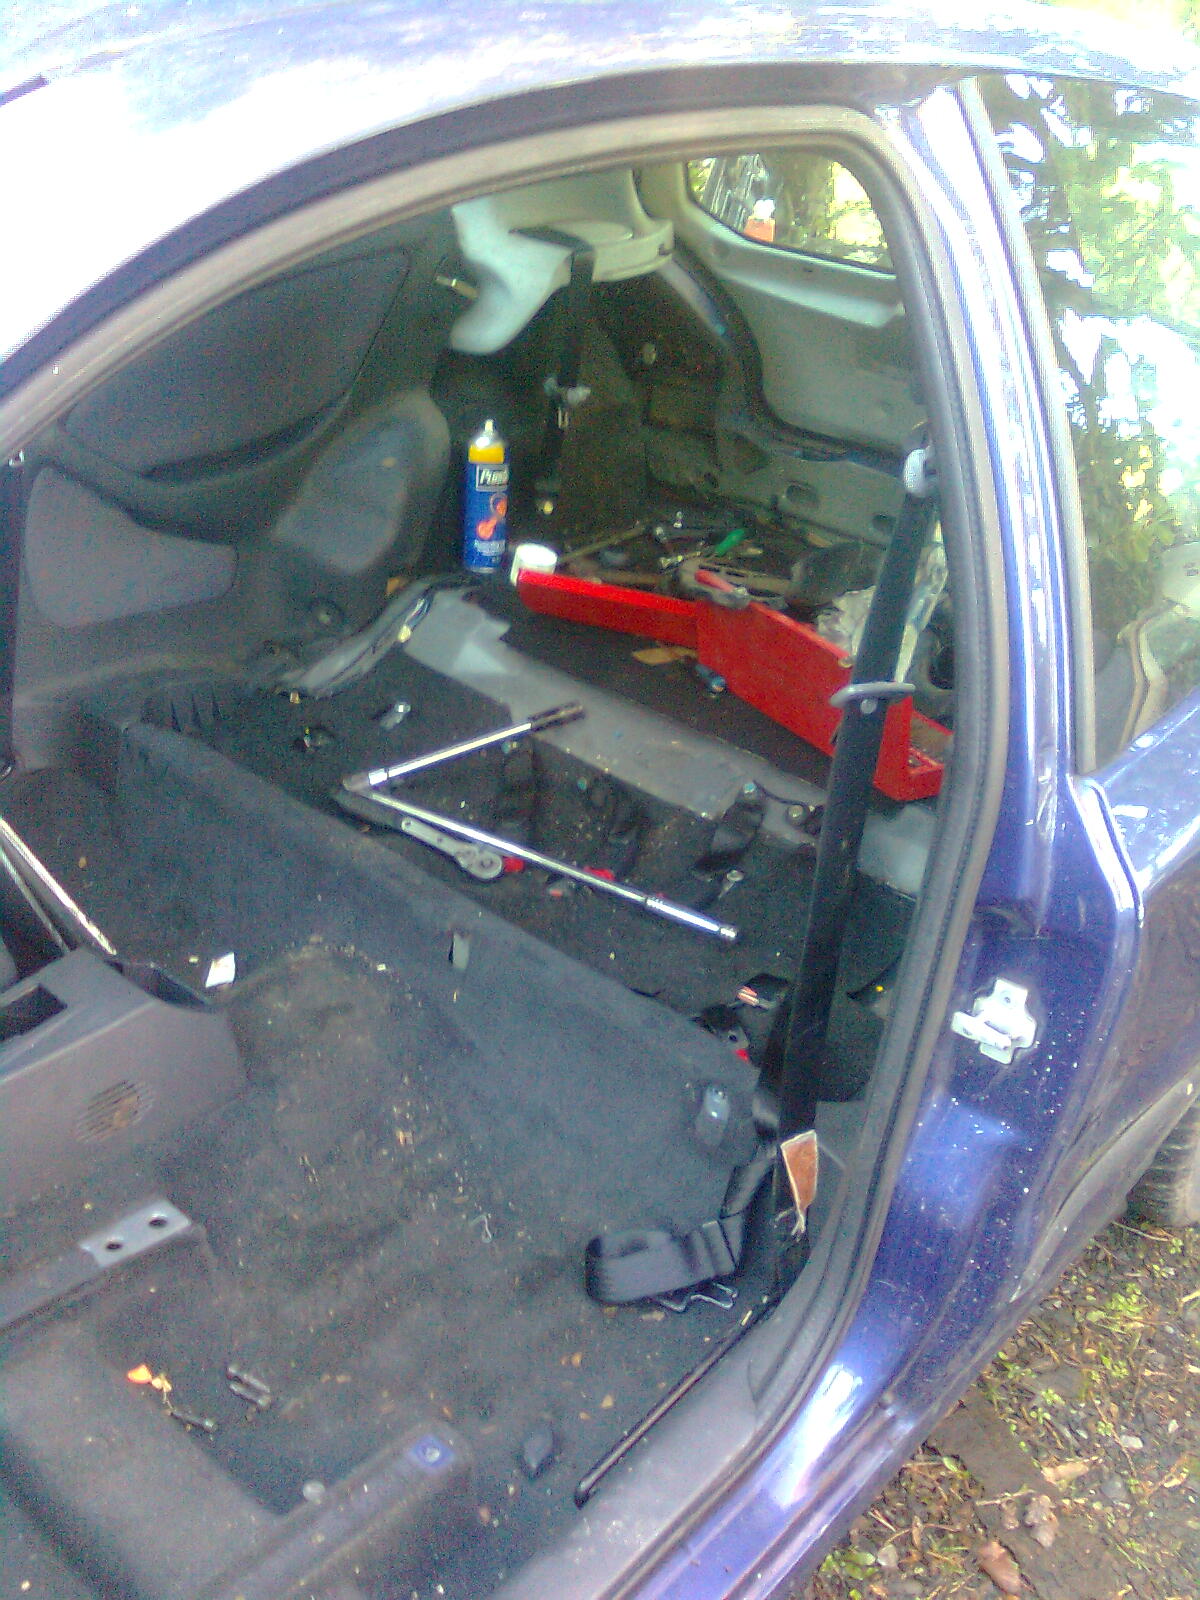
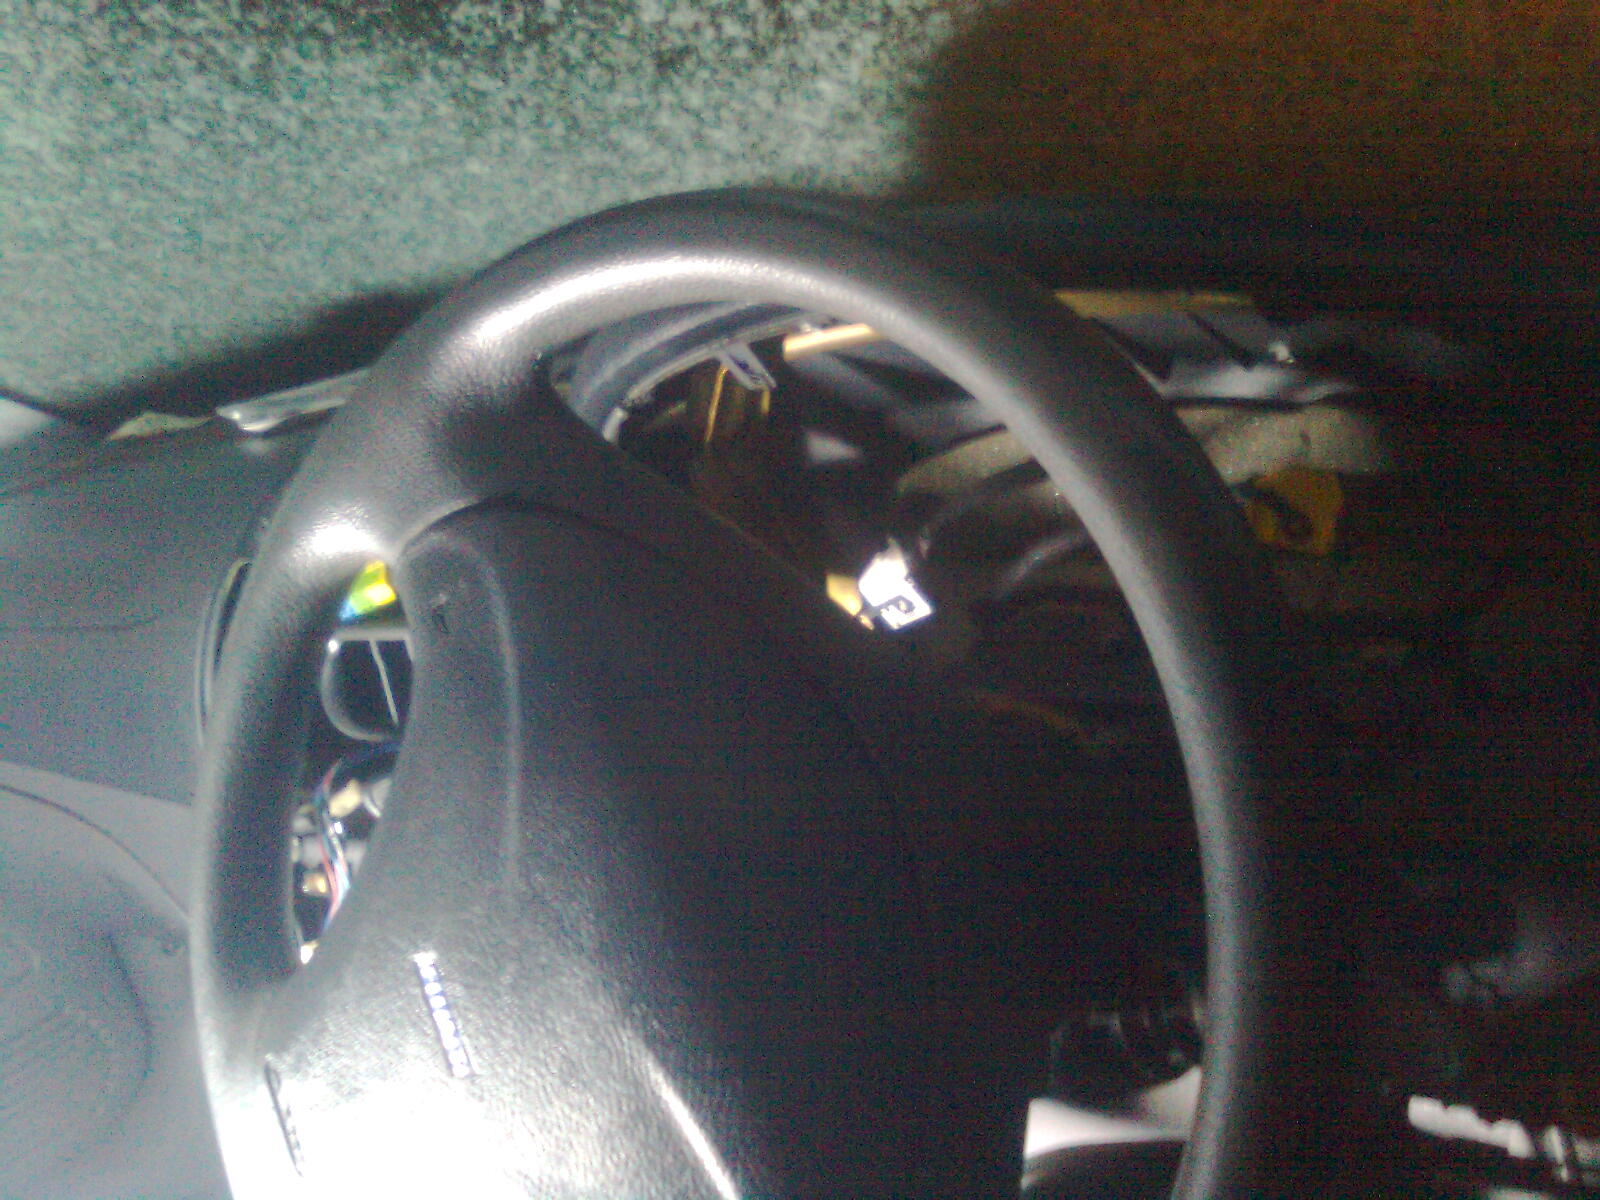
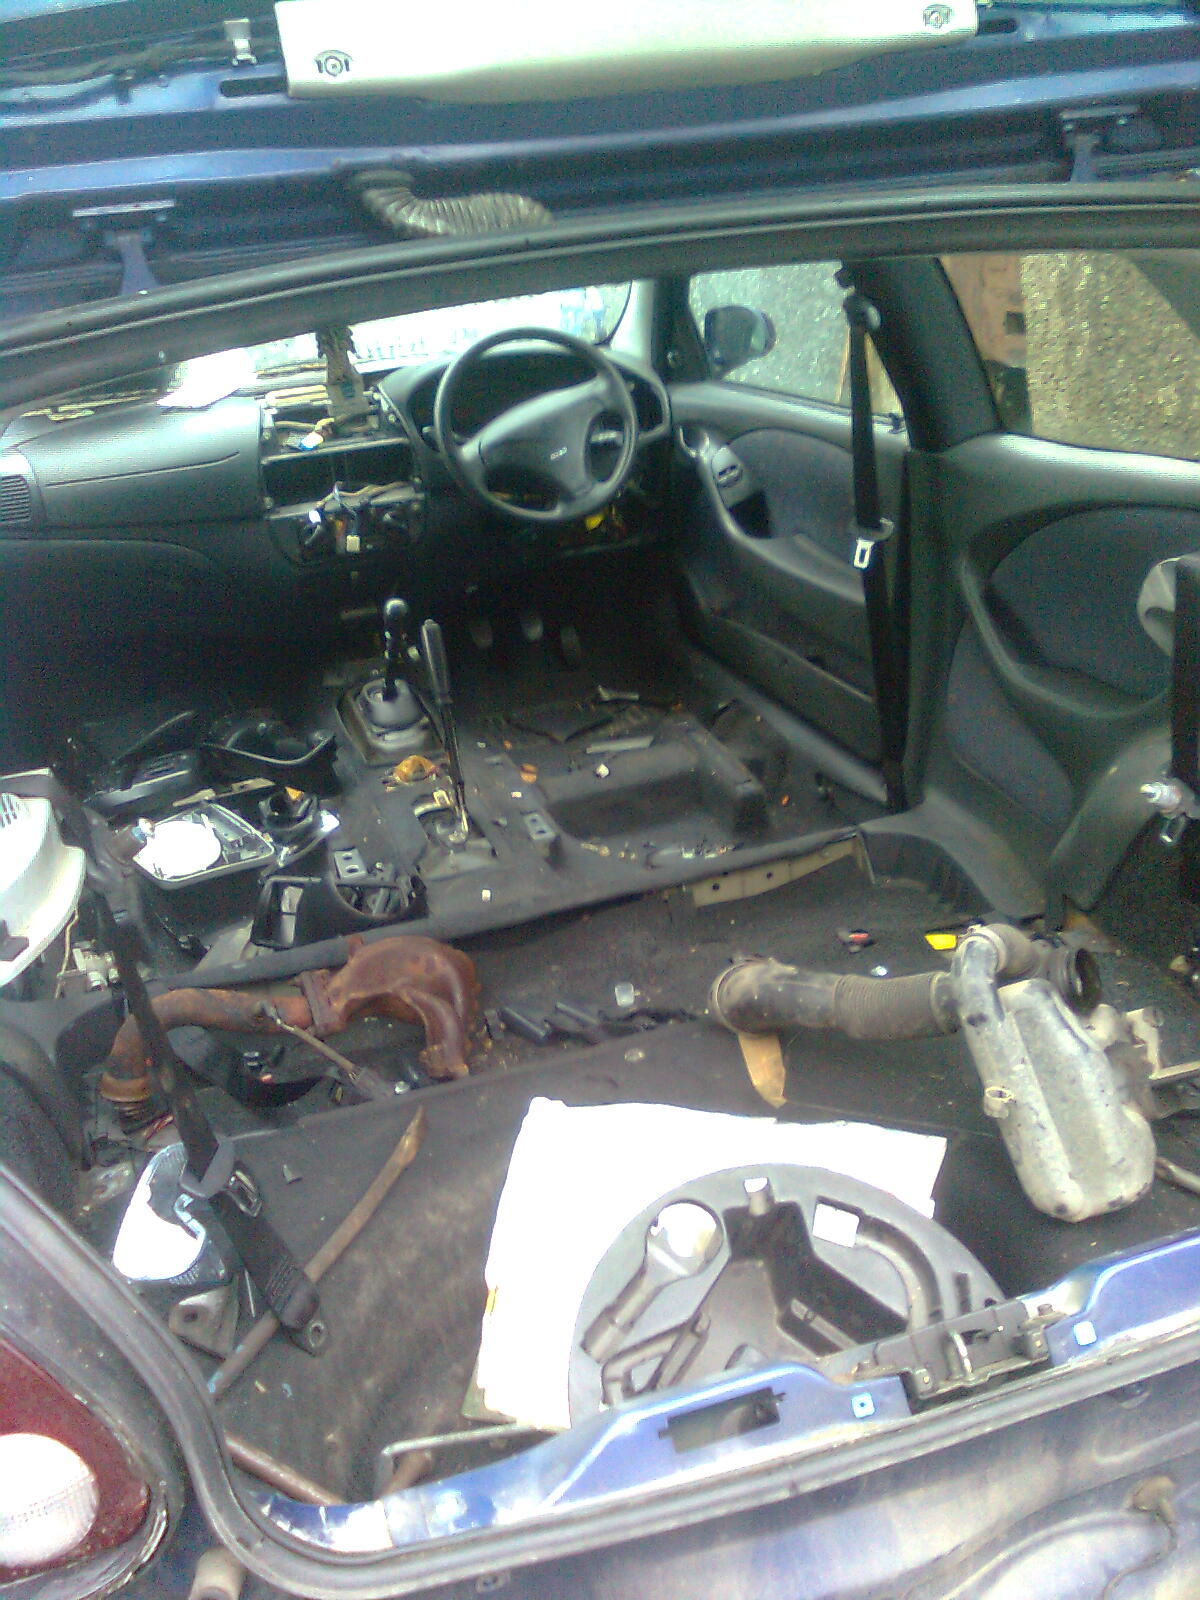
But I need a second person. Onto the interior, or whats left of it :p
Image02331.jpg

I despise those steering wheels, theyre sooooo ugly :mad: 
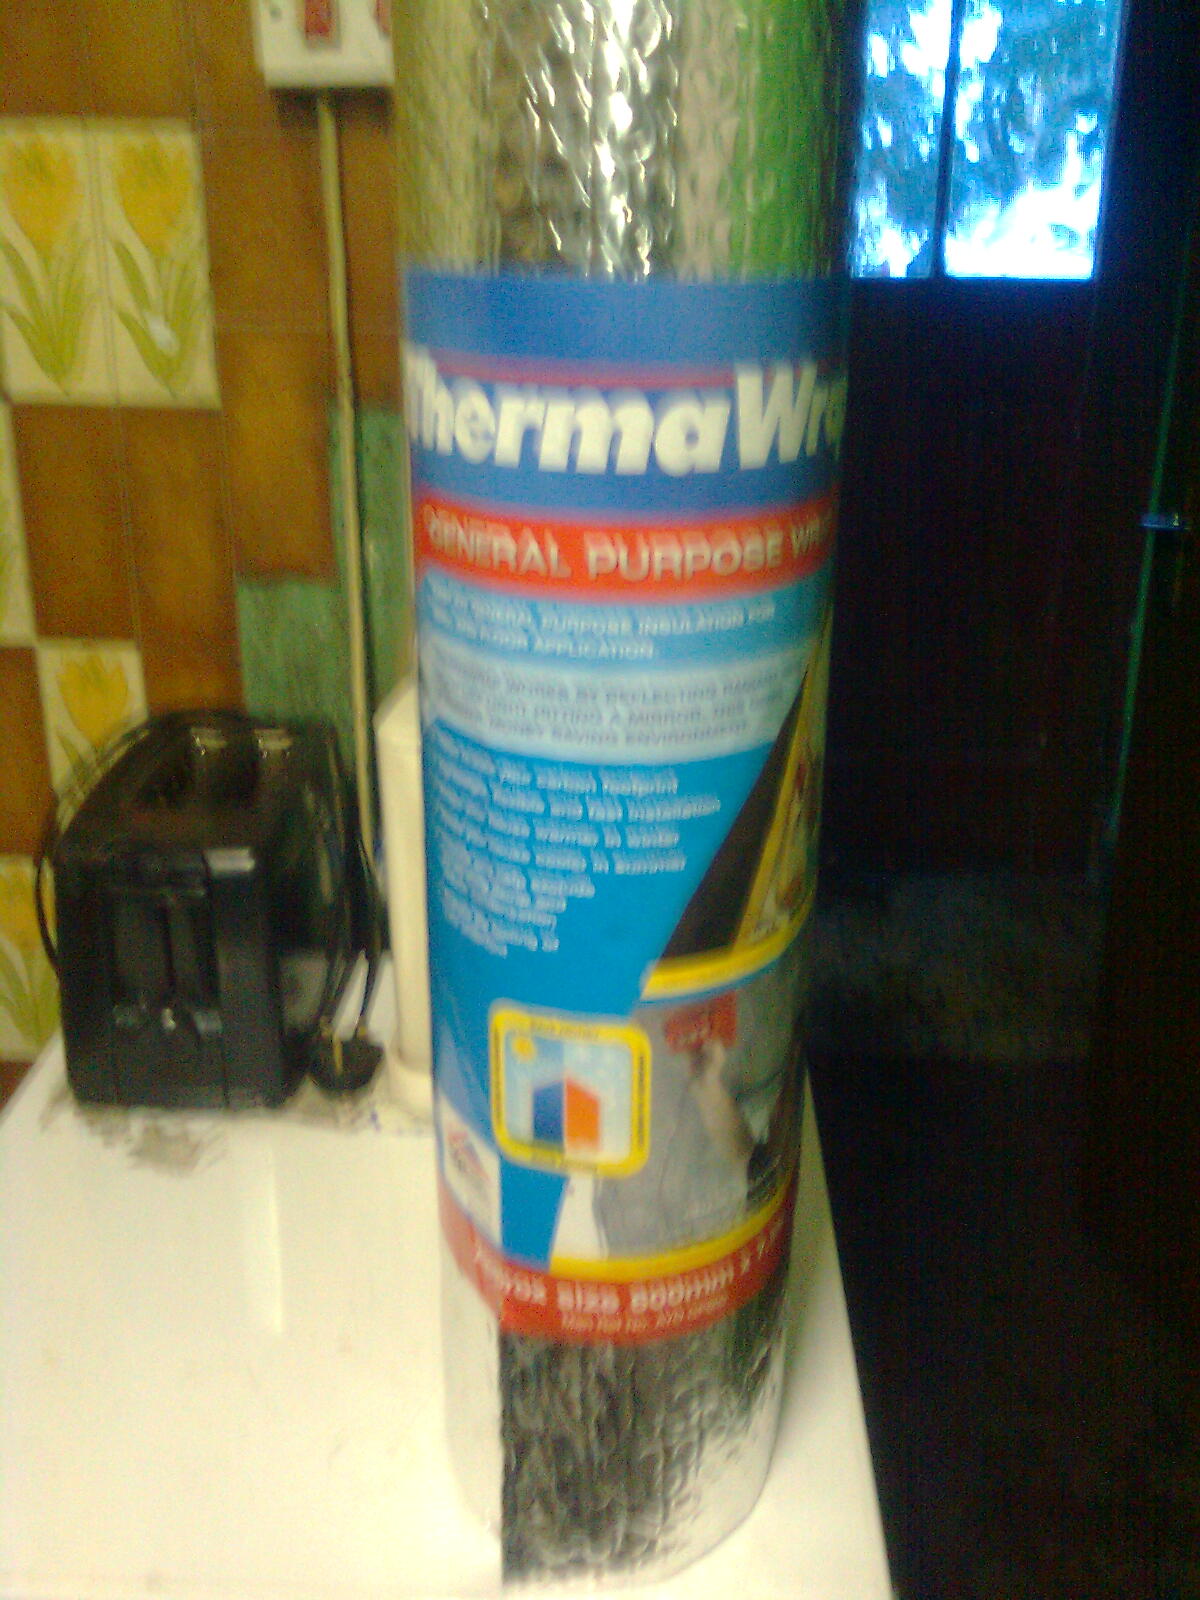
When the interior is fully out I have this for it. Keep the heat in the winter, keep the heat out in summer ;)
Image02361.jpg

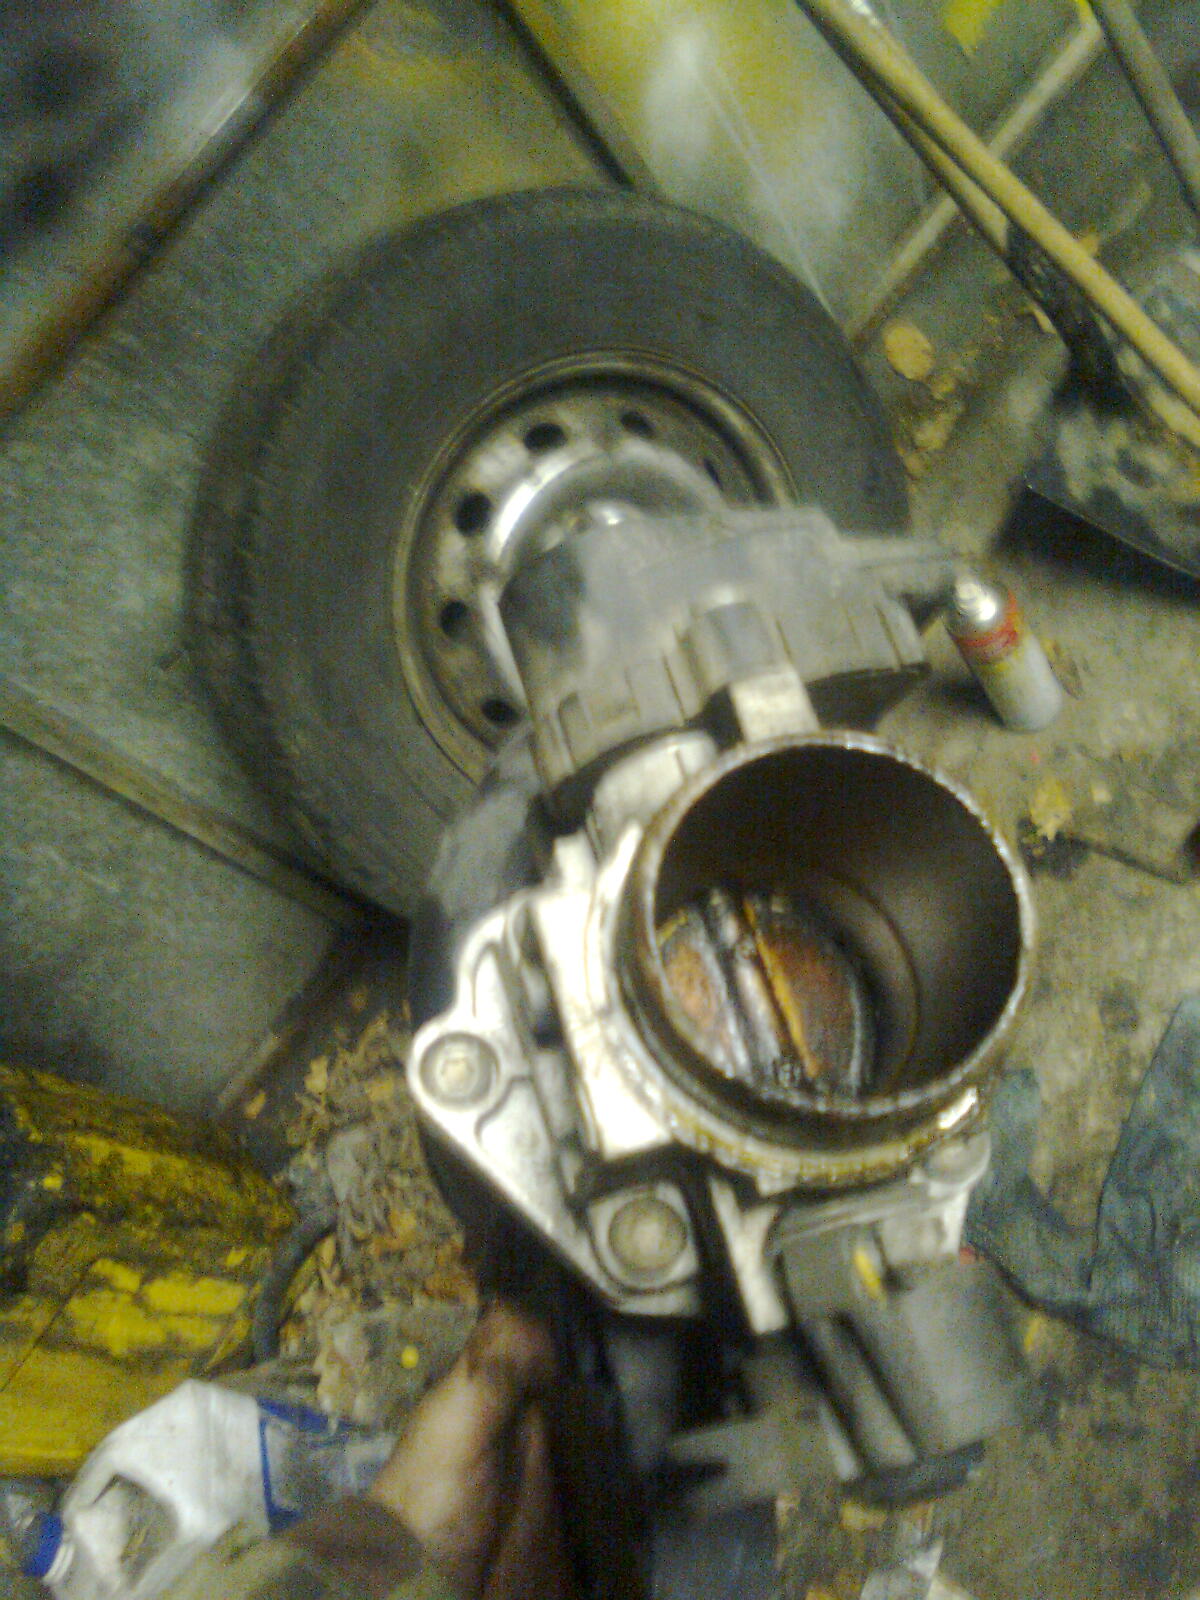
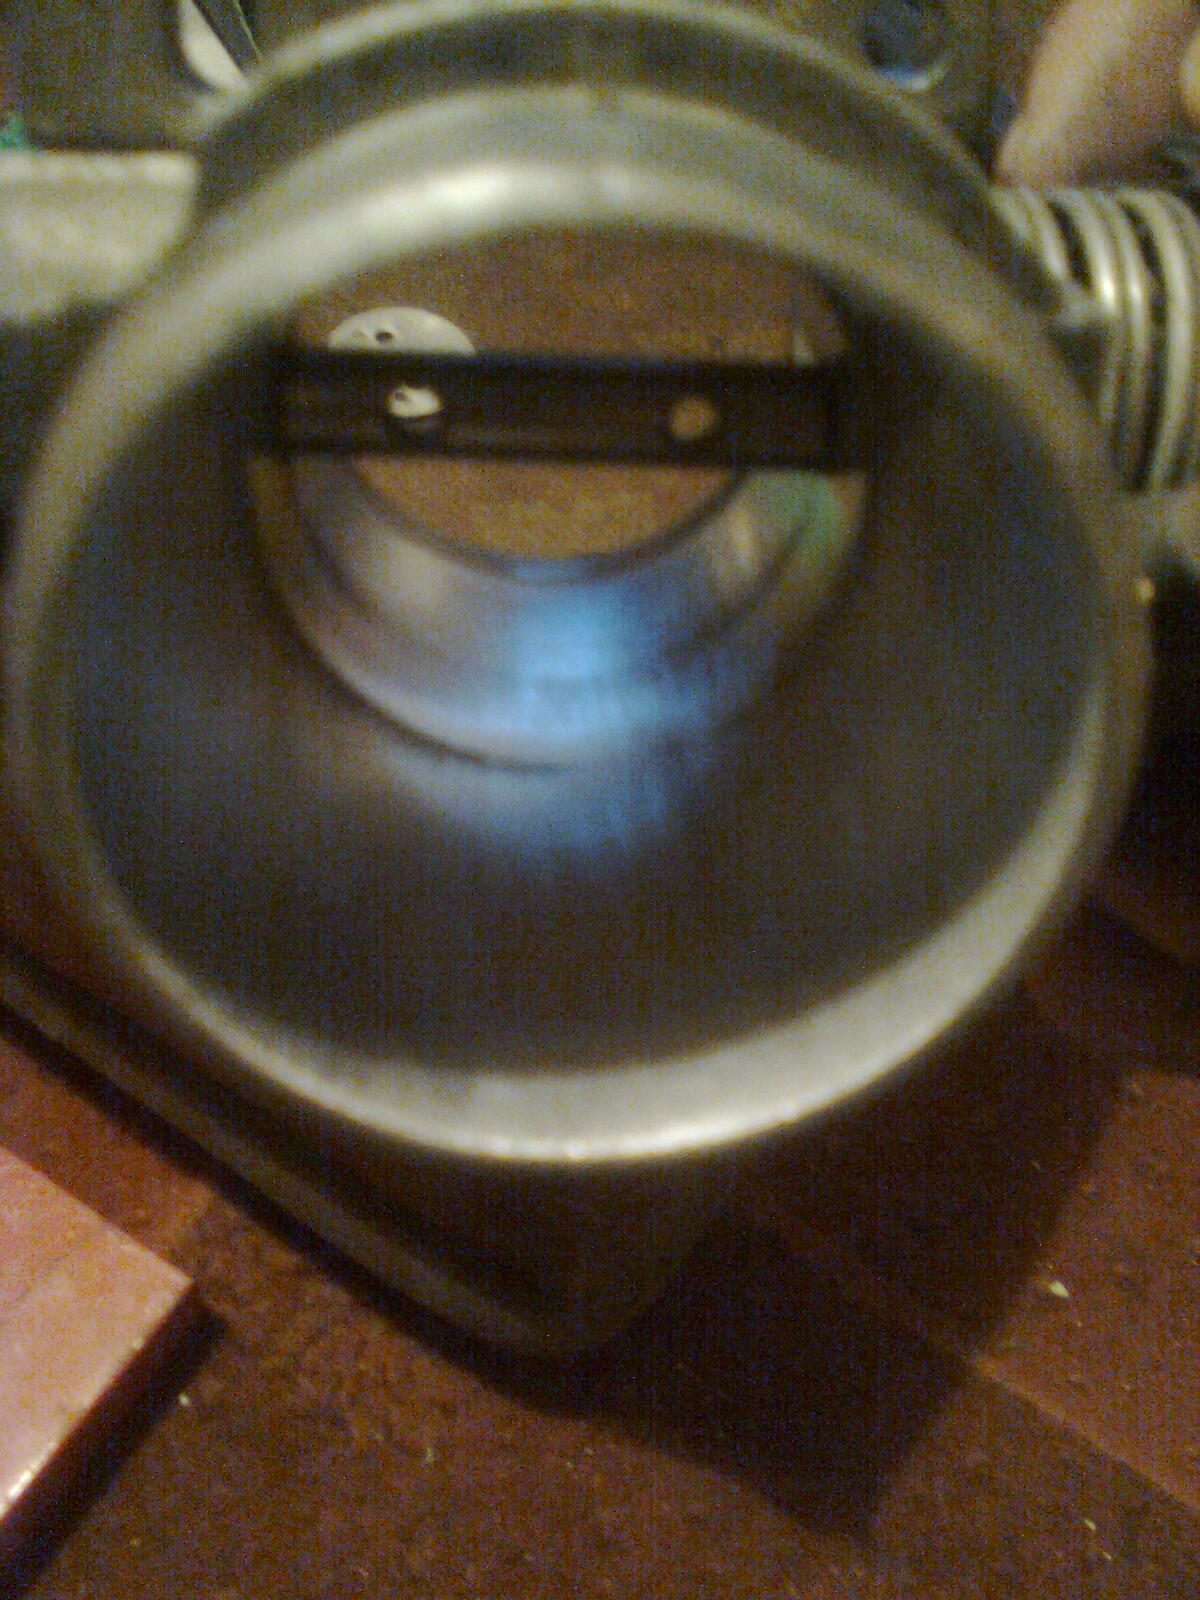
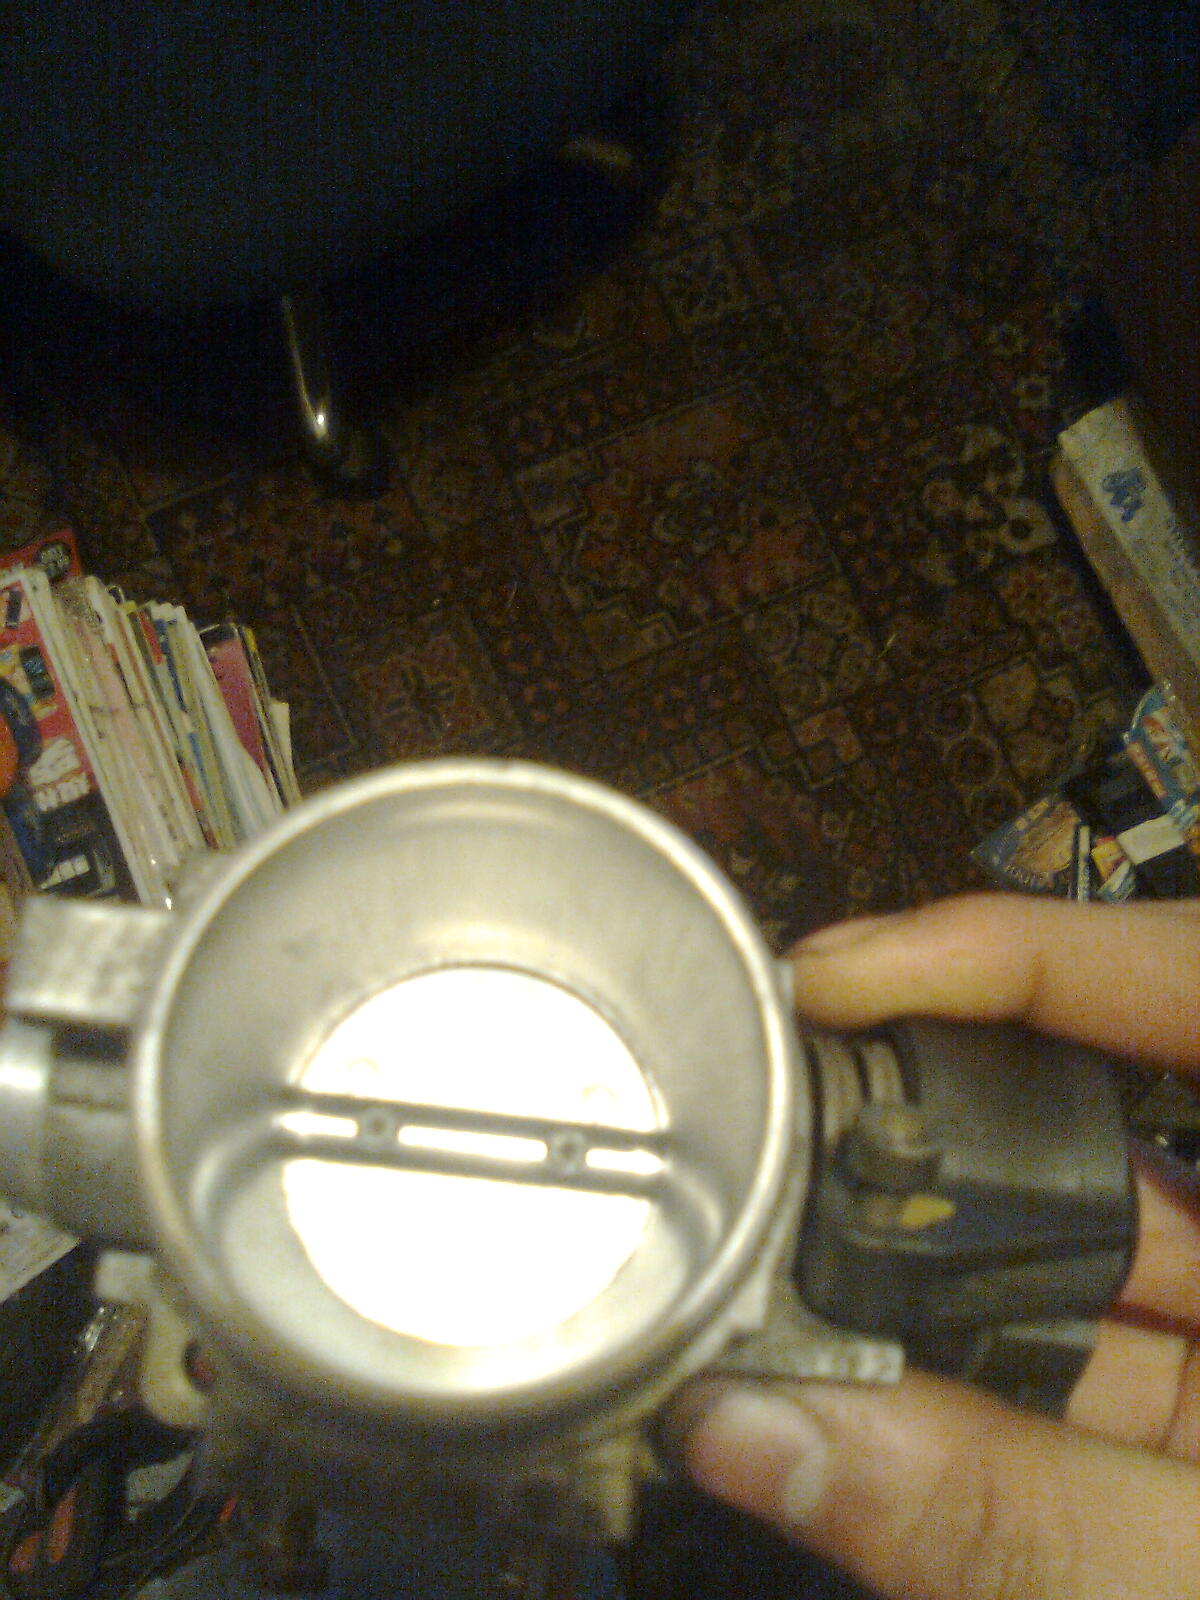
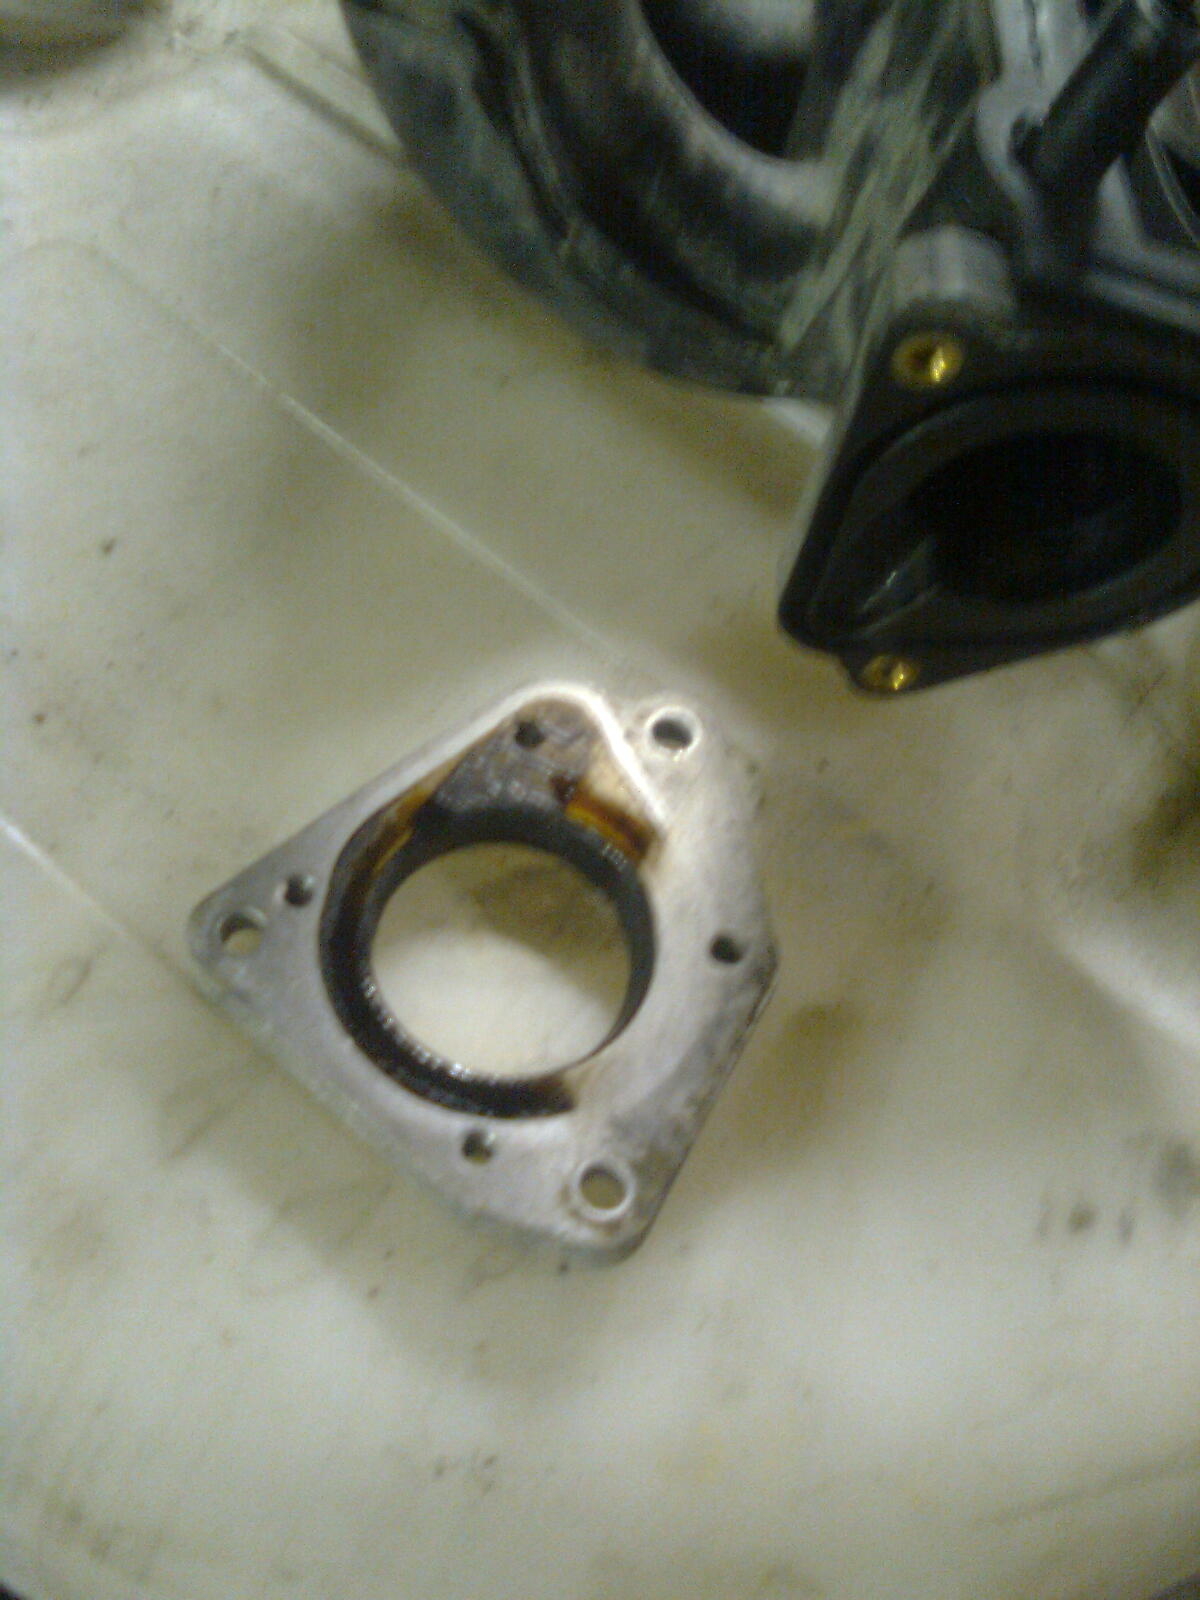
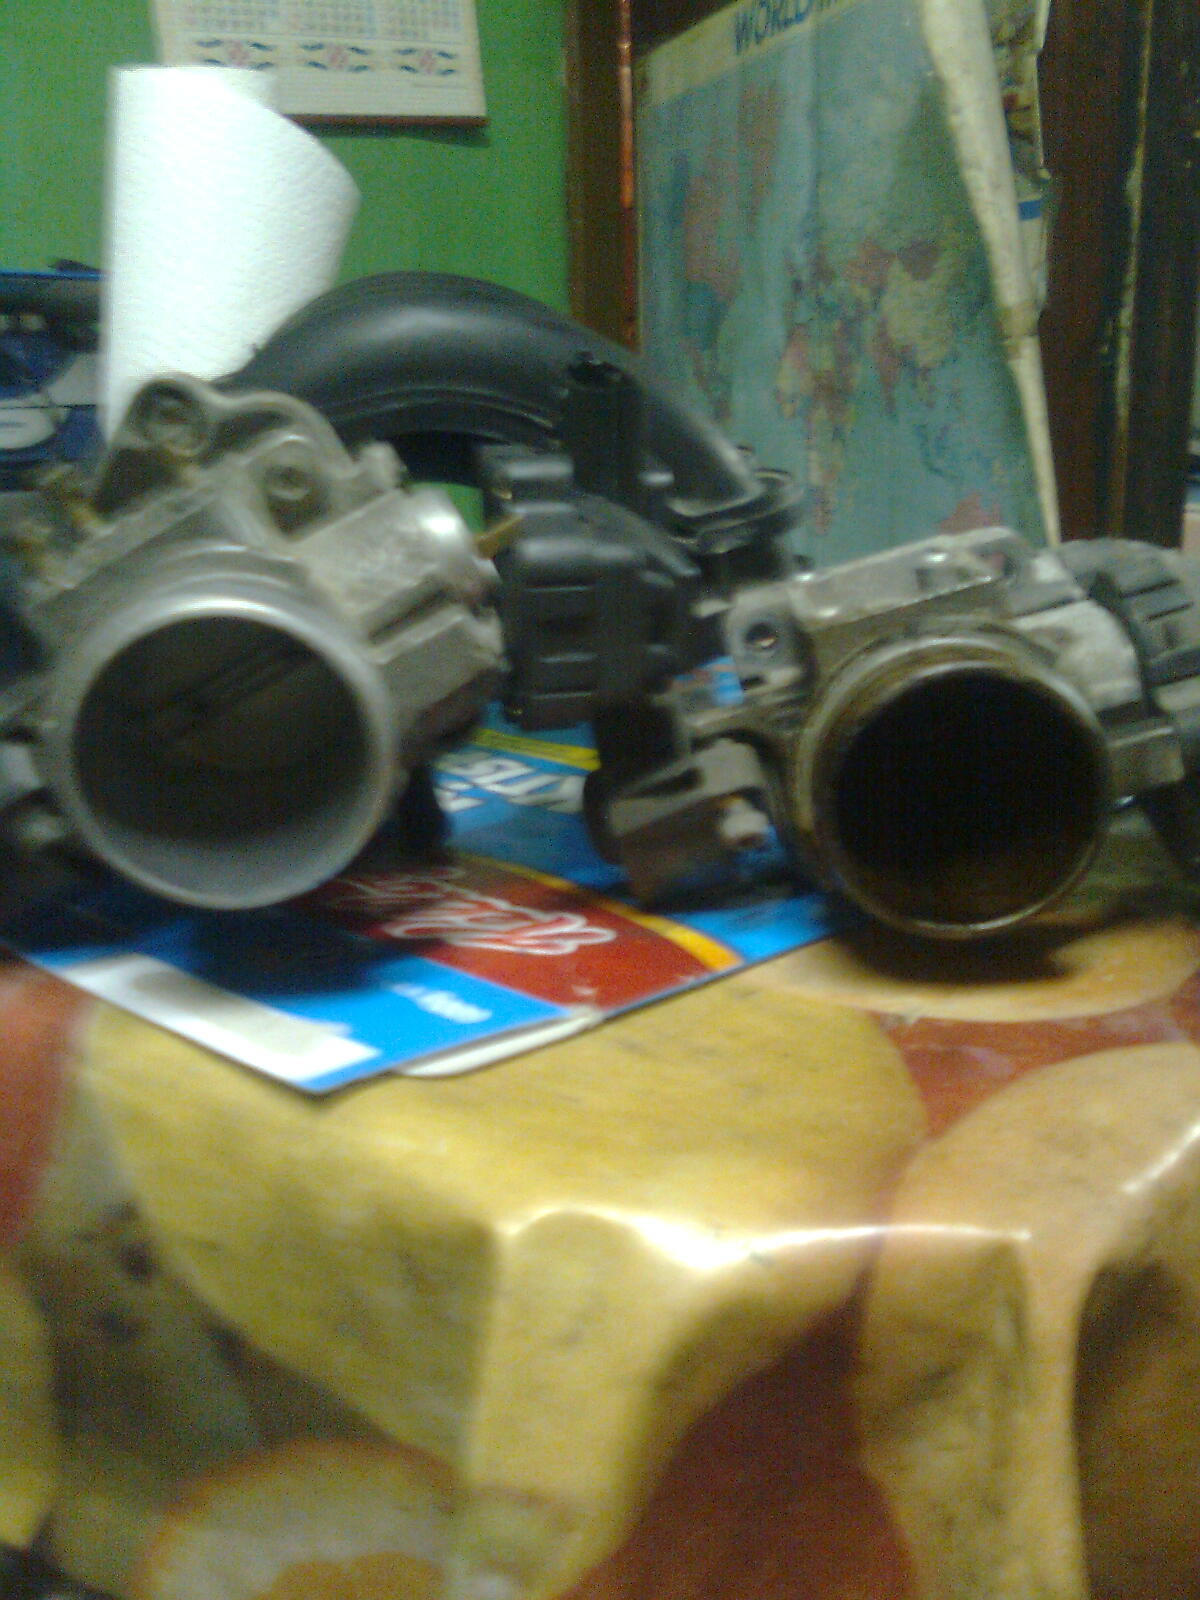
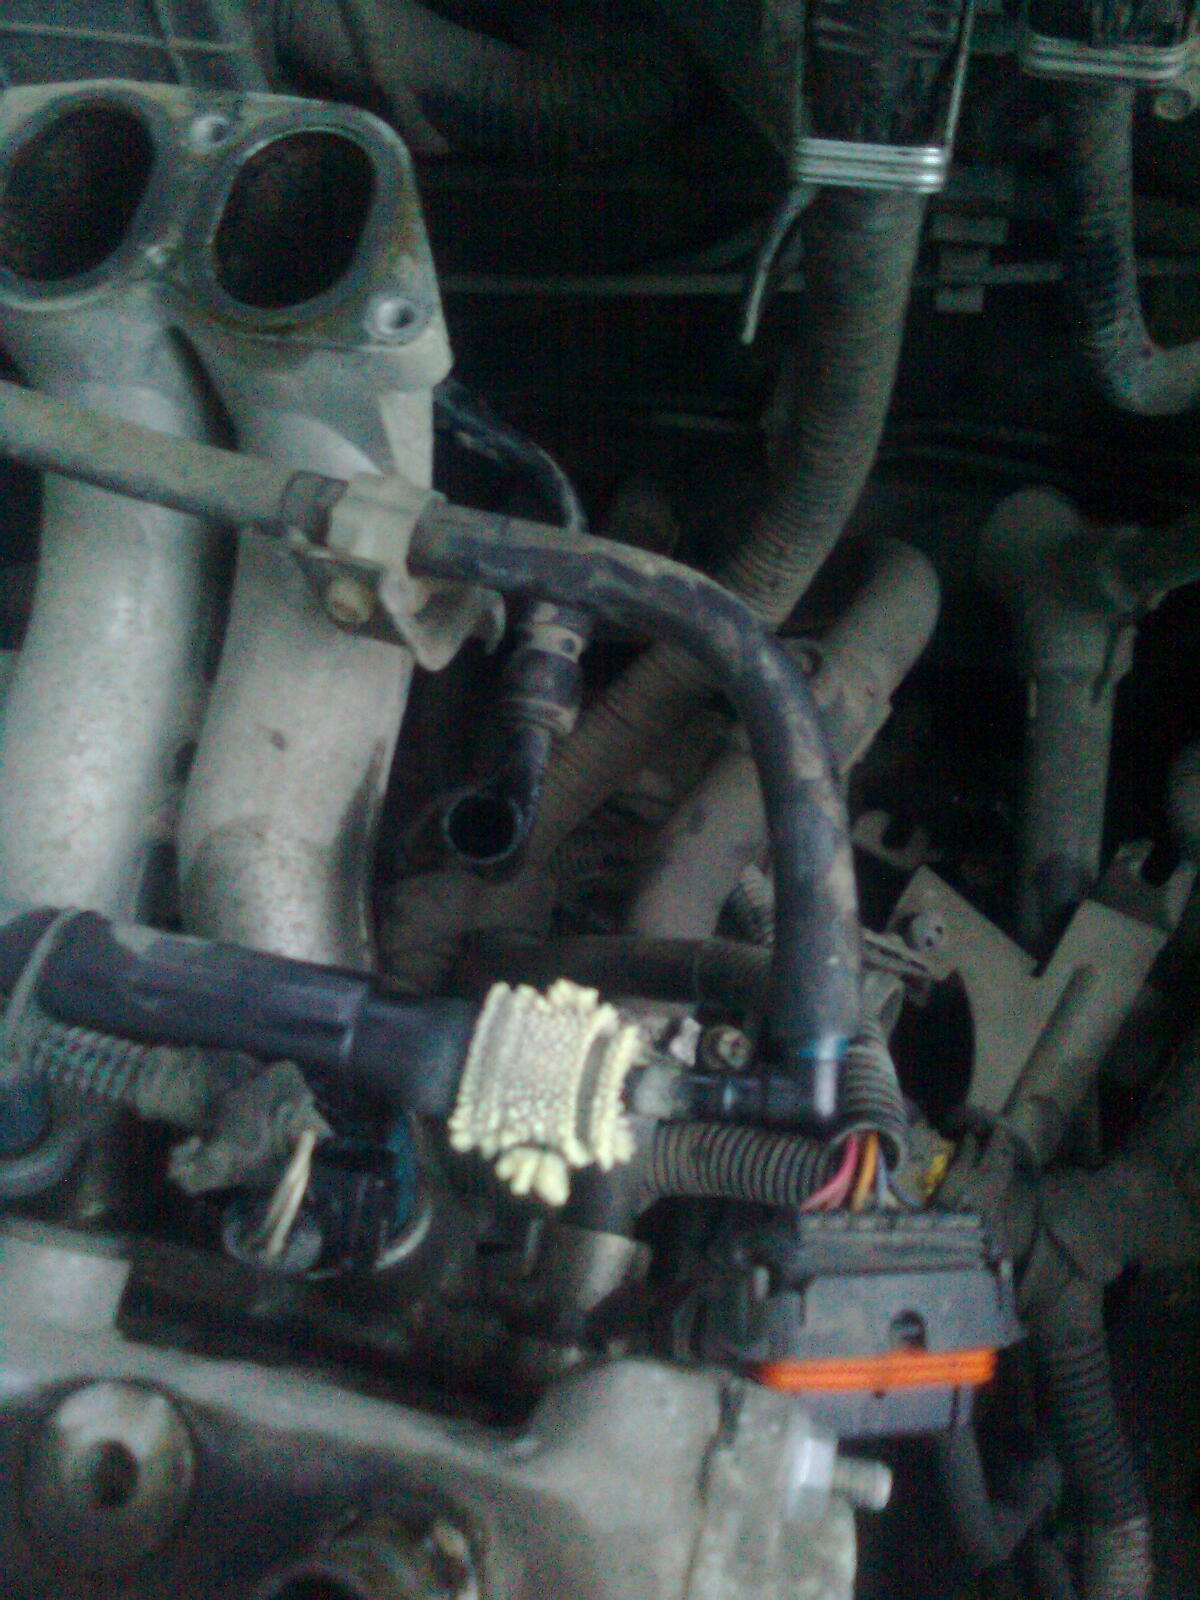
While I'm still waiting I decided to clean up my stinky manifold :D
Image02221.jpg

Now I couldnt get the light to shine in right but the difference after was day and night. Just like the adaptor for the tb
Image02241.jpg

Job done, time for a coffee (y)
Image02251.jpg
Image02261.jpg

Reinforcement has arrived so its time to take that engine out (y) Its been freezing since the last photo...
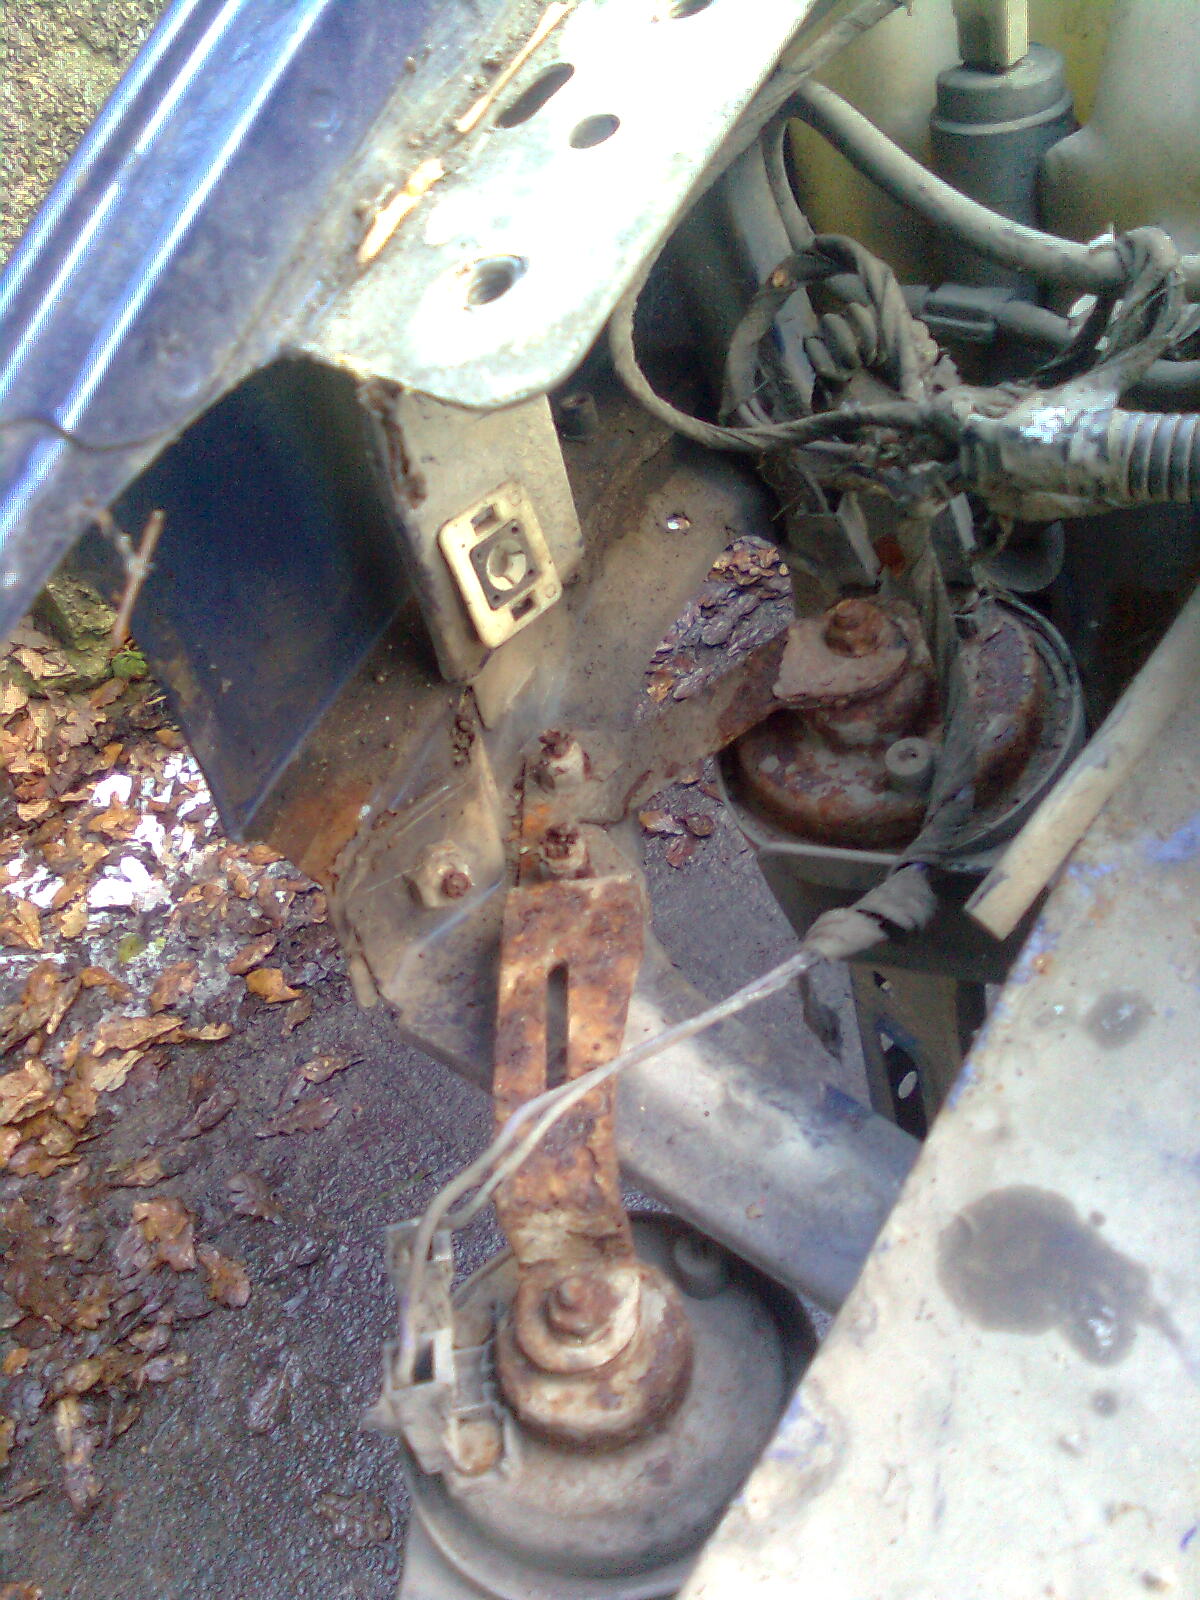
Image02321.jpg


20 minutes later...
Image0239.jpg

(y) 
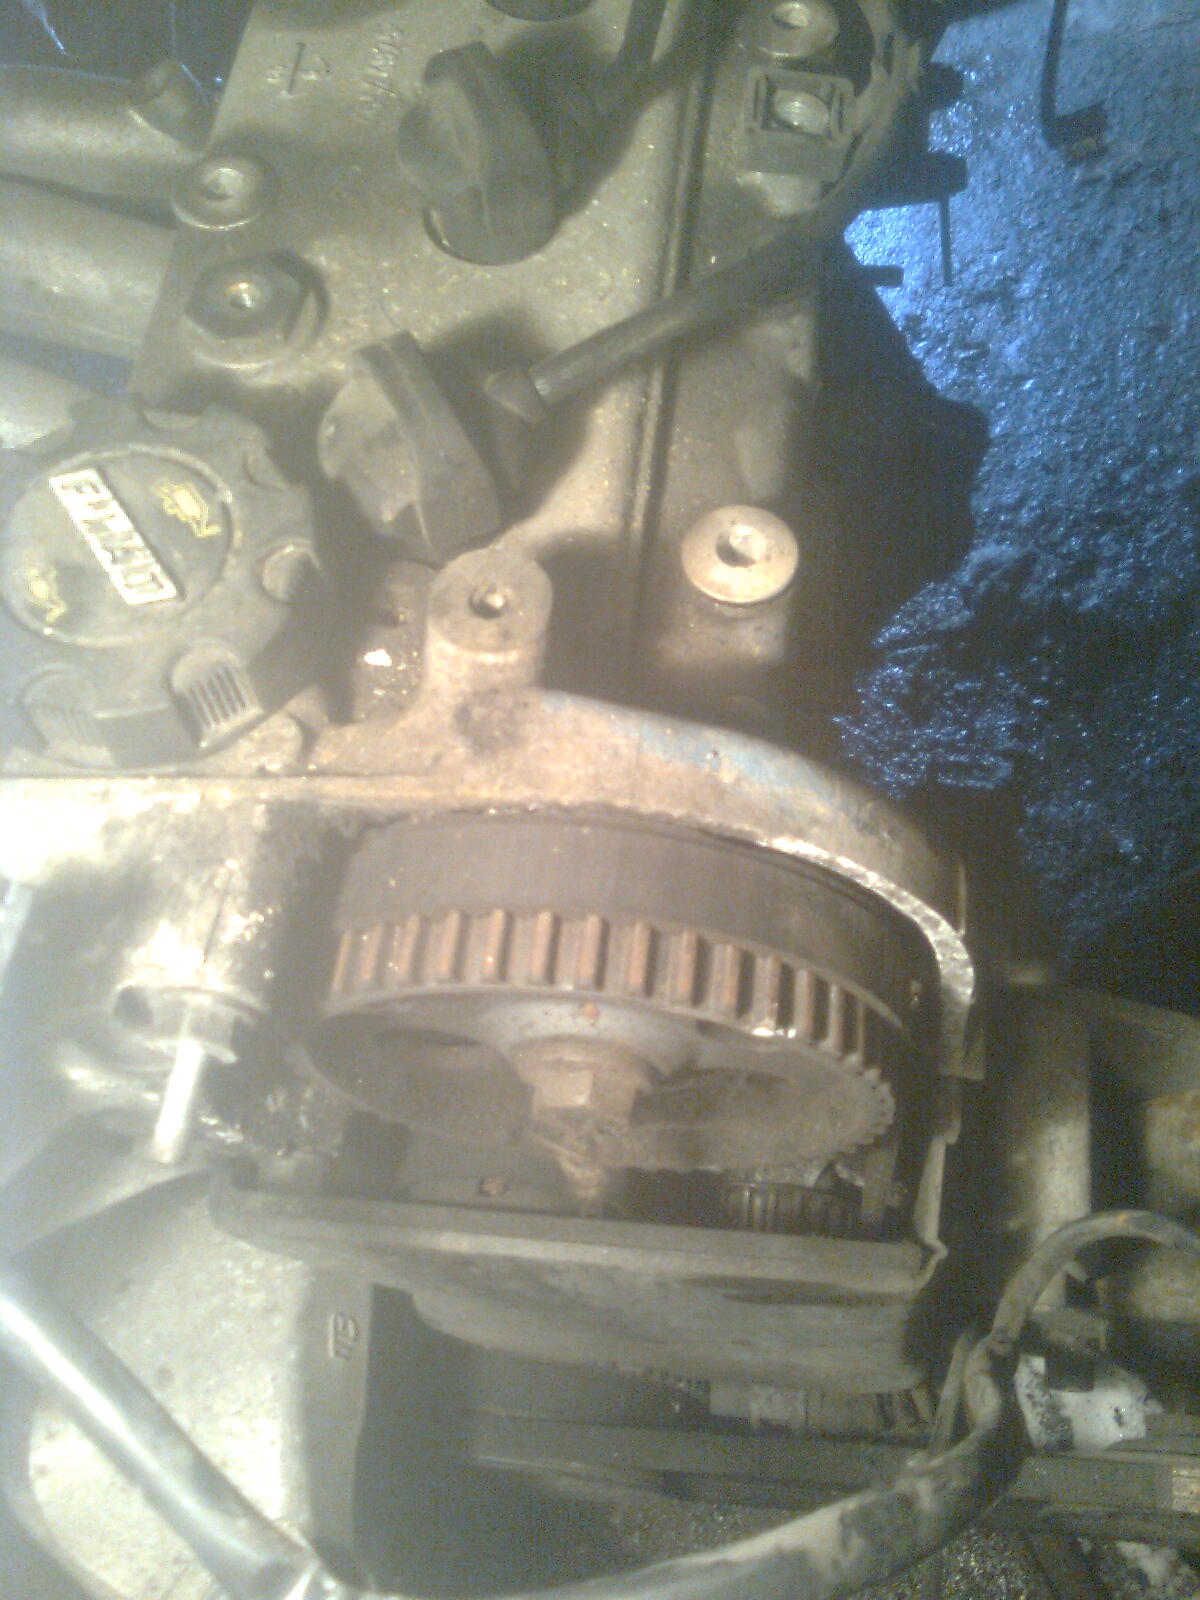
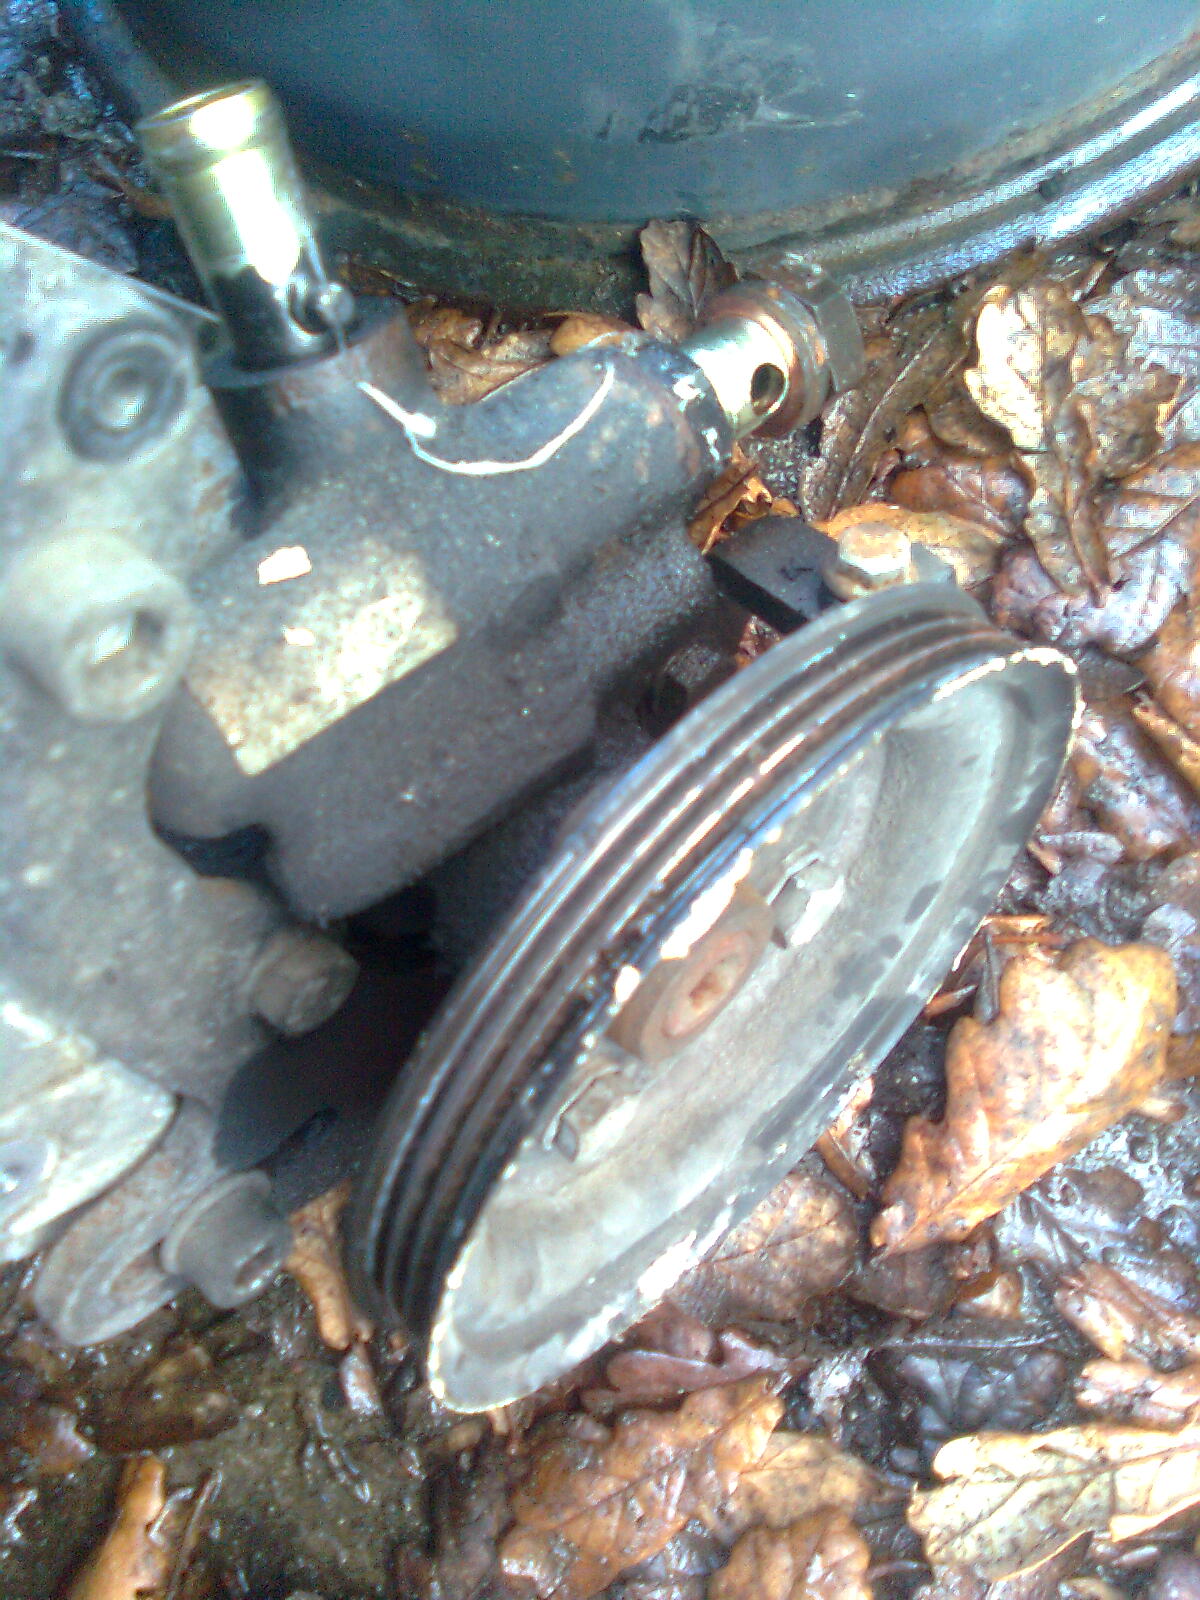
Horay! Eh wait a minute that definetly dosent look right...
Image0238.jpg

The so called mechanic that serviced this car put on a belt for a 1.2 8v :doh: Fortunate that the belt didnt break...

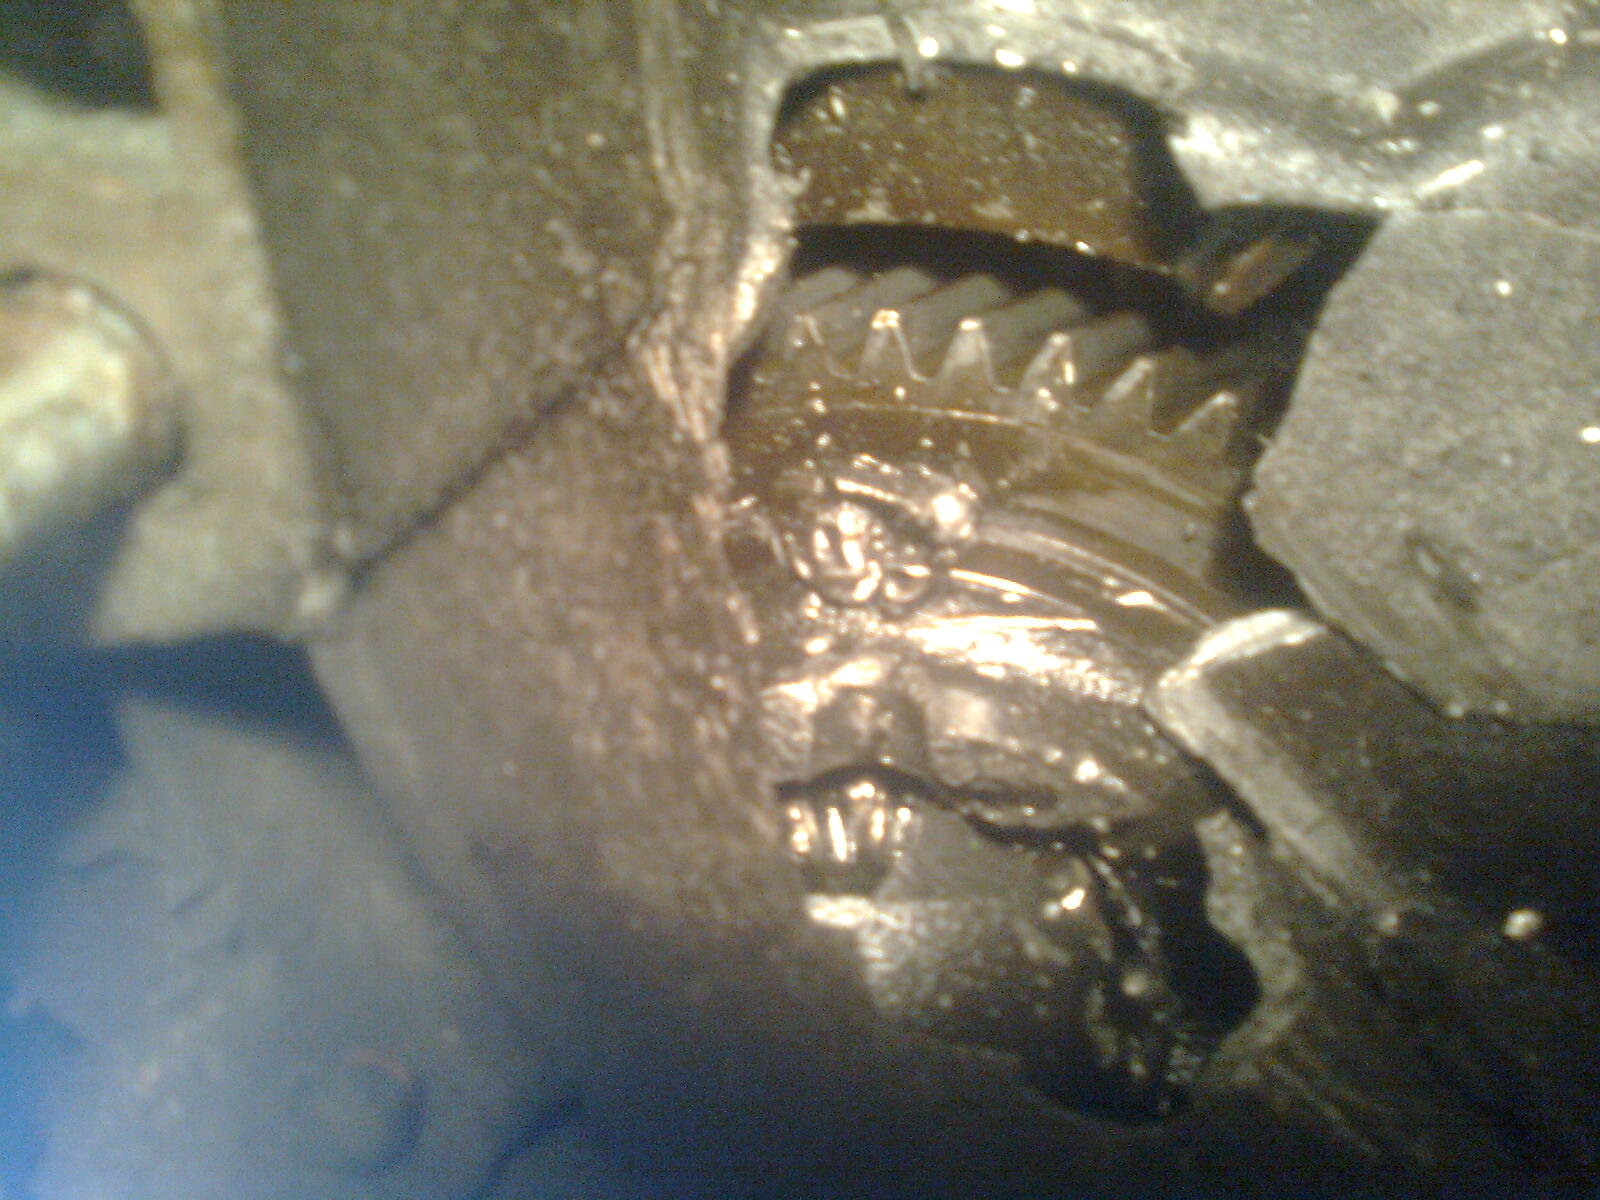
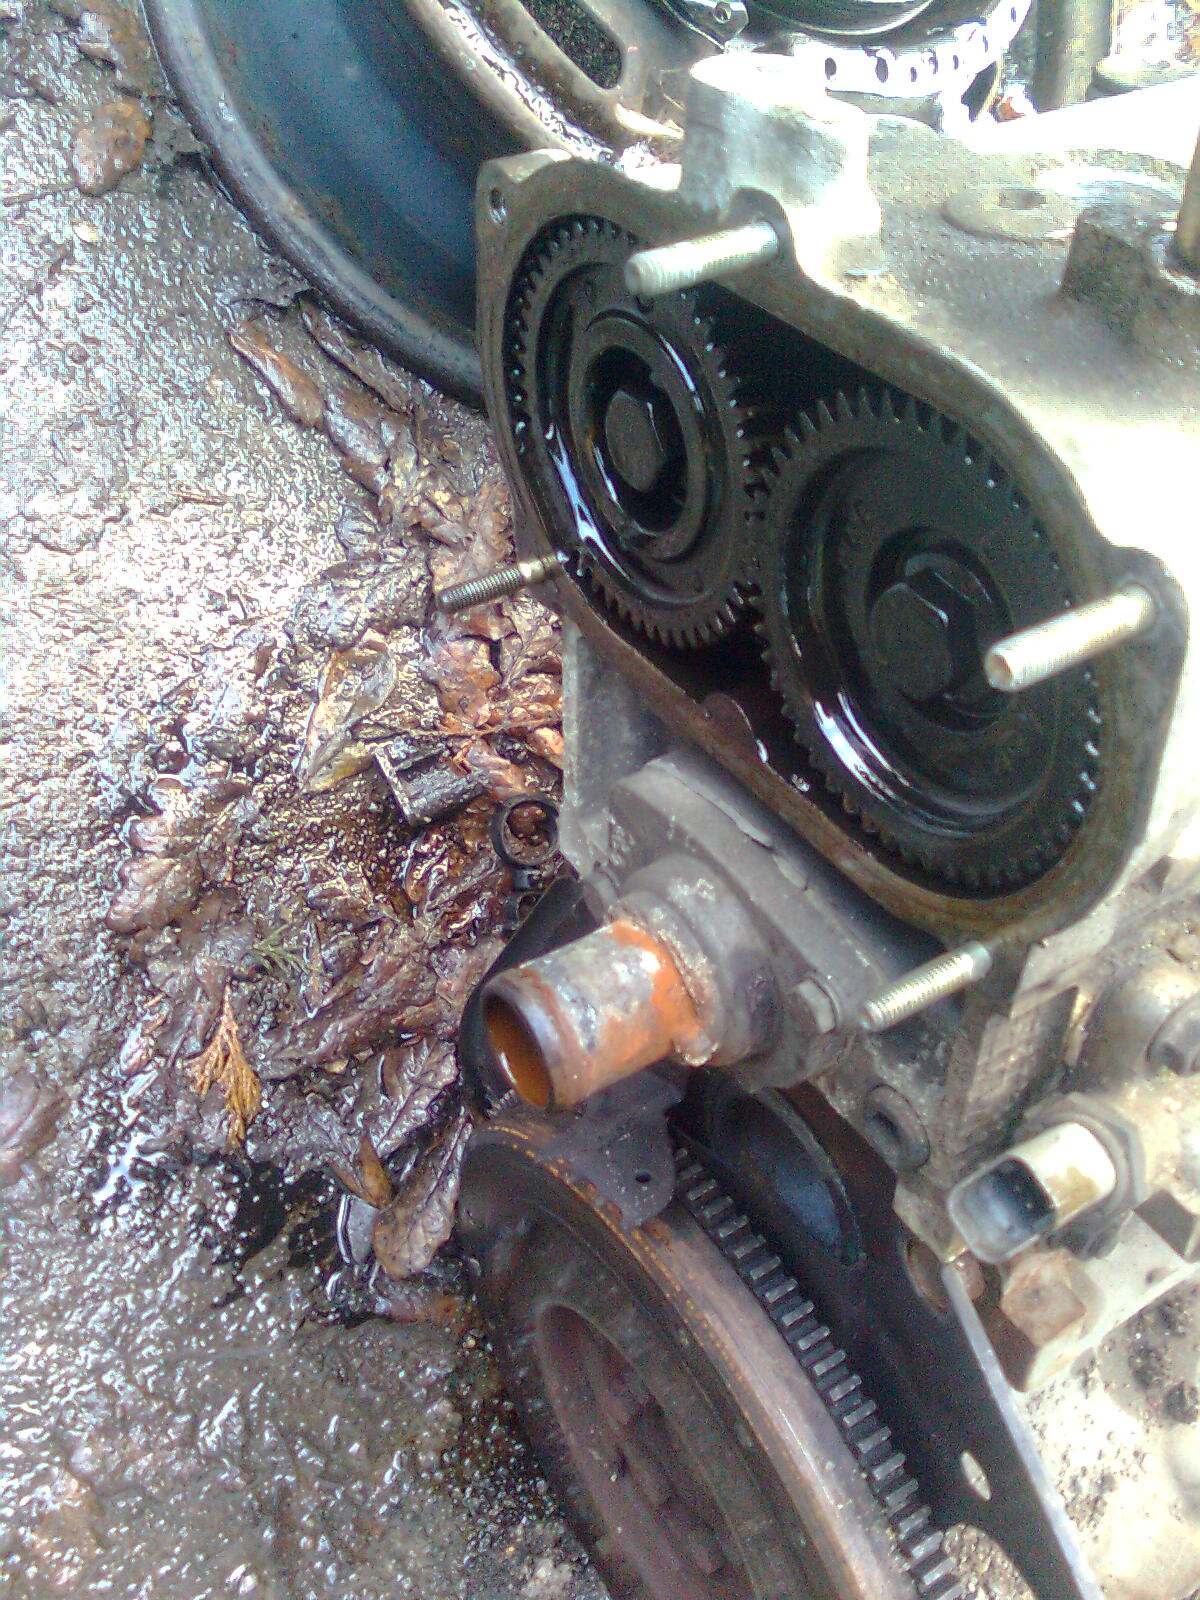
The previous owner said he stopped driving the car because it lost all gears. Ah this is the common diff failure so, simple to fix (y) 
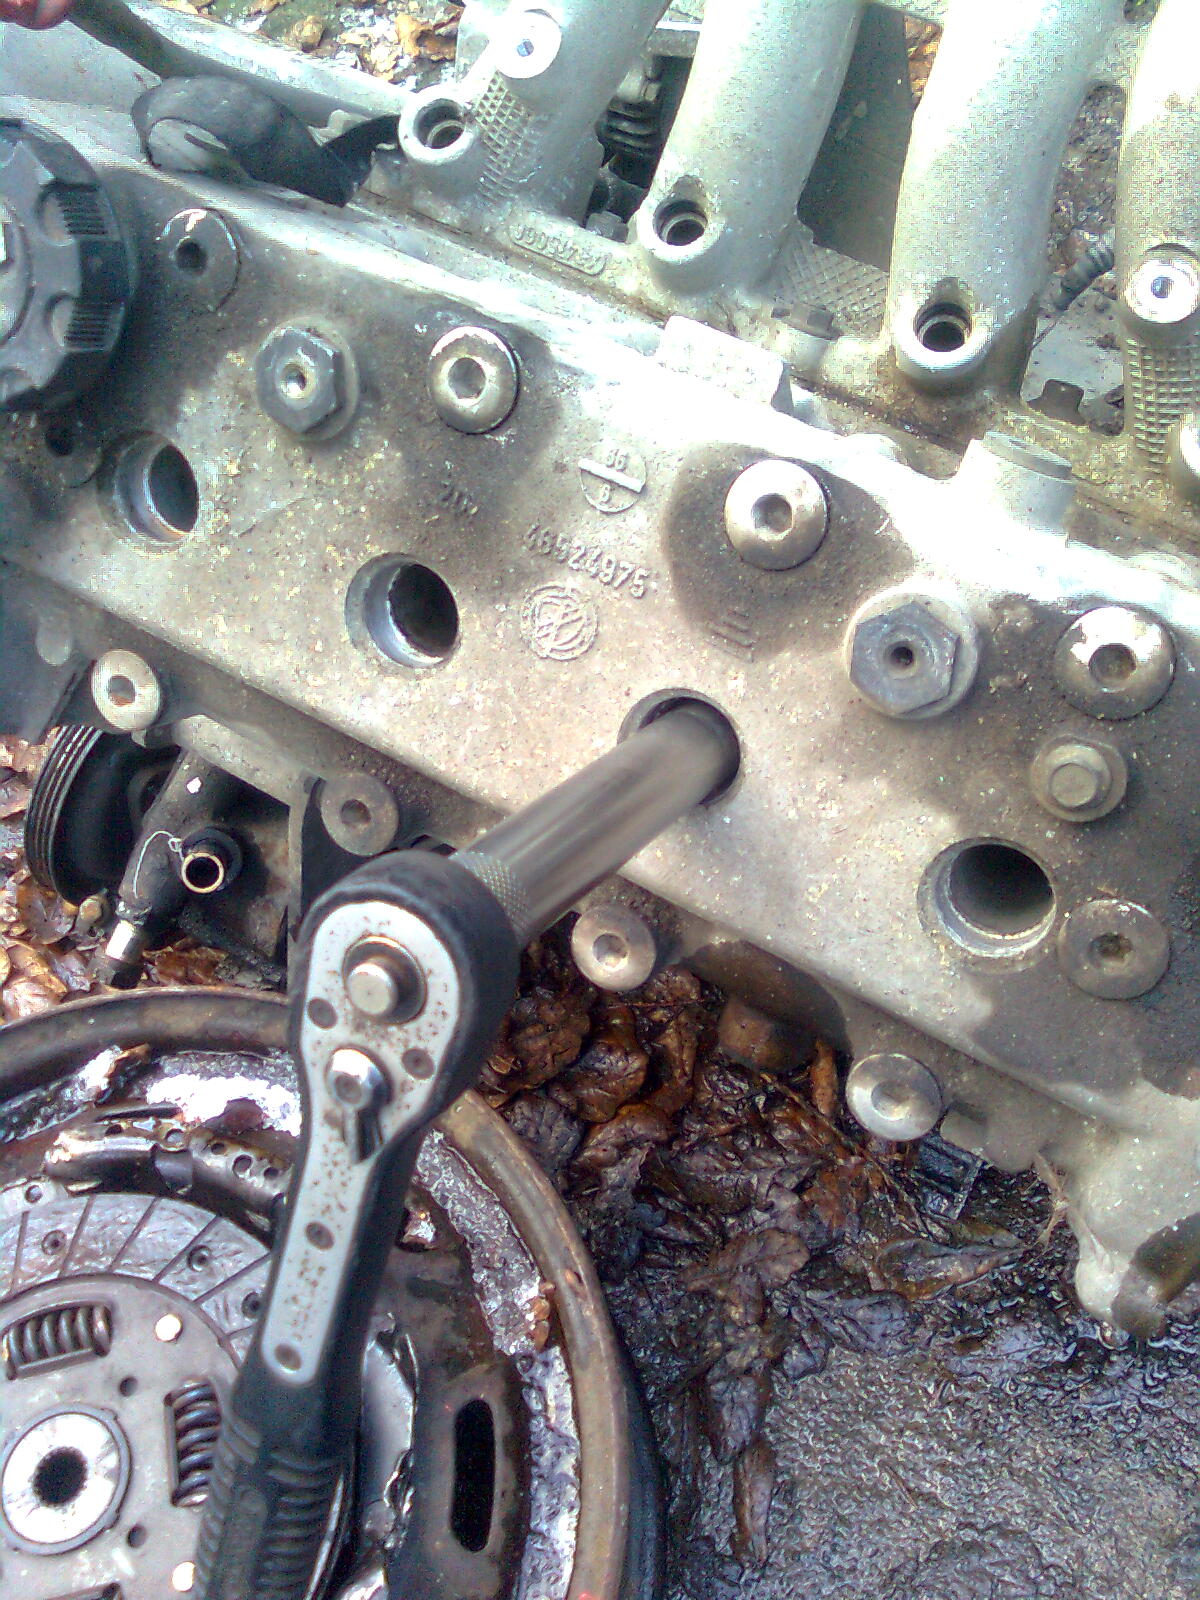
Time to split the box from the engine...
Image0240.jpg

Hang on somethings not right about that :confused: 
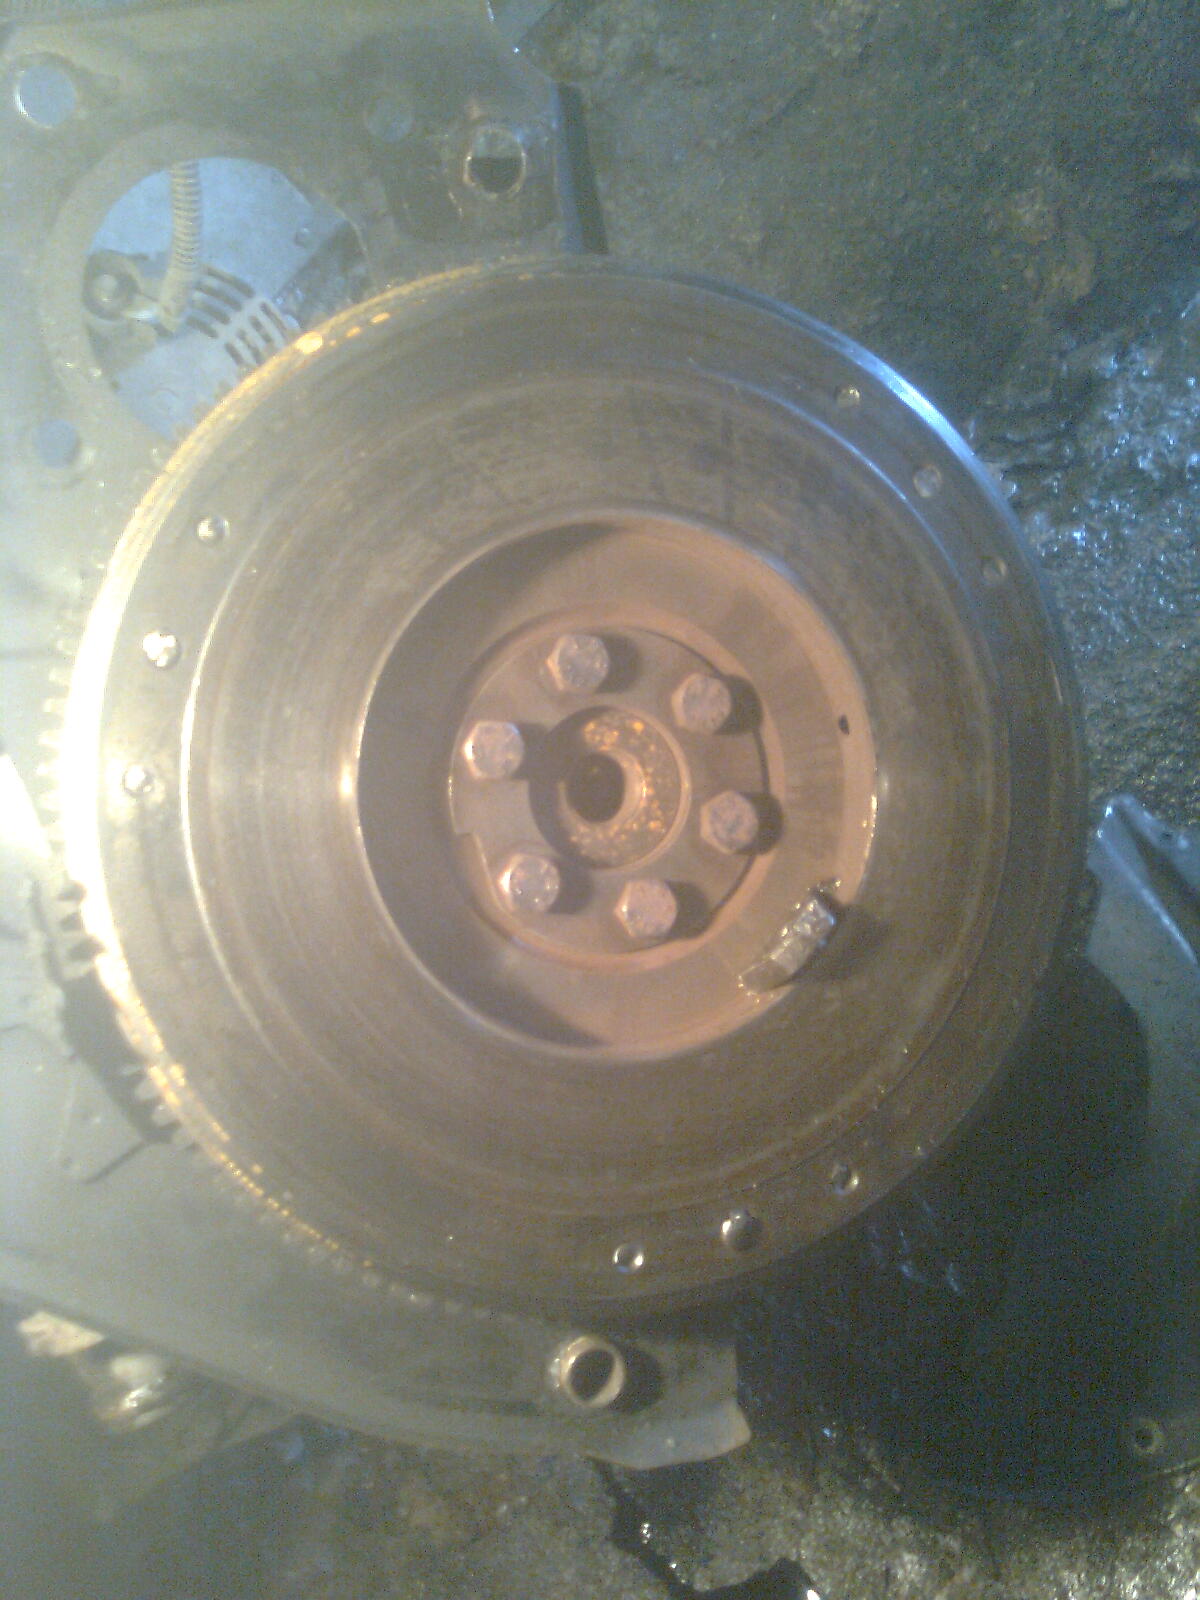
Lets take it off fully...
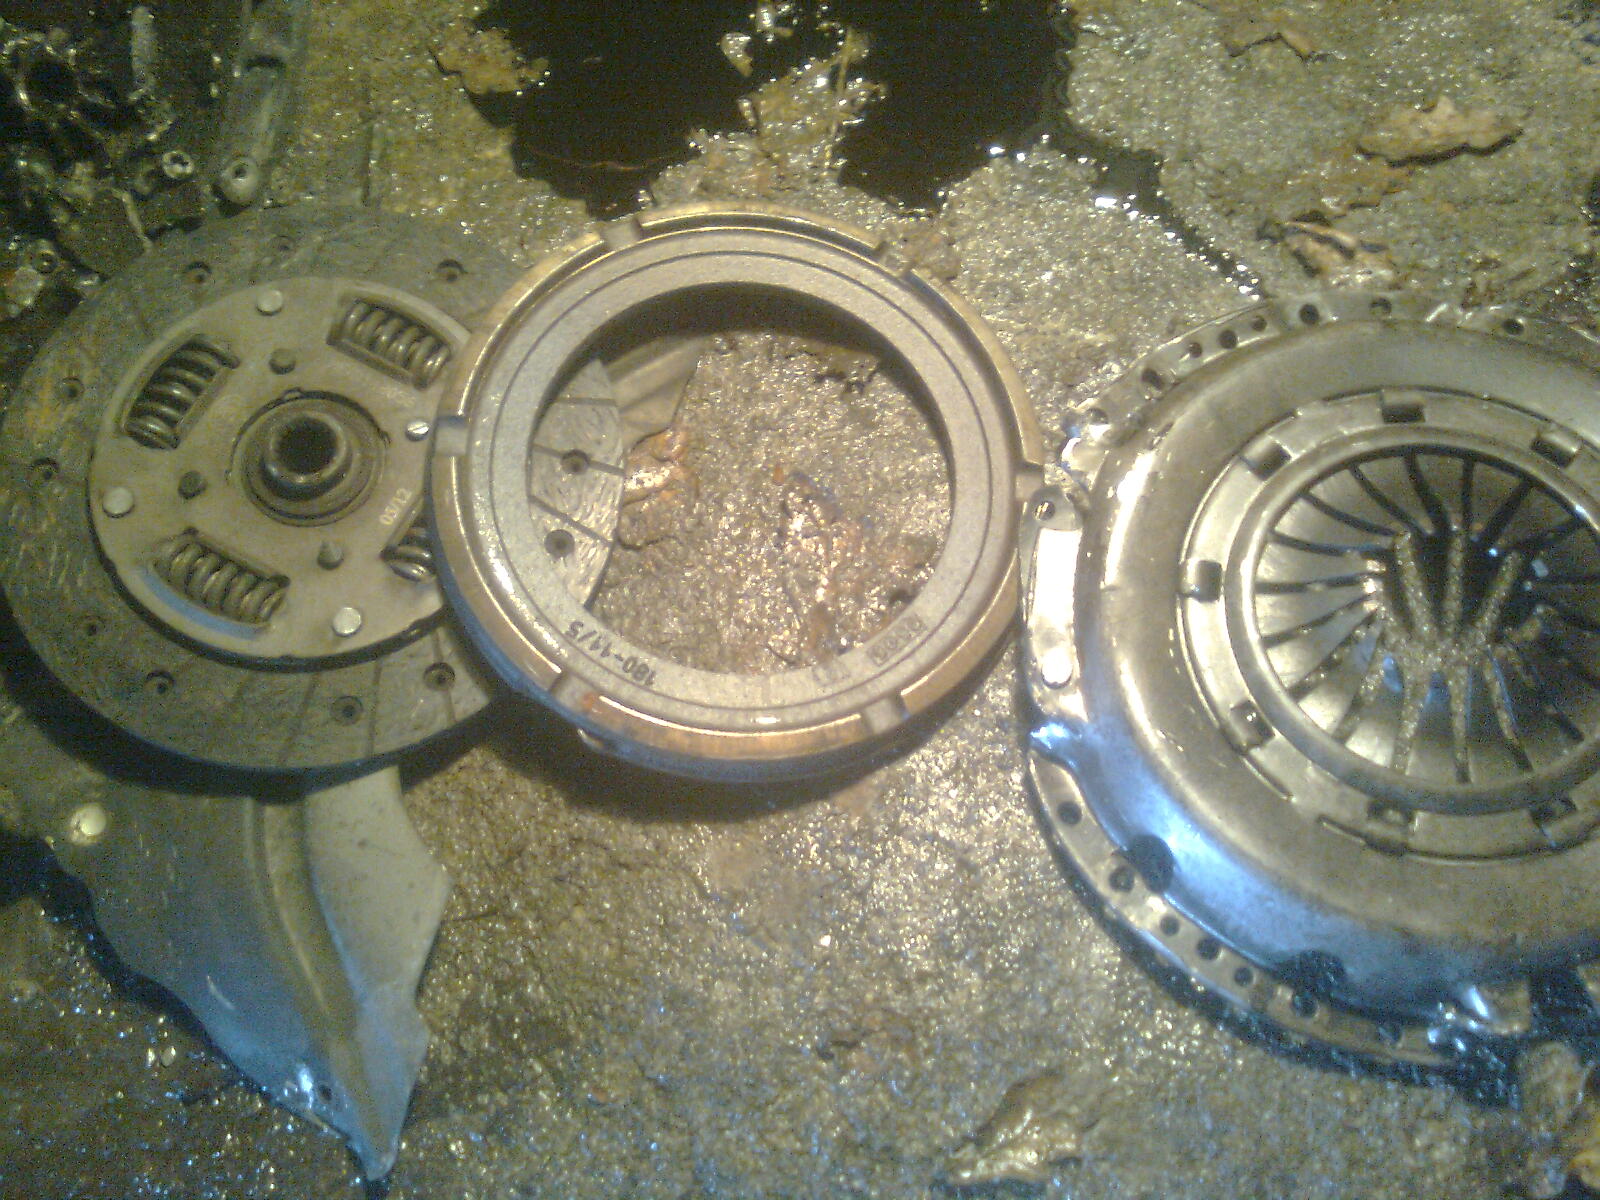
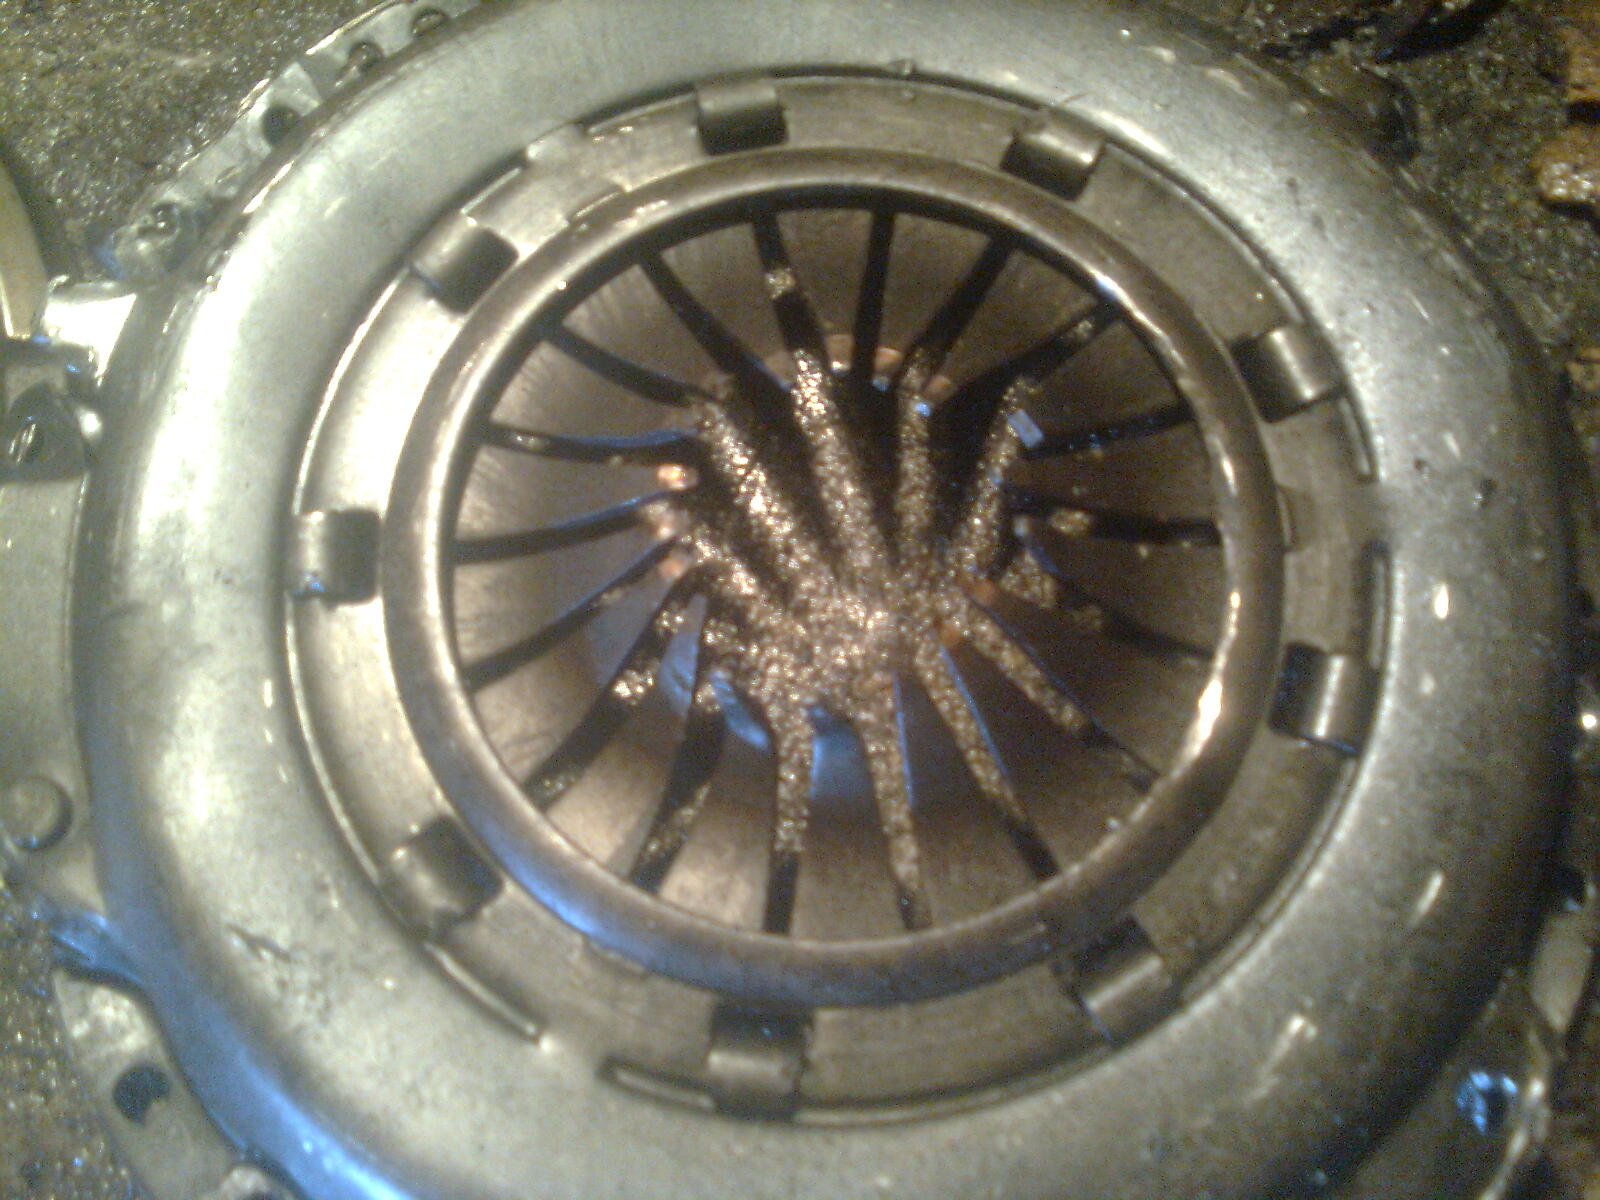
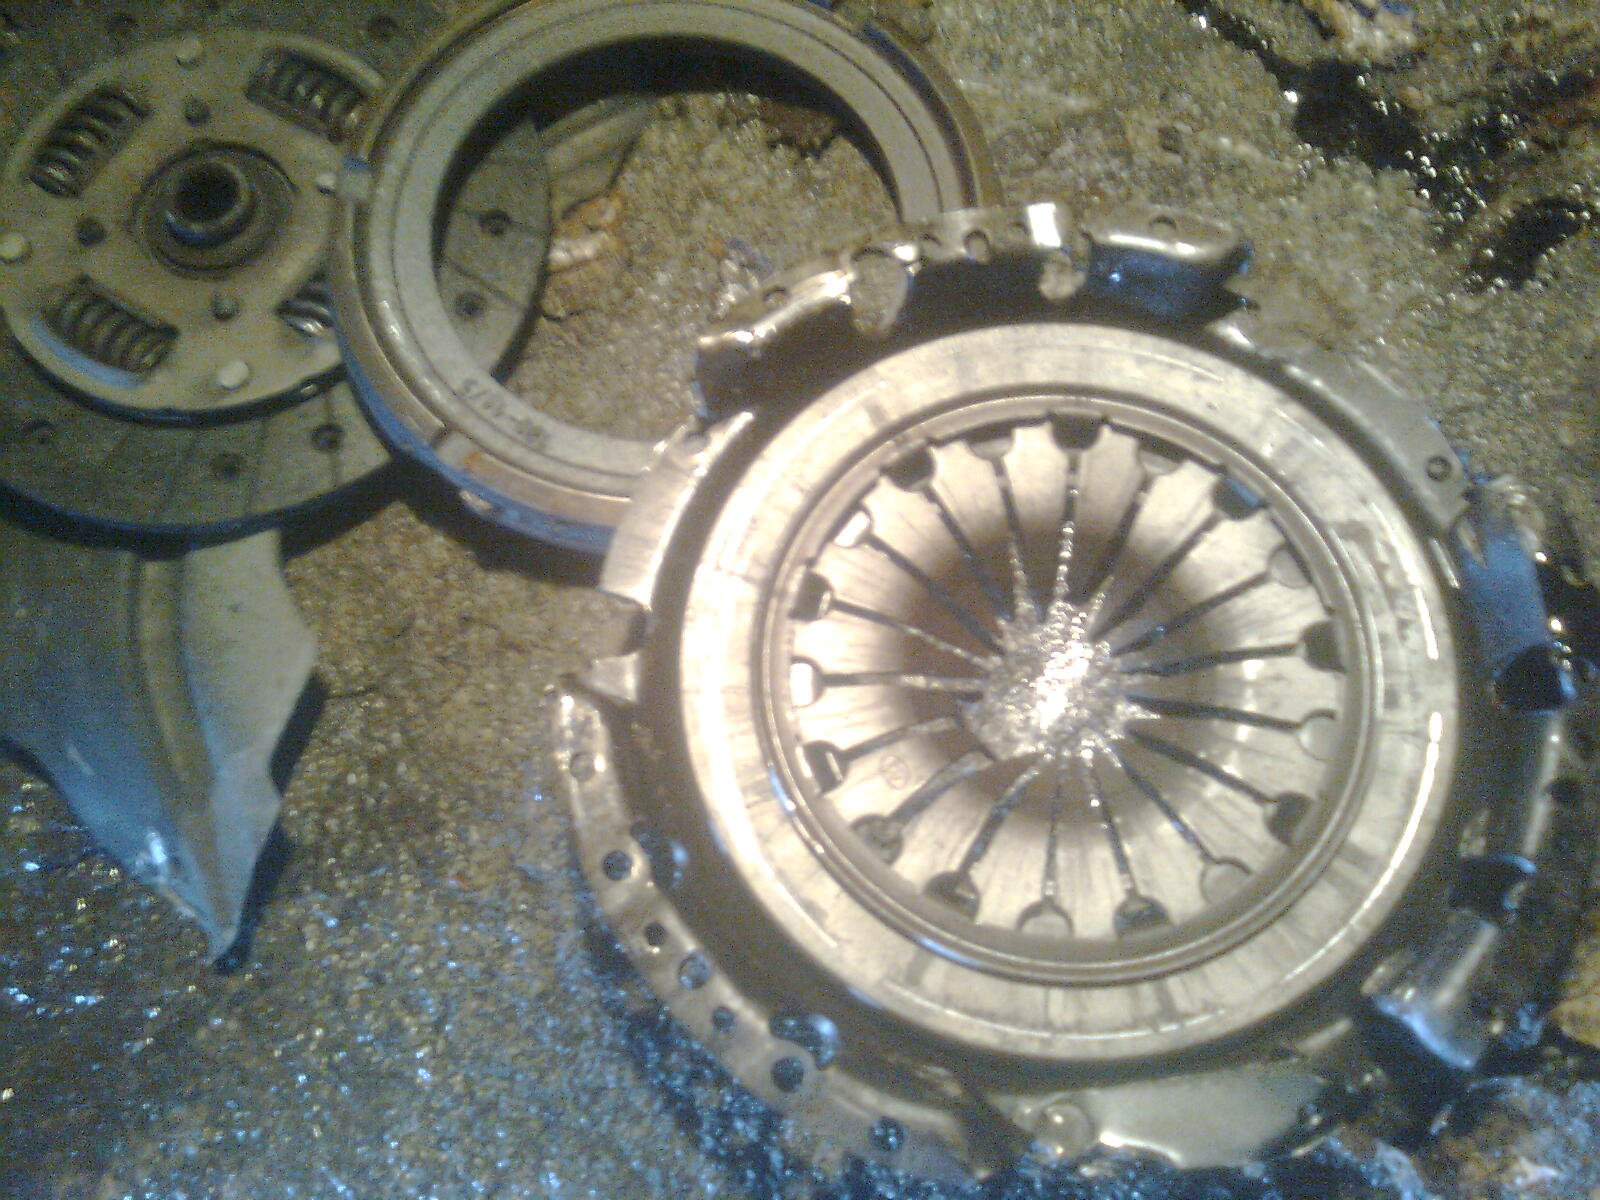
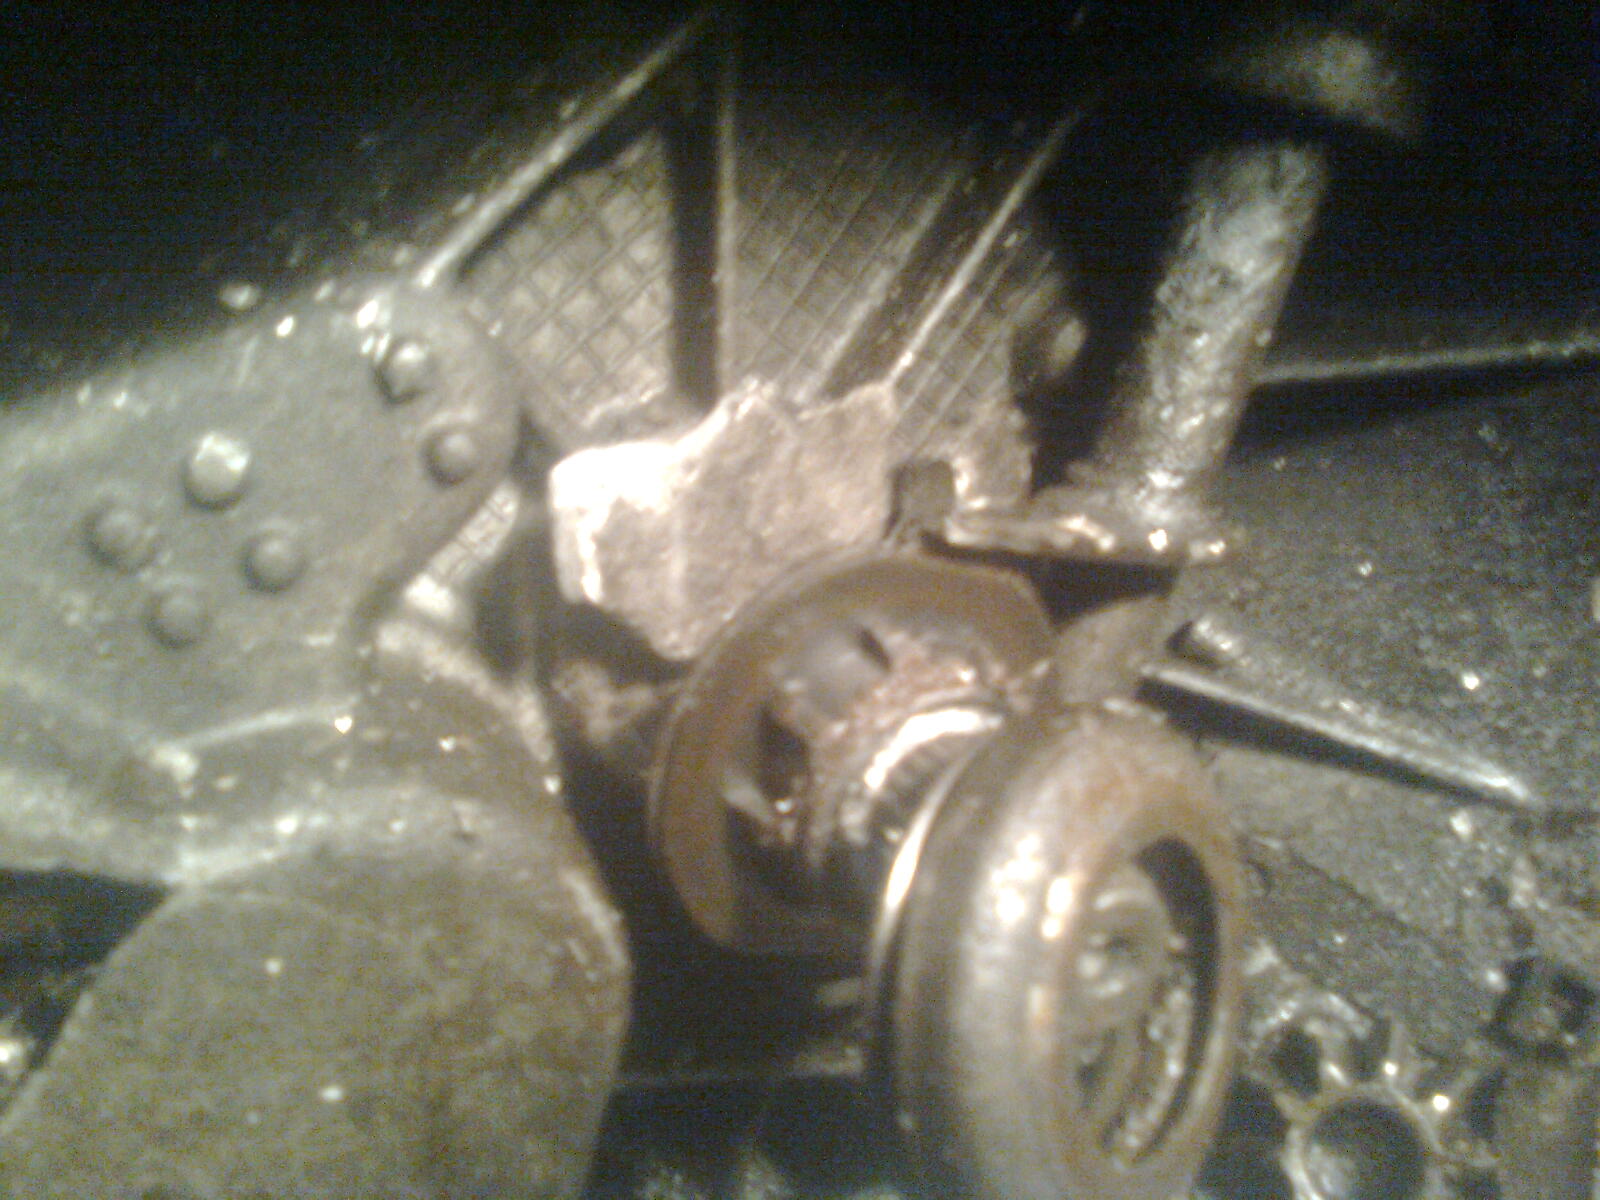
Image02411.jpg

:eek::eek::eek::eek::eek: WTF????!!!!!!!!!
Image02421.jpg
Image02431.jpg
Image02441.jpg
Image02451.jpg
Image02461.jpg
Image0247.jpg

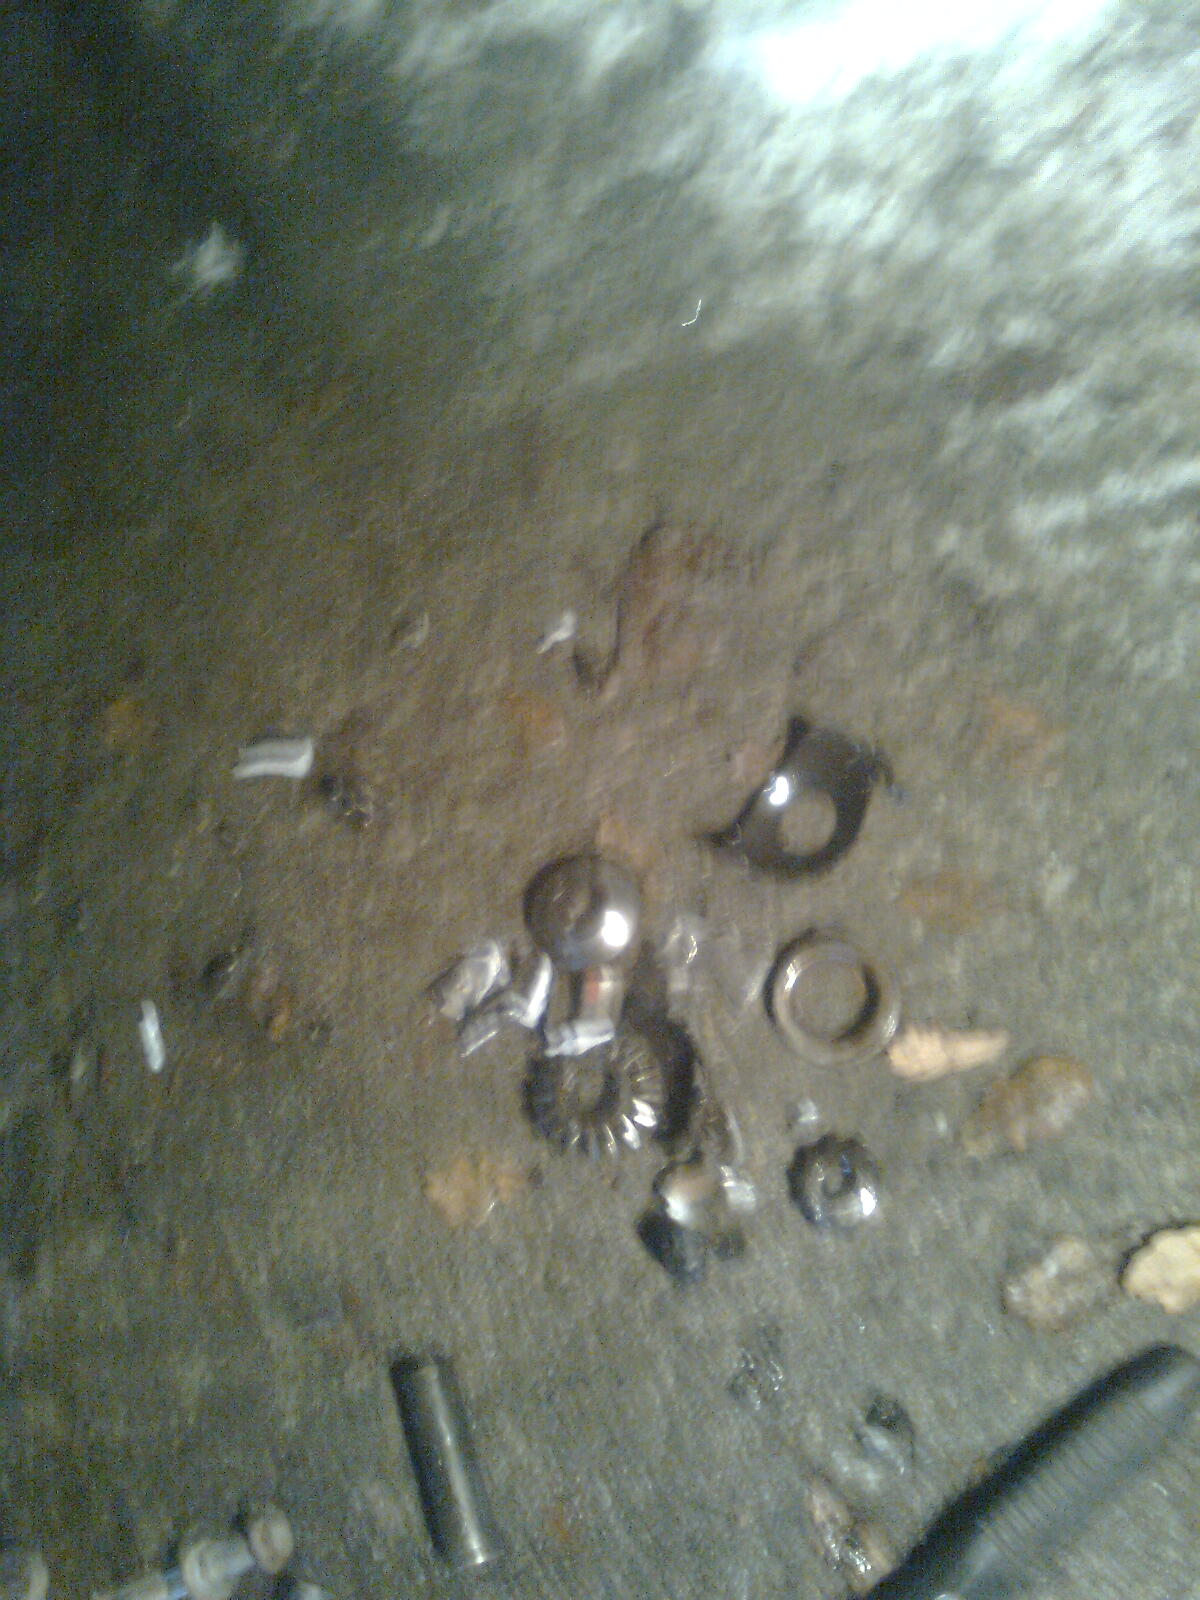
I have never seen that happen before, ever. Even the couplings didnt escape the torture :cry:
Image0248.jpg

Maintained? By what a madman thats trigger happy with an airgun? This is by far the worst maintained Fiat weve ever had. To sum it all up, when we lifted the box up...
Image0249.jpg

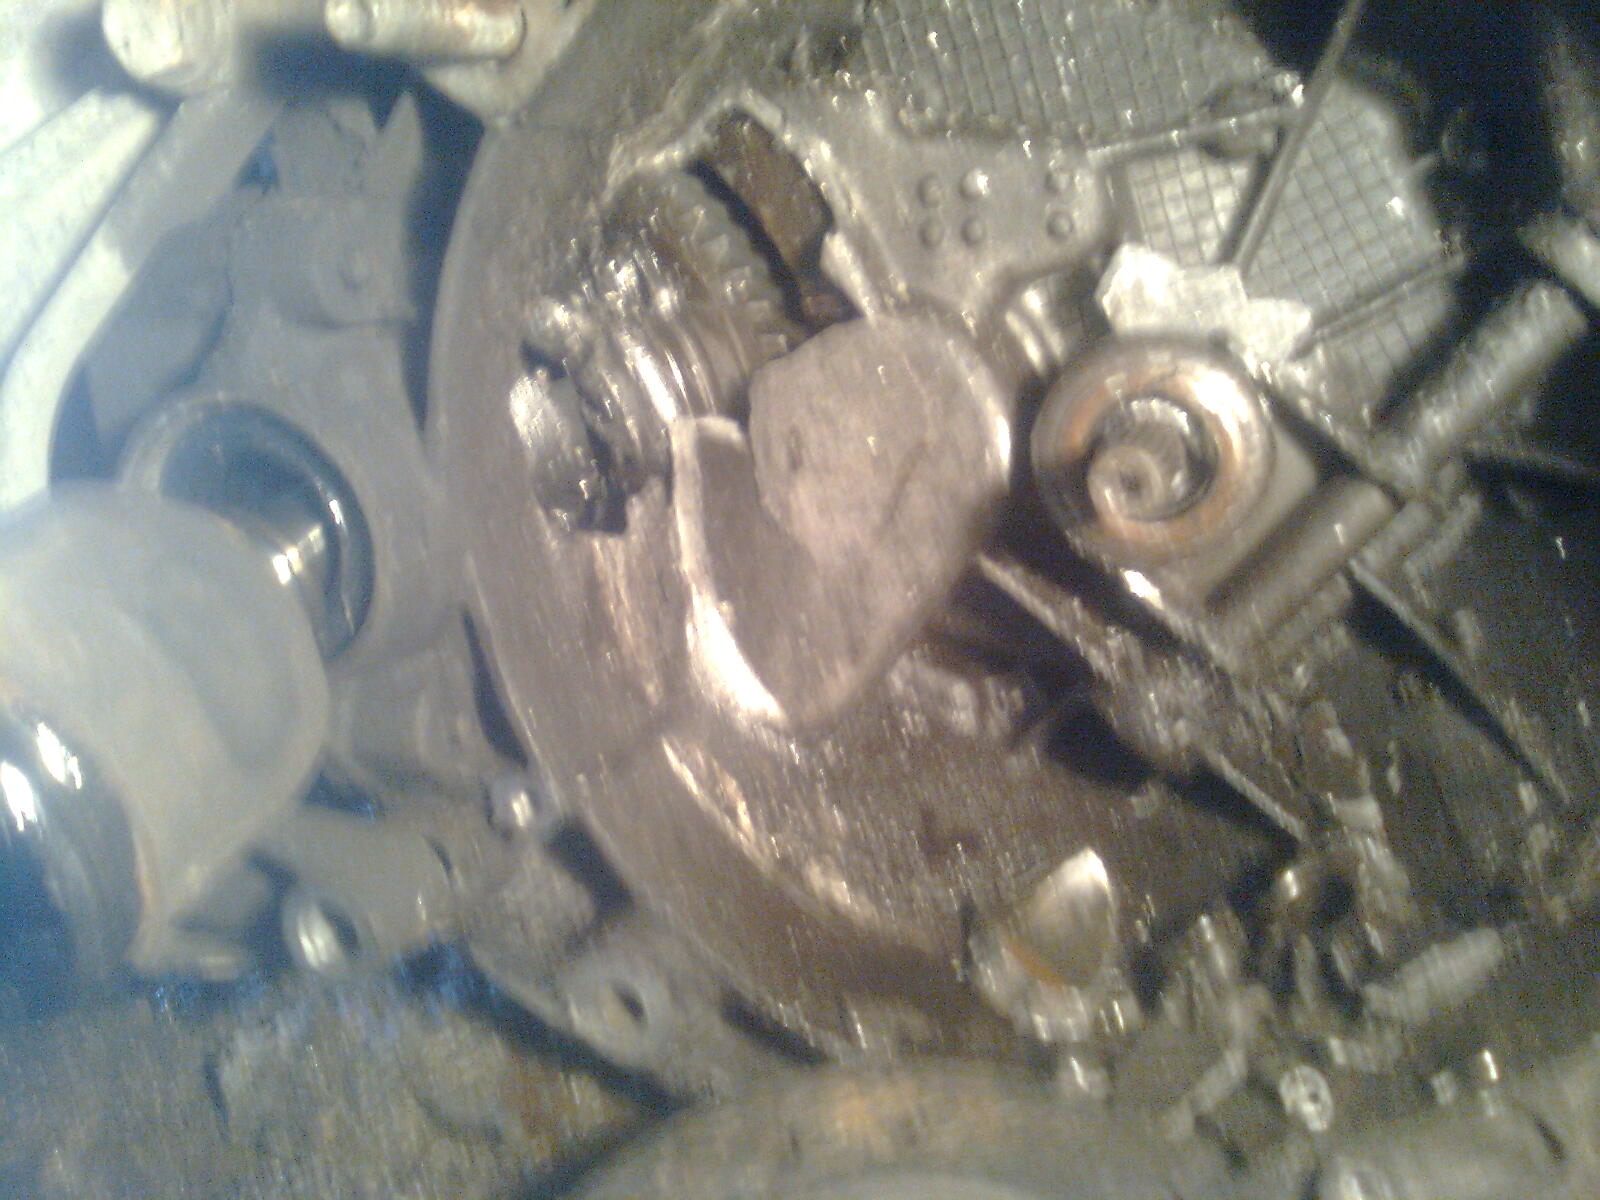
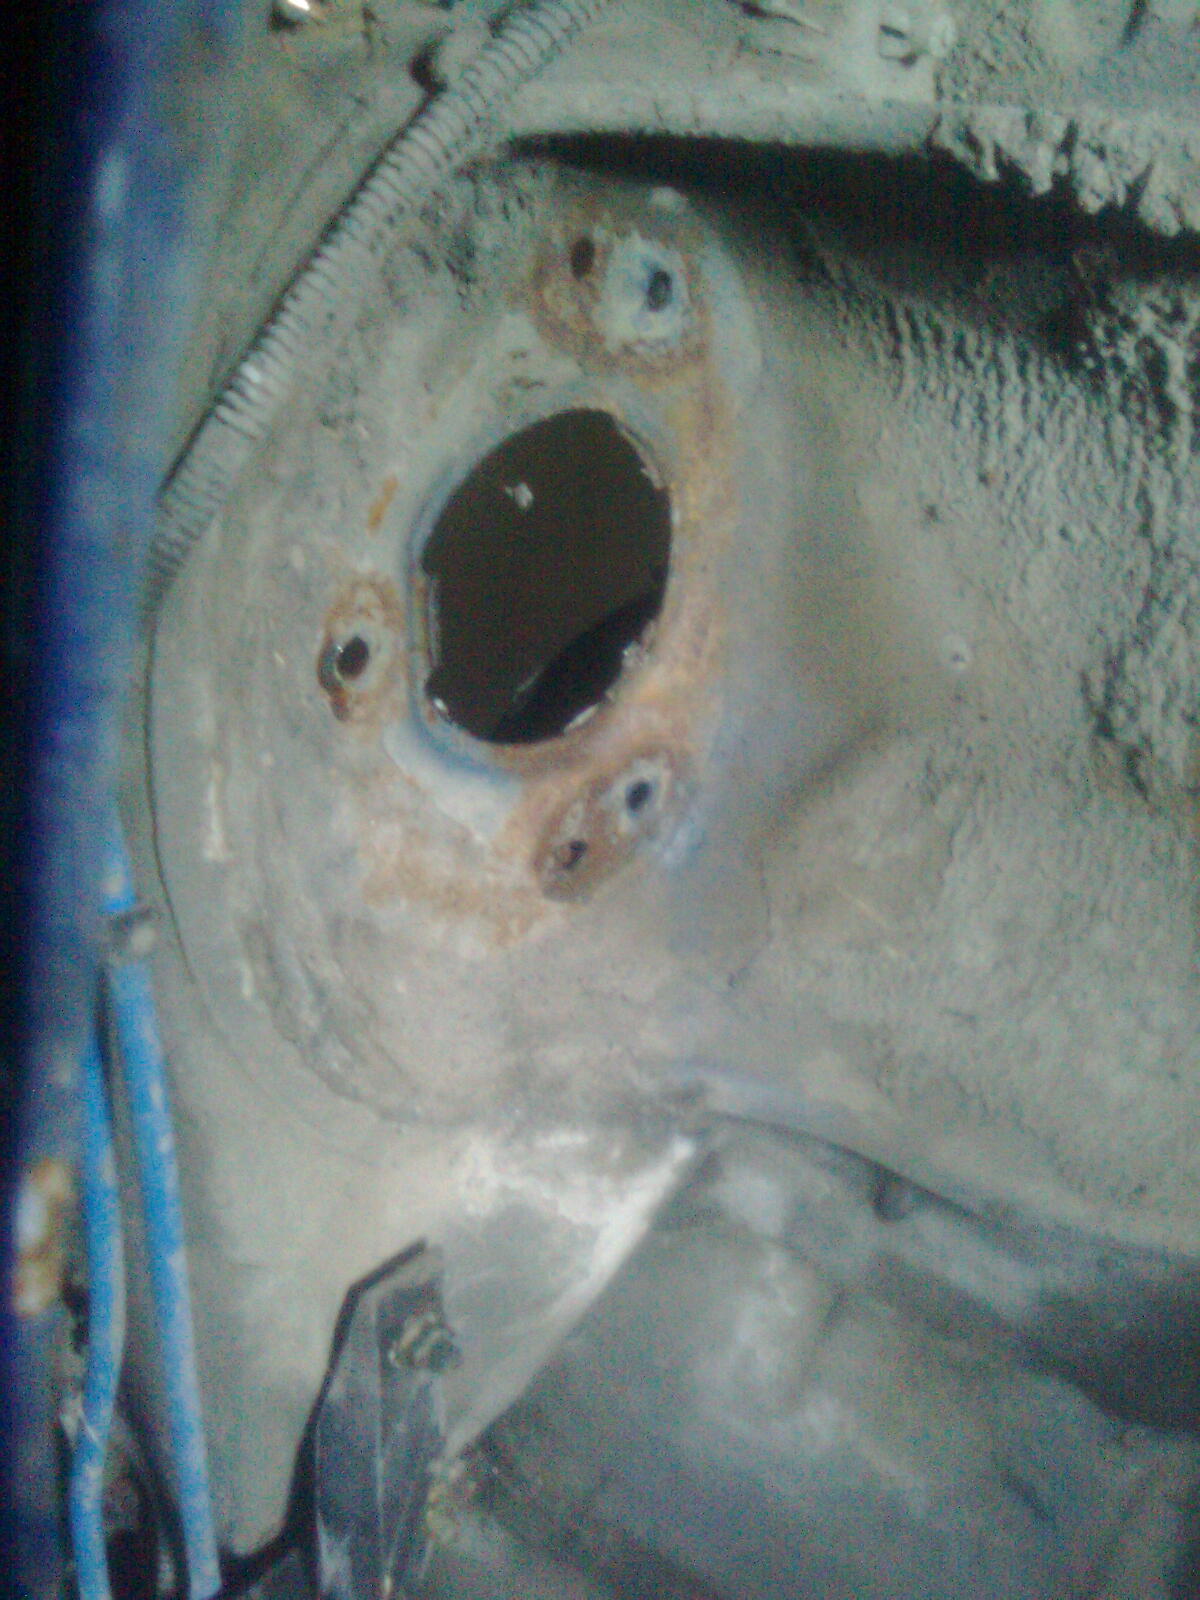
Words just failed me. I didnt get pictures of the injector rail bolts that were rang off. Or the missing manifold studs. Or the coil pack thats glued on. Or how tatty the loom is. Its a disgrace that a Fiat was let go into this condition (n)(n)(n) What wonders will I find next? I cant wait... :cry:
 
Re: Van with a difference!!!

Looking forward to seeing what you do with this mate (y)

Cheers! I'm looking foreward to what else is out of the ordinary on this car :p

Blimey looks like its had a hard life. I notice all the bolts and dowels have snapped off on the flywheel, is the clutch the right one or where the dowels ground off to fit it?

Im enjoying the pics (y)

And there was me thinking this car had it handy, online pictures can be deceiving!! :D What we think happened was the clutch needed replacing (that is a new clutch btw, even if it is unusable) so they got someone to do it that overtightened the bolts, along with some hard driving (the bushes and ball joints are in bits) and to set it all off the common diff failure, which when goes causes an unholy mess in the bell housing (been there twice (n)). The release bearing actually had been crushed into a grey paste in some parts... Just goes to show, I thought I'd seen it all!!


Time for more pics :p
A daylight pic with no engine to begin with
Image0250.jpg

Now I knew that the exhaust was rotten but come on how could anyone not notice the racket inside?! A closer look at the subframe....
Image02511.jpg

Oh dear, rust :mad:
Image02521.jpg
Image02531.jpg
Image0254.jpg

These cars are rust proofed, how did this happen??? :confused:
Now onto the well maintained engine (y)
Scuffed power steering pump pully probably explains why this one has packed up (n)
Image0255.jpg

The worst oil that came out of an engine was in a 1987 Fiat Regatta, which went into tar and cruds when it hit the pan :yuck: this isnt too far behind
Image0256.jpg

What quality oil I thought, perfect for mending the roads :D Now this got me curious on the plugs, what would I find? Would it be too much to expect the twin electrode plugs these cars take? Only one way to find out (y)
Image0257.jpg

And after alot of screeching I find these :mad:
Image0259.jpg

They were so tight I twisted my shoulder trying to get them out :mad::mad::mad: Although not the worst I've ever had to take out... When I'm slightly better I'll be out to attack it again (y)
 
Re: Van with a difference!!!

Bit of an update, couldnt do much due to that cursed snow :mad:

Had a poke round one night and found more rust
Image0264.jpg
Image0265.jpg


And a true quality repair job :ROFLMAO:
Image0266.jpg
Image0267.jpg

Needless to say, they were duly ripped off there and then (y) just have to fill in the holes now :mad:


I was slightly better earlier toady and I had the weather so I had another shot at the car :)

Rust treatment, die rust die :devil:
Image0286.jpg

Image0287.jpg


The interior is nearly ready, just need the door cards out and the roof lining out
Image0284.jpg


Which leads onto the back bumper, or lack of one :D I hope to have my jap style bumper finished in time for this car... ;)
Image0285.jpg


And 30 mins after that photo was taken...
Image0288.jpg


Then my shoulder went again :mad: Because its gone again, changing the subframe will be put on hold for a little while. Wonder what I'll have done for the next update... :chin:
 
Last edited:
Re: Van with a difference!!!

wooow the pictures make it look like a fun job, but doing it, im sure is alot different feeling.

and some of those pictures take me back, when i took my car to pieces..:) glad i aint going back there again.

ill look forward to more updates!! (y)
 
Back
Top