

- Joined
- Aug 23, 2010
- Messages
- 58
- Points
- 21
So, the MoT failures on my Scudo included a shredded CV boot on the Offside front. I don't know how long the boot has been ripped but I had a new joint so decided to replace the whole thing in case the original had been damaged with muck.
I'm not saying that this is the best way to do it but here's how I got the old joint off and new one (with new boot) back on.
Firstly, chock the rear wheels, engage the handbrake and stick the van in first gear. Remove the hub cap, knock out the lock pin/clip securing the large (36mm) hub nut. Slacken off the hub nut and wheel nuts whilst the vehicle is on the ground.
Jack up van, either using the frontside jack point or the central support member behind the engine. Add axle stands or other *secure* methods of keeping the vehicle elevated.
Remove the wheel and place under the vehicle to provide extra 'drop protection'.
Remove the brake caliper (either tie it up so as to not strain the the brake pipe or remove it from the brake pipe completely). [Note -I have some photos of this process but cannot find them right now - will add later]
Continue to remove the pre-loosened hub nut...


Remove the track rod end (this is also to be replaced - another MoT failure)
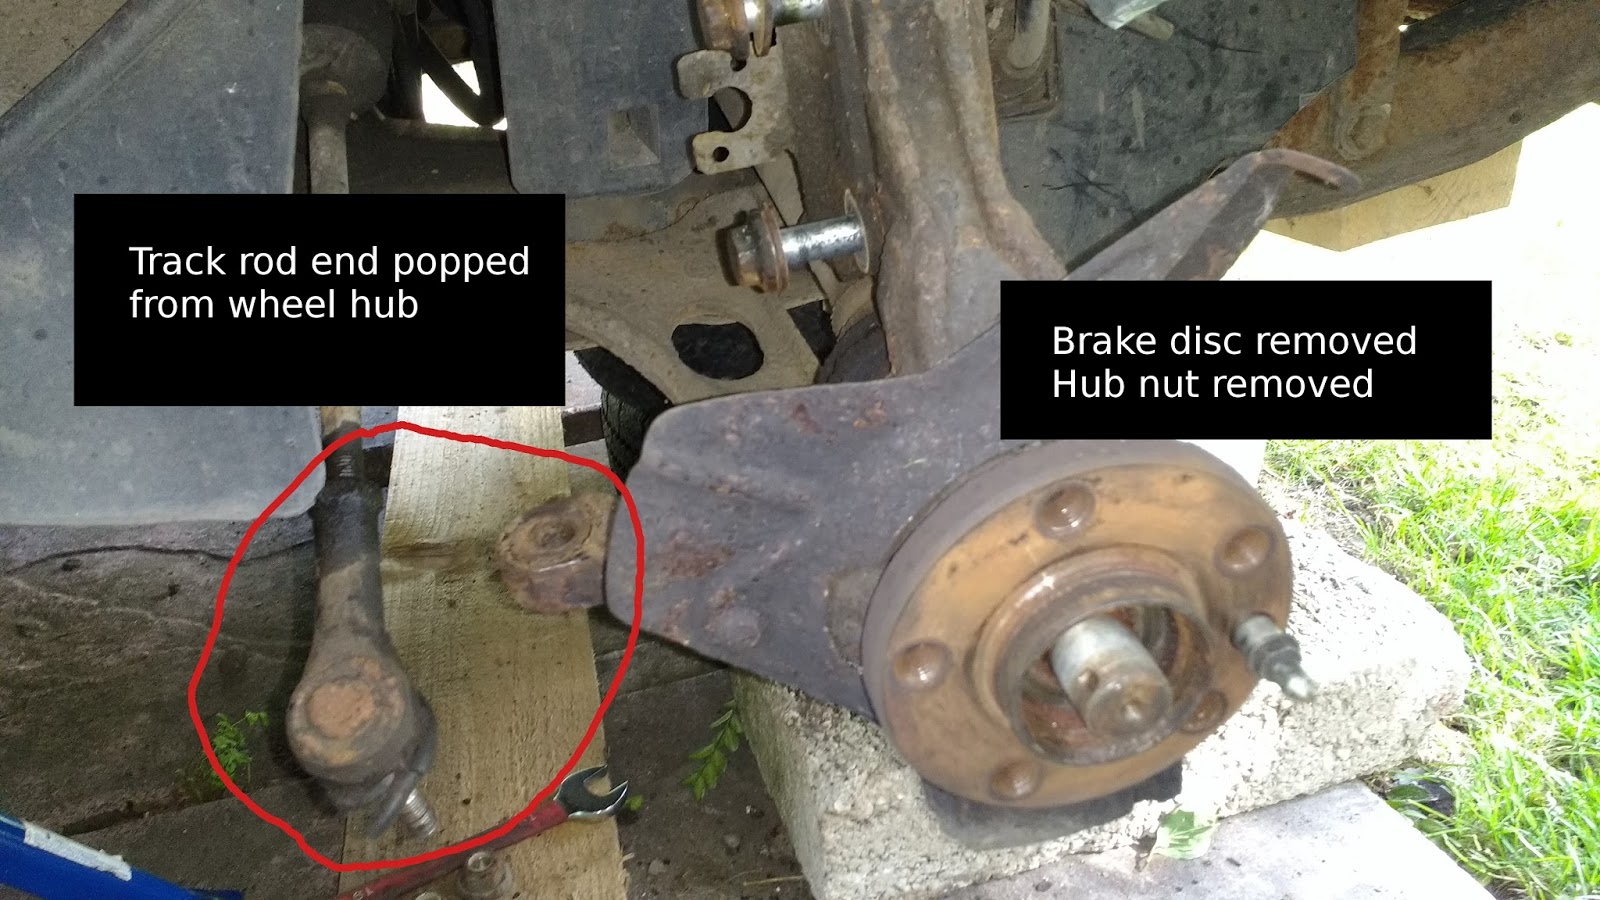
(At this point I removed the brake disc, I should have done this as soon as I removed the caliper)
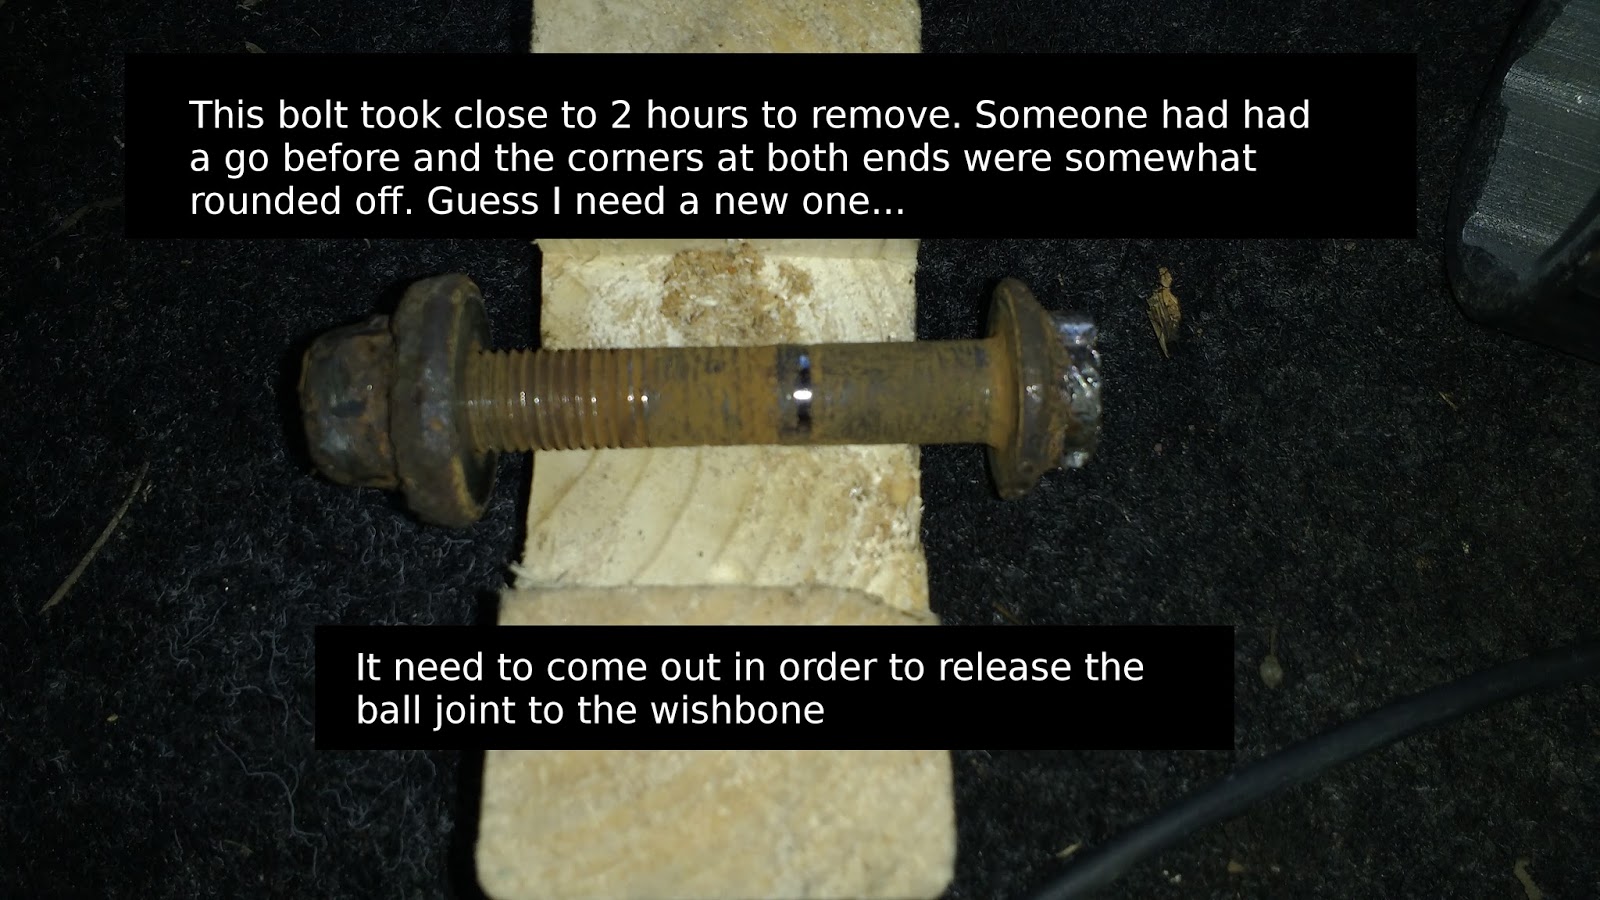
Undo the pinch bolt securing the hub assembly to the lower wishbone
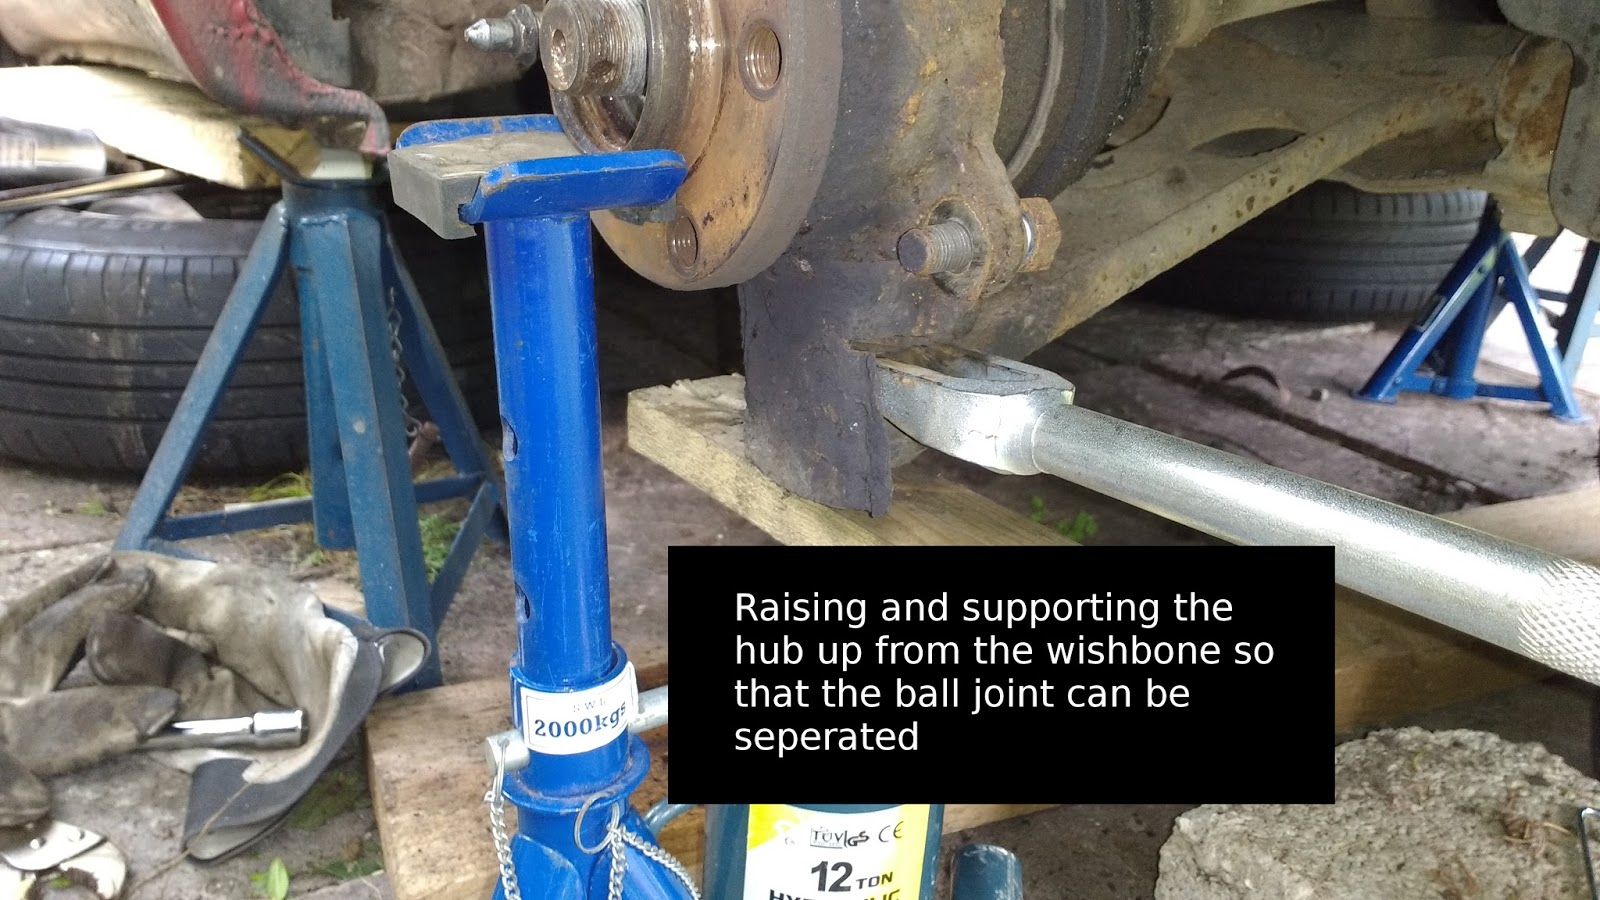
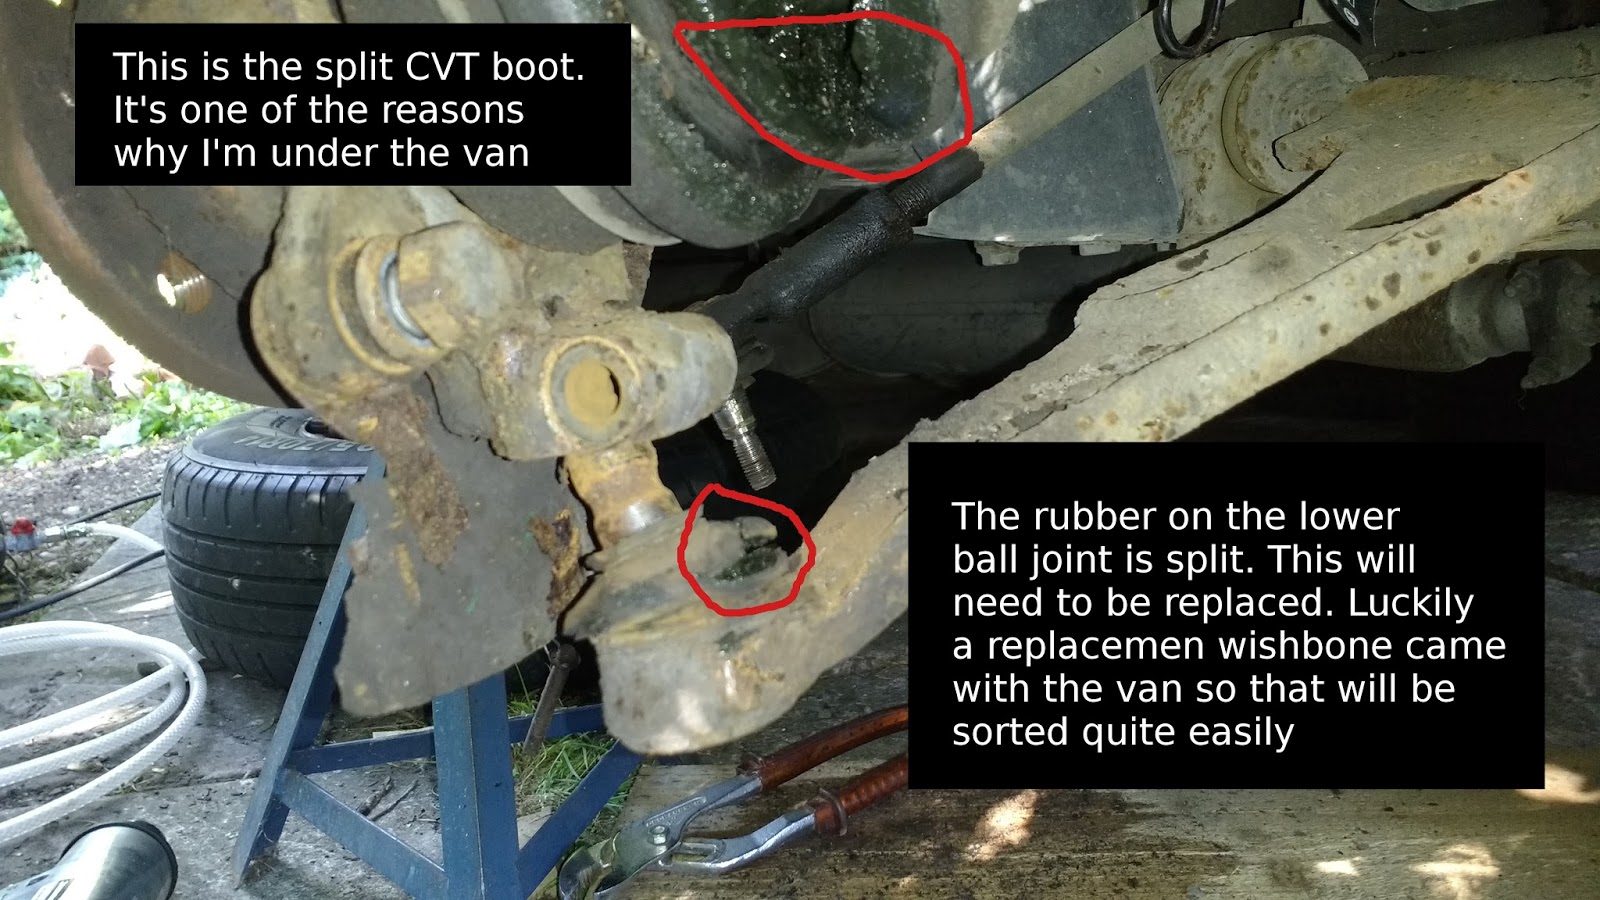
Support the hub assembly and separate from the wishbone - I used a fork-separator here because the worn rubber on the lower suspension arm is also an MoT failure so that assembly needs to be replaced and the rubber can be sacrificed.
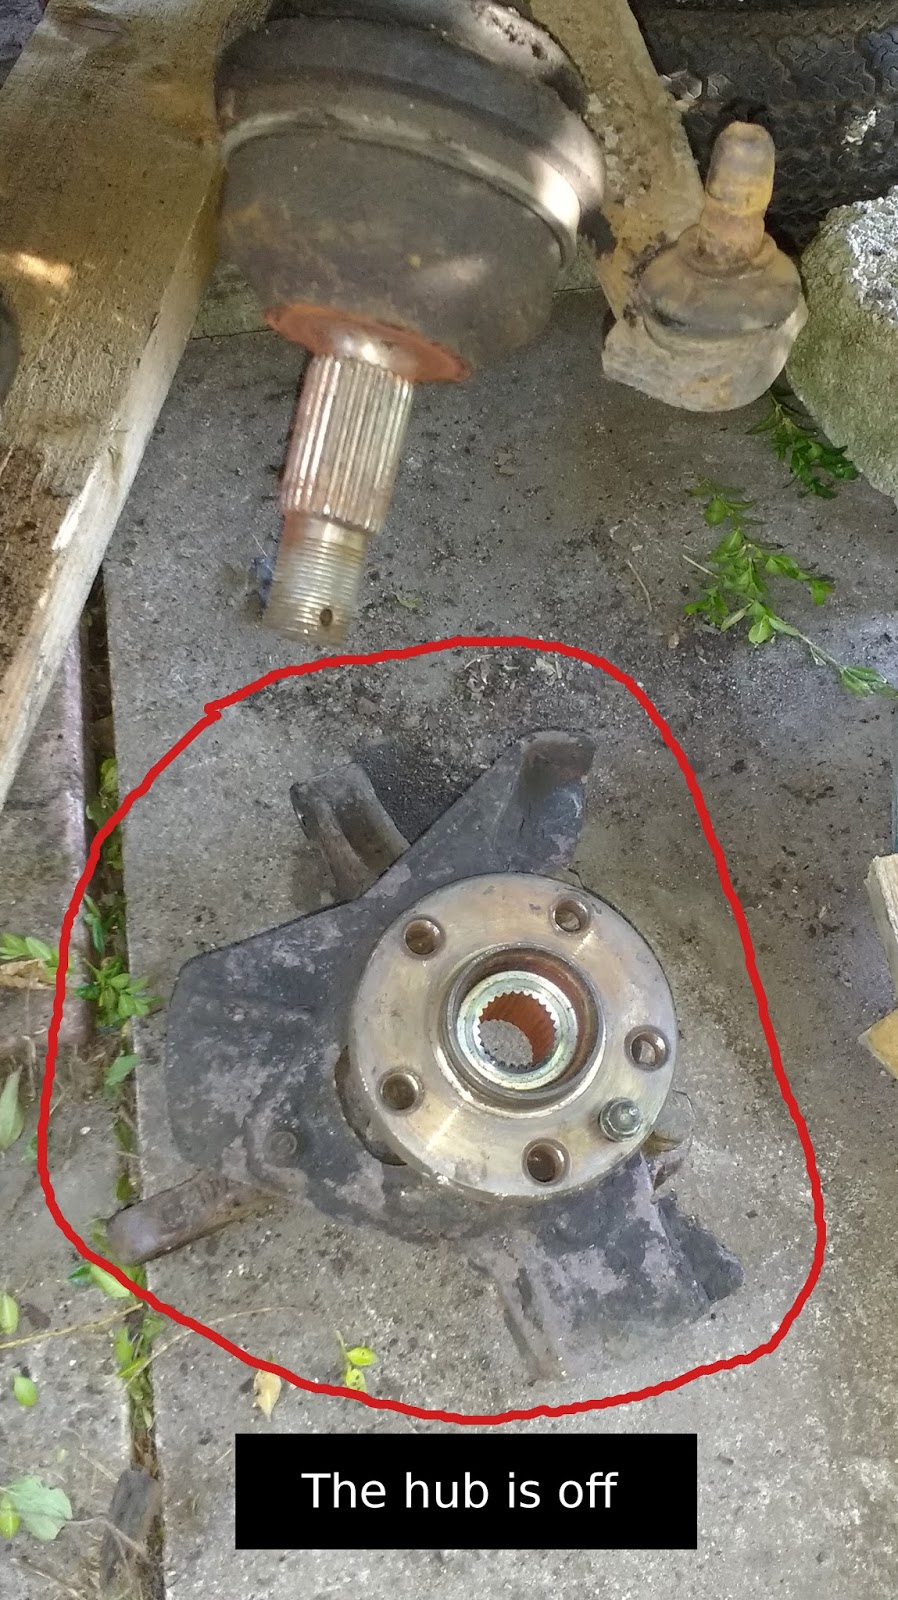
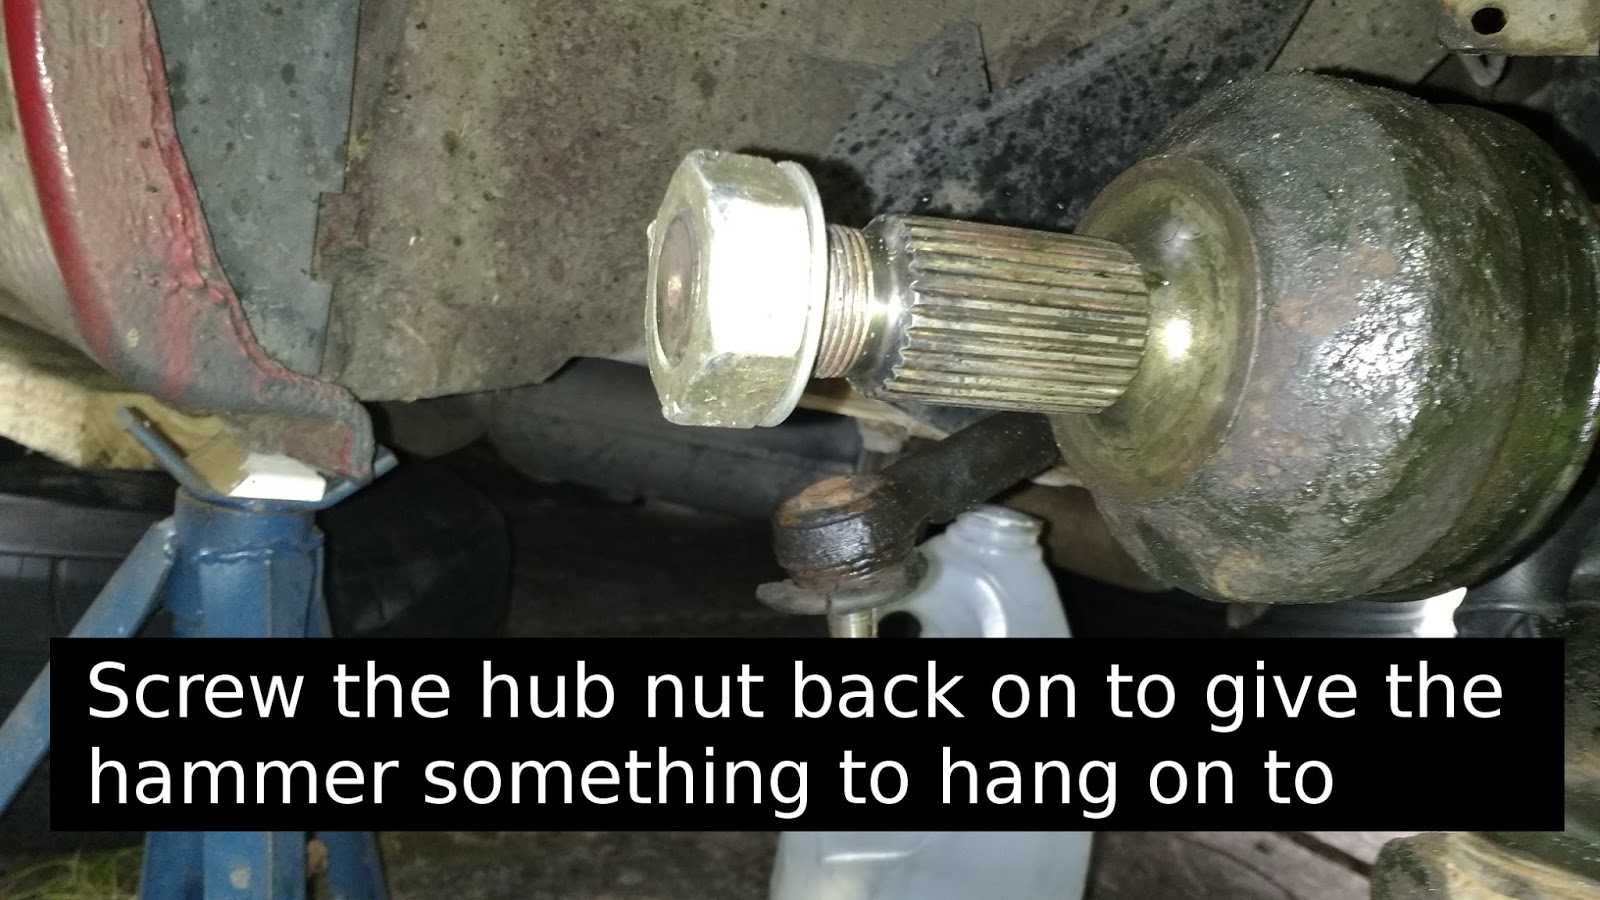
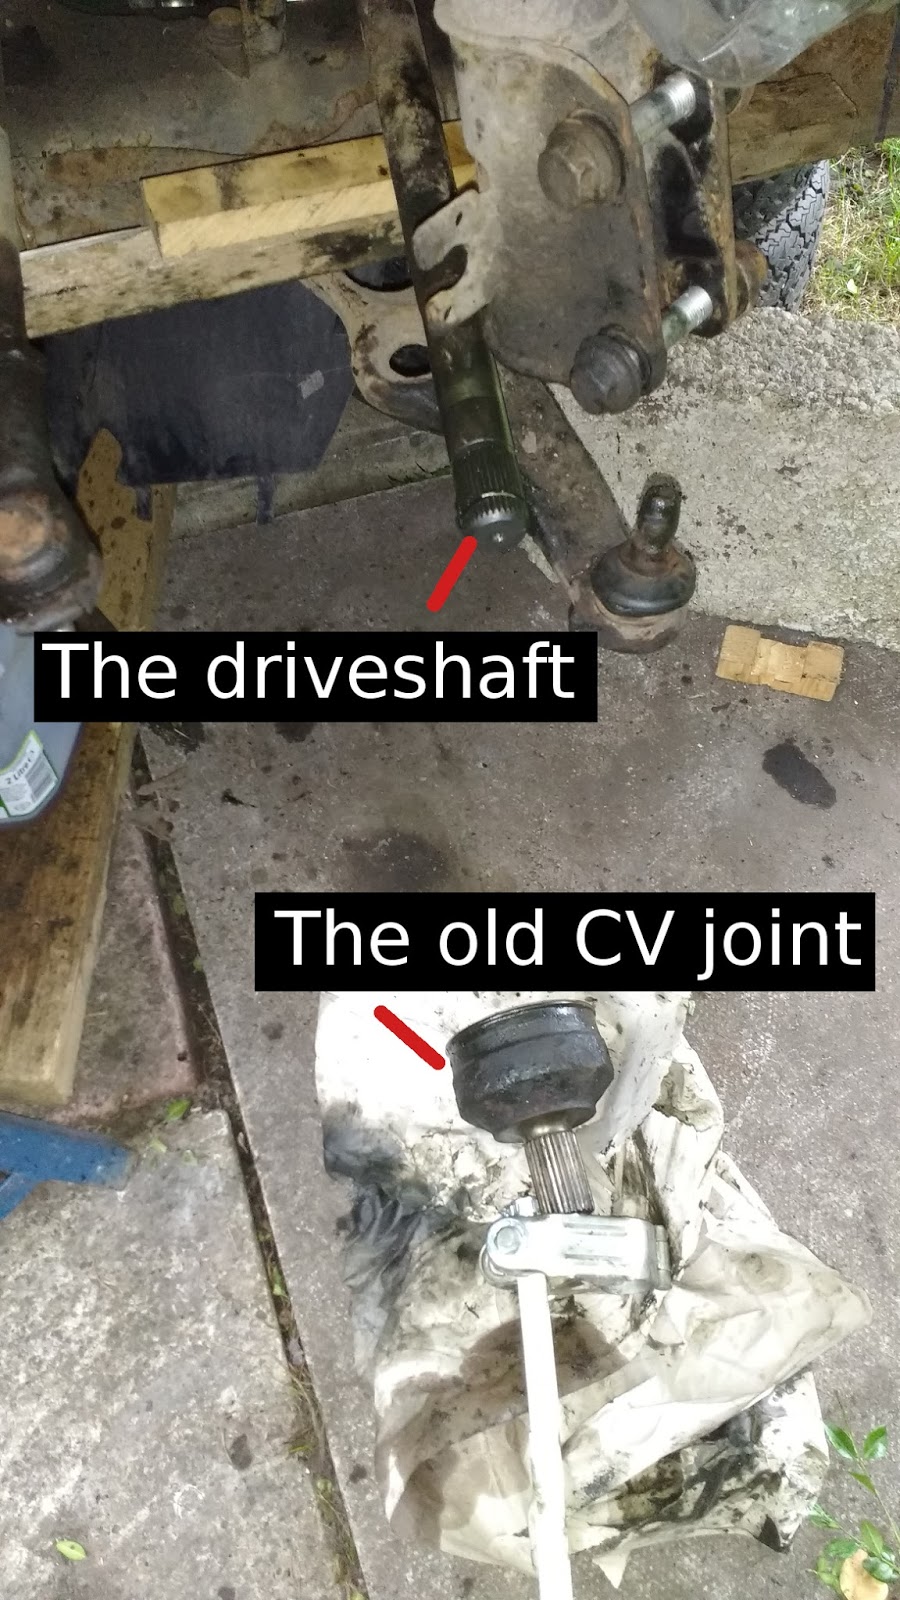
At this point the hub assembly could be removed from the joint. If it needs some help then put the hub nut on with a couple of turns and give it a persuade with a hammer. Be careful pulling the hub assembly and pulling the drive shaft out at the same time - the driveshaft wants to stay completely located in the gearbox.
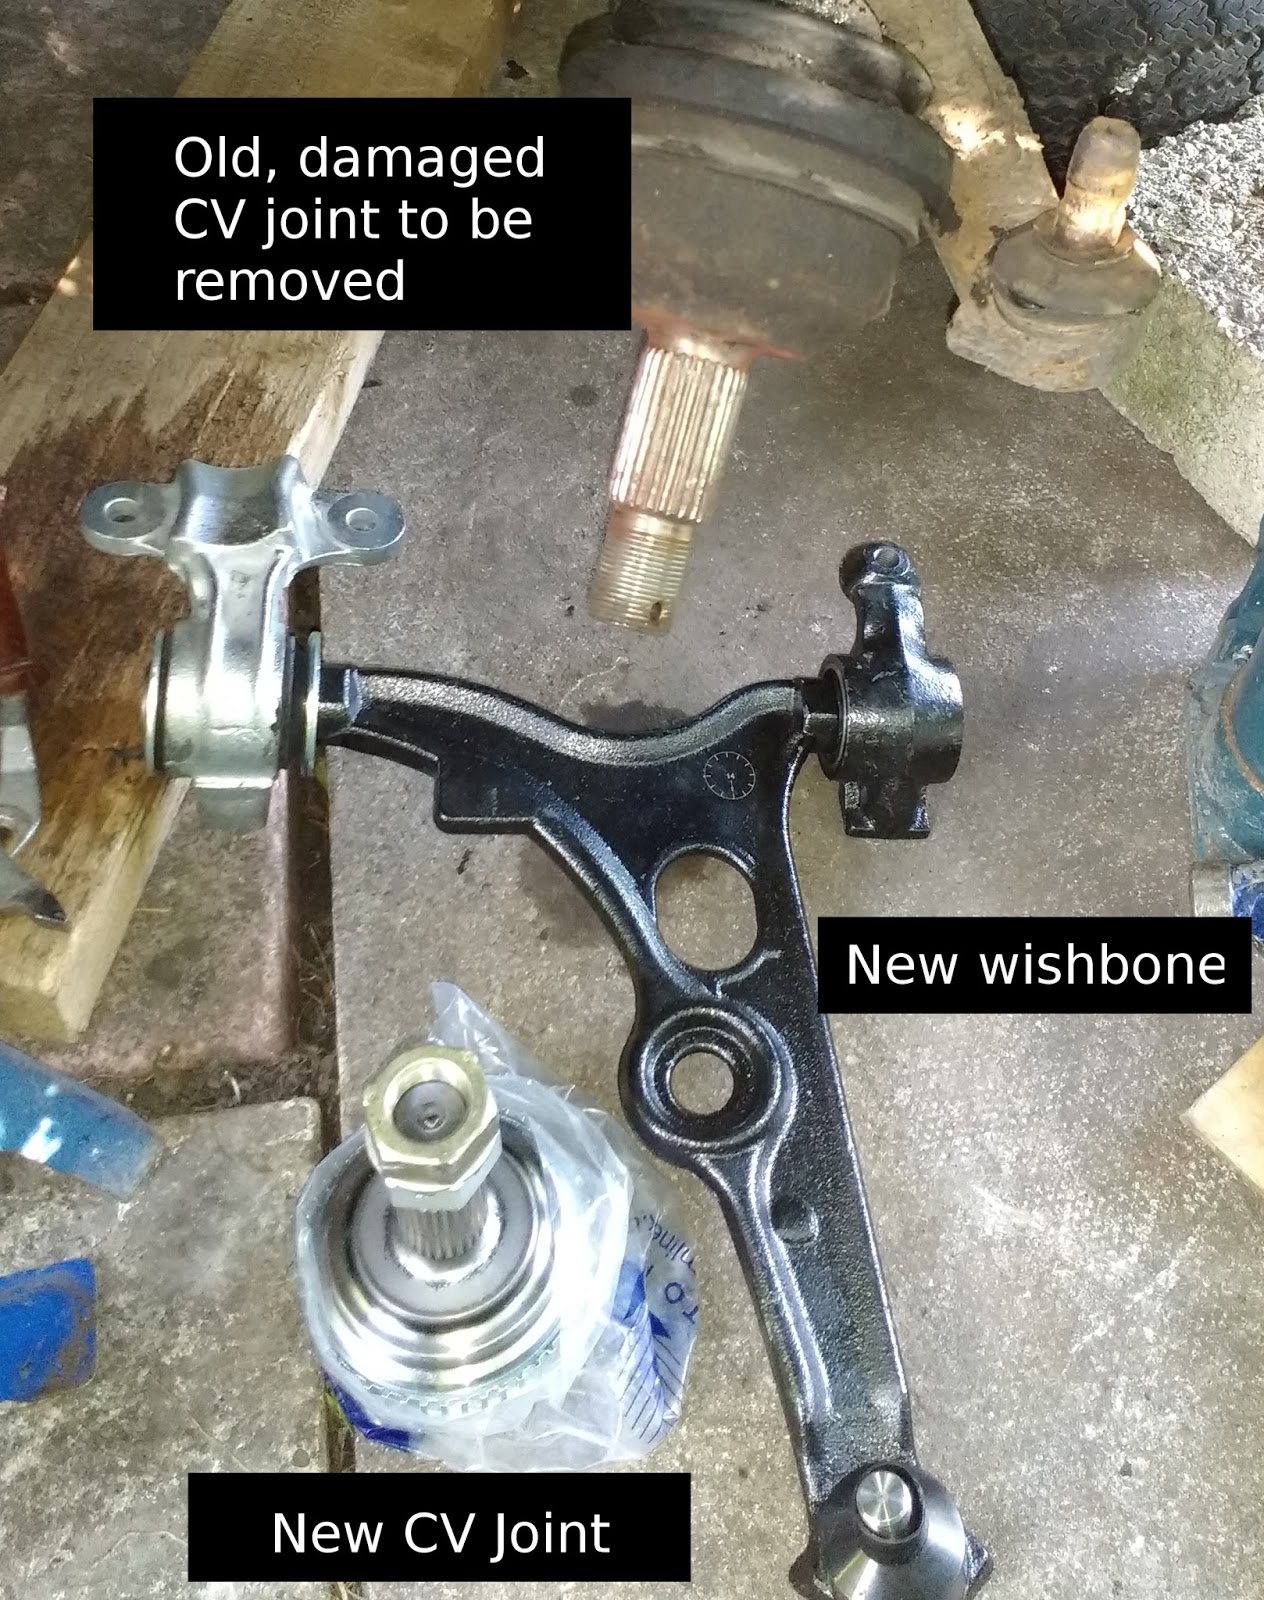
Now to remove the joint from the driveshaft. I firstly tried to ensure that attempting to pull the CV Joint off would not pull the driveshaft out.
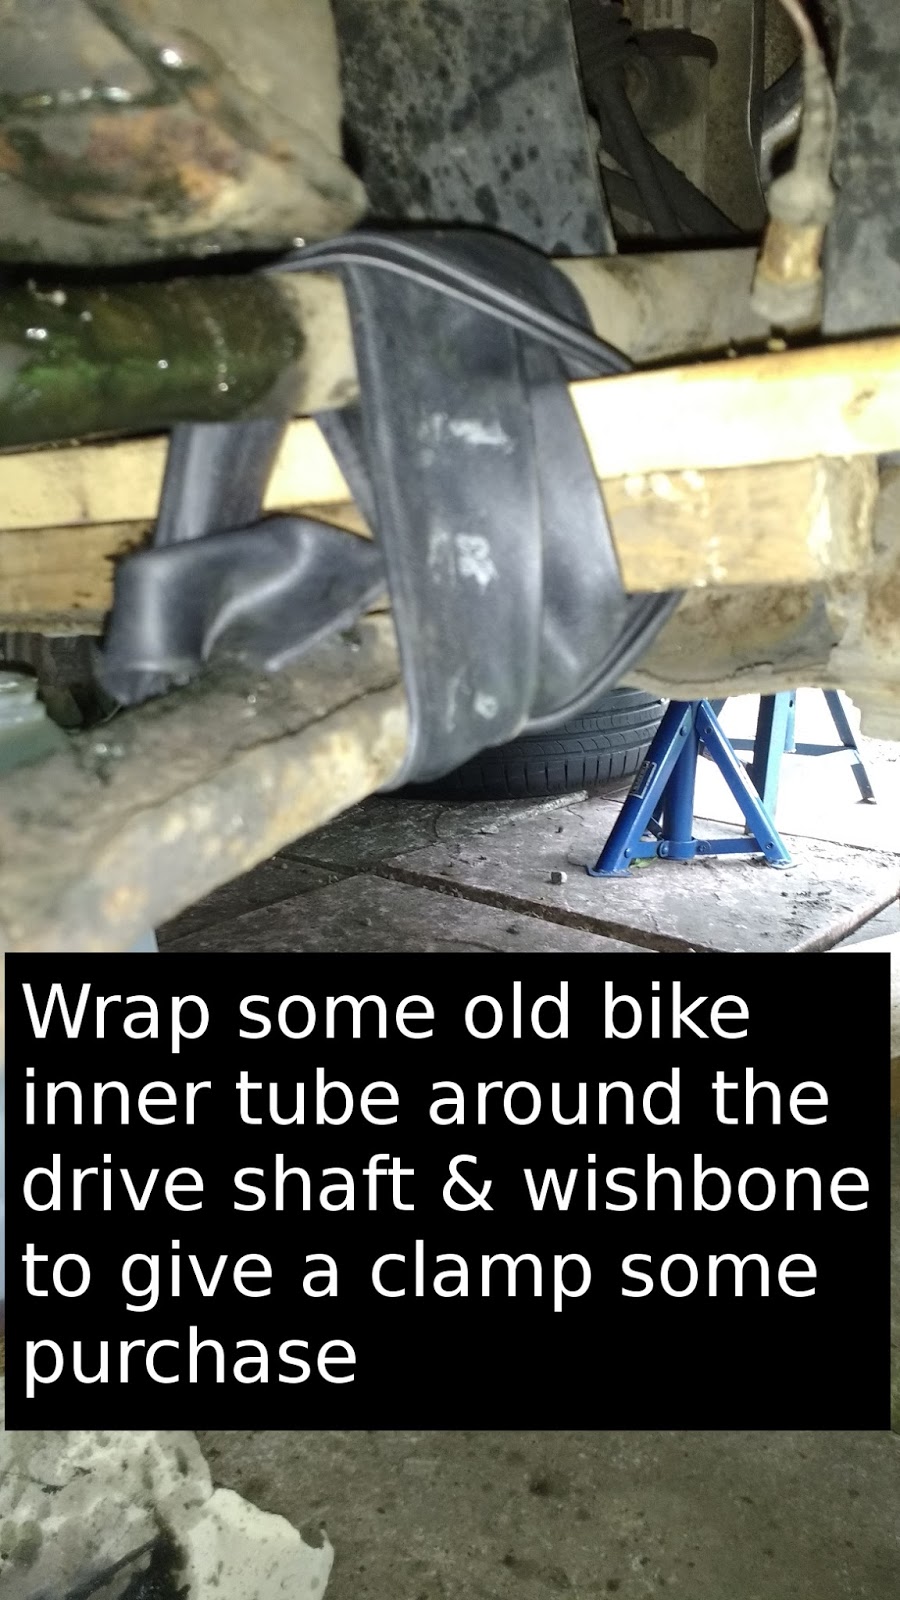
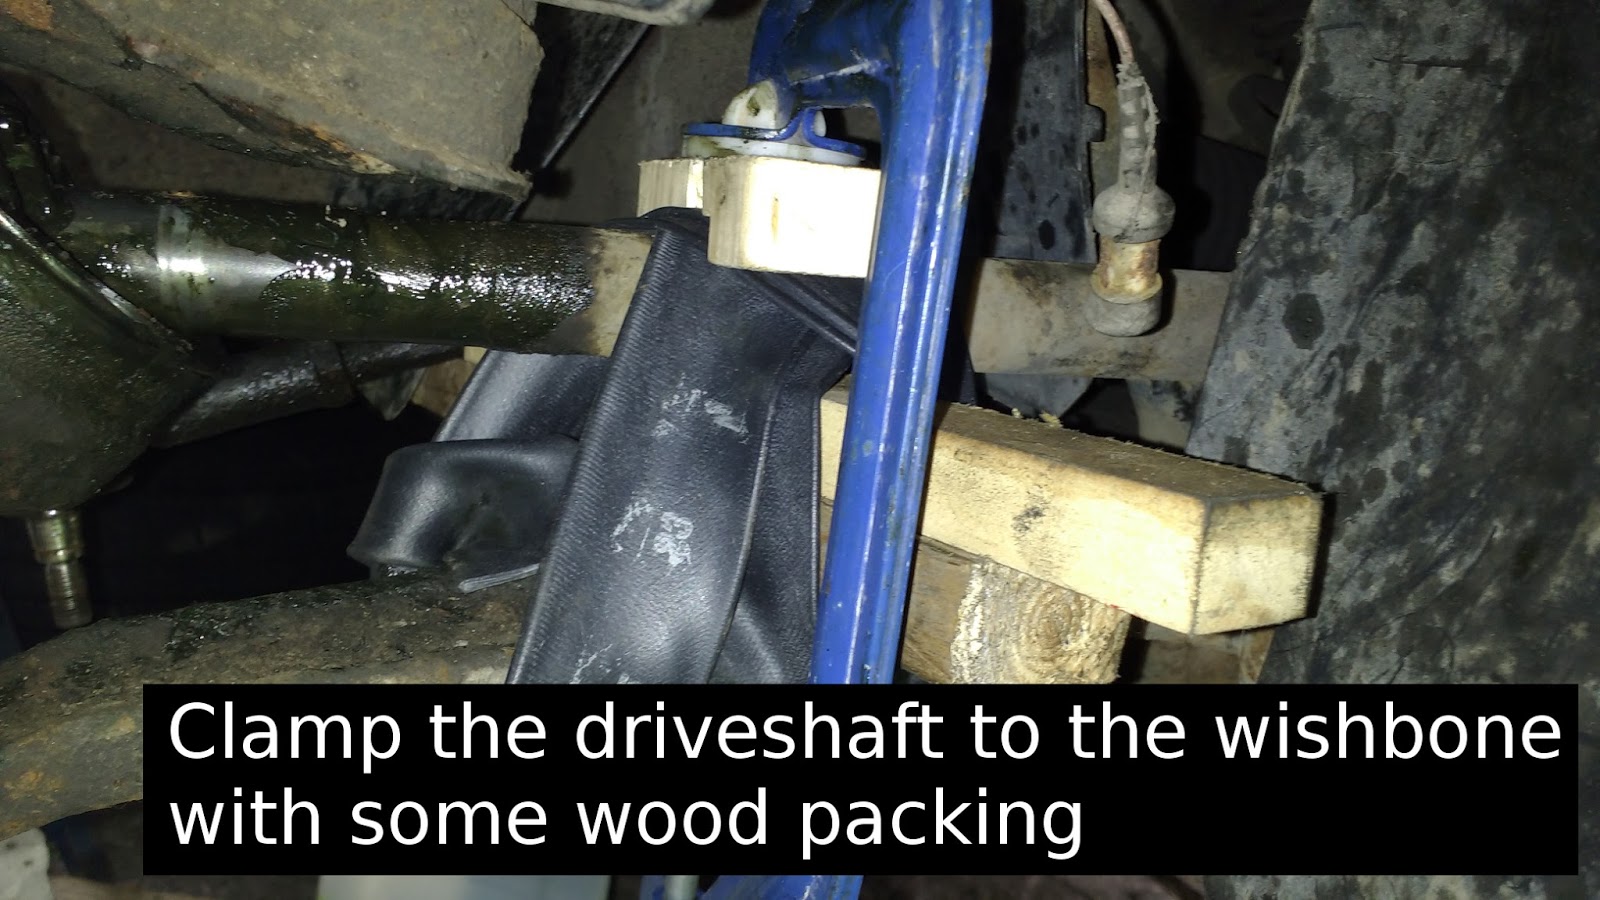
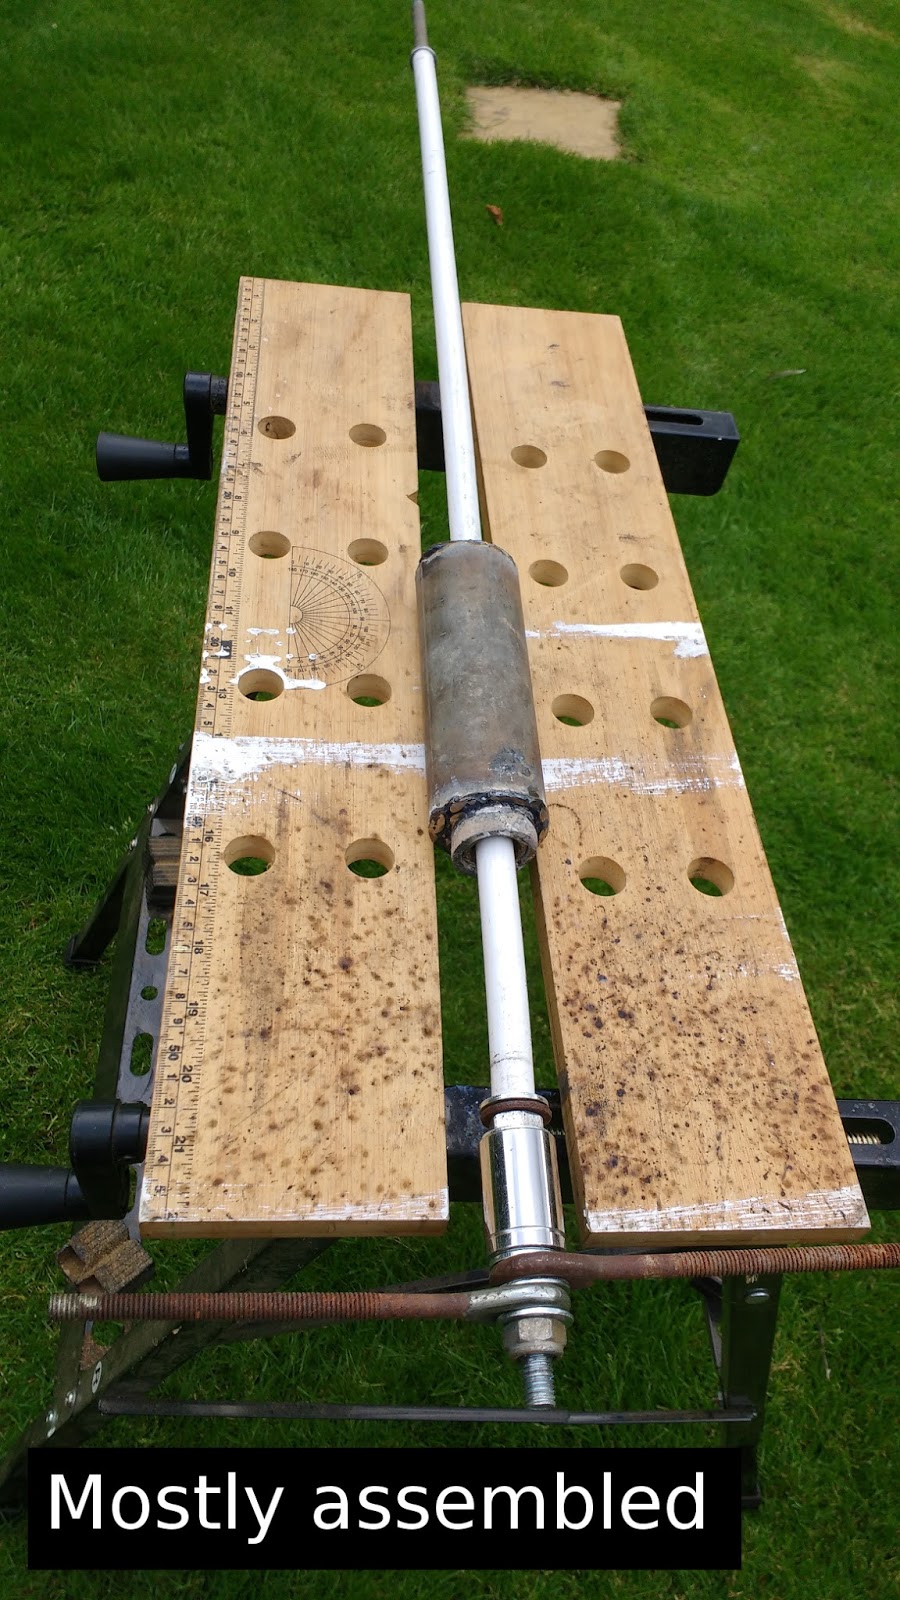
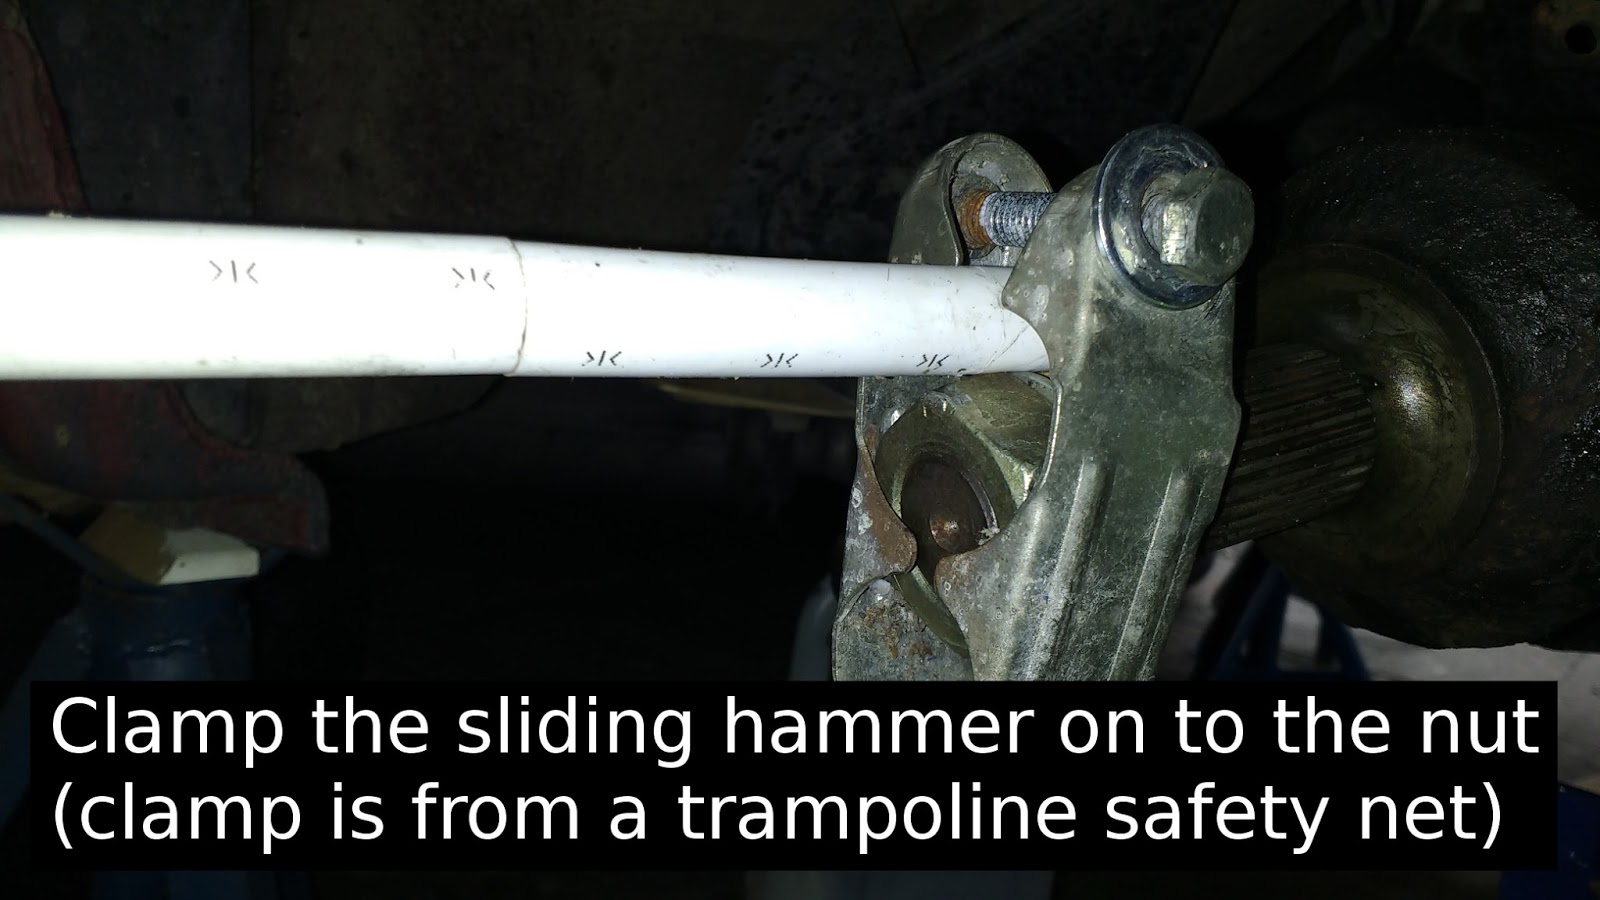
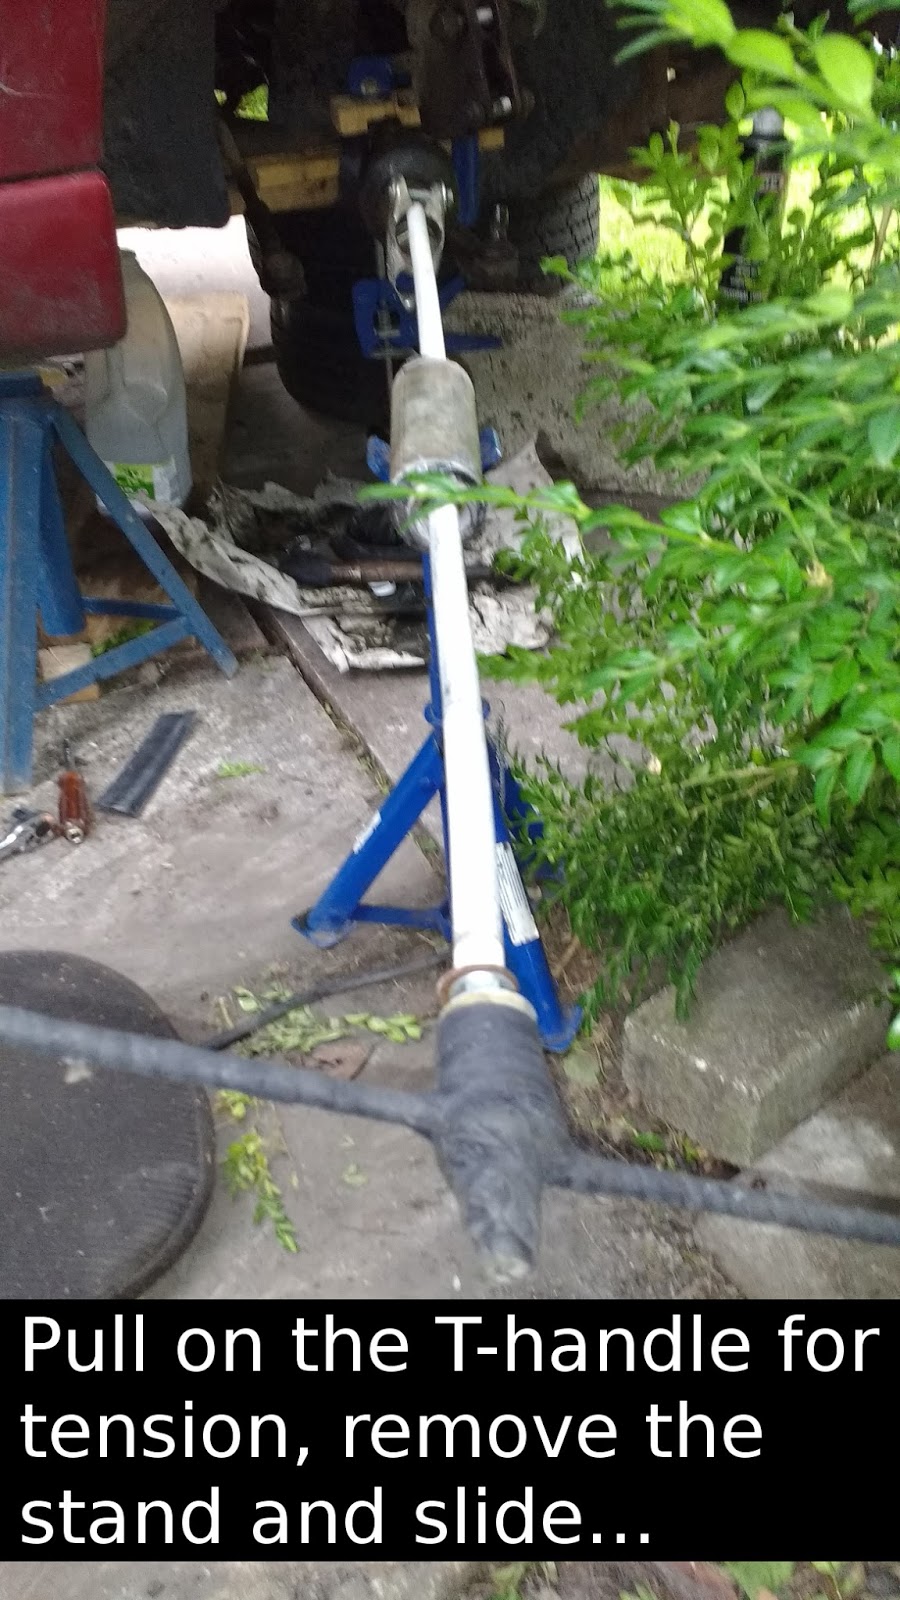
I saw some posts about using a slide hammer to shock the joint off the shaft. I didn't have a slide hammer so I made one out of a bit of threaded stud, some scaffold pipe, and various other bits and bobs I had lying around - I have a set of photos for that, here's one:
WARNING! The joint is secure on to the drive shaft with a spring clip - try to make sure that this doesn't fly away. You may need to have a replacement to hand.
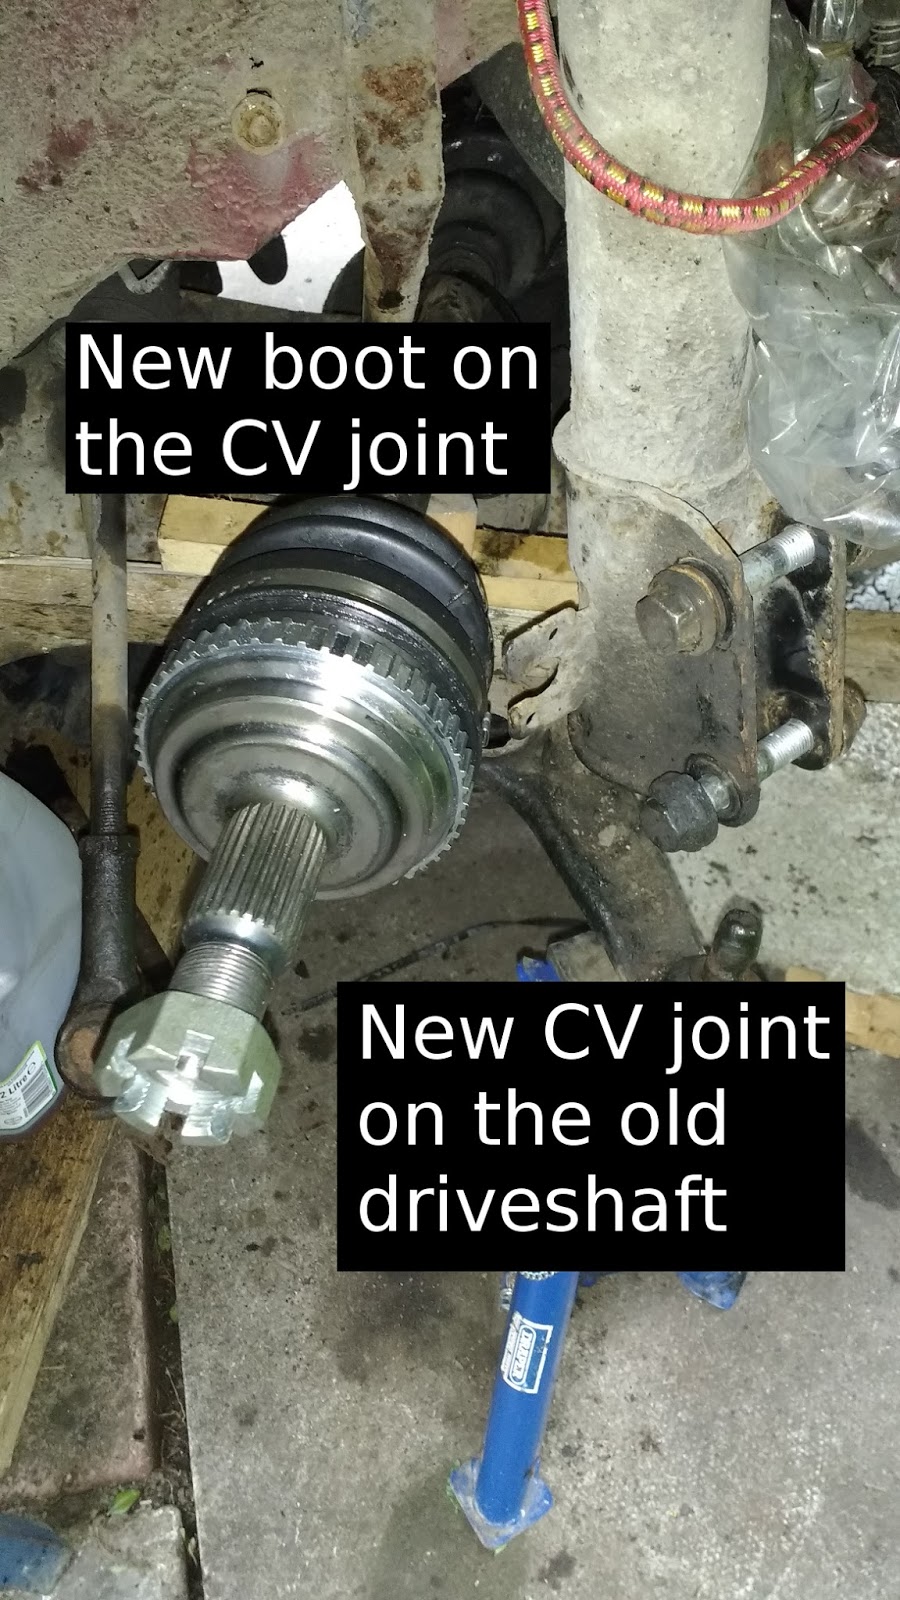
To fit the new joint, firstly clean up the drive shaft as much as possible. Then put the new boot on to the shaft (do not yet secure with the boot clips). Add the supplied grease to the new joint (this is where it gets messy again).
Getting the new joint over the spring clip on the driveshaft is awkward - I compressed the spring into its slot with a wide cable tie then offered the joint up on to the shaft up to the cable tie. I then used a rubber mallet to sharply move the joint over the clip, pushing the cable tie along. The cable tie was then cut off. This is analogous to using piston ring compressors in an engine block.
Push the joint home. Fit the boot over the joint and secure the boot clips.
In true Haynes style, reassembly is the opposite of what's been done - I need to get some more photos of this but I haven't finished in this wheel arch yet (track rod end, wishbone, brakepipe). Torque the hub nut up when the wheel is back on and the ground!
I'm not saying that this is the best way to do it but here's how I got the old joint off and new one (with new boot) back on.
Firstly, chock the rear wheels, engage the handbrake and stick the van in first gear. Remove the hub cap, knock out the lock pin/clip securing the large (36mm) hub nut. Slacken off the hub nut and wheel nuts whilst the vehicle is on the ground.
Jack up van, either using the frontside jack point or the central support member behind the engine. Add axle stands or other *secure* methods of keeping the vehicle elevated.
Remove the wheel and place under the vehicle to provide extra 'drop protection'.
Remove the brake caliper (either tie it up so as to not strain the the brake pipe or remove it from the brake pipe completely). [Note -I have some photos of this process but cannot find them right now - will add later]
Continue to remove the pre-loosened hub nut...
Remove the track rod end (this is also to be replaced - another MoT failure)
(At this point I removed the brake disc, I should have done this as soon as I removed the caliper)
Undo the pinch bolt securing the hub assembly to the lower wishbone
Support the hub assembly and separate from the wishbone - I used a fork-separator here because the worn rubber on the lower suspension arm is also an MoT failure so that assembly needs to be replaced and the rubber can be sacrificed.
At this point the hub assembly could be removed from the joint. If it needs some help then put the hub nut on with a couple of turns and give it a persuade with a hammer. Be careful pulling the hub assembly and pulling the drive shaft out at the same time - the driveshaft wants to stay completely located in the gearbox.
Now to remove the joint from the driveshaft. I firstly tried to ensure that attempting to pull the CV Joint off would not pull the driveshaft out.
I saw some posts about using a slide hammer to shock the joint off the shaft. I didn't have a slide hammer so I made one out of a bit of threaded stud, some scaffold pipe, and various other bits and bobs I had lying around - I have a set of photos for that, here's one:
WARNING! The joint is secure on to the drive shaft with a spring clip - try to make sure that this doesn't fly away. You may need to have a replacement to hand.
To fit the new joint, firstly clean up the drive shaft as much as possible. Then put the new boot on to the shaft (do not yet secure with the boot clips). Add the supplied grease to the new joint (this is where it gets messy again).
Getting the new joint over the spring clip on the driveshaft is awkward - I compressed the spring into its slot with a wide cable tie then offered the joint up on to the shaft up to the cable tie. I then used a rubber mallet to sharply move the joint over the clip, pushing the cable tie along. The cable tie was then cut off. This is analogous to using piston ring compressors in an engine block.
Push the joint home. Fit the boot over the joint and secure the boot clips.
In true Haynes style, reassembly is the opposite of what's been done - I need to get some more photos of this but I haven't finished in this wheel arch yet (track rod end, wishbone, brakepipe). Torque the hub nut up when the wheel is back on and the ground!
Last edited: