General Aux input Panda pop

Currently reading:
General Aux input Panda pop

Thanks guys, managed to move the pins still doesn't work though. The guy did me the blue one slightly cheaper, good on him as was my mistake.

Thanks for your help and advice.
Cheers
Oli

Bad luck. I posted to link to the correct part when I started the thread. At least you know it will work. Kev
 
Hi

I see that the original link is no longer active, would somebody be able to help as I'm not sure what lead I should be purchasing for the same purpose on a 14 reg Panda Pop 1.2.

Thanks
Gavin
 
Unfortunately in my car it doesn't work.

I have a Fiat Panda 1.3 Multijet (Panda 2nd generation 169) bought in 2006 with a built in radio "blaupunkt 169 cd" showing the "no source available" message.

I followed this procedure:


I was optimistic at first because the radio has the 4 cd changer pins although on the diagram pasted at the back of the radio they are labeled as "NC" (not connected?) instead of "A.AF.L", "A.AF.R" etc.

Still, I thought it was worth a shot (I thought to myself "it has the pins right?") so I bought this cable off Amazon
[ame]http://www.amazon.it/Blaupunkt-ISO-poli-Adattatore-presa/dp/B000L36HF8[/ame]

I had to cut a strip of plastic off the corner or it wouldn't click in position.

Once plugged, I turn on the car and it still shows the "no source available" message.

So disappointing.

Perhaps this post will save someone else with the same model the trouble.
 
Last edited:
The mod is easy to do if you just want an AUX in. A little more complex with bluetooth and some of the links are now out of date.
If you need a Blue Mini Iso connector & Pins and you make up your own lead this company will supply them https://www.nexxia.co.uk/

The Connector is this...... https://www.nexxia.co.uk/product/blue-mini-iso-housing-8-way-cd-changer-connector/M-42-1

Here are the pins required...... https://www.nexxia.co.uk/product/mini-iso-connector-pins-pack-of-10/M-48-1

They can also supply screened cable and 3.5mm Jack sockets, I didn't use them as I have plenty of my own in stock.
 
This is my installation. I used a 3.5mm stereo jack socket in one of the blank positions. Job took around 40 mins from start to finish. Using my minidisc the audio quality is first class.
 

Attachments

  • IMG_20170724_132730.jpg
    IMG_20170724_132730.jpg
    2.6 MB · Views: 375
  • IMG_20170724_132753.jpg
    IMG_20170724_132753.jpg
    2.8 MB · Views: 304
This is my installation. I used a 3.5mm stereo jack socket in one of the blank positions. Job took around 40 mins from start to finish. Using my minidisc the audio quality is first class.

Neat job. I've just gone for a 3.5mm jack routed round by the steering wheel adjuster. Handy for plugging into my phone in its cradle, plus I've got a little portable DAB radio that I think should let me listen to TMS on the move - not tested that yet though!

It is easy when you know how, and even buying two plugs off ebay, cost was only about a fiver
 
I bought this item number 382453155357 from ebay;
Sorry I can't yet post url links in the forums as I 'm a new member.


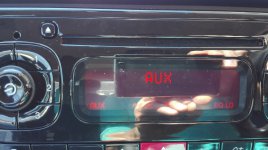
Managed to get an AUX connection showing on the head unit by following the advice mentioned in the other post by shorting pins 13 & 14. Otherwise you just get the no source available message.

Unfortunately when I connect a selection of android mobiles to it the phones do not detect that a cable is connected. It should come up with an icon on the phone showing that headphones are connected. I can force this by shorting pins 18 & 19 which are the left channel and ground but as soon as I remove the short they lose the connection. Seems to be something to do with impedance being used by the phone to detect what is plugged in.

It does work with a simple audio device such as an mp3 player as these use a physical switch in the headphone socket to route the audio to the cable when plugged in.

Has anyone had this same problem with connecting an android phone and managed to overcome it?

Thanks
 
Hi.
No problems using my Huawei ALE L21. What you possibly need is two 33 ohm 1/8 watt resistors to load each channel from the phone one from left and the other to right the other ends of each resistor to the screen of the lead. This should let the phone see a load. Most low impedance headphones are 32 ohms
 
Okay, all sorted now. :)

I found this thread to be the most useful in getting it all to work.
https://www.fiatforum.com/i-c-e/3374...ml#post4280527
See post #16 for the detail. Many thanks to davet2001.


Complete solution was as follows;


1. Note that most cables you can buy only come with 3 pins populated and will result in the 'no source available' message. You need to add a link between pins 13 & 14 to fix this. See picture 3 in the above link.


2. I resolved the issue with the phones not detecting the cable/stereo by shorting the left channel and ground pins on the connector block using a resistor. It's all to do with the android standards for headphone detection.

A simple piece of wire on these pins will allow audio through but the left channel is quieter than the right due to the signal bleeding back through the unrestricted link. I tried a variety of resistors pushed into the block in order to get to a point where the cable was detected but audio unaffected. A 470K ohm resistor did the trick.
The pins are 18 & 19 or the black & white cables in picture 3 in the above link.


I removed the pins from the ISO connector using two paper staples with one leg straightened. These can be pushed into the bottom of the connector to release the two small tangs that hold the pin in place and then push it through with a small, flat blade screwdriver. This is far safer than attempting to pull them out through the top with pliers.
Cables can then be soldered and replaced.


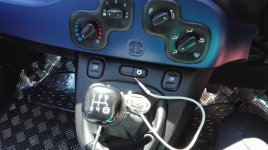
3. The cable can be routed either out the back left of the radio cavity and into the passenger footwell (you can see the gap if you peer in) or down through a hole front & centre of the cavity just behind the hazard light button.
I did the latter & mounted the 3.5mm socket into one of the unused blank buttons above the gear lever.
The hardest part was removing the insides of the button in order to fit the socket. A small saw & dremel router did the job once the hole was drilled.


Now I can annoy everyone with a selection of banging tunes. :slayer:
 
Last edited:
Very nice! How's that working out for you?

Very well. I had intended to buy a Panda Cross but the Multijet engine went out of production, and it didn't make sense for me to buy a petrol. The Mito has the Multijet and is somewhat more powerful. Still got a sunroof and the added bonus of heated seats. So I'm enjoying it.
 

Attachments

  • _20190525_233243.JPG
    _20190525_233243.JPG
    359.6 KB · Views: 73
Very well. I had intended to buy a Panda Cross but the Multijet engine went out of production, and it didn't make sense for me to buy a petrol. The Mito has the Multijet and is somewhat more powerful. Still got a sunroof and the added bonus of heated seats. So I'm enjoying it.

That's lovely. Good luck with it.
 
I am unable to feed the aux cable behind the radio and down to the left (or right)...is there a knack to it?

Could someone please explain how to do it ( complete novice tinkerer)

Thank you
 
Back
Top