Dear Friends,
It is concluded that following may the possible causes for the oil seepages around the engine cylinder head cover and below that.
1. Head-cover gasket leakage.
2. Camshaft and/or Crankshaft oil seal leakages.
Most predominant cause may be the
#1 from above. And so that issue I took on priority basis to resolve. Here is the brief detail how I did the job myself.
Removal & Refitting the Head-Cover/Rocker-Cover/Tappet-Cover and Gasket.
1.
The engine must be stone-cooled. Drain little (about 1 lit.) engine oil from the sump for the purpose of safety and clarity in viewing inside after removal of the cover. (Also put the ignition key somewhere to avoid any chance to start the car during the working !).
2.
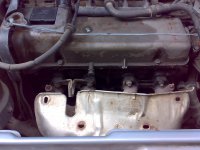
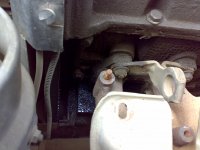
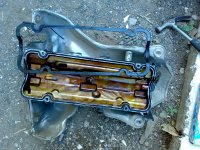
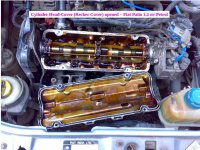
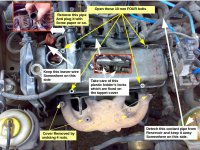
Detach coolant pipe and oil fume went pipe (going to air inlet line) and keep them at a side. Remove oil rubber plug. Also rest the leaver wire at a side. Open 4+2 nuts and remove a cover which is on the outlet manifold. Also carefully remove the plastic fixer holding wire connections to the injector as it has TWO locks attached with the tappet cover on driver-side wall. Undo the 4 bolts (10 mm) on the top and remove the Tappet cover.
3.
Properly hide/cover the opened engine area to avoid dust/dirt input during the working. And take the Tappet cover with its Gasket out to clean it.
4.
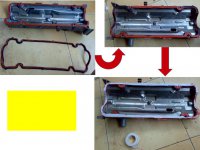
Take tappet cover and gasket. Also remove a metal-sheet inner cover from the tappet cover. Thus THREE parts will be separated. Wash and clean all the three parts with a appropriate soap/detergent solution. You may dip the metal parts overnight in a cleaner solution, rub properly and remove all gasket makers rubbery linter from the groves. If you want to reuse the old gasket, just properly clean and degrease it (i.e. as I have done here). Completely dray all the components and refit the metal-sheet inner cover. Do not put old rubber gasket in a detergent or cleaner's solution for overnight.
5.
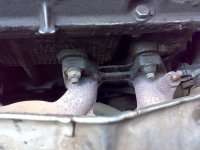
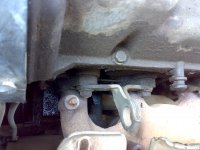
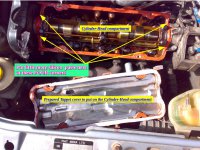
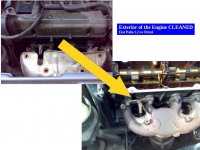
Clean the engine outer parts and oily area spread around as damped and dusty due to the seepage. Use brush and petrol to clean this area. Clean as much as possible. Properly and very carefully clean the surface where gasket rests on the engine. There should no any scratches or damage happen on it.
6.
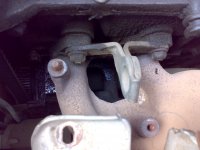
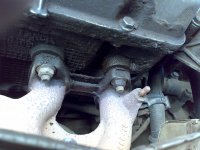
Take the tappet cover, apply gasket maker paste (RTV Tube) in the grooves on metal and gasket rubber.
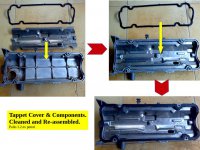
Additionally you may also apply a white Teflon tap (as I have used here). Same way also apply the gasket maker uniformly on the engine body edge surface. Here apply little more paste at FOUR corners of the two upward half-circled area (Bearing support on left and right sides).
7.
Put the Tappet cover back on the cleaned engine carefully and bolt it uniformly. Do not over tight these bolts. (it may require 7 to 9 Nm, not more that that). Softly clean the surroundings. Still do not connect any pipes or components detached but just leave it for 24 hours or overnight to set the gasket maker paste permanently and properly with in the TWO faces. ( 24 hours or overnight drying is found more successful as per my previous experience in such work with RTV tube gasket maker).
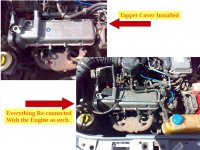
8.
Next day, refill the drained oil and top it up. Connect all the detached/removed components. Top up the coolant if required. Re-fix the plastic cover ( holding wire connections to the injector) carefully. The engine is ready to ON !
I run the car for about 2.5 km an found normally o.k. However real results may come after couple of weeks which will be uploaded in future.
Thank you all for sparing your valuable time to guide me and reading this write-up.
THANK YOU all again.
Navin Talati / 03-02-2016.