

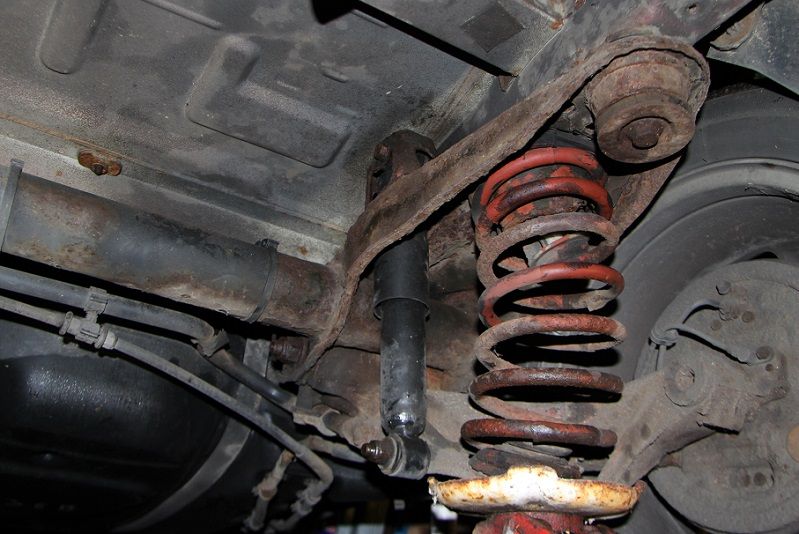
Decided today it was about time I removed my Sub-frame, to replace the Trailing Arm Bearings.
Wheels have been leaning for a while, promised myself I wouldn't leave it as long as my last one
Thought I may as well remove it rather than struggle trying to drill/cut the bolts in-situ, as I was certain they'd be as stubborn as those on my previous Multi, which may as well have been welded in place.
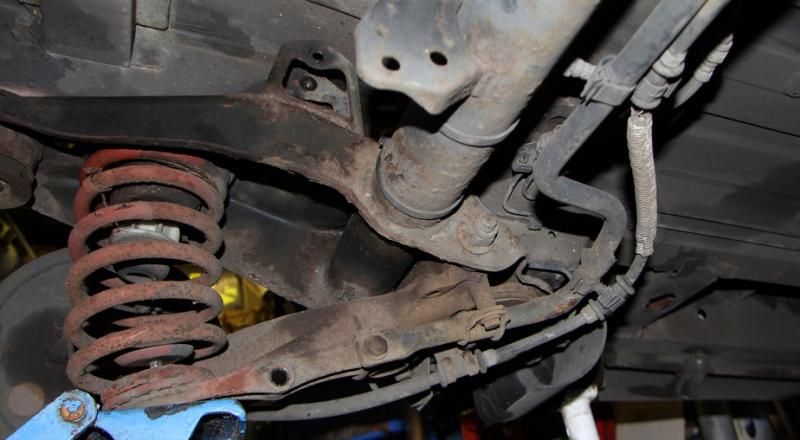
Anyway, Wheels off, Exhaust dropped, ARB removed, stripped all the Brake lines/cables off it, ABS sensors unplugged, and dropped it down.
A couple of Bolts sheared, one on the ARB, another on a pipe bracket, not too bad really, already drilled out and re-tapped.
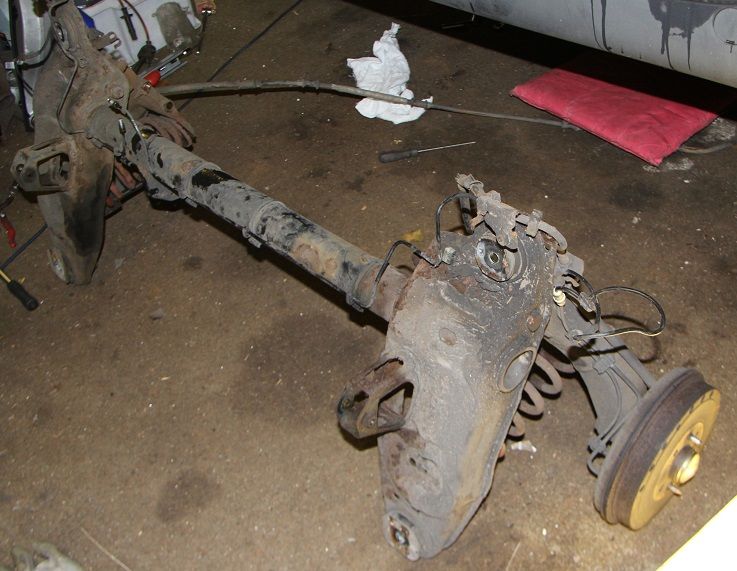
All in a bit of a state as you can see, but should clean up OK.
Got it on the floor . . .
Got the Alligator Saw out ready to hack through the bolt, then, in a sudden an uncharacteristic moment of optimism (I am on my second Multi after all), decided to undo the Nuts and try shifting the Bolts, you know, just for a giggle . . . bu**er-me if they didn't both knock out with just a few blows from my Club Hammer
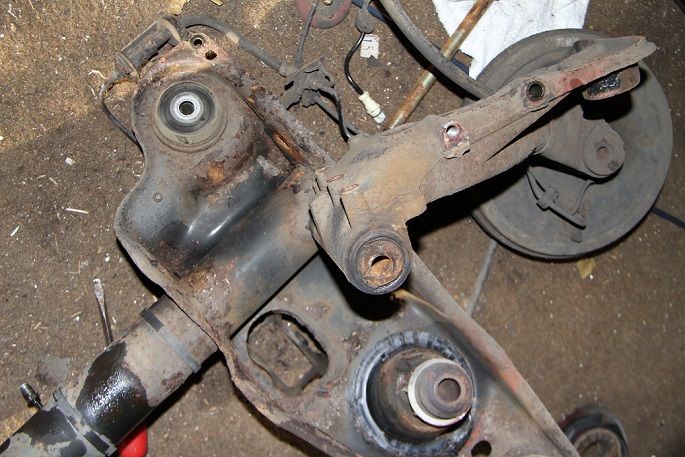
As expected, Bearings (or what was left of them) were in pretty-much the same state as the last lot, hence my surprise at the Bolts coming out.
Cleaned the bores up after drifting out the old outer races, new ones in, and Grease Nipples fitted.
Managed to snap one of the ABS sensors, another brief moment of optimism (read insanity) had me thinking I could get it out . . . never going to happen :bang:
In the process of 'rescuing' it now.
It sheared off flush with the Brake back-plate, so not much left to work with, but I like a challenge . . . particularly when I stand to save £50+.
When I eventually got the Drum and Hub off, it knocked out easily enough, should have done that in the first place really
I had to make up a simple puller using the two rear Subframe Bolts and a section of 'U' channel, the Drums are worn, and the lip on the rim made it really tight to get off, Shoes are down to about 1mm
I've cut away the plastic around the wires in the Sensor body, just need to solder the Lead wires back on, and Epoxy it back into the back-plate. . .
Wheels have been leaning for a while, promised myself I wouldn't leave it as long as my last one
Thought I may as well remove it rather than struggle trying to drill/cut the bolts in-situ, as I was certain they'd be as stubborn as those on my previous Multi, which may as well have been welded in place
.Anyway, Wheels off, Exhaust dropped, ARB removed, stripped all the Brake lines/cables off it, ABS sensors unplugged, and dropped it down.
A couple of Bolts sheared, one on the ARB, another on a pipe bracket, not too bad really, already drilled out and re-tapped.


All in a bit of a state as you can see, but should clean up OK.
Got it on the floor . . .

Got the Alligator Saw out ready to hack through the bolt, then, in a sudden an uncharacteristic moment of optimism (I am on my second Multi after all), decided to undo the Nuts and try shifting the Bolts, you know, just for a giggle . . . bu**er-me if they didn't both knock out with just a few blows from my Club Hammer

As expected, Bearings (or what was left of them) were in pretty-much the same state as the last lot, hence my surprise at the Bolts coming out.

Cleaned the bores up after drifting out the old outer races, new ones in, and Grease Nipples fitted.
Managed to snap one of the ABS sensors, another brief moment of optimism (read insanity) had me thinking I could get it out . . . never going to happen :bang:
In the process of 'rescuing' it now.
It sheared off flush with the Brake back-plate, so not much left to work with, but I like a challenge . . . particularly when I stand to save £50+.
When I eventually got the Drum and Hub off, it knocked out easily enough, should have done that in the first place really
I had to make up a simple puller using the two rear Subframe Bolts and a section of 'U' channel, the Drums are worn, and the lip on the rim made it really tight to get off, Shoes are down to about 1mm
I've cut away the plastic around the wires in the Sensor body, just need to solder the Lead wires back on, and Epoxy it back into the back-plate. . .

