Well, my Multi is back on the road, sporting a nice shiny new clutch 
Feels good, nice & light and the bite somewhere in the middle of the pedal.
So, to share my experiences...
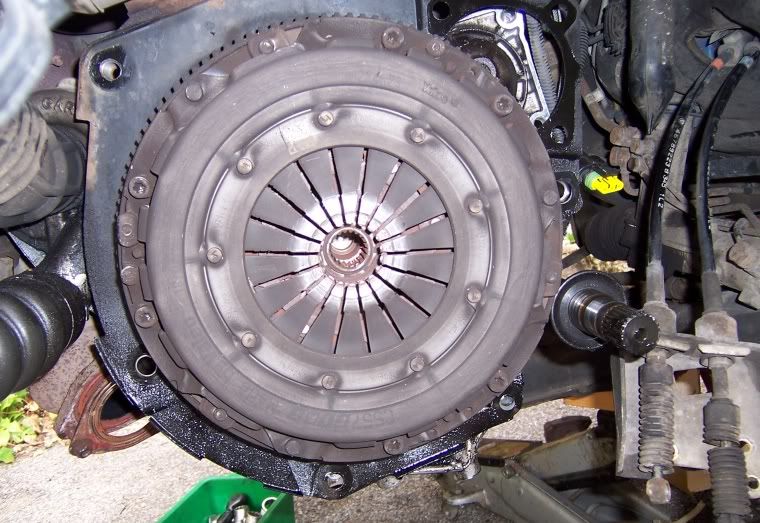
First a gratuitous pic of the offending thrust bearing

I mostly followed the 'Notes for Novices' (from now on 'N4N') by SillyBilly, with reference also to 'Diy guide clutch replacement' by bikes-for-me. Both great guides, with good pictures, and I would heartily recommend to anyone thinking about doing their clutch at home to read them both.
I printed out the N4N guide for reference as it includes the torque settings for putting it all back together.
There are a few alterations I would make to these guides though.
1) Rear Engine Mount
In the N4N guide, (part 21 iv.) he says to "remove the central, vertical 19mm long bolt in the rear support". He then goes on to show how this causes the mount to fall apart There's no need to take this central bolt out of the mount.
In part 21 iii, he says "You don’t need to undo the more visible big bolt holding the brace that goes from the bottom of the rear support to the top stud". This is true if you take the long bolt out of the centre of the mount. I ignored this and took the brace bar off the mount and just the two 13mm bolts holding it to the cross beam. The mount will then swing forward on the lower stud and out of the cross beam in one piece, with no need for lowering the engine, and you don't have to re-assemble it before putting it back on.
Similarly, in section 30 he shows taking the centre, vertical bolt out of the front gearbox mount. I removed the three 13mm bolts holding the rubber onto the chassis and took the whole mounting off. I don't know if it makes much difference which way you do it, but the big bolt on mine didn't want to move easily.
2) Starter Motor
This is quite a biggie in terms of making life easier - leave the starter motor alone until you've got the engine supported and the rear engine mount off. The 'N4N' guide does tell you to do it this way round, but bikes-for-me says the other way round. I obviously hadn't read both the guides thoroughly enough and I struggled (and swore) a lot getting the bolts out, but when putting it back together, I found that the access was massively improved with the mount out of the way. You can't see it any better, but at least you can get both hands up to it rather than trying to work one-handed.
3) The Long Stud (snigger away folks)
DEFINITELY get the top longer stud out of the gearbox as described in part 23 of 'N4N' guide. Mine came out easily and means you don't need to move the box very far to clear the engine.
4) Driveshafts
I found that you don't need to break the track-rod ends on either side or undo the anti-roll bar nuts to get the driveshafts out of the way, just undo the two bolts attaching the hub to the strut on the N/S and you'll have enough room to maneuver.

On the O/S, you don't have to split the driveshaft, but you'll have to undo the two hub/strut bolts and crack the lower wishbone knuckle to get enough movement to actually get the driveshaft clear of the gearbox oil seal.

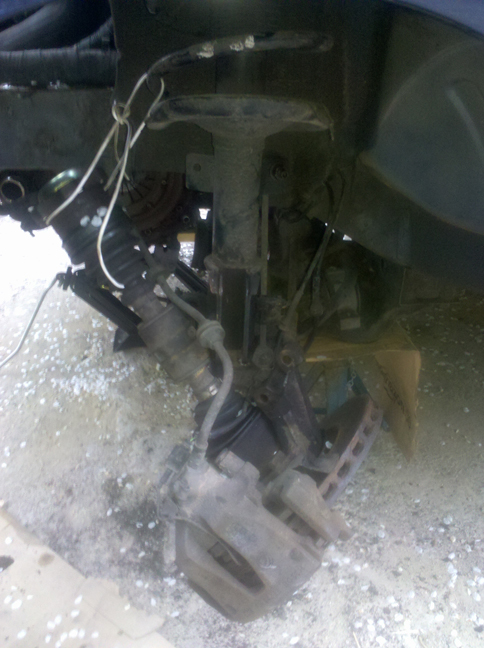
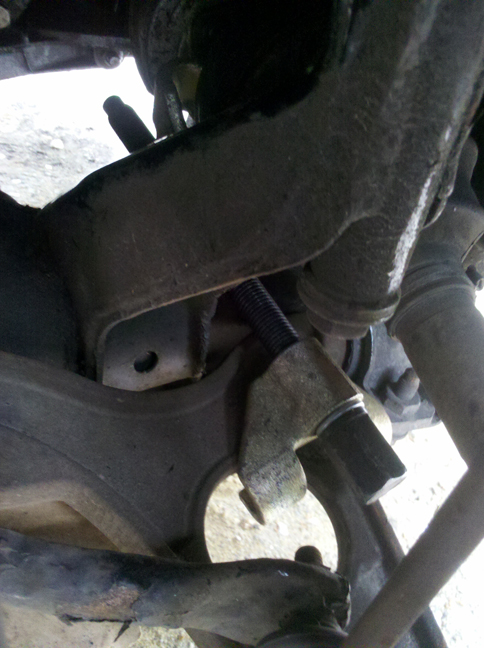
I had trouble getting the O/S driveshaft bearing to move, so I improvised a puller using spring compressors (Hilka, £17.99 from Screwfix) between the driveshaft flange and wishbone as below:


Fair amount of pressure on the puller and a couple of sharp tugs on the hub and the bearing popped out of its housing, allowing the driveshaft to clear the gearbox oil seal.
5) Gearbox
I got mine out without dropping the subframe. It's tight, but not impossible. And if like me the look of the rusty bolts on your subframe give you the fear, here's roughly how I did it.
After much wiggling, I came back to the forum as I vaguely remembered reading that someone had managed the feat. I found the post from Flying Clutchman saying that you need to jack up the engine. Only having one hydraulic jack (which was under the gearbox), I put the Multi's own scissor jack under the sump with a block of wood. I think that this helped (more by luck than judgement) as the articulated foot on the jack allowed the engine to move backwards (towards the bulkhead) as I raised it, giving a bit more clearance at the front to get the box out. I also had to undo the front intercooler pipe (the corrugated one) at the engine end, to give enough room for the bell-housing to come out.
In the end, the box had to turn in two axes
- as you look from on top (under the bonnet): clockwise
- as you look from the end (through the N/S wheelarch): anti-clockwise
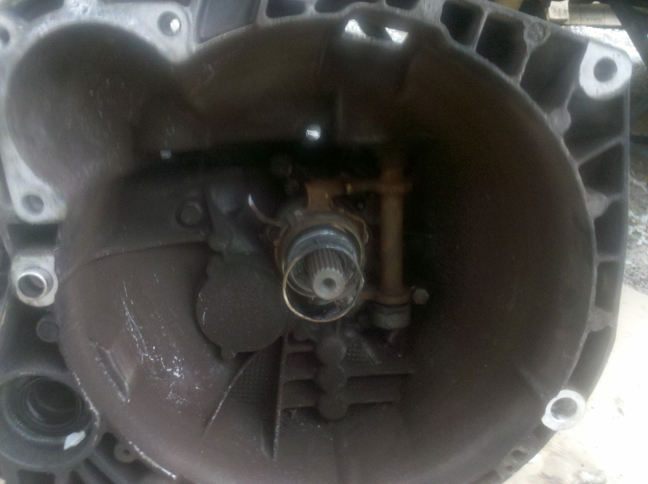
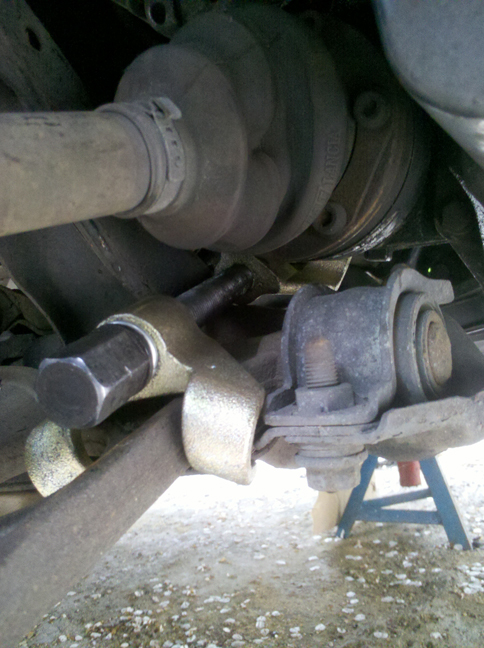
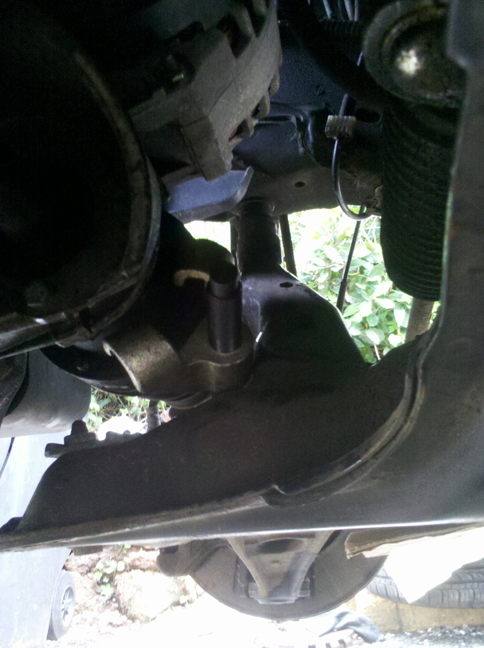
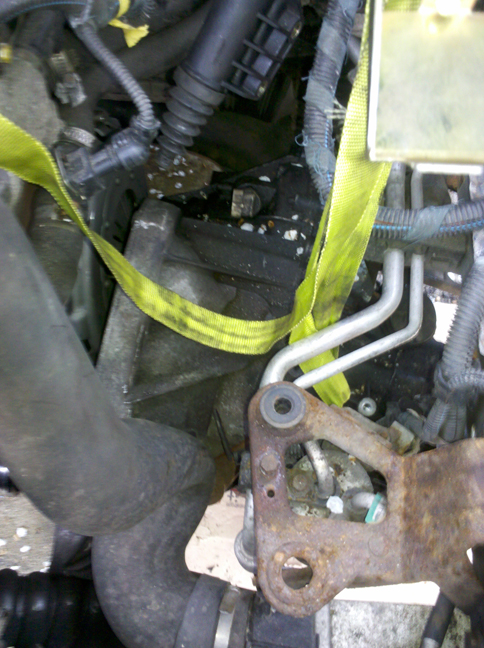
I took pictures as I put it back in to show roughly how it went (apologies for the poor focus on some of them, not the best light and camera on my phone):


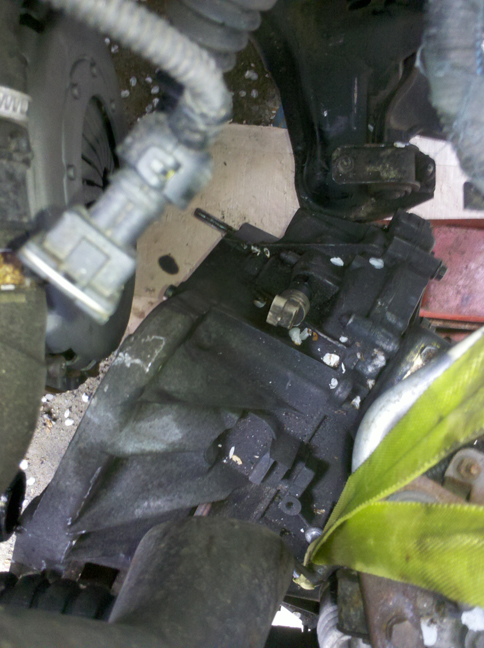
After the last photo, I spent quite a long time scratching my head and not being able to get the splined shaft to line up with the clutch until I realised I needed to let the engine back down off the jack. As I did, the engine obligingly came back forward towards the radiator, and the gearbox slid nicely home. Success
You might have noticed the lifting eye I used to re-fit. This was an M8 straining-eye bolt from the local hardware shop (about 90p) cut down so the thread was the same length as the slave cylinder bolts and screwed into the hole nearest the bell-housing (the one that is used for the cylinder, not the 'spare' one). The box hangs nicely from this and I really should have done it when dropping the box :bang: would have made my life a lot easier!
In the end, I found the existing guides for clutch replacement are very thorough and I wouldn't have got very far without them, so I would like to thank both SillyBilly and bikes-for-me.
I hope this information helps somebody out in the future.
Apologies for the thumbnail size photos, can't figure out how to make them bigger?
Cheers all,
Ben.
Feels good, nice & light and the bite somewhere in the middle of the pedal.
So, to share my experiences...
First a gratuitous pic of the offending thrust bearing
I mostly followed the 'Notes for Novices' (from now on 'N4N') by SillyBilly, with reference also to 'Diy guide clutch replacement' by bikes-for-me. Both great guides, with good pictures, and I would heartily recommend to anyone thinking about doing their clutch at home to read them both.
I printed out the N4N guide for reference as it includes the torque settings for putting it all back together.
There are a few alterations I would make to these guides though.
1) Rear Engine Mount
In the N4N guide, (part 21 iv.) he says to "remove the central, vertical 19mm long bolt in the rear support". He then goes on to show how this causes the mount to fall apart
There's no need to take this central bolt out of the mount.In part 21 iii, he says "You don’t need to undo the more visible big bolt holding the brace that goes from the bottom of the rear support to the top stud". This is true if you take the long bolt out of the centre of the mount. I ignored this and took the brace bar off the mount and just the two 13mm bolts holding it to the cross beam. The mount will then swing forward on the lower stud and out of the cross beam in one piece, with no need for lowering the engine, and you don't have to re-assemble it before putting it back on.
Similarly, in section 30 he shows taking the centre, vertical bolt out of the front gearbox mount. I removed the three 13mm bolts holding the rubber onto the chassis and took the whole mounting off. I don't know if it makes much difference which way you do it, but the big bolt on mine didn't want to move easily.
2) Starter Motor
This is quite a biggie in terms of making life easier - leave the starter motor alone until you've got the engine supported and the rear engine mount off. The 'N4N' guide does tell you to do it this way round, but bikes-for-me says the other way round. I obviously hadn't read both the guides thoroughly enough and I struggled (and swore) a lot getting the bolts out, but when putting it back together, I found that the access was massively improved with the mount out of the way. You can't see it any better, but at least you can get both hands up to it rather than trying to work one-handed.
3) The Long Stud (snigger away folks)
DEFINITELY get the top longer stud out of the gearbox as described in part 23 of 'N4N' guide. Mine came out easily and means you don't need to move the box very far to clear the engine.
4) Driveshafts
I found that you don't need to break the track-rod ends on either side or undo the anti-roll bar nuts to get the driveshafts out of the way, just undo the two bolts attaching the hub to the strut on the N/S and you'll have enough room to maneuver.
On the O/S, you don't have to split the driveshaft, but you'll have to undo the two hub/strut bolts and crack the lower wishbone knuckle to get enough movement to actually get the driveshaft clear of the gearbox oil seal.
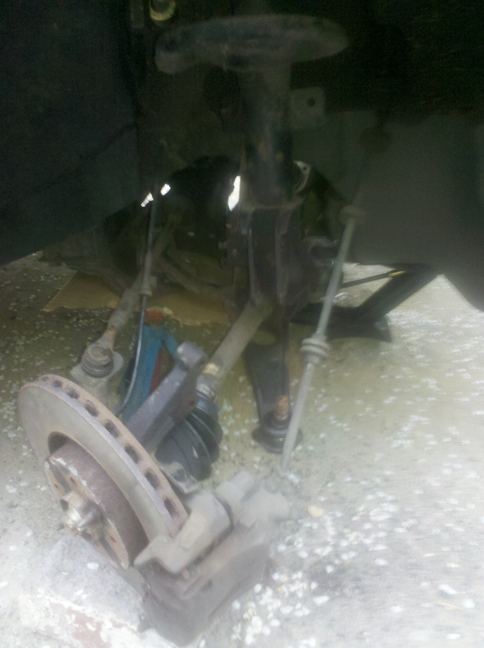
I had trouble getting the O/S driveshaft bearing to move, so I improvised a puller using spring compressors (Hilka, £17.99 from Screwfix) between the driveshaft flange and wishbone as below:

Fair amount of pressure on the puller and a couple of sharp tugs on the hub and the bearing popped out of its housing, allowing the driveshaft to clear the gearbox oil seal.
5) Gearbox
I got mine out without dropping the subframe. It's tight, but not impossible. And if like me the look of the rusty bolts on your subframe give you the fear, here's roughly how I did it.
After much wiggling, I came back to the forum as I vaguely remembered reading that someone had managed the feat. I found the post from Flying Clutchman saying that you need to jack up the engine. Only having one hydraulic jack (which was under the gearbox), I put the Multi's own scissor jack under the sump with a block of wood. I think that this helped (more by luck than judgement) as the articulated foot on the jack allowed the engine to move backwards (towards the bulkhead) as I raised it, giving a bit more clearance at the front to get the box out. I also had to undo the front intercooler pipe (the corrugated one) at the engine end, to give enough room for the bell-housing to come out.
In the end, the box had to turn in two axes
- as you look from on top (under the bonnet): clockwise
- as you look from the end (through the N/S wheelarch): anti-clockwise
I took pictures as I put it back in to show roughly how it went (apologies for the poor focus on some of them, not the best light and camera on my phone):
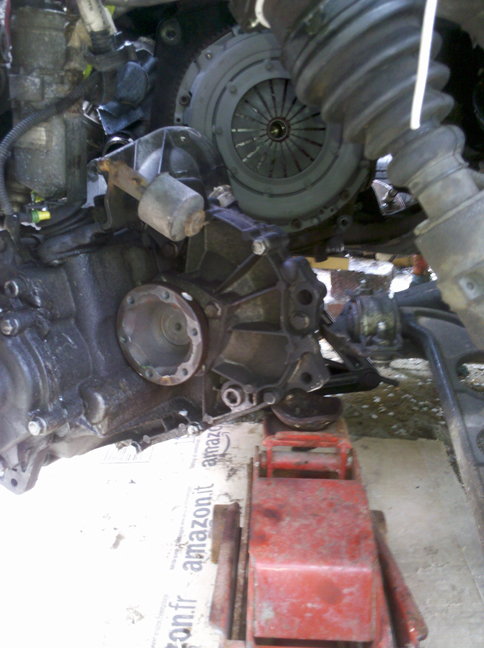
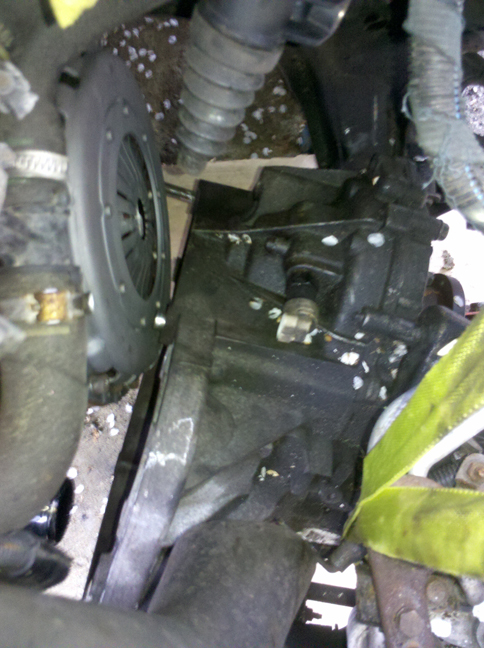
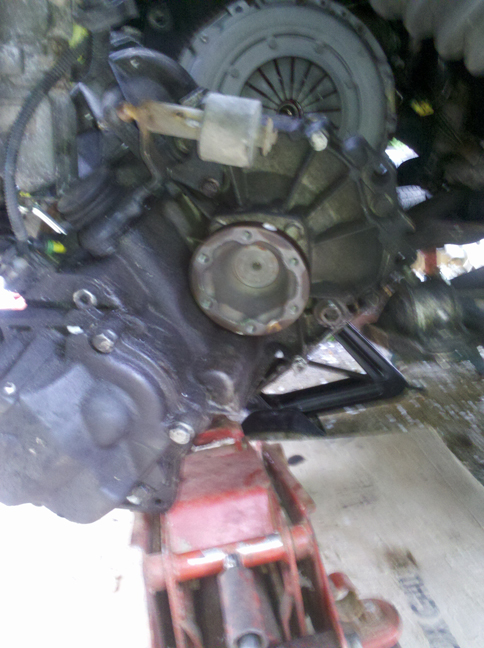
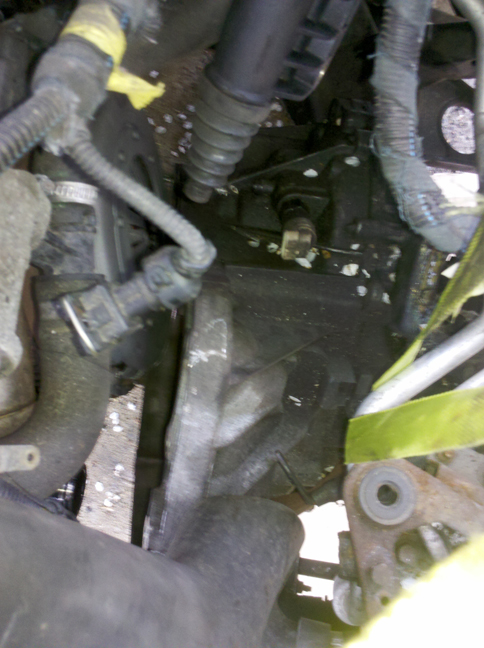
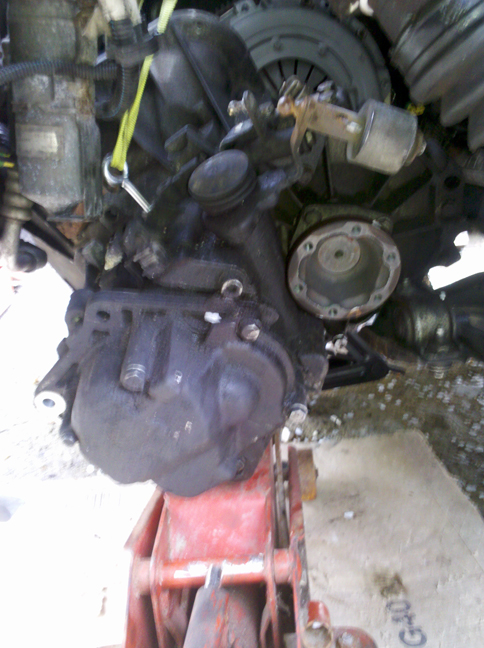
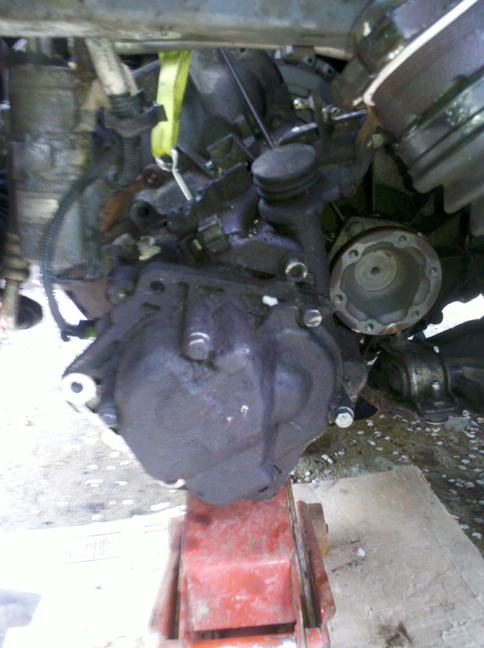
After the last photo, I spent quite a long time scratching my head and not being able to get the splined shaft to line up with the clutch until I realised I needed to let the engine back down off the jack. As I did, the engine obligingly came back forward towards the radiator, and the gearbox slid nicely home. Success
You might have noticed the lifting eye I used to re-fit. This was an M8 straining-eye bolt from the local hardware shop (about 90p) cut down so the thread was the same length as the slave cylinder bolts and screwed into the hole nearest the bell-housing (the one that is used for the cylinder, not the 'spare' one). The box hangs nicely from this and I really should have done it when dropping the box :bang: would have made my life a lot easier!
In the end, I found the existing guides for clutch replacement are very thorough and I wouldn't have got very far without them, so I would like to thank both SillyBilly and bikes-for-me.
I hope this information helps somebody out in the future.
Apologies for the thumbnail size photos, can't figure out how to make them bigger?
Cheers all,
Ben.