jvNLZBr.jpg

Panda (Classic) 1988 Fiat Panda 4x4 Sisley "Four by Fork"

Introduction

Hello everyone, as some of you saw, I am now the proud owner of a Panda 4x4, as previously discussed in this thread: https://www.fiatforum.com/panda-classic/448853-sisley-ebay.html

Rough around the edges, rusty around various edges as well, but ready to go. Ticketed till next year and just been insured and taxed in my name so I'll be on the road in it by tomorrow!

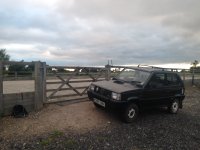
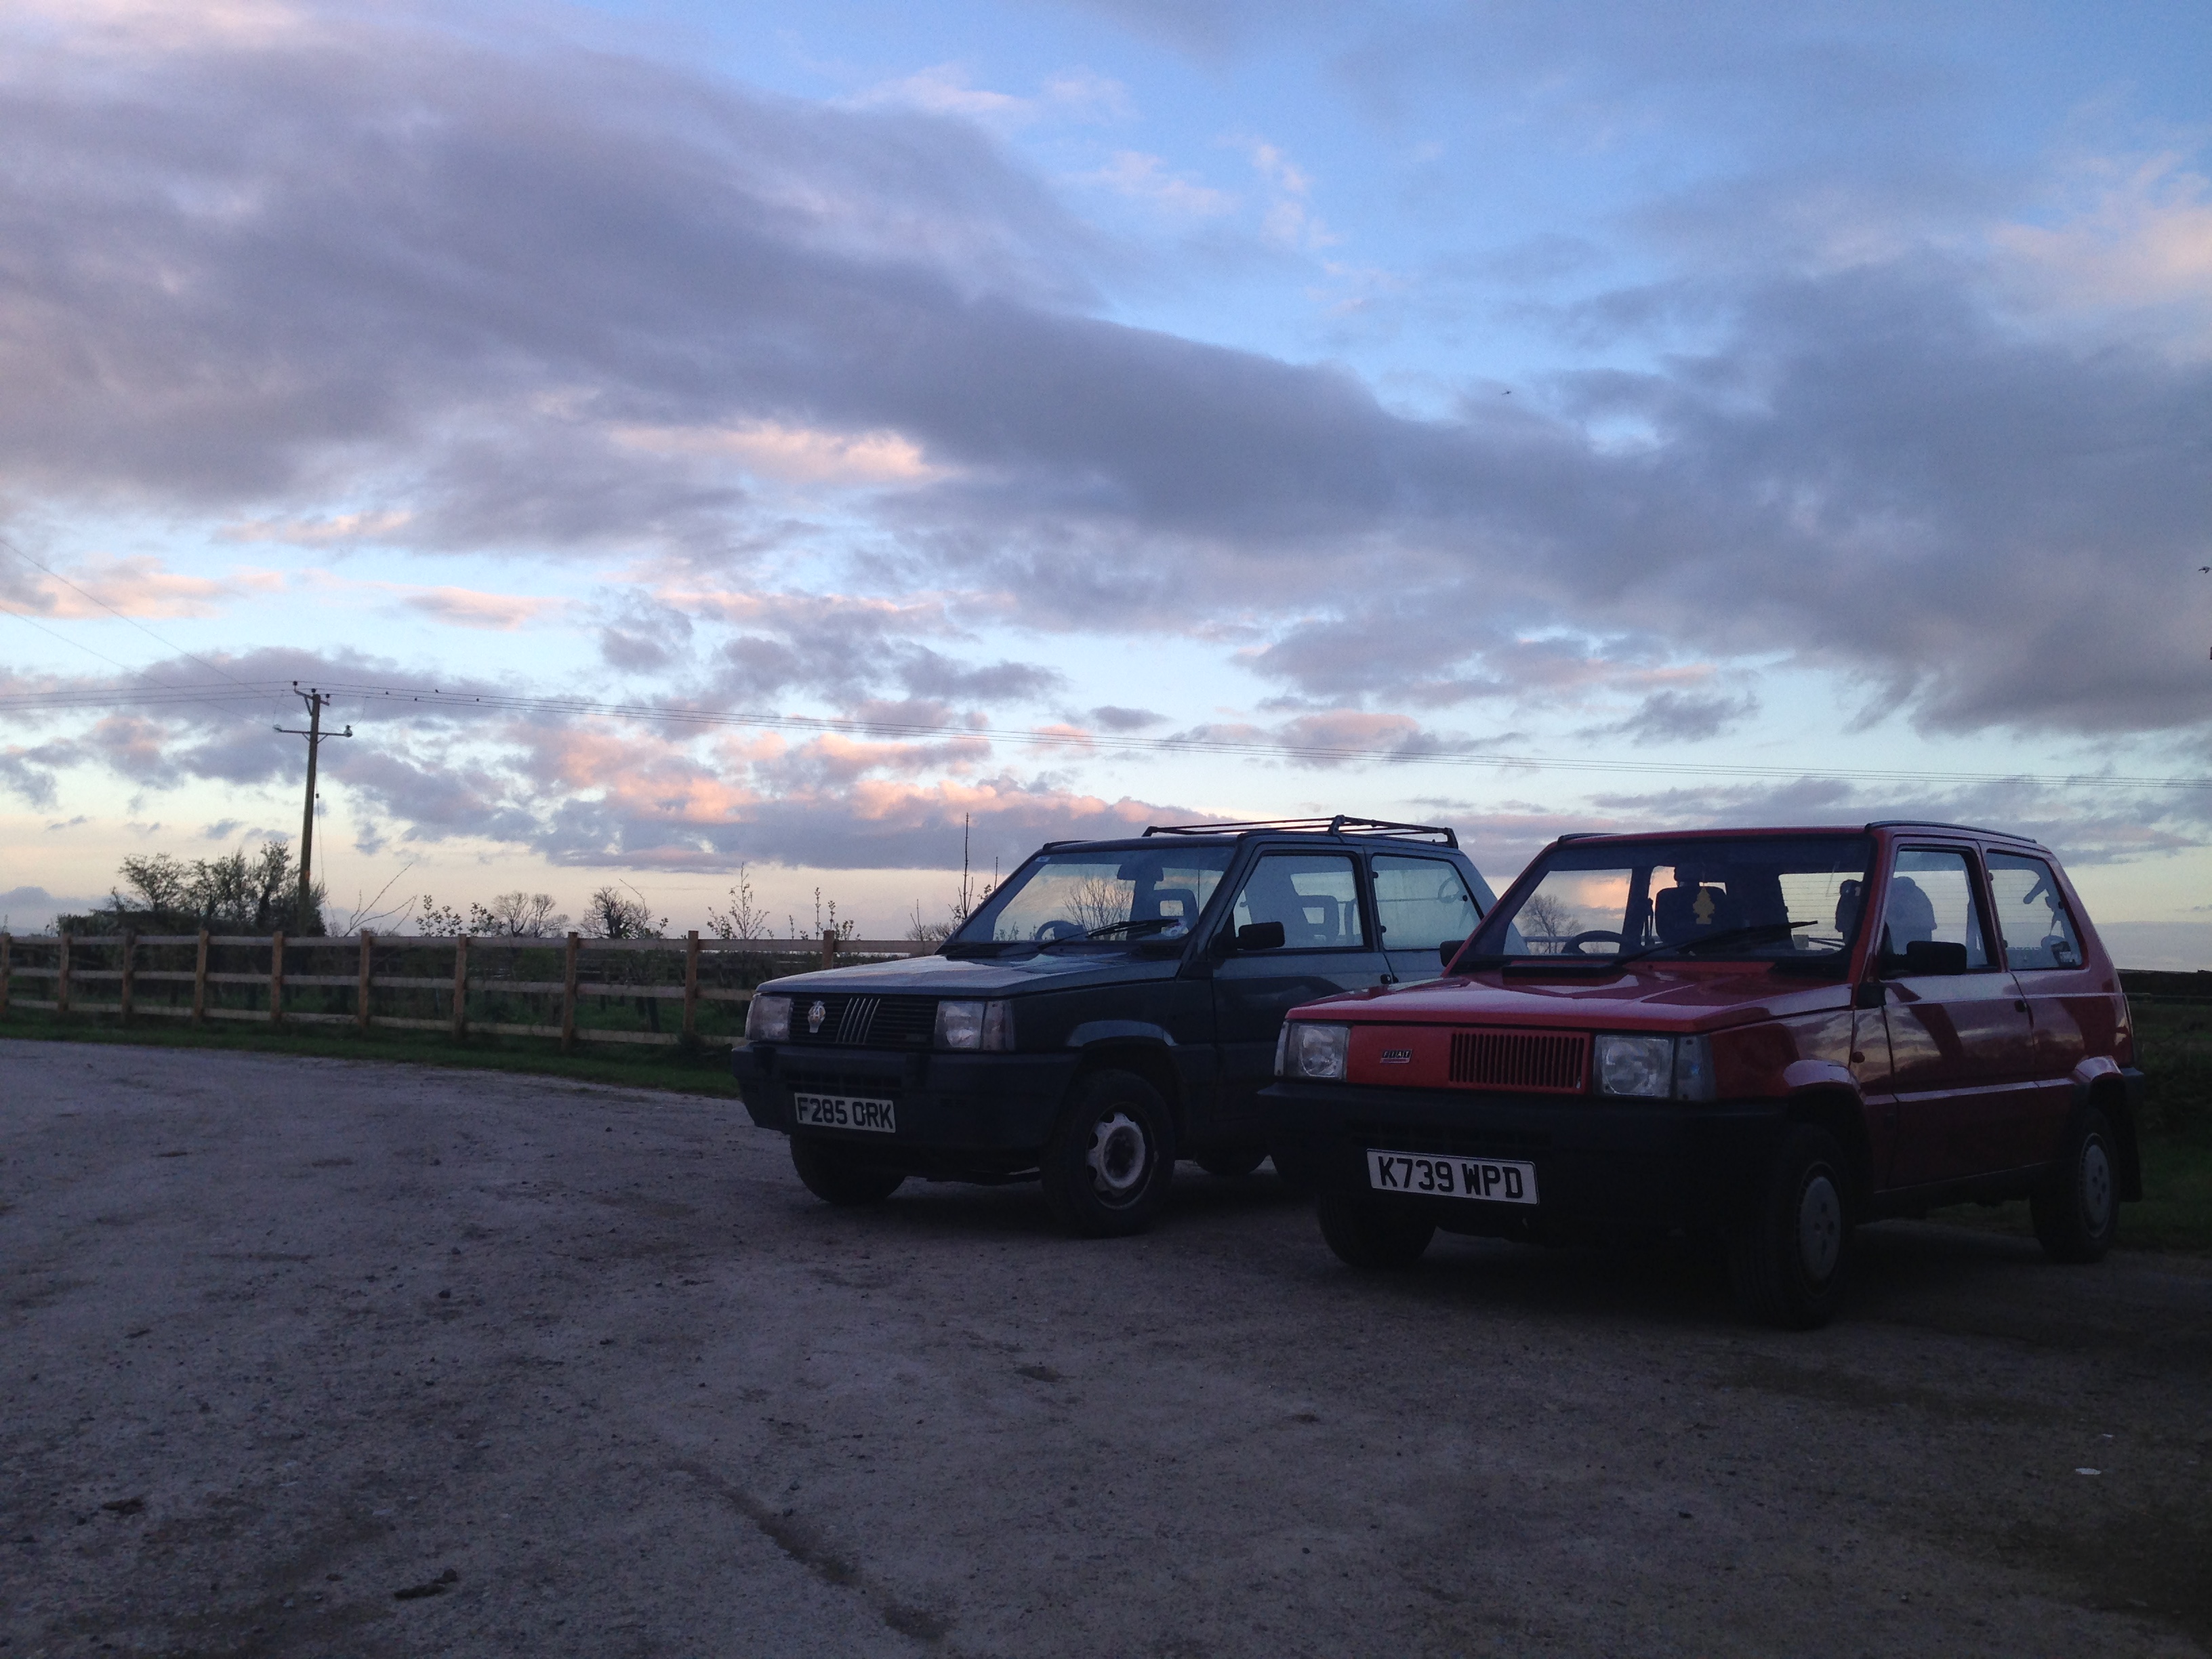
When I entered the Panda scene, the 4x4 Sisley soon became a dream for me, little did I know this one would present itself so soon and so nearby. Once it had come up, I had to go see it. After a very thorough look around and a little bit of haggling, the seller took an offer for the car and we drove away that night. Here's a picture of the Fizz and Sisley sitting pretty on the seller's farm :)
JH3xJpY.jpg


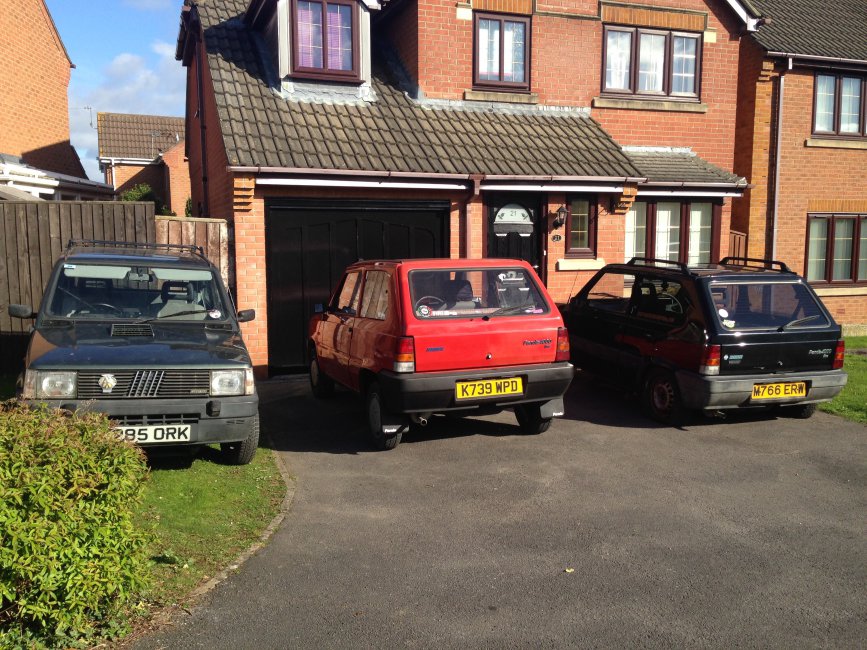
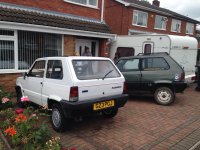
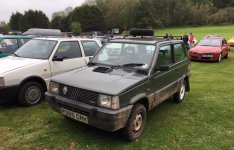
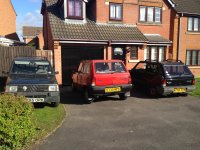
The Sisley surprised me at how different it was to my 93 Fizz at first. The gearbox and stick has a different feel, and the manual choke/carb/distributor is all something new compared to the auto choke, SPI, distributorless 93 engine! I'm definitely excited to get acquainted to the Sisley though, and I am also looking forward to making the most of the 4x4 system off road at some point. Pictures will be coming soon off road of course, when I get it there, but first a picture of the car sitting with Pandino and Chaz at home :cool:
jvNLZBr.jpg

All in all a bit of works needs to be done but this is definitely a great start for me in the 4x4 scene. I hope to meet some other 4x4 owners off road once I've learned some skills as well, so more on this lovely little Sisley to come, stay tuned! :D
View attachment DSC_0004.JPG

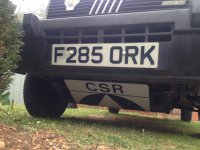
Oh, and the nickname, "Four by Fork". Reason being, as soon as I saw the car advertised, I noticed it looked like the number plate said Fork. I dabbled with the idea of "The Forking Panda" and "Forkie", but once I thought of "Four by Fork", I knew that had to be the one... though I suppose I can still call it Fork for short, and if it ever decides to conk out on me then it'll turn into Forking Panda really quickly! (y)

I'll be posting more updates here soon but if anyone has any interests or questions then let me know. What I've done so far is fit a parcel shelf and started to clean the interior, as well as refit the bonnet vent as it wasn't on properly before!
You can change the barrel or at least lock pins so the old key will work, wort the hassle! If not high priority keep the lock safe.
It was a quick change so put the old barrel on my CLX for the time being but will keep it as spare anyway :) The key from the doors on the Sisley would fit into the original boot lock but it would only fit in upside down, is it meant to do that? And then it wouldn't lock anyway once it's in there!
 
Preparation for the 4x4 meet in Yorkshire this coming weekend first involved needing to do the driveshaft gaiters and make up a sump guard for the weekend.

Sump Guard Attempt 1

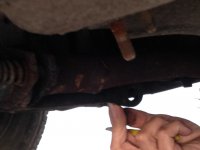
On the way to my father's friend's place last week to sort out the sump guard, I changed from third to fourth gear, and suddenly something had gone very wrong! Turns out that as I changed gear, one of the gear linkage bushes had decided to no longer be part of the gear linkage system, which resulted in one seriously floppy gear lever (seriously, it would flop from all the way forward to all the way back).

An image of the damage...
SSsvGBS.jpg

A few cable ties later, we were off. However, only 2nd and 4th were still present (probably due to tightness of the ties), so I drove straight home and admitted defeat on the sump guard for one day.
c6S0oh4.jpg

The old bush had removed itself so it was just a matter of fitting a new one with a vice and then g-clamping the linkage back into the ball joint, and after that it was fine! The linkage was removed by removing the pin at the back to put the bush in and re-fitted to attach it to the ball joint and all has been fine since.

Driveshaft Gaiters

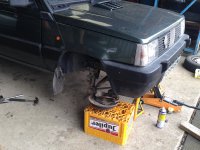
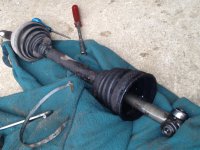
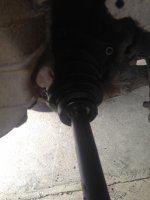
So, it then came to Saturday, and it was time to get the driveshaft gaiters done. Thanks to Freddy I had some good outer gaiters, and thanks to Ricambio I had the inner gaiters and bearings. Firstly, a nice drive down (with all the gears intact this time) to my father's friend's place and we set to work. Removal of the wheels then leads to the removal of the carriers, when the two bolts and nuts holding the top of the carrier are loose the rest is fairly easy, take the nut off the bottom and split the ball joint then off the splines it comes. The main problem with removing the bolts and nuts for me is that it was filled with crap, so that was cleaned out when the bolts were removed. Then simply prop it up on a beer crate and take some pictures!
FMfhVvC.jpg

After removing the bolts from the inner gaiter section holding in the driveshaft on the driver side and pulling the gaiter out of the mount on the passenger side, the driveshafts slide out and can be placed on a worktop to work on. Of course, you need to drain the gearbox oil into a container before letting oil go all over the floor instead ;) I'm not sure what I'll use the old oil for yet but if anyone has any useful suggestions for it then let me know...
XvSbDOr.jpg

The bearings come off the inner part of the driveshafts given a bit of shock (the inner seals like staying there so they have to be taken off as well if they stay on once the rest is removed). The inner gaiter will come off once the bearing is off, then the new bearing/gaiter can be placed on. Either order is fine we found, as if you do the bearing first you can focus on getting it in the right place and then putting the gaiter on and pulling it up and around it. The outer gaiter was simple for one side but the other side needed removal of the cv joint which was done by using external circlip pliers on the circlip in the joint. It's a pain to get to with all the grease in there! Once the gaiters are changed and joints together etc (making sure grease is packed in the cv joints), the eared ring clips are put on and the tool I bought from Amazon was used to pinch the ears correctly and then the clips were very tight on the gaiters, exactly what's needed! After that, all goes back in reverse order, the driveshafts go in (ooooh shiny)...
QCGaZcR.jpg

So once the driveshafts are in and the mounts are bolted up etc, the carrier needs to go back on. We tried this with various difficulty but found the best method as follows! First, put the carrier onto the splines and the bottom ball joint attachment and make sure it's secure, then push the carrier into place at the top so that the two bolts can be put through. Then, put the nuts on the end of where they need to be and tighten them up and that's it! I also renewed a calliper brake pipe clip while I was there as it had come off and was held with a cable tie. A new clip looks nicer now and it'll keep it held on nicely. Lastly, once everything is done back up and wheels are on, you'll need to fill the gearbox oil, so this was done using 20w50 motor oil through a garden pipe and funnel to the plug at the top of the gearbox for filling (takes about 2.3-2.4l). Lastly, place the plug back in, give the car a quick drive and make sure no grease/oil is spewing everywhere and... result! Picture of the car at the place is of course necessary :)
kUowwpT.jpg

Sump Guard Attempt 2

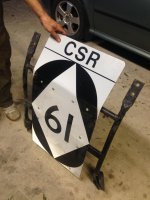
Last but not least, a bit of time on the Saturday for the sump guard. By drawing out the back of the original guard on the back of the aluminium sign we had obtained before after placing the sign where we wanted it (in relation to where the bend needed to be on the front), we could see where we needed our mounts to go. Now what I wanted to do was attach this sign without bolting through the original guard and without welding or anything fancy, I wanted it simple. So, some metal rail with holes for bolts was found for use, and a few strong pieces cut to size. A few holes drilled later and the sign was placed under the guard again with the metal mount pieces placed above the guard. The bolts used were ones with small (alan key) heads so that they were not protruding far out underneath, and they went through the holes drilled in the sign and through the piece of metal on the other side of the original guard and then a nut was placed on the end of the thread and tightened. This meant that the plates underneath were pressing tight against the original guard, which in turn meant that the sign was being pressed up sufficiently against the guard and hence held on tightly. By standing on the top of the guard when flat and pulling up on the end of the sign, it gave a nice bend to it which will help slide rather than crash when coming across any higher rocks!
IdNQ4Xx.jpg

The guard was bolts back to the car yesterday. The angle on the end was purely guesswork but it's actually perfect for the car - not too low to protrude too much into the road/cause issues off road, and not too high so that it hits the rest of the car structure - it sits under the two tabs under the front in the middle of the front structure. I like it, and Vernon and my father have come up with some different ideas for "CSR", a couple of my favourites being "Custom Sisleys Rule" and "Climbs Sizable Rocks"...
fRumJSX.jpg

So moving on to today now. The sump guard seems to look nice and sits nice, I checked the gap underneath and it was quite close to the gearbox but other than that I thought it would be okay! The sign extends nicely to protect the linkages without touching them too which is an added bonus.

However, while driving the car today, I noticed a bit of rattling that I suspect to be the passenger side top mount for the sign (on top of the guard) rattling against the gearbox or something in the vicinity... I shall be inspecting this further tomorrow, if it's in the way then a quick hammer job should do it. It may just be that the guard gives it some added rattle anyway though, in which case it'll stay as it is, got to wait and see I suppose but we're only a couple of days from the meet so I haven't got a lot of time for slight rattles now!

---

I think that's enough of an update for now, hope this is remotely helpful/enjoyable for you guys and I hope to see those coming to the Yorkshire meet very soon (y)
 
So today was the last minute prep for the 4x4 meet, which mainly consisted of cleaning the interior out ready for the ride down and filling the car up with useful bits.

Earlier in the day we also sorted out my cigarette lighter as it hadn't been working previously. Turns out the connector was off, and as we put it back on, every time the radio went back in it took it off again! So with some tape on the back of the connector and by taping the wires out of the way for the lighter with the connector in, when the radio went back in, it wouldn't pull the wires/connector out again. Now we've got a working lighter so great!

The speaker on the passenger side had never worked and even after trying different speakers and fiddling with wiring, it never worked. But just for fun, we plugged it back in today, and it works now... I'll call that a success ;)

From the other day, I had planned to check the sump guard. So I did, and it rattles a little bit, but it looks clear of everything so I'm just putting it down to the engine being on and rattling everything else around! All gears work and 4x4 activates so all the linkages are clear too. I tried the lights and checked those while I was outside, and turns out there was quite a bit that needed sorting... I've not had the car long and all the lights were fine previously (albeit one side always is brighter than the other on the rear)!

So the lighting issues start with the driver's headlight. It wasn't very bright so figured we'd swap the bulb for a new one. Same issue occurred so we carried on with the rest of the issues, more on this in a second... so next was the indicator on the driver's side, took off the screws (one of which broke as it came off) to reveal the bulb which was definitely blown and replaced it. Put the lens back on, put a screw back on, went to do the other one and then it snapped as it was going back on... all was well, I had one more screw and the snapped one came out with pliers. New screw in, about 90% of the way in, suddenly... snapped again! No more screws and no room for pliers so it'll do. Then the rear light on the passenger side was being tempremental so we got a spare bulb holder, transferred some good bulbs, made sure connectors were pressing the back correctly and put it all back together - works now! Speaking of works now, we tried the headlights again and they were fine. That's a normal Fiat thing to do, right? :D I call that a victory as well... see you all at the weekend, making the trip down to Yorkshire tomorrow!
 
The journey to Yorkshire, firstly a stop off to my friend Matt's to see him and his 1000CL - picture complimentary of course!
IMG_6616.JPG

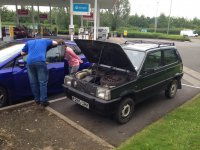
The second stop was needed after a long standstill on the M1, the car got a bit hot and bothered so a quick cool down and looping round the motorway for the next part of the journey did a lot of good and the car ran a dream after that.
IMG_6620.JPG

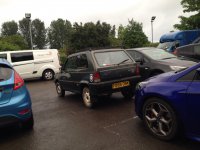
A third stop for a bit of food!
IMG_6621.JPG

And finally arrived, saying night to the Panda for now but looking forward to seeing the 4x4 group and get on the rougher stuff tomorrow. It's going to be a great experience for me and I hope to meet some new people at the same time :)
IMG_6622.JPG
 
Update time for the Four by Fork! :D

I haven't spoken on the thread since the 4x4 meet in Yorkshire. Overall it was a great success for the car, and the sump guard addition proved well as it gained a lot of scratches and dents! It has been cleaned up now, ready for another 4x4 meet I reckon. I'd like to get to the next meet in September, however already planned something for the weekend, so I am going to see if I can work around it and get there. It would be great to meet all the 4x4 lot and get muddy again. Speaking of mud, I still need to clean the car of all the Yorkshire mud that has been caked on... it has made good conversation at car meets and such though ;)

The car did have a slight starting issue after the meet, where the turn of the key didn't engage the starter motor, after a few turns it would start. This persisted so I cleaned various Earth connections on the car and also cleaned all the starter motor connections. The problem still happened once after so I removed the starter motor from the parts car ready to put on - now that I've done that though, I haven't had any issues starting since, and it's started a lot of times on the dot now... maybe the clean did help after all but we shall see :p

The most recent issue occurred when I got to work this morning, opened my door, got out and got all my stuff, then tried to shut the door but to no avail. A work mate thought it was the top hinge that had bent so I went to the workshop and got the tools to remove the bolts on it but turns out it wasn't the top hinge - hence I needed to take off the bottom hinge. Couldn't take it off from the side because the plastic piece needs the door shut to take it off. Couldn't take it off from the inside of the door because I didn't have the tools and it was going to rain as well so I didn't have much time. The verdict - hop in the car, and drive it to the workshop! I held the door tight, luckily it's only a few houses down the road, though the small Panda width means you don't go over the side of the road even with your door half open anyway. Once in the workshop, removed the door and then the plastic and bottom hinge. The issue was the metal spring plate thing had snapped off and fell into two pieces on the floor. It was jamming the door open when trying to shut it. The fix? Put it all back together and just leave the metal spring plate out. Sorted, and as good as ever! ;)
 
The car did have a slight starting issue after the meet, where the turn of the key didn't engage the starter motor, after a few turns it would start. This persisted so I cleaned various Earth connections on the car and also cleaned all the starter motor connections. The problem still happened once after so I removed the starter motor from the parts car ready to put on - now that I've done that though, I haven't had any issues starting since, and it's started a lot of times on the dot now... maybe the clean did help after all but we shall see :p

I had a similar thing with mine, getting nothing when turning the key. I got quite adept at getting out, whacking the starter motor with the little wheelbrace thing, then it would start fine. Then all of a sudden it stopped happening and has never done it since. All I can assume is that some muck must have got into it or something and caused it to stick, but a bit of use cleaned it out.
 
1988 Fiat Panda 4x4 Sisley "Four by Fork"

Yes mud in the bendix ( the spiral that throws the gear into the fly wheel teeth can get blocked up with debris
Take off the starter give it a bath in diesel and oil mix. That should fix that
Owen you have a new (old) door hinge on the spares car don't you
Swop that out as that spring plate stop your door blowing open or swinging out on a hill it's a 20 min job .
 
Last edited:
I had a similar thing with mine, getting nothing when turning the key. I got quite adept at getting out, whacking the starter motor with the little wheelbrace thing, then it would start fine. Then all of a sudden it stopped happening and has never done it since. All I can assume is that some muck must have got into it or something and caused it to stick, but a bit of use cleaned it out.
Yes mud in the bendix ( the spiral that throws the gear into the fly wheel teeth can get blocked up with debris
Take off the starter give it a bath in diesel and oil mix.
Sounds like it was probably some kind of muck causing it after the meet then, as I expected with the earths and connections etc though likely to be in the spiral, must be cleaned up now then but if this occurs again then I know to give the starter a bath! Or use my nice spare one :D
Owen you have a new (old) door hinge on the spares car don't you
Swop that out as that spring plate stop your door blowing open or swinging out on a hill it's a 20 min job .
I have another Panda that needs doors looking at and possibly needs new hinges too so the hinges from the parts car may well be used for that, in which case I won't have a spare plate - the door still acts the same as it did before so makes no difference to me. As long as it's not going to fly open around a corner... though I usually keep the driver door locked because that happened once before! ;)
 
A bit of an update on the Four by Fork now! I have been using this car as a daily since Pandino stood down to make way for me to work on a new red CLX which will be coming to another thread soon. With this, and the recent Staffordshire meet (which was a great load of fun may I had), I have now managed to find out what else needs doing!

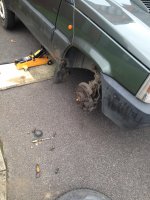
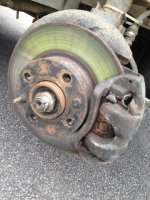
Starting before the Staffordshire meet, it was time for a set of front pads as the old ones were getting a bit low. Didn't take too long, up in the air, wheel off, out the pins and free off the calliper, old pads out and new pads in, put it all back together!
1.jpg

That'll allow a few extra miles :)
2.jpg

The Staffordshire meet was brilliant fun, the car performed well on standard tyres but beefy tyres have been added to the list. This will improve my performance in future meets. But I'm more than happy with what I achieved in the most recent action days and we had a blast :cool:
3.jpg

As you may or may not know, I've attended a couple of meets this year in the Four by Fork, one of which was a Castle Combe event after the Yorkshire meet. This time, I took off to the Italian Breakfast Meet near Alton, though my steady progress on the M4 was abrupted when my nearside rear tyre very suddenly went flat at 70mph...
4.jpg

That tyre had always gone down slightly where the others hadn't so I always suspected something was wrong but I could never find or hear a leak. The tyre was pumped up that morning so I wonder if that further unsettled what ever problem there was. Anyway, a quick jack up and wheel change later and we were back on the road! We made it to the meet and that was great as well, some lovely cars and great people :)
5.jpg

At the workshop, a little inspection of my wheel by inflating it and seeing what happens. Seemed fine to start with, then turned it around... oh. This tyre is a bit dead :eek: So, along with beefy tyres, that's a winter tyre on the list as well! I've got a couple of spare wheels in the car but I'll probably change the old Bridgestone for a new Hankook soon (as they don't make Bridgestones 145 anymore for the winter Blizzak, only 155).
6.jpg

At the Quarry during Freddy's meet, I had a loud rattling noise - Andy was quick to the rescue fishing out some rocks from my centre prop guard. Though that was not all, as on the journey back, I found my car was vibrating very awkwardly. I again suspected the prop but I wasn't sure on this one so I let Freddy test drive the car and he came back confirming the prop would need to come off. Big thanks to Freddy as he helped take my propshaft off with me and we found the rear universal joint had quite a bit of play! A new part from Freddy and a little help from a work mate later, we fit a new universal joint, and now all that needs to be done is re-fitting of the propshaft...
7.jpg

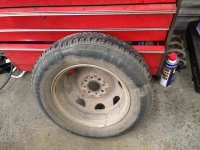
Last but not least for pictures, the new wheels, thanks to Vernon for these as I picked them up at the Alton meet from him. They do not look the most perfect wheels ever, but they are straight and the valve holes are solid, so I'll be giving these a bit of a restoration soon ready for beefy tyres! Now the next part though... what colour paint to go for!? :eek:
8.jpg

In the time since I've last updated, I've also fixed the nearside brake light bulb - turns out someone put a 24v bulb in there. That would explain it being half as bright... easy fix though! My father also helped my change my radio wiring loom. We had some spare wiring from another car and wanted to tidy up what we had. The main reason for the swap was for me to fix the plastic (the black radio housing was broken, we put my spare grey housing in, it fits in nicely with the Sisley grey dash liner) and also to fix the cigarette lighter as if I turned my headlights on the sat nav would stop charging using the lighter and the lighter would also not power a tyre inflator at any point. The new wiring now means that things are tidier, and I now have a working cigarette lighter at all times, which is what I wanted!

So the current plans are to refit the sump guard and propshaft again, find and fit a winter tyre to the original wheel, restore my new set of wheels and fit beefy tyres to them (Kobra Tracs), refurb the carb and a couple of other small tidying jobs. And by the time I'm half way through, I'll have another half of a list added to that list anyway! ;)

In the meantime then, I'll consider what colour the new wheels are going to be :slayer:
 
A bit of an update on the Four by Fork now! I have been using this car as a daily since Pandino stood down to make way for me to work on a new red CLX which will be coming to another thread soon. With this, and the recent Staffordshire meet (which was a great load of fun may I had), I have now managed to find out what else needs doing!

Starting before the Staffordshire meet, it was time for a set of front pads as the old ones were getting a bit low. Didn't take too long, up in the air, wheel off, out the pins and free off the calliper, old pads out and new pads in, put it all back together!
View attachment 185222

That'll allow a few extra miles :)
View attachment 185223

The Staffordshire meet was brilliant fun, the car performed well on standard tyres but beefy tyres have been added to the list. This will improve my performance in future meets. But I'm more than happy with what I achieved in the most recent action days and we had a blast :cool:
View attachment 185224

As you may or may not know, I've attended a couple of meets this year in the Four by Fork, one of which was a Castle Combe event after the Yorkshire meet. This time, I took off to the Italian Breakfast Meet near Alton, though my steady progress on the M4 was abrupted when my nearside rear tyre very suddenly went flat at 70mph...
View attachment 185225

That tyre had always gone down slightly where the others hadn't so I always suspected something was wrong but I could never find or hear a leak. The tyre was pumped up that morning so I wonder if that further unsettled what ever problem there was. Anyway, a quick jack up and wheel change later and we were back on the road! We made it to the meet and that was great as well, some lovely cars and great people :)
View attachment 185226

At the workshop, a little inspection of my wheel by inflating it and seeing what happens. Seemed fine to start with, then turned it around... oh. This tyre is a bit dead :eek: So, along with beefy tyres, that's a winter tyre on the list as well! I've got a couple of spare wheels in the car but I'll probably change the old Bridgestone for a new Hankook soon (as they don't make Bridgestones 145 anymore for the winter Blizzak, only 155).
View attachment 185227

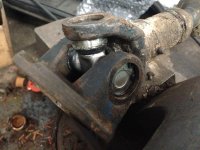
At the Quarry during Freddy's meet, I had a loud rattling noise - Andy was quick to the rescue fishing out some rocks from my centre prop guard. Though that was not all, as on the journey back, I found my car was vibrating very awkwardly. I again suspected the prop but I wasn't sure on this one so I let Freddy test drive the car and he came back confirming the prop would need to come off. Big thanks to Freddy as he helped take my propshaft off with me and we found the rear universal joint had quite a bit of play! A new part from Freddy and a little help from a work mate later, we fit a new universal joint, and now all that needs to be done is re-fitting of the propshaft...
View attachment 185228

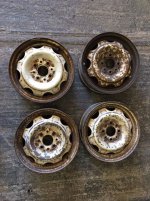
Last but not least for pictures, the new wheels, thanks to Vernon for these as I picked them up at the Alton meet from him. They do not look the most perfect wheels ever, but they are straight and the valve holes are solid, so I'll be giving these a bit of a restoration soon ready for beefy tyres! Now the next part though... what colour paint to go for!? :eek:
View attachment 185229

In the time since I've last updated, I've also fixed the nearside brake light bulb - turns out someone put a 24v bulb in there. That would explain it being half as bright... easy fix though! My father also helped my change my radio wiring loom. We had some spare wiring from another car and wanted to tidy up what we had. The main reason for the swap was for me to fix the plastic (the black radio housing was broken, we put my spare grey housing in, it fits in nicely with the Sisley grey dash liner) and also to fix the cigarette lighter as if I turned my headlights on the sat nav would stop charging using the lighter and the lighter would also not power a tyre inflator at any point. The new wiring now means that things are tidier, and I now have a working cigarette lighter at all times, which is what I wanted!

So the current plans are to refit the sump guard and propshaft again, find and fit a winter tyre to the original wheel, restore my new set of wheels and fit beefy tyres to them (Kobra Tracs), refurb the carb and a couple of other small tidying jobs. And by the time I'm half way through, I'll have another half of a list added to that list anyway! ;)

In the meantime then, I'll consider what colour the new wheels are going to be :slayer:

Good work! Personally I think the cream wheels are lovely when they add nice and clean :)
 
Back
Top