jvNLZBr.jpg

Panda (Classic) 1988 Fiat Panda 4x4 Sisley "Four by Fork"

Introduction

Hello everyone, as some of you saw, I am now the proud owner of a Panda 4x4, as previously discussed in this thread: https://www.fiatforum.com/panda-classic/448853-sisley-ebay.html

Rough around the edges, rusty around various edges as well, but ready to go. Ticketed till next year and just been insured and taxed in my name so I'll be on the road in it by tomorrow!

When I entered the Panda scene, the 4x4 Sisley soon became a dream for me, little did I know this one would present itself so soon and so nearby. Once it had come up, I had to go see it. After a very thorough look around and a little bit of haggling, the seller took an offer for the car and we drove away that night. Here's a picture of the Fizz and Sisley sitting pretty on the seller's farm :)
JH3xJpY.jpg


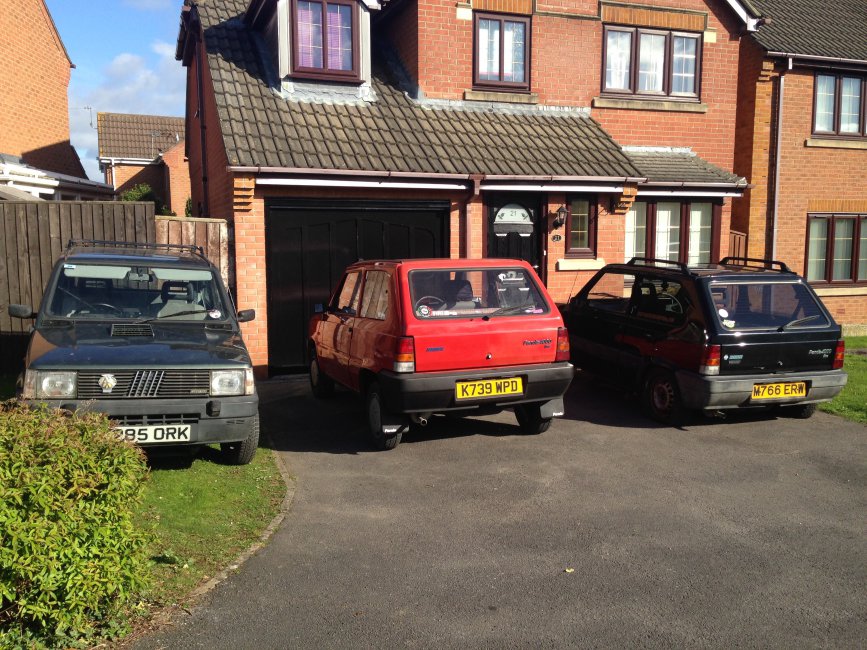
The Sisley surprised me at how different it was to my 93 Fizz at first. The gearbox and stick has a different feel, and the manual choke/carb/distributor is all something new compared to the auto choke, SPI, distributorless 93 engine! I'm definitely excited to get acquainted to the Sisley though, and I am also looking forward to making the most of the 4x4 system off road at some point. Pictures will be coming soon off road of course, when I get it there, but first a picture of the car sitting with Pandino and Chaz at home :cool:
jvNLZBr.jpg

All in all a bit of works needs to be done but this is definitely a great start for me in the 4x4 scene. I hope to meet some other 4x4 owners off road once I've learned some skills as well, so more on this lovely little Sisley to come, stay tuned! :D
View attachment DSC_0004.JPG

Oh, and the nickname, "Four by Fork". Reason being, as soon as I saw the car advertised, I noticed it looked like the number plate said Fork. I dabbled with the idea of "The Forking Panda" and "Forkie", but once I thought of "Four by Fork", I knew that had to be the one... though I suppose I can still call it Fork for short, and if it ever decides to conk out on me then it'll turn into Forking Panda really quickly! (y)

I'll be posting more updates here soon but if anyone has any interests or questions then let me know. What I've done so far is fit a parcel shelf and started to clean the interior, as well as refit the bonnet vent as it wasn't on properly before!
Had the Fork on the ramp today to get to work on removing the prop!
View attachment 180197

So, removing one of the nuts today and this happens to the spanner... so, quick trip to the shop to buy some more spanners and some hex keys while I'm at it [emoji14]
View attachment 180198

Used some bumper shine on the side trims and they've come up very well. You can see the grey here that it was before, now it is all in the nice black you see above it!
View attachment 180199

After a while, all the bolts were loosened and removed. To get the prop shaft out, a couple hits with a hammer at either end were needed to loosen it from where it was housed, and then the exhaust rubber mount is removed to take the prop out. Not sure what will be done for sure next but my assumption is it is going to need new cvs, if not then a good clean and sort out that's for sure!
View attachment 180200

Front and rear have been marked, the rear cv was making the noise but if they need replacing then it may be best to replace both
looking good dude
 
Well done Owen, first step to getting it fixed - you should be pleased with your efforts.


Owen strip it down fully circlip pliers required photo ever operation so you don't get it wrong on re assembly . Dot punch or permantly mark the parts as dissembling. If the bearings aren't very shiny there knackered if there is a indent in the ball race it's knackered if all clean and tidy wash out flush and clean re grease new gaiter rebuild then the other end one at a time don't mix parts the race has to be off the spline to reassemble
[emoji209][emoji1360][emoji375][emoji1009]
Sorry no "adjuster "emoji ha
 
Thought you might have an adjustable spanner of some sort around for this sort of eventuality? ;)
I told you that it was granddad's one, so I didn't have it you see... ;)
looking good dude
Thank you, still a way to go but it has to be done!
Well done Owen, first step to getting it fixed - you should be pleased with your efforts.
Cheers Andy, I think the repair step is going to be a bit of a challenge but at least re-fitting should be a little easier as there won't be bolts on there that haven't turned for almost 30 years!
Owen strip it down fully circlip pliers required photo ever operation so you don't get it wrong on re assembly . Dot punch or permantly mark the parts as dissembling. If the bearings aren't very shiny there knackered if there is a indent in the ball race it's knackered if all clean and tidy wash out flush and clean re grease new gaiter rebuild then the other end one at a time don't mix parts the race has to be off the spline to reassemble
[emoji209][emoji1360][emoji375][emoji1009]
Sorry no "adjuster "emoji ha
I'm going to get a friend to check it out first and we might be going to someone he knows as well to see :) Thanks for the advice and I'll take it all into consideration when fixing the joints!

I also heard you may have bits of a Sisley interior for sale Sj, are you selling it all as one set? Not that I can afford anything interior/cosmetic-wise now that I'm going to be fixing things :rolleyes: :p
 
I told you that it was granddad's one, so I didn't have it you see... ;)


Thank you, still a way to go but it has to be done!


Cheers Andy, I think the repair step is going to be a bit of a challenge but at least re-fitting should be a little easier as there won't be bolts on there that haven't turned for almost 30 years!


I'm going to get a friend to check it out first and we might be going to someone he knows as well to see :) Thanks for the advice and I'll take it all into consideration when fixing the joints!


I also heard you may have bits of a Sisley interior for sale Sj, are you selling it all as one set? Not that I can afford anything interior/cosmetic-wise now that I'm going to be fixing things :rolleyes: :p


We have 2 interiors Most items. But mouse worn in a few places
I think all the seat covers removed then put through either dry cleaners or mums washer would come out fine carpets need a full jet was on the line then spot clean then rewash most bits of trim but not perfect would like to move it as a job lot really Once we had our pick as we only require 1 interior But are after a mk /750 rubber carpet set !!
Regards
steve
My seats and carpet needs a good clean and most of it should come up okay (I hope, there are some stains that may need some specialist removal) - driver seat is torn on the base of it and my door cards are pretty warped. The dash liner has been cut to fit a hands free system too but I think it will sew up nicely! I have a rubber carpet in my Fizz but won't take that out I'm afraid ;) Though the Fizz is another one you can look for to find your rubber carpet!
 
My seats and carpet needs a good clean and most of it should come up okay (I hope, there are some stains that may need some specialist removal) - driver seat is torn on the base of it and my door cards are pretty warped. The dash liner has been cut to fit a hands free system too but I think it will sew up nicely! I have a rubber carpet in my Fizz but won't take that out I'm afraid ;) Though the Fizz is another one you can look for to find your rubber carpet!
rubber carpet for life haha
 
Okay, so the plan of action from here is now to remove the joints on the prop, thoroughly clean, re-grease and then put together with new boots. Then, the prop is going back on with new bolts.

Driveshaft gaiters are also still on the shopping list so I've got a running total with Freddy at the minute... not ordered yet as just finalising but almost there!

I've also got plans for a sump guard. One of my dad's friends has some spare metal signs which he says I can use, so I'm going to take a look at them hopefully tomorrow to see what I can do. If all works out then I'll be making my own to fit the frame already on the Sisley.

Other than that, I'm just hoping to clean up the carb before a certain trip in July. Yorkshire Dales is on the cards, I'll be going in the Fork as long as the Fork plays nice in June and I get it all fixed up! If not then I'll still be there in Yorkshire so I can tag along with someone else but it would be awesome to bring the Sisley along :)
 
So here are the signs I talked about! I believe they're 3mm aluminium railway signs. Probably not as fancy as checker plate but I don't think you can go wrong by saying you have railway signs as a sump guard ;)
48.jpg

The plan for the signs is to have the two of them in front of each other, the first sign bolted into the front two mounts and the second sign bolted to the rear two. The size will be cut slightly as they are a bit too wide but it's better to have some to cut off rather than need more to put on. To attach the signs together, the potential is there just to have bolts in the middle, but they may be better riveted together. It always sounds easy to do, but nothing ever seems as easy to execute! :p

You may also see a angle bar with two hook eyes, this is what my dad's friend used on his Sisley a decade ago as a towing bar on the front. It bolts to where the front of the sump is planned to go (I need to make sure the bolt is going to hold all this on!). It was used with the hook eye metal piece facing downwards but he noticed an issue when he went down a hill one time that because it didn't clear far off the ground that it acted as more of a plow... so the idea will be to invert it and have the eye bar facing upwards rather than down. It will just require some (hopefully) simple notches in the metal and then it will fit to the car in a much more efficient way :)

However, I do have more pressing issues to attend to now as my Sisley has decided to reward me after getting it some presents by stalling in between gear changes and at idle. A bit of choke bypassed it for the journey home but I am now going to look at the idle solenoid (credit to Vernon's advice and some old Fiat Forum threads), though probably clean the carb while I'm there if I can as my bet is that it hasn't been cleaned in a long time, if ever... :rolleyes:

My plan consists of something like this:
Carb/idle fix
Prop fix
Driveshaft gaiter fix
Sump guard fit
Fit fog lamps (I have some brackets, and some lamps, so I'm most the way there!)
Tow bar fit

And probably lots of other stuff I've forgotten. But I have plans for the future as well! Such as:
Fix/replace parts of the interior
Fix a faulty lock
Remove rust
Bullbars/light grilles?
Repaint the whole car? (I was thinking a military theme but I'm open to suggestions :D)

Most of these are probably a long way away. Slowly but surely, I want to make the Four by Fork properly awesome :cool:
 
Thomas had been sitting silently looking sad at the new branch line junction for 3 hours. Presently The Fat Controller Sir Topham Hat arrived. "Why arent you moving Thomas? I am very dissapointed, you are one of my most useful engines!" he said with more than a hint of scolding in his voice. "But Sir, someone has stolen the signs...."

haha only joking (my boy watches a lot of Thomas the Tank engine)
 
So here are the signs I talked about! I believe they're 3mm aluminium railway signs. Probably not as fancy as checker plate but I don't think you can go wrong by saying you have railway signs as a sump guard ;)
View attachment 180741

The plan for the signs is to have the two of them in front of each other, the first sign bolted into the front two mounts and the second sign bolted to the rear two. The size will be cut slightly as they are a bit too wide but it's better to have some to cut off rather than need more to put on. To attach the signs together, the potential is there just to have bolts in the middle, but they may be better riveted together. It always sounds easy to do, but nothing ever seems as easy to execute! :p

You may also see a angle bar with two hook eyes, this is what my dad's friend used on his Sisley a decade ago as a towing bar on the front. It bolts to where the front of the sump is planned to go (I need to make sure the bolt is going to hold all this on!). It was used with the hook eye metal piece facing downwards but he noticed an issue when he went down a hill one time that because it didn't clear far off the ground that it acted as more of a plow... so the idea will be to invert it and have the eye bar facing upwards rather than down. It will just require some (hopefully) simple notches in the metal and then it will fit to the car in a much more efficient way :)

However, I do have more pressing issues to attend to now as my Sisley has decided to reward me after getting it some presents by stalling in between gear changes and at idle. A bit of choke bypassed it for the journey home but I am now going to look at the idle solenoid (credit to Vernon's advice and some old Fiat Forum threads), though probably clean the carb while I'm there if I can as my bet is that it hasn't been cleaned in a long time, if ever... :rolleyes:

My plan consists of something like this:
Carb/idle fix
Prop fix
Driveshaft gaiter fix
Sump guard fit
Fit fog lamps (I have some brackets, and some lamps, so I'm most the way there!)
Tow bar fit

And probably lots of other stuff I've forgotten. But I have plans for the future as well! Such as:
Fix/replace parts of the interior
Fix a faulty lock
Remove rust
Bullbars/light grilles?
Repaint the whole car? (I was thinking a military theme but I'm open to suggestions :D)

Most of these are probably a long way away. Slowly but surely, I want to make the Four by Fork properly awesome :cool:

Not too hot on the 4x4 stuff (hence sat out on all the technical stuff been going on here) but I'd guess that for a sump guard your 3mm alu signs will make a better sump guard than chequer plate as it'll slide over things it hits rather than the friction caused by the chequer plate? Likewise for the join if the front plate goes slightly over the rear it should be less likely to catch (at least while travelling forward), rather than the other way around, I guess ideally as smooth a join as possible.

I was originally considering some nato/matt olive green vinyl for our adventure panda but I think Jenny has ideas on more of a purple theme and I'm all cool with that:D.
 
1988 Fiat Panda 4x4 Sisley "Four by Fork"

Owen a good plan would be to take off the sump guard make a cardboard template off down to your local sheet metalworkers get one cut and folded out of 2mm steel smooth bolt in place refit sump guard quick easy £30 proper job no chequer plate on the out side smooth zinctec sorted
Ali plate is too soft it will gouge then tear steel all the way
 
Last edited:
Thomas had been sitting silently looking sad at the new branch line junction for 3 hours. Presently The Fat Controller Sir Topham Hat arrived. "Why arent you moving Thomas? I am very dissapointed, you are one of my most useful engines!" he said with more than a hint of scolding in his voice. "But Sir, someone has stolen the signs...."

haha only joking (my boy watches a lot of Thomas the Tank engine)
I was really wondering what was going on when I started reading that... but then it all made sense, haha ;)
Not too hot on the 4x4 stuff (hence sat out on all the technical stuff been going on here) but I'd guess that for a sump guard your 3mm alu signs will make a better sump guard than chequer plate as it'll slide over things it hits rather than the friction caused by the chequer plate? Likewise for the join if the front plate goes slightly over the rear it should be less likely to catch (at least while travelling forward), rather than the other way around, I guess ideally as smooth a join as possible.

I was originally considering some nato/matt olive green vinyl for our adventure panda but I think Jenny has ideas on more of a purple theme and I'm all cool with that:D.
The joints aren't exactly fun, but it has to be done! I'm not sure how much friction you will get with checker plates, I'd imagine while it does have a rougher surface it probably doesn't make too big a difference because it's not a very large thing sticking out - the sump guard will have to be properly bent so that the front plate is only slightly over the rear one, which will be enough to glide over anything forwards and hopefully not be in the way when going backwards!

Funny my dad's friend suggested nato green as well ;) I think I'll go for paint rather than vinyl as the body needs some rust treatment anyway (little bits on doors/wings/boot)
Owen a good plan would be to take off the sump guard make a cardboard template off down to your local sheet metalworkers get one cut and folded out of 2mm steel smooth bolt in place refit sump guard quick easy £30 proper job no chequer plate on the out side smooth zinctec sorted
Ali plate is too soft it will gouge then tear steel all the way
I considered doing something like this though couldn't find any proper metalworkers locally so when I heard that my dad's friend has this plate then it seemed like a good opportunity. He had some steel but it was like a large mesh so it wouldn't have worked as it would let in any protruding rocks etc. So you think that 3mm aluminium is not going to do the job? I did have a look around and people have used similar for sump guards before


I'd appreciate it if anyone else has an opinion on the 3mm aluminium as well! It is not first on the list so I've got time to consider the use of the signs or finding some other sheet
 
Order some on line but Cutting it would be s problem. a problem for you really it best to get s large area covered and also bring it up the front to aid sliding and prevent water and mud being thrown directly into the bay
 
Order some on line but Cutting it would be s problem. a problem for you really it best to get s large area covered and also bring it up the front to aid sliding and prevent water and mud being thrown directly into the bay
Bring it up to the front as in attaching it where the number plate goes as well?

Another idea as well... could the aluminium guard be made as I suggested and then a steel sheet riveted to the underneath of the aluminium sheet?
 
No rivets it has to be bolted though or tapped into the sump guard with 5.5 mm self drilling self taperers into the struts got to be good as. The panda will try to rip it off
 
Another idea as well... could the aluminium guard be made as I suggested and then a steel sheet riveted to the underneath of the aluminium sheet?

Aluminium and steel really do not mix well. Avoid contact where possible and where it is unavoidable make sure the paint/finish is good and thick and ideally joins are separated (rubber washers etc.). It's the reason the floors in land rovers turn to dust where they go over cross-members, the paint wears through and then the steel and aluminium react.
 
Aluminium and steel really do not mix well. Avoid contact where possible and where it is unavoidable make sure the paint/finish is good and thick and ideally joins are separated (rubber washers etc.). It's the reason the floors in land rovers turn to dust where they go over cross-members, the paint wears through and then the steel and aluminium react.
good point
 
What AndyPanda4x4 has on his car seems to work very well to me, I'm sure Andy would agree...


Five 10mm thick and roughly 50mm wide flat bars welded to the original guard. Incredibly strong and pretty impossible to do any damage to, also unlike a flat plate it will not trap mud and stones etc and does not restrict air flow around the bottom of the engine.
 
Back
Top