IMG_20141010_172517.jpg

Panda (Classic) Digger the Yellow 4x4

Introduction

So, I've been after a 4x4 for using on the rough stuff for a while, and today I've finally got one:D

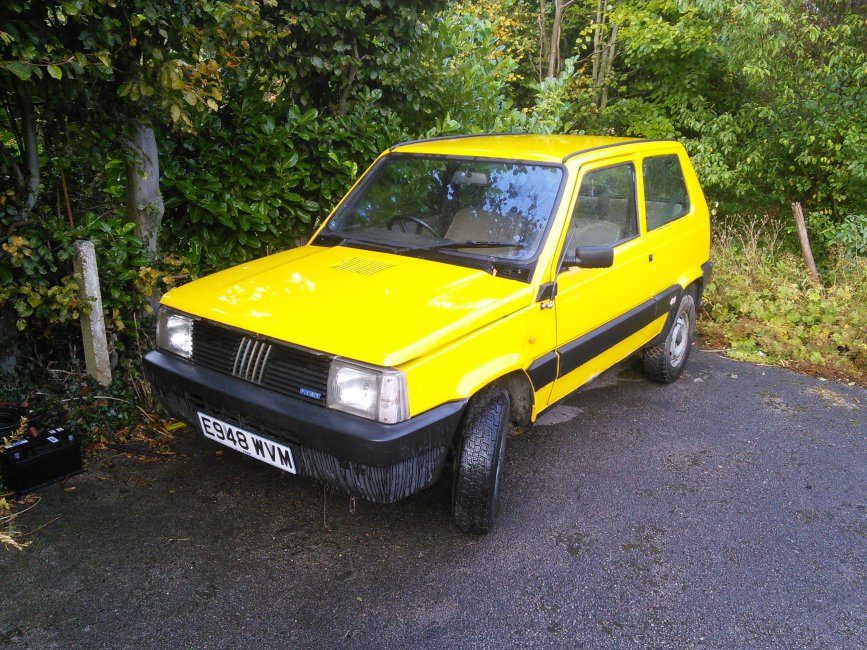
Let me introduce Digger:


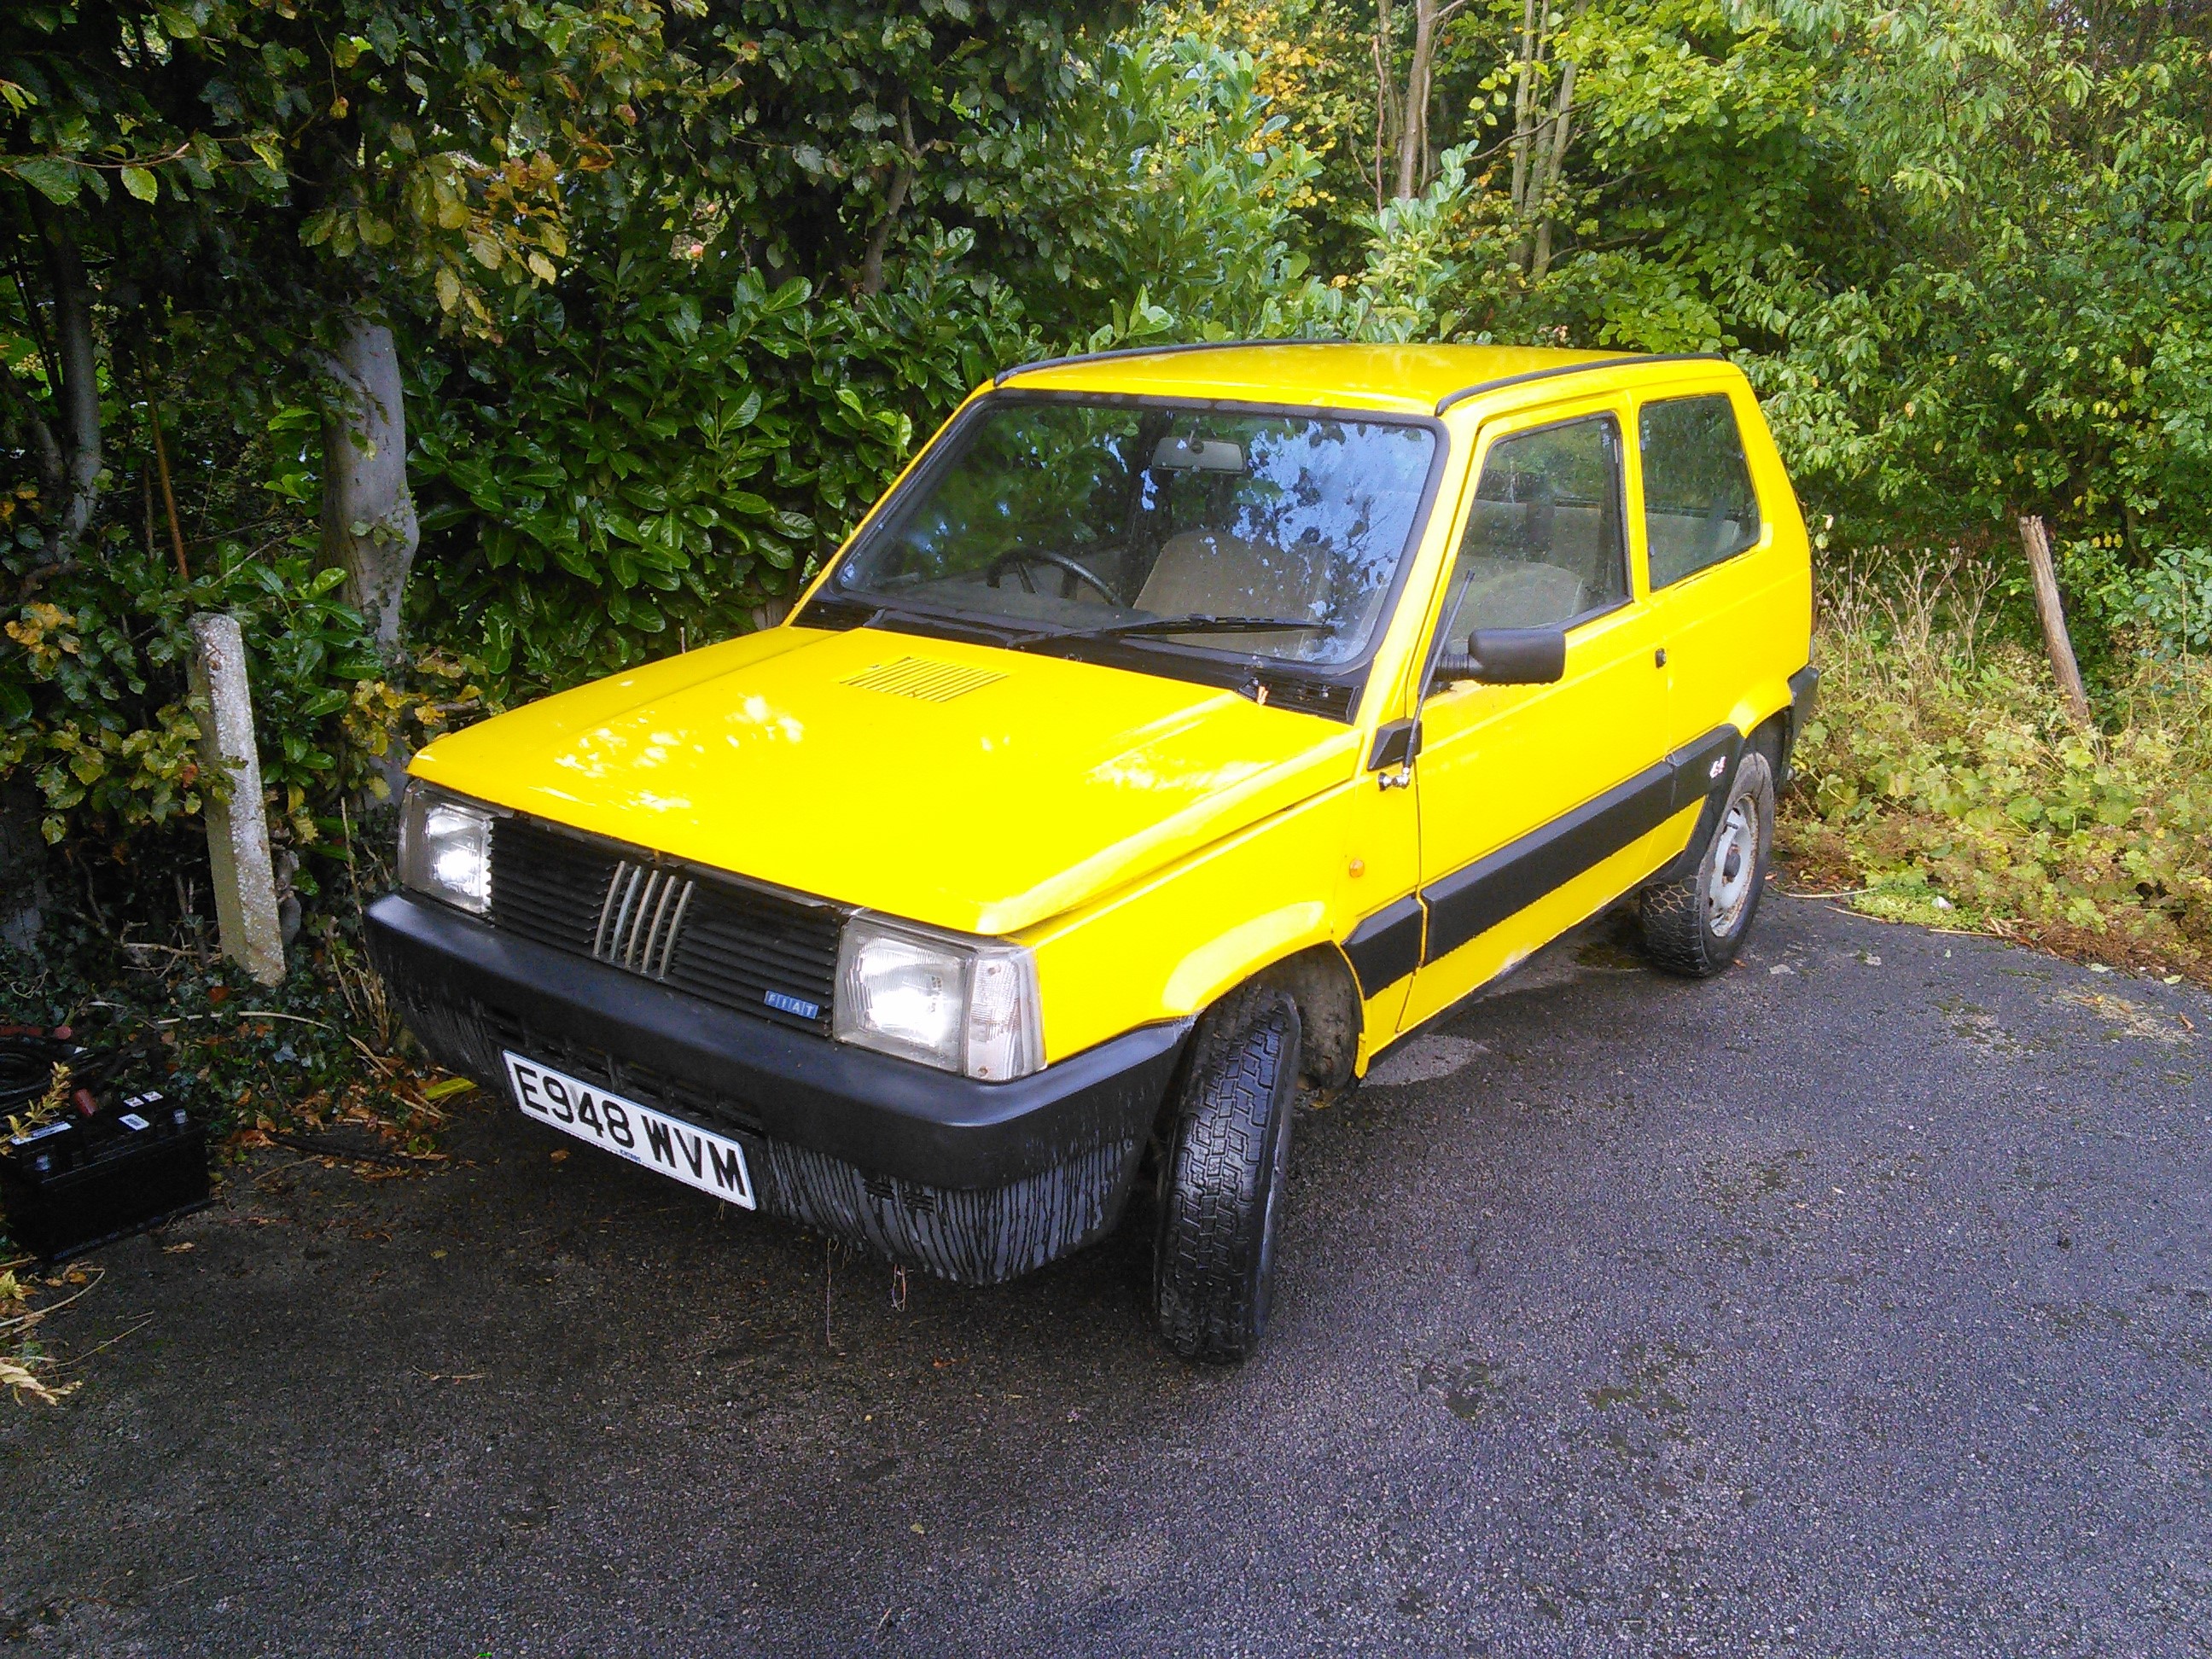
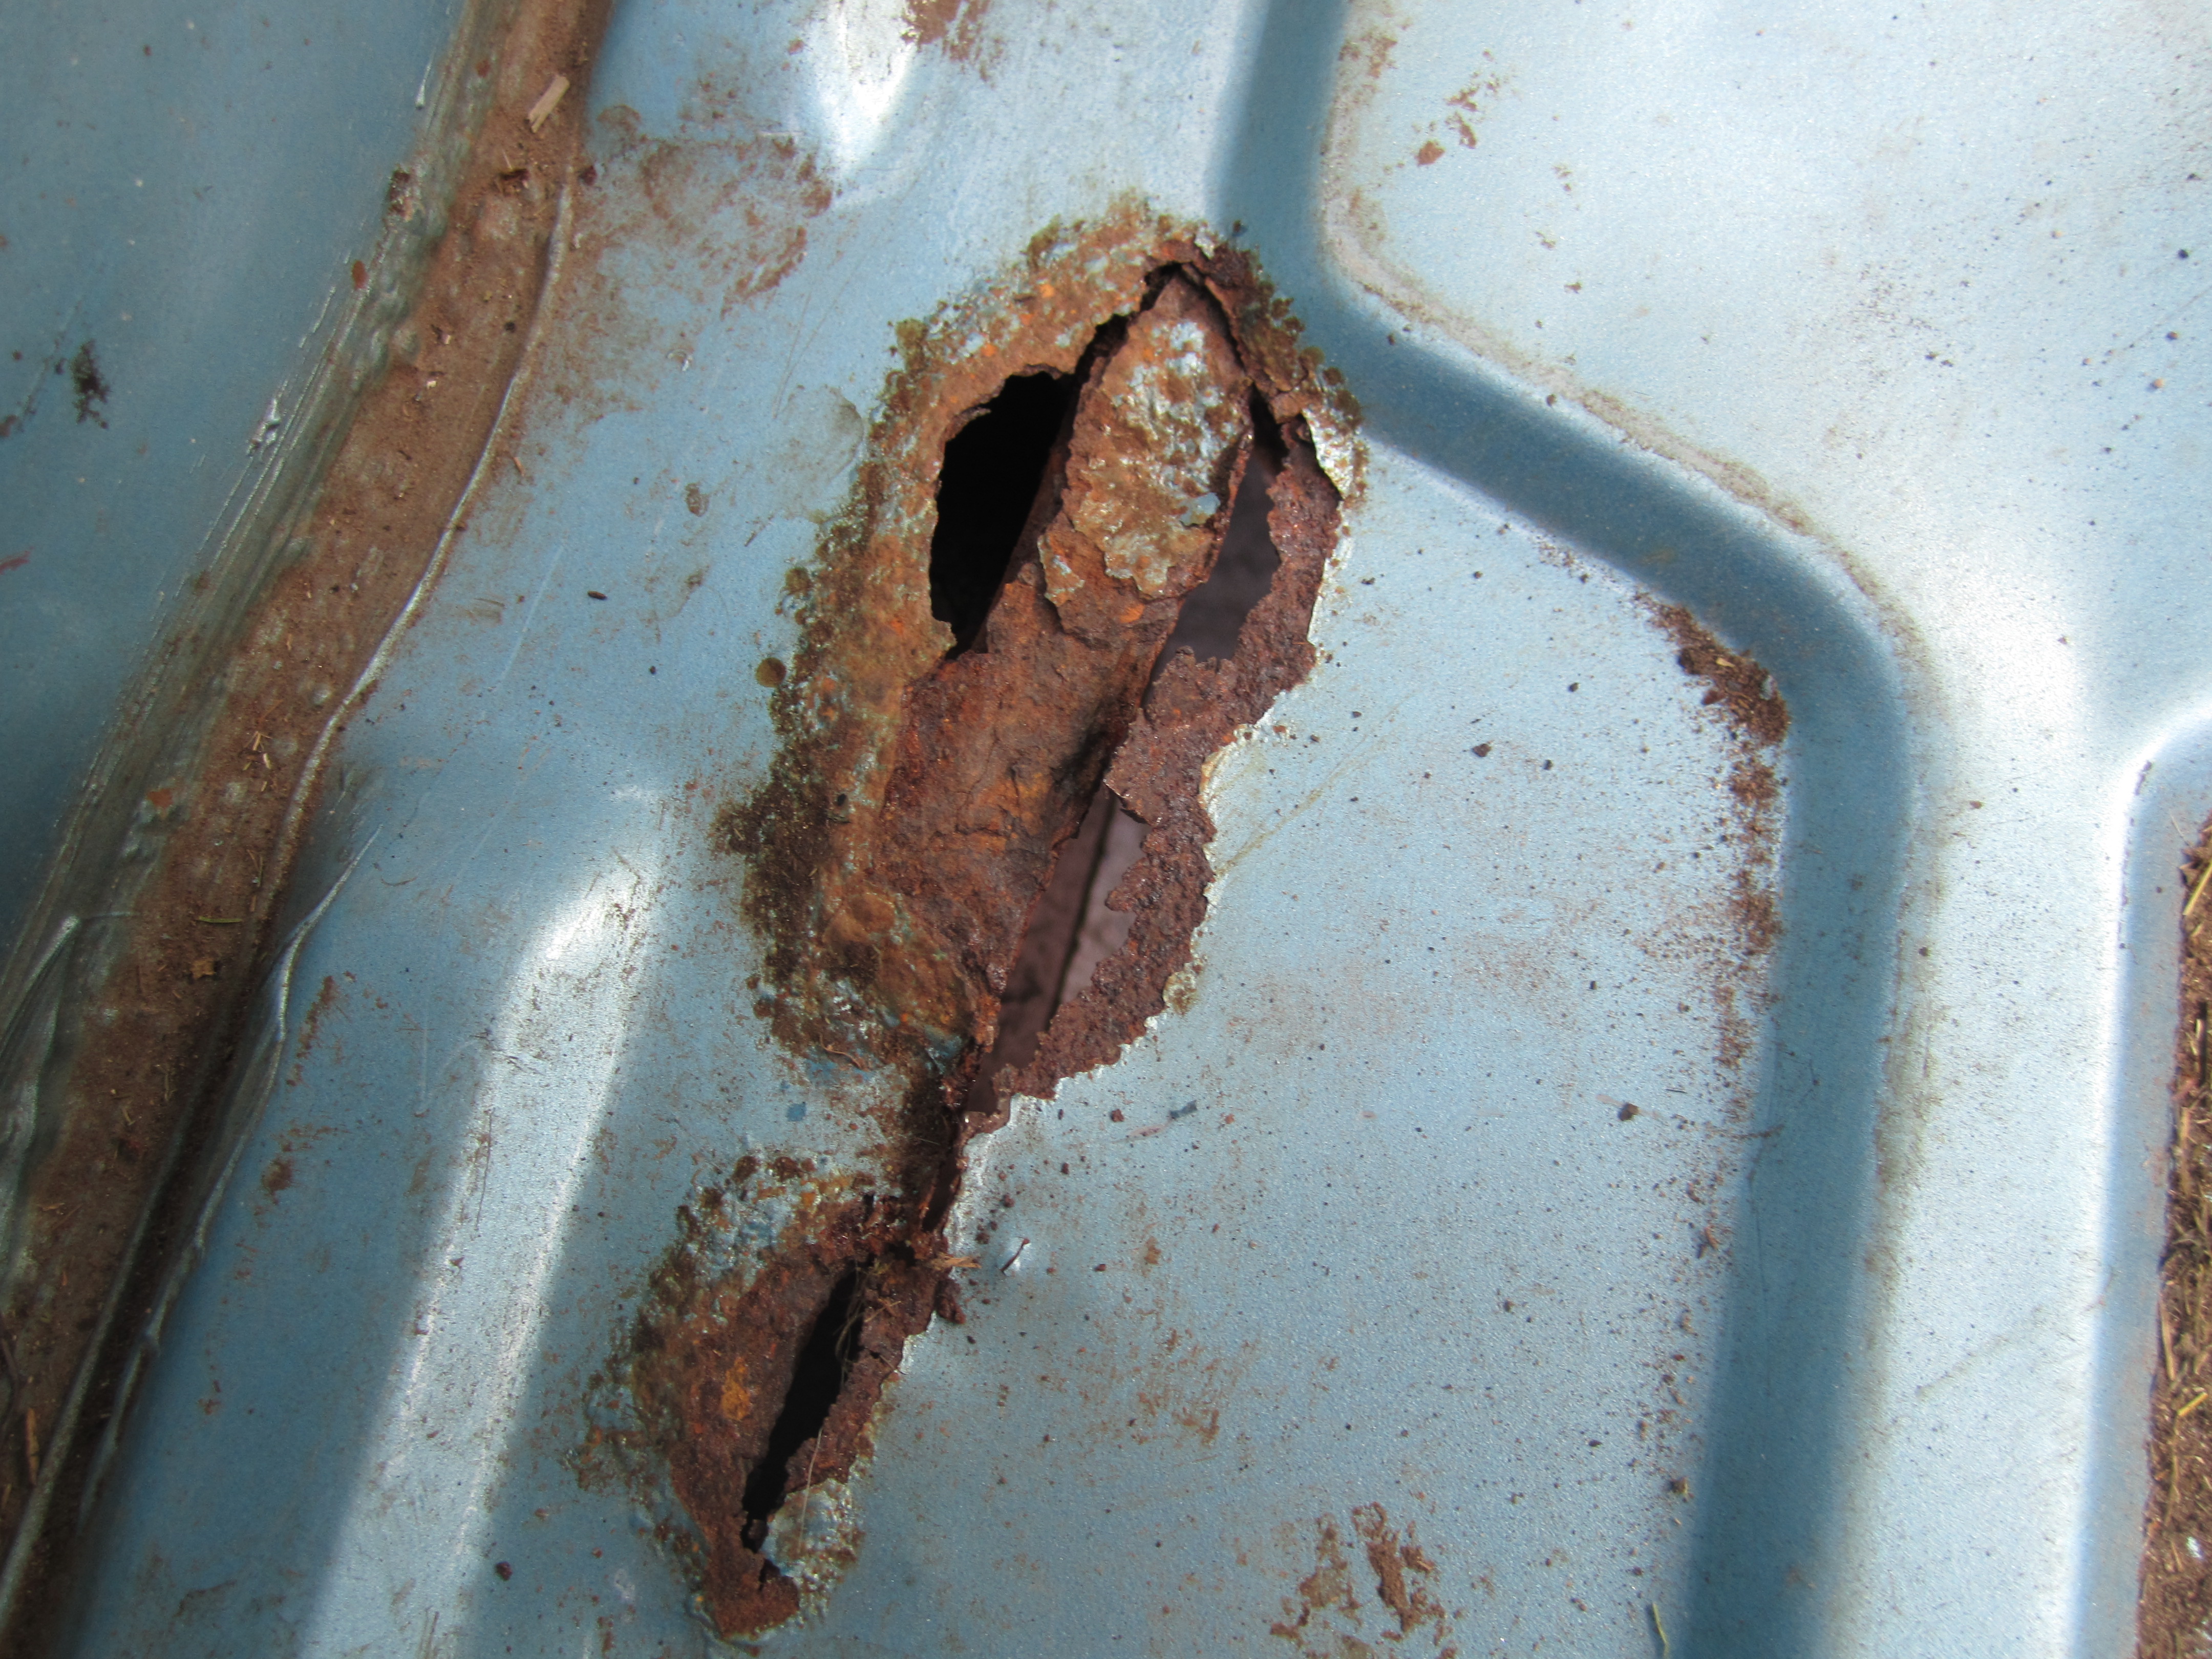
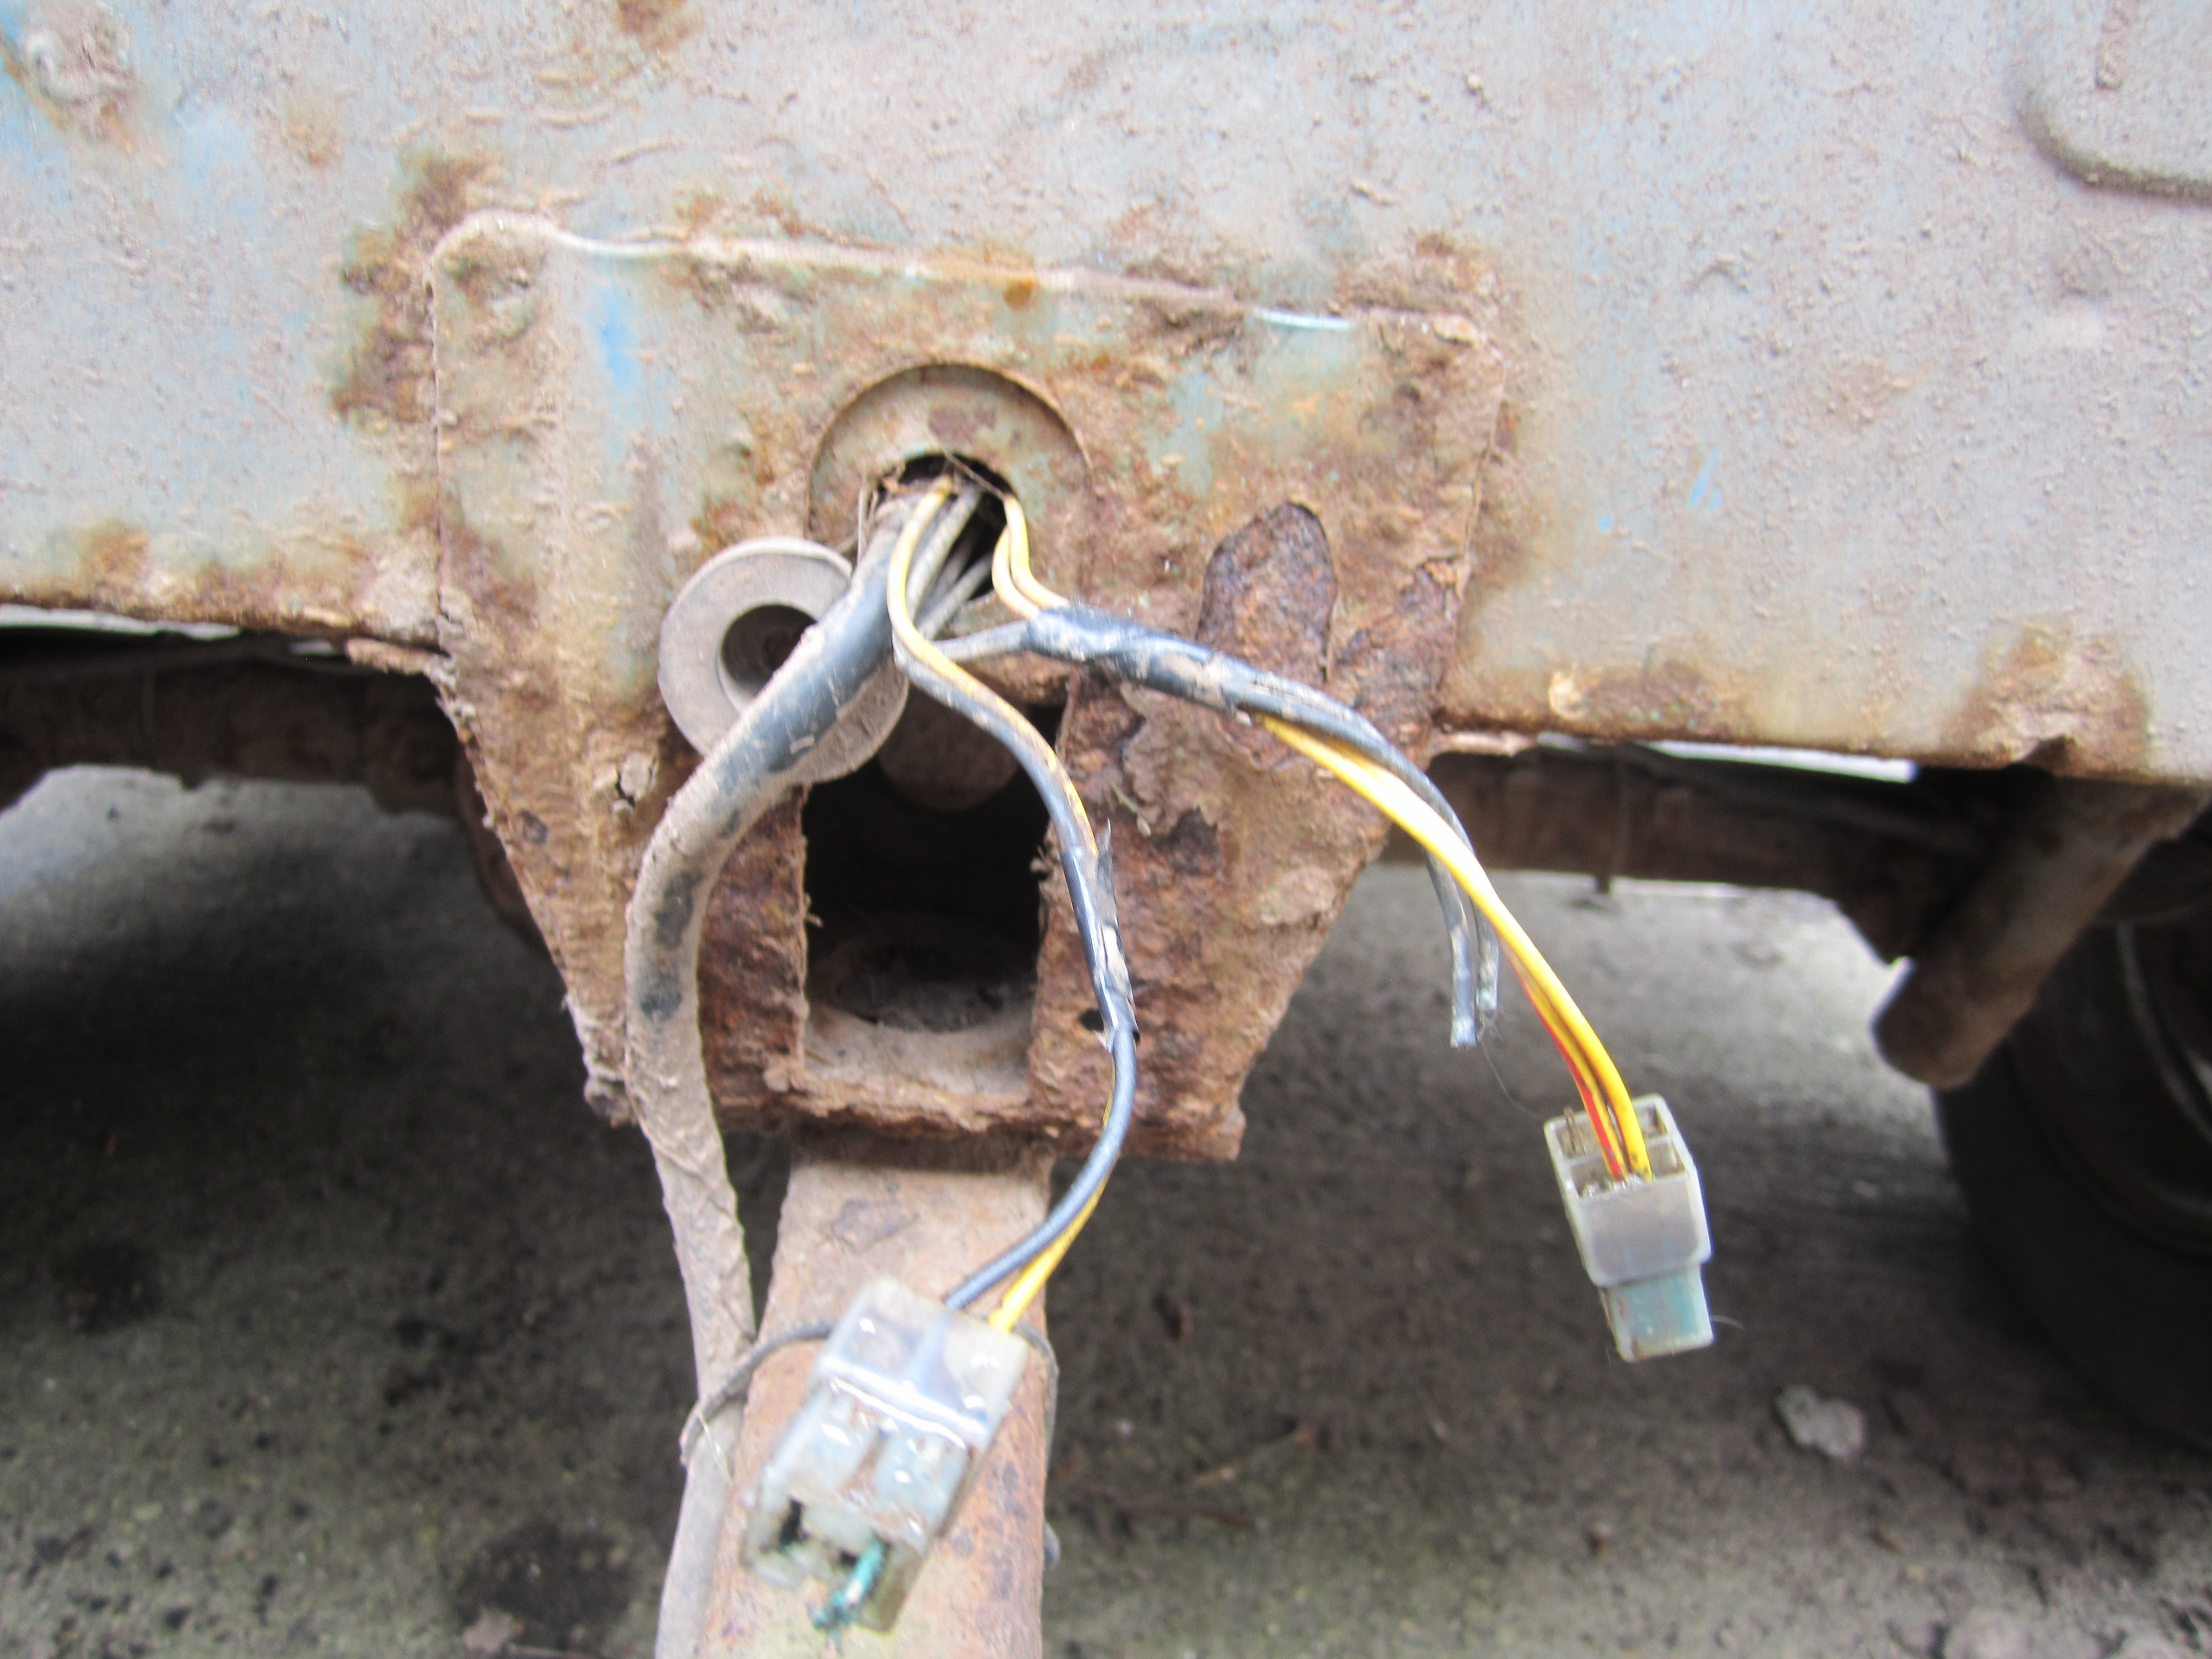
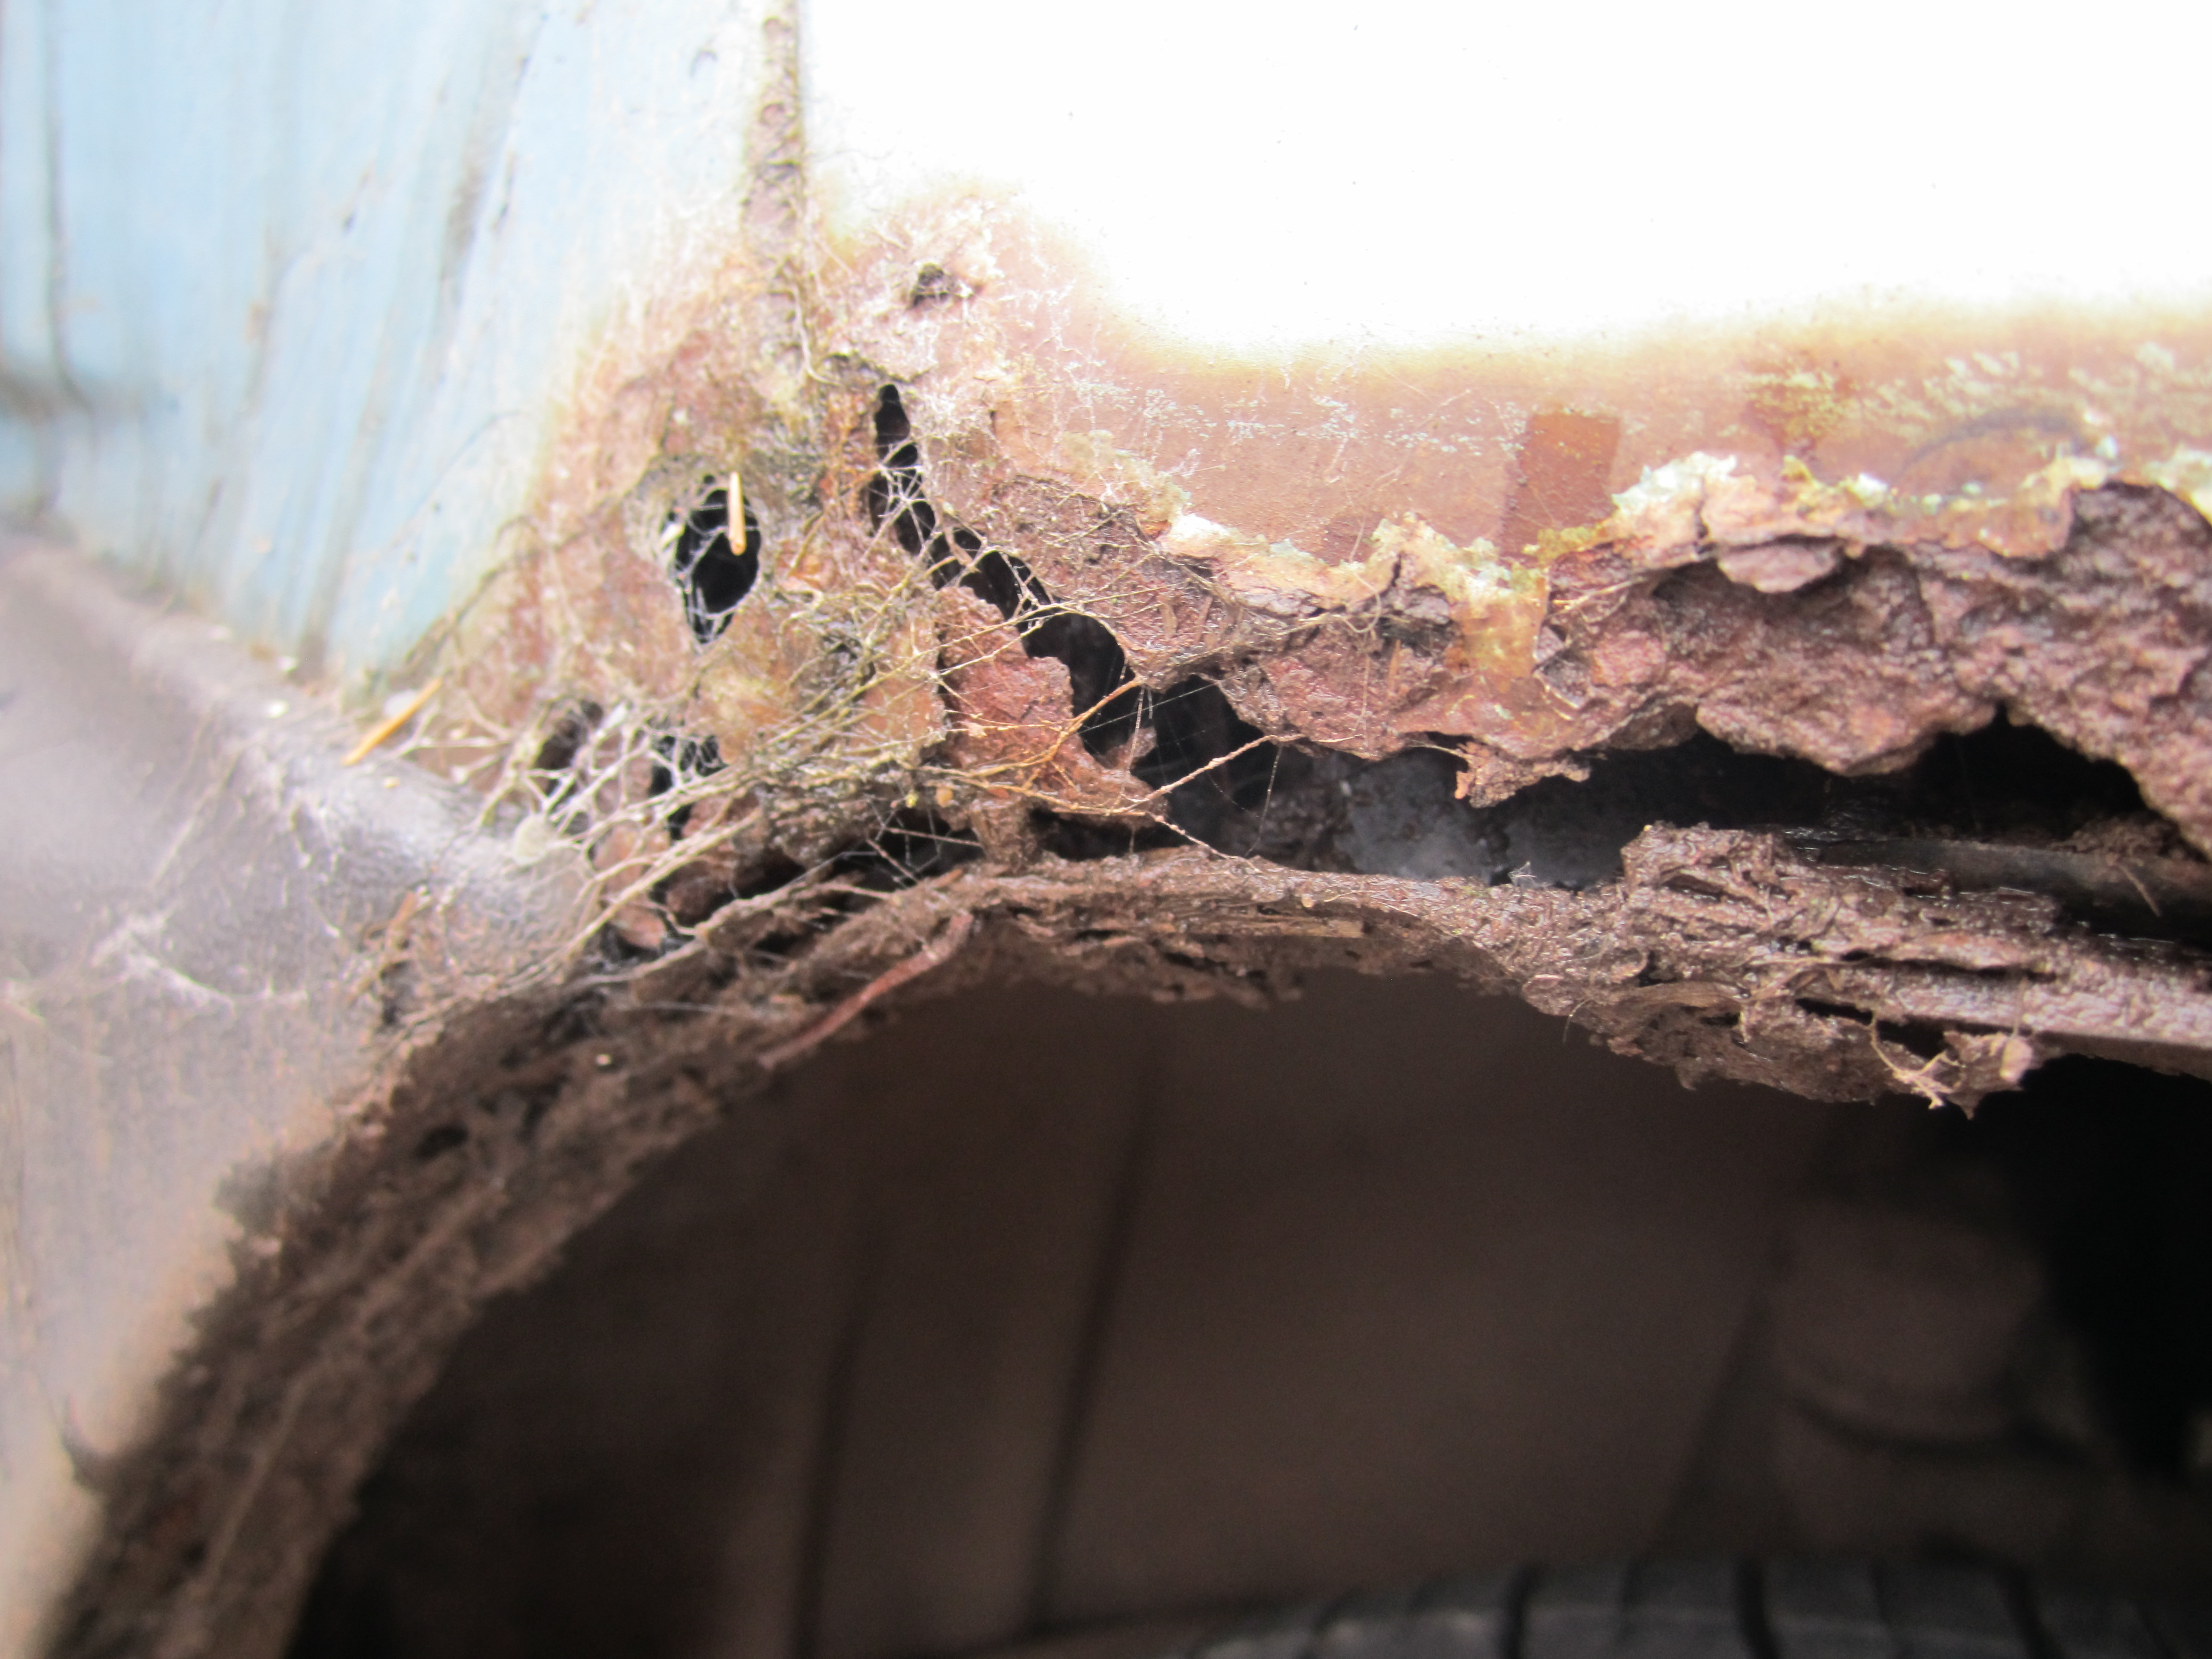
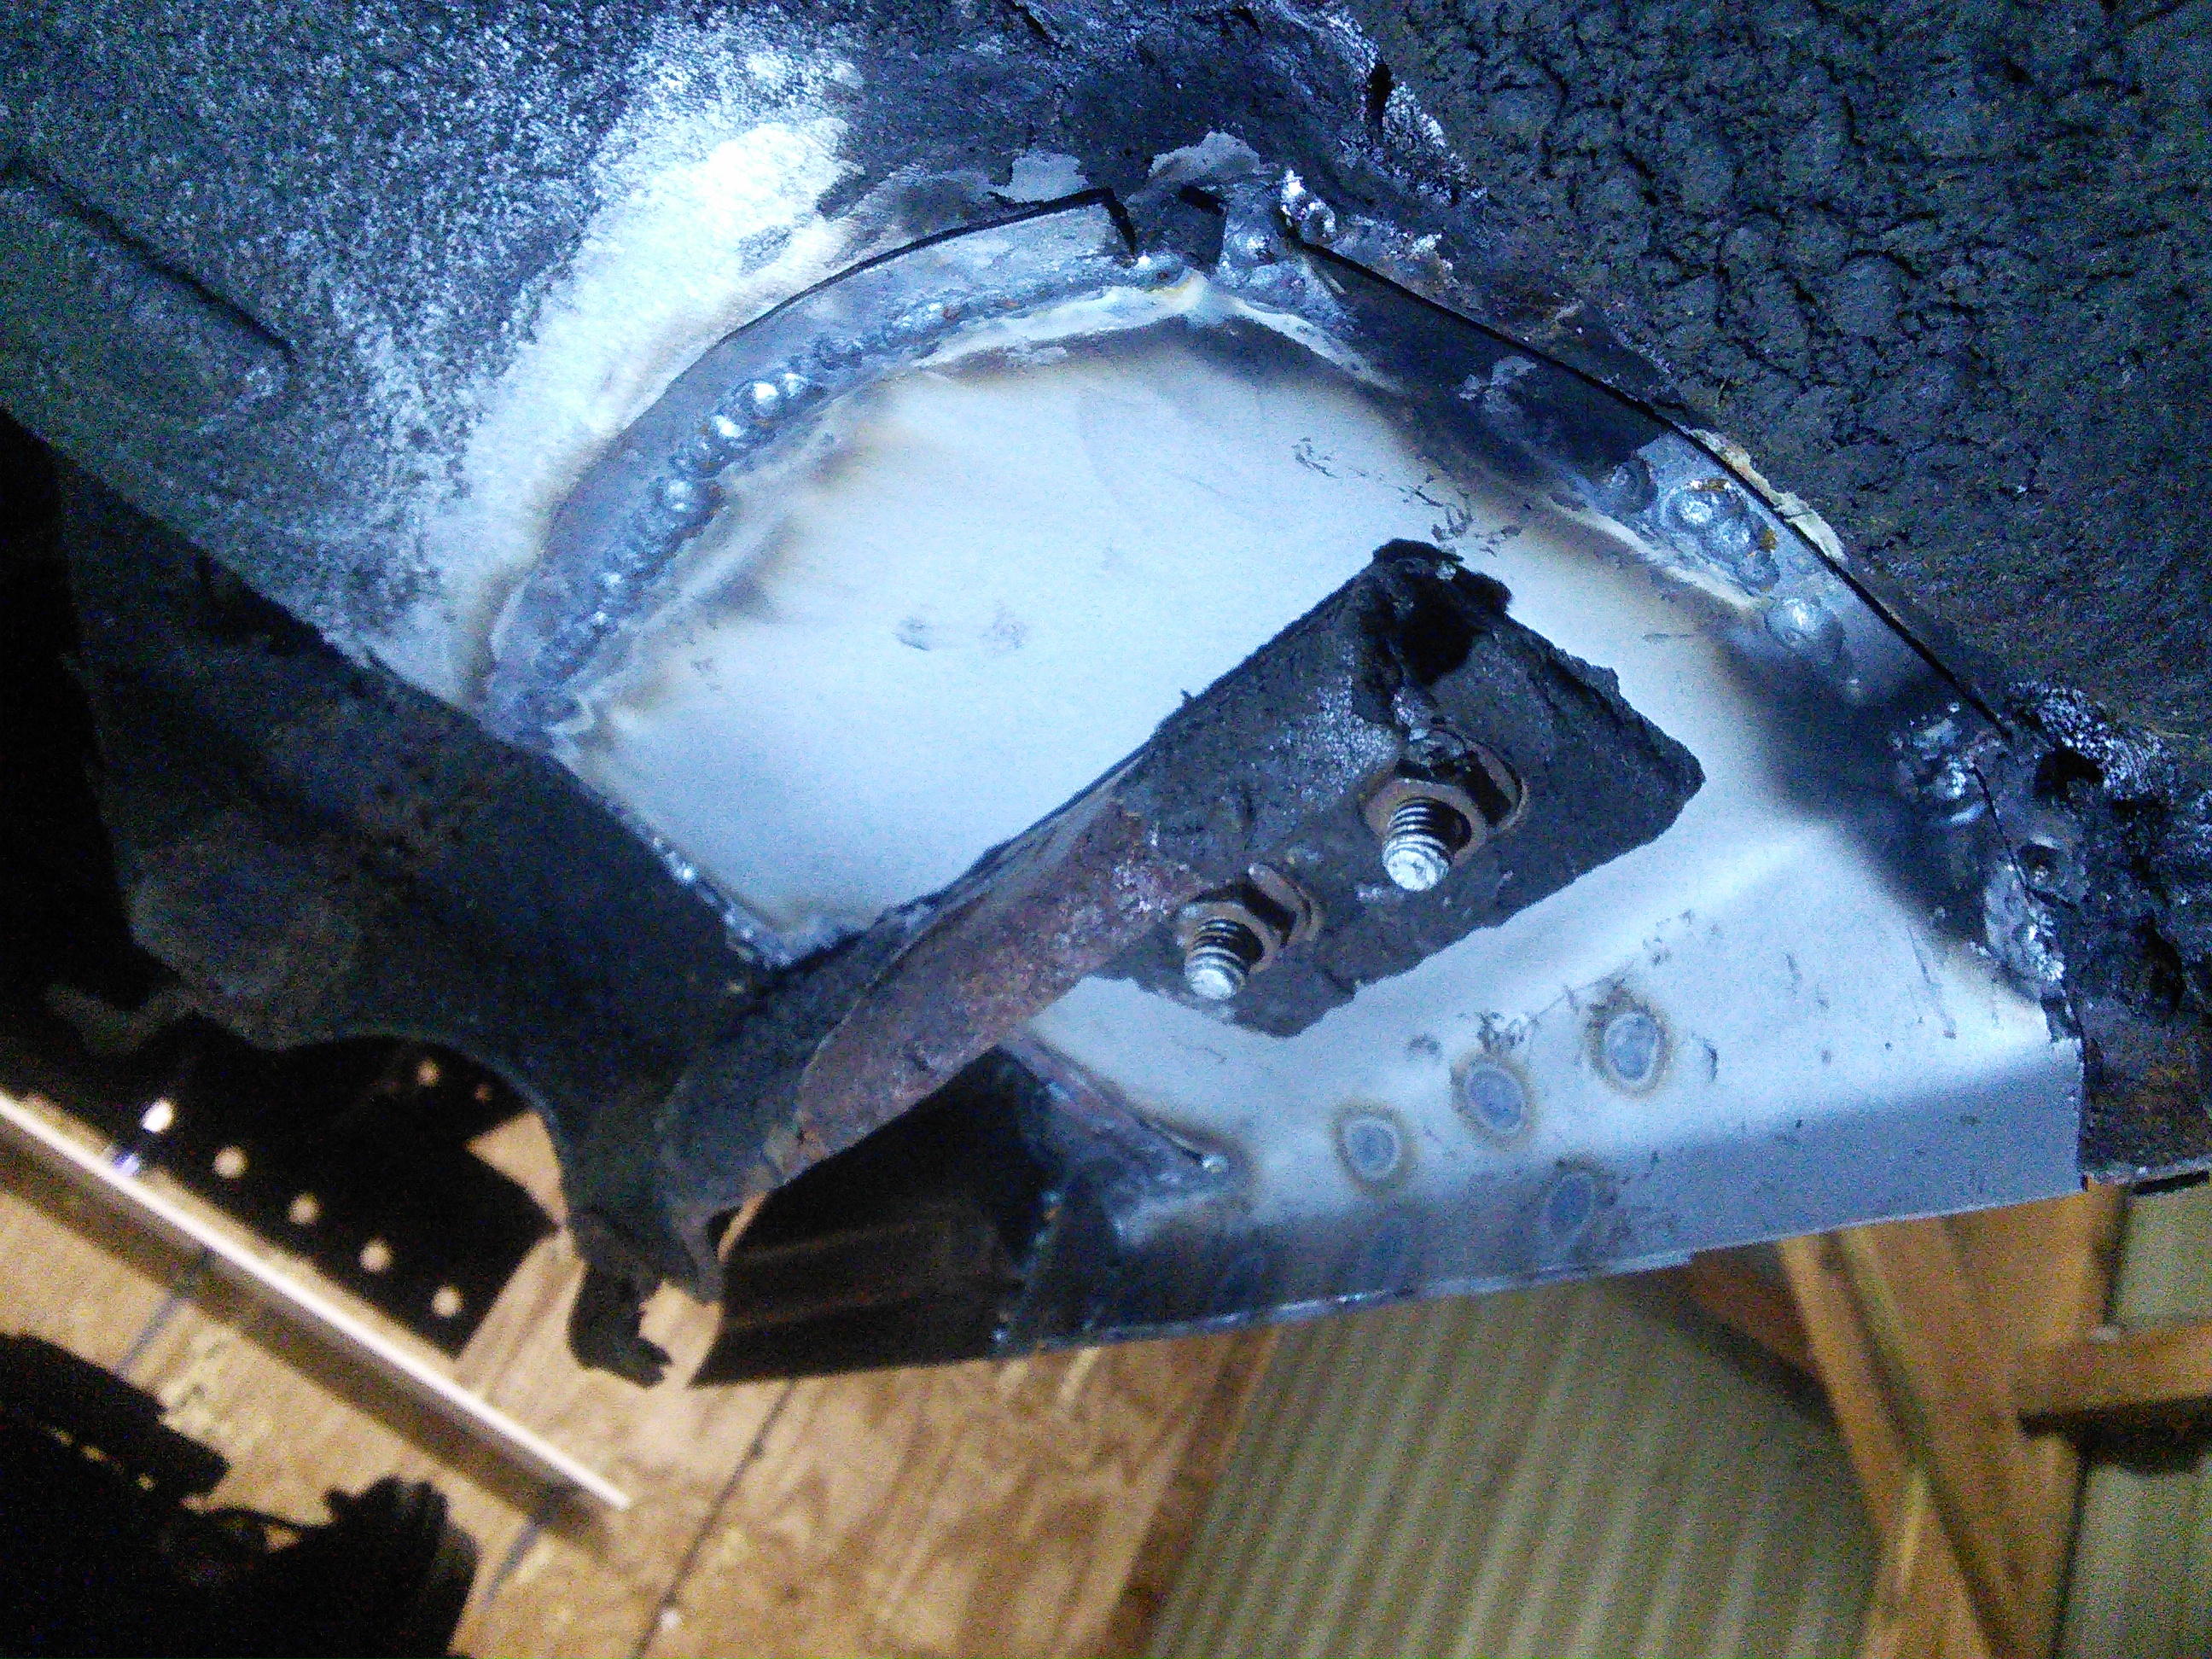
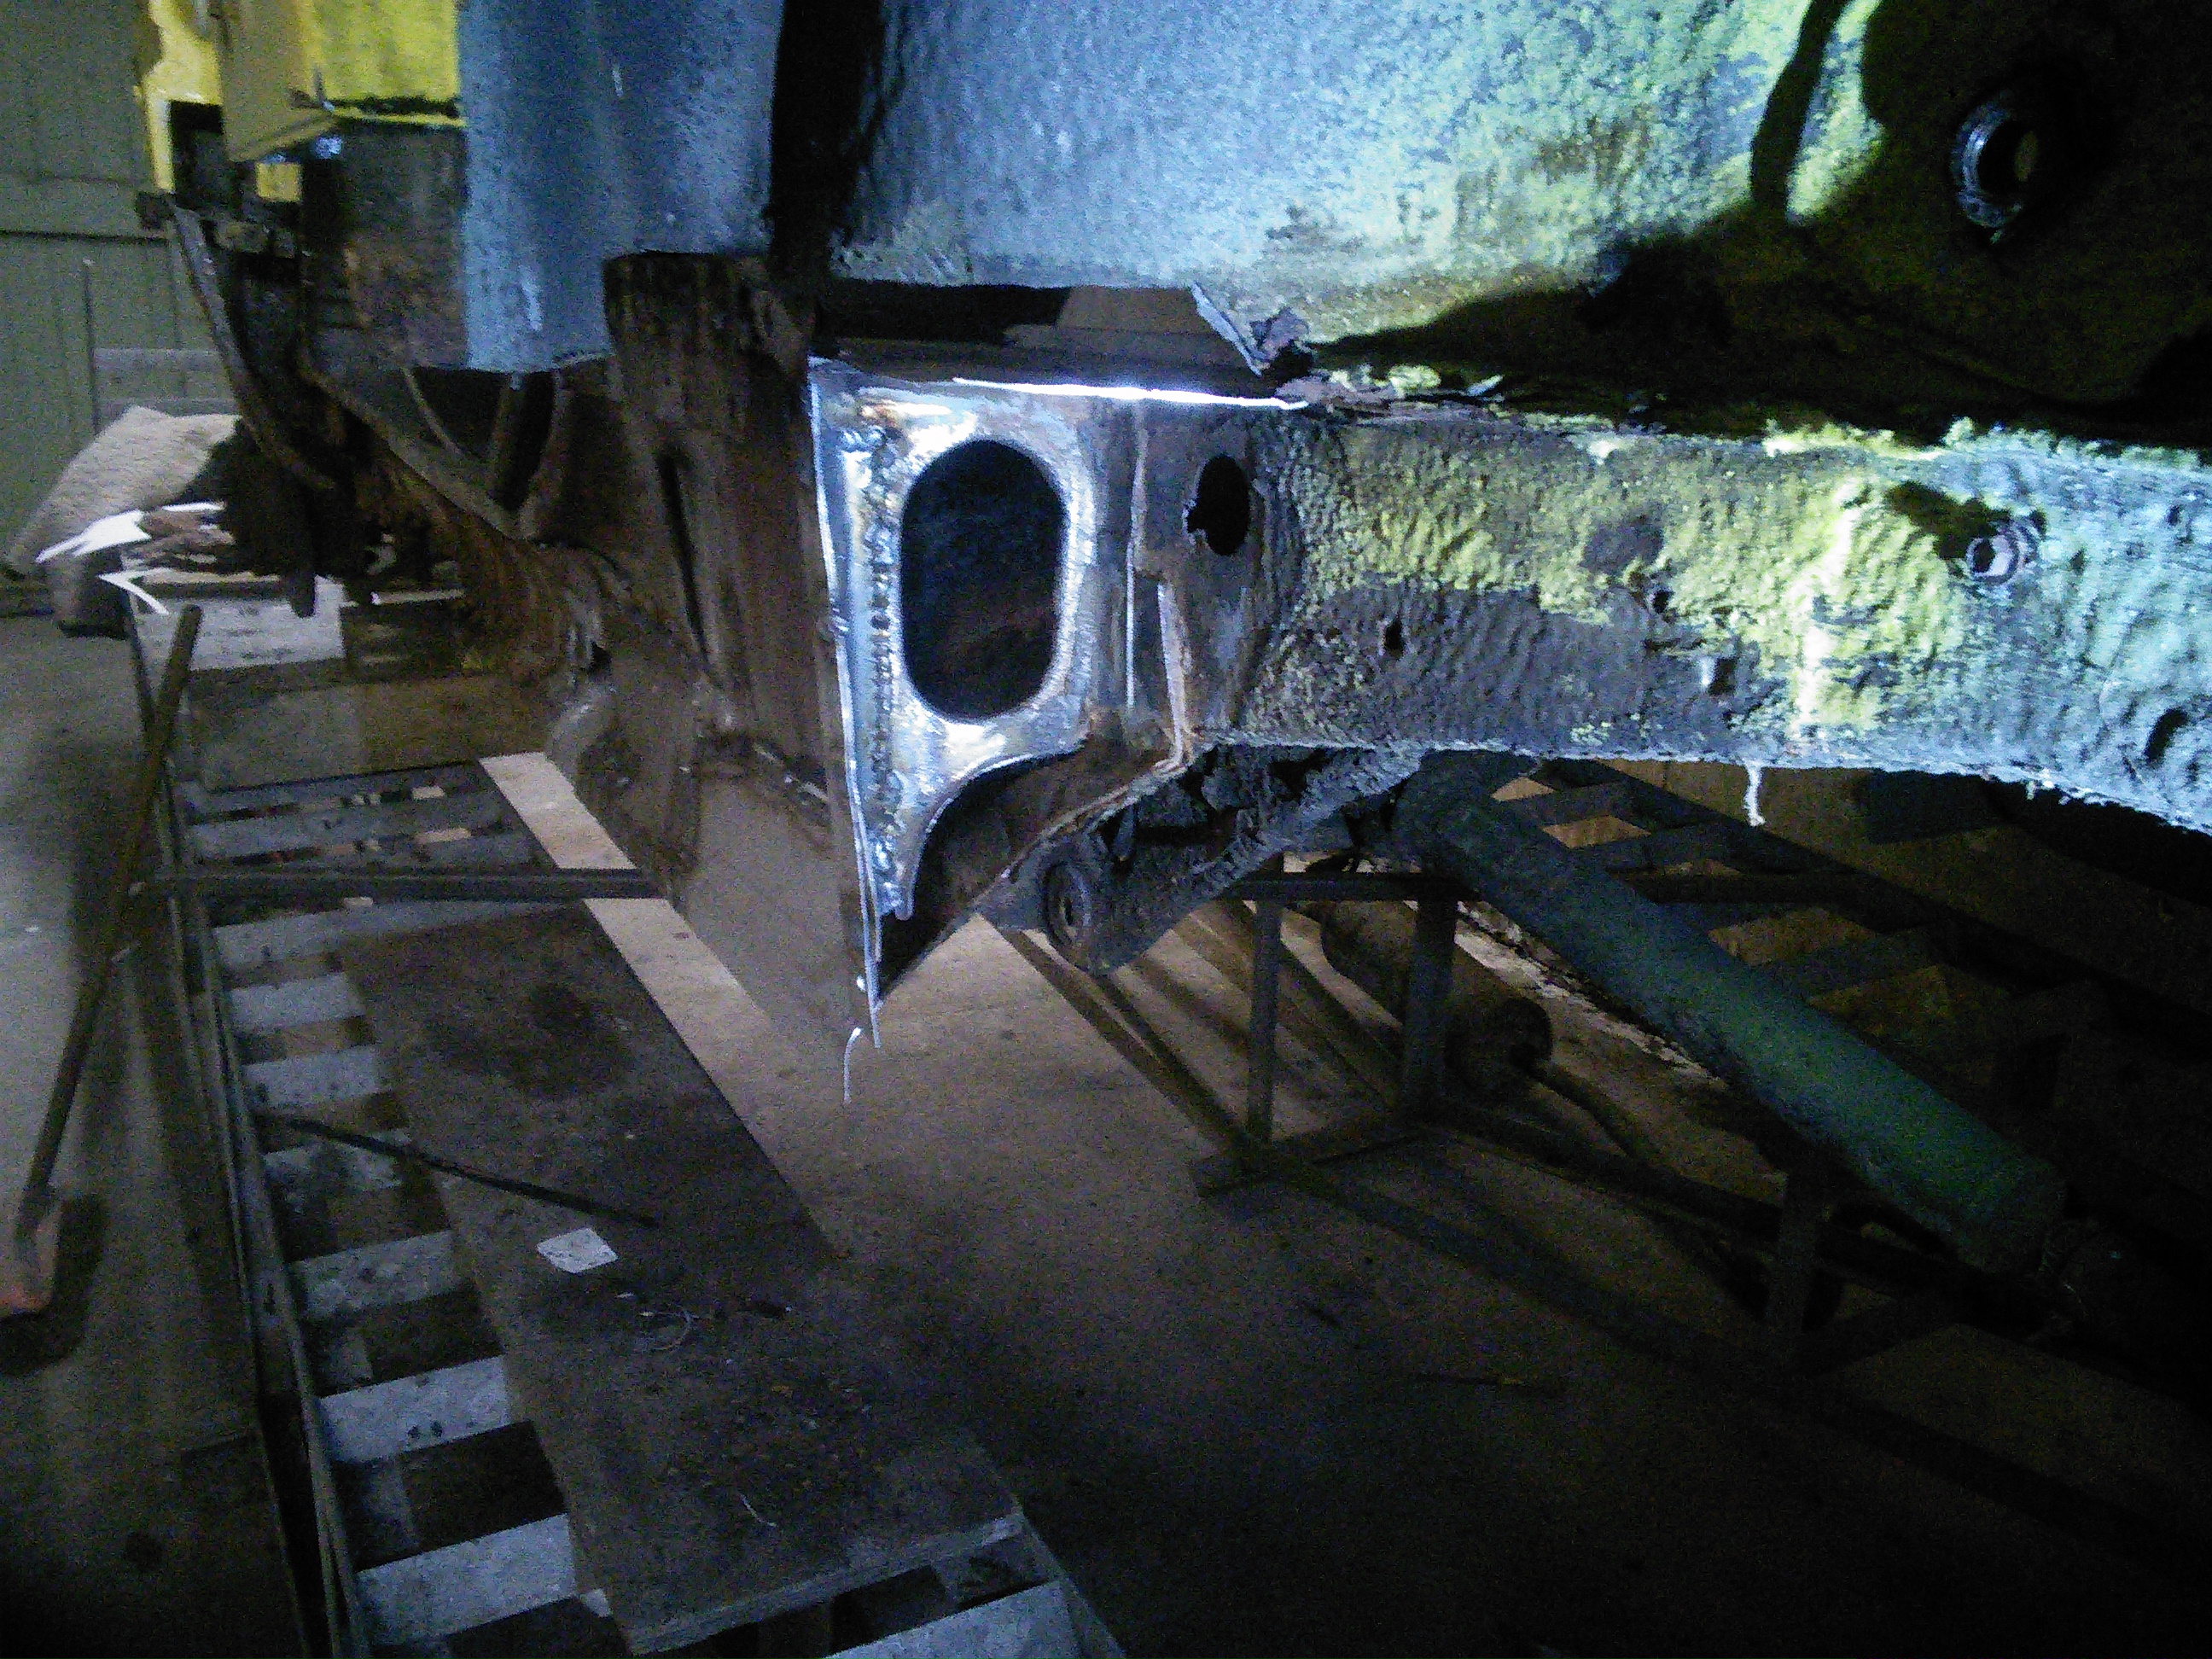
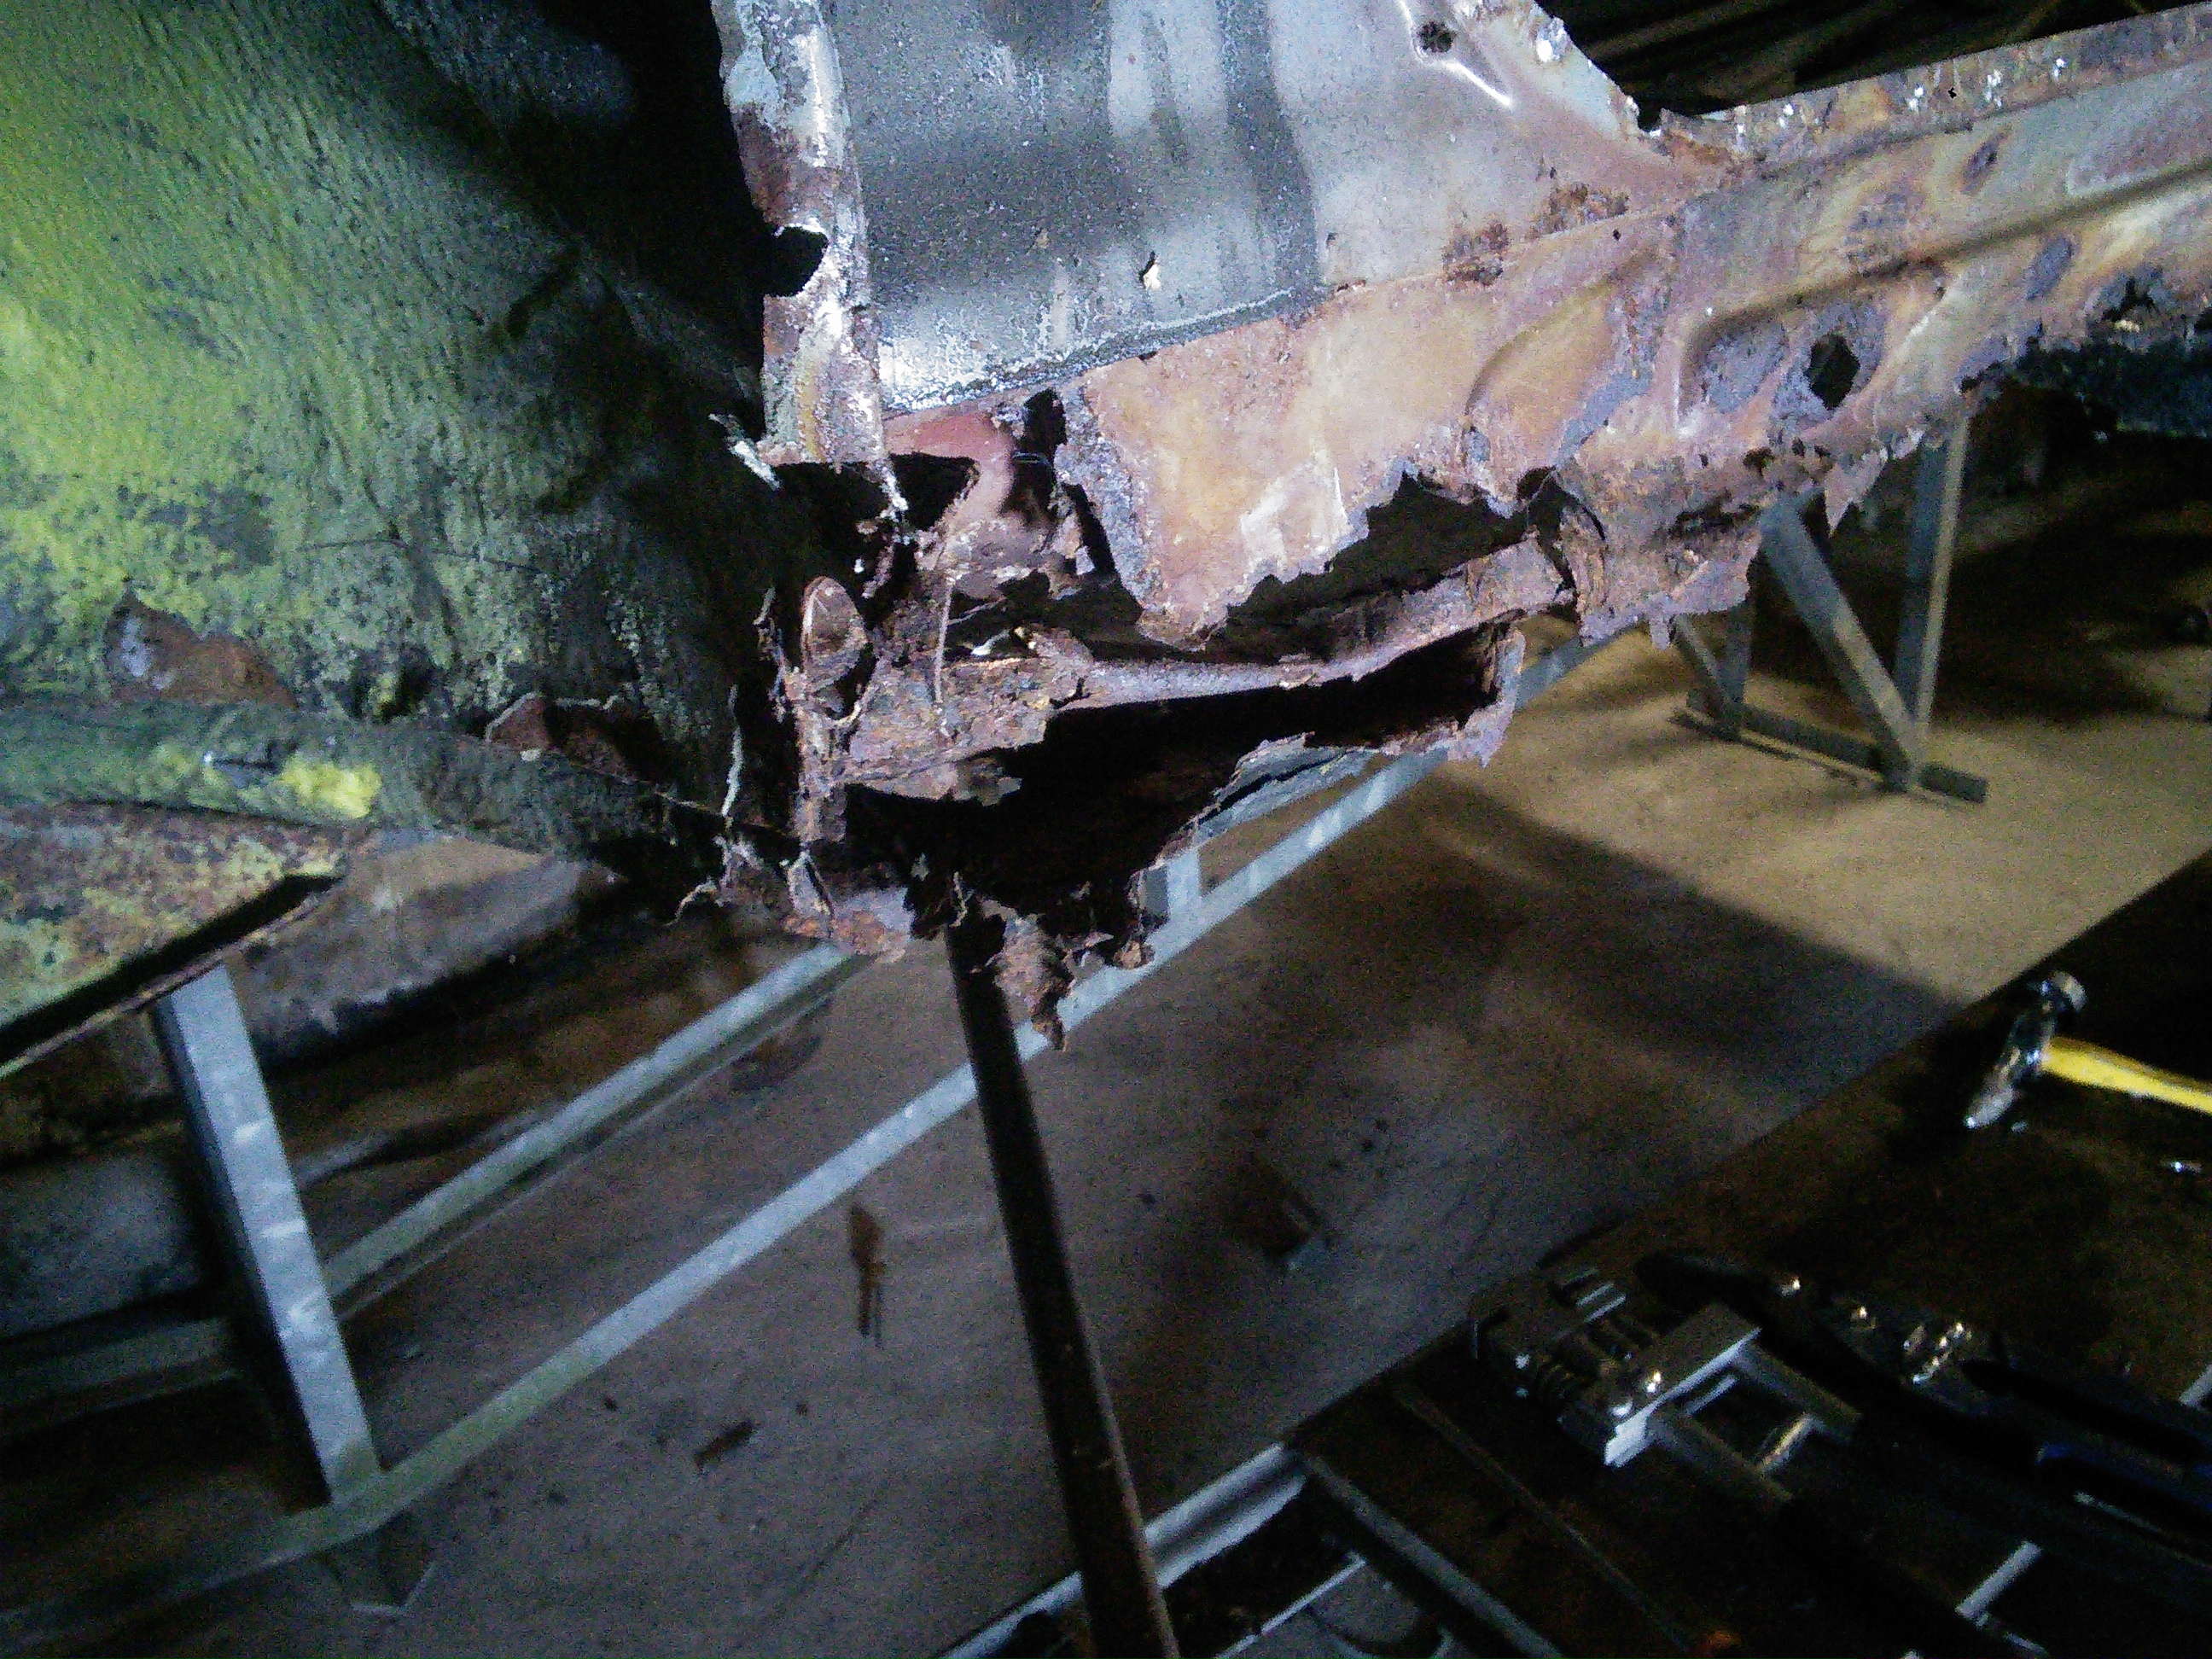
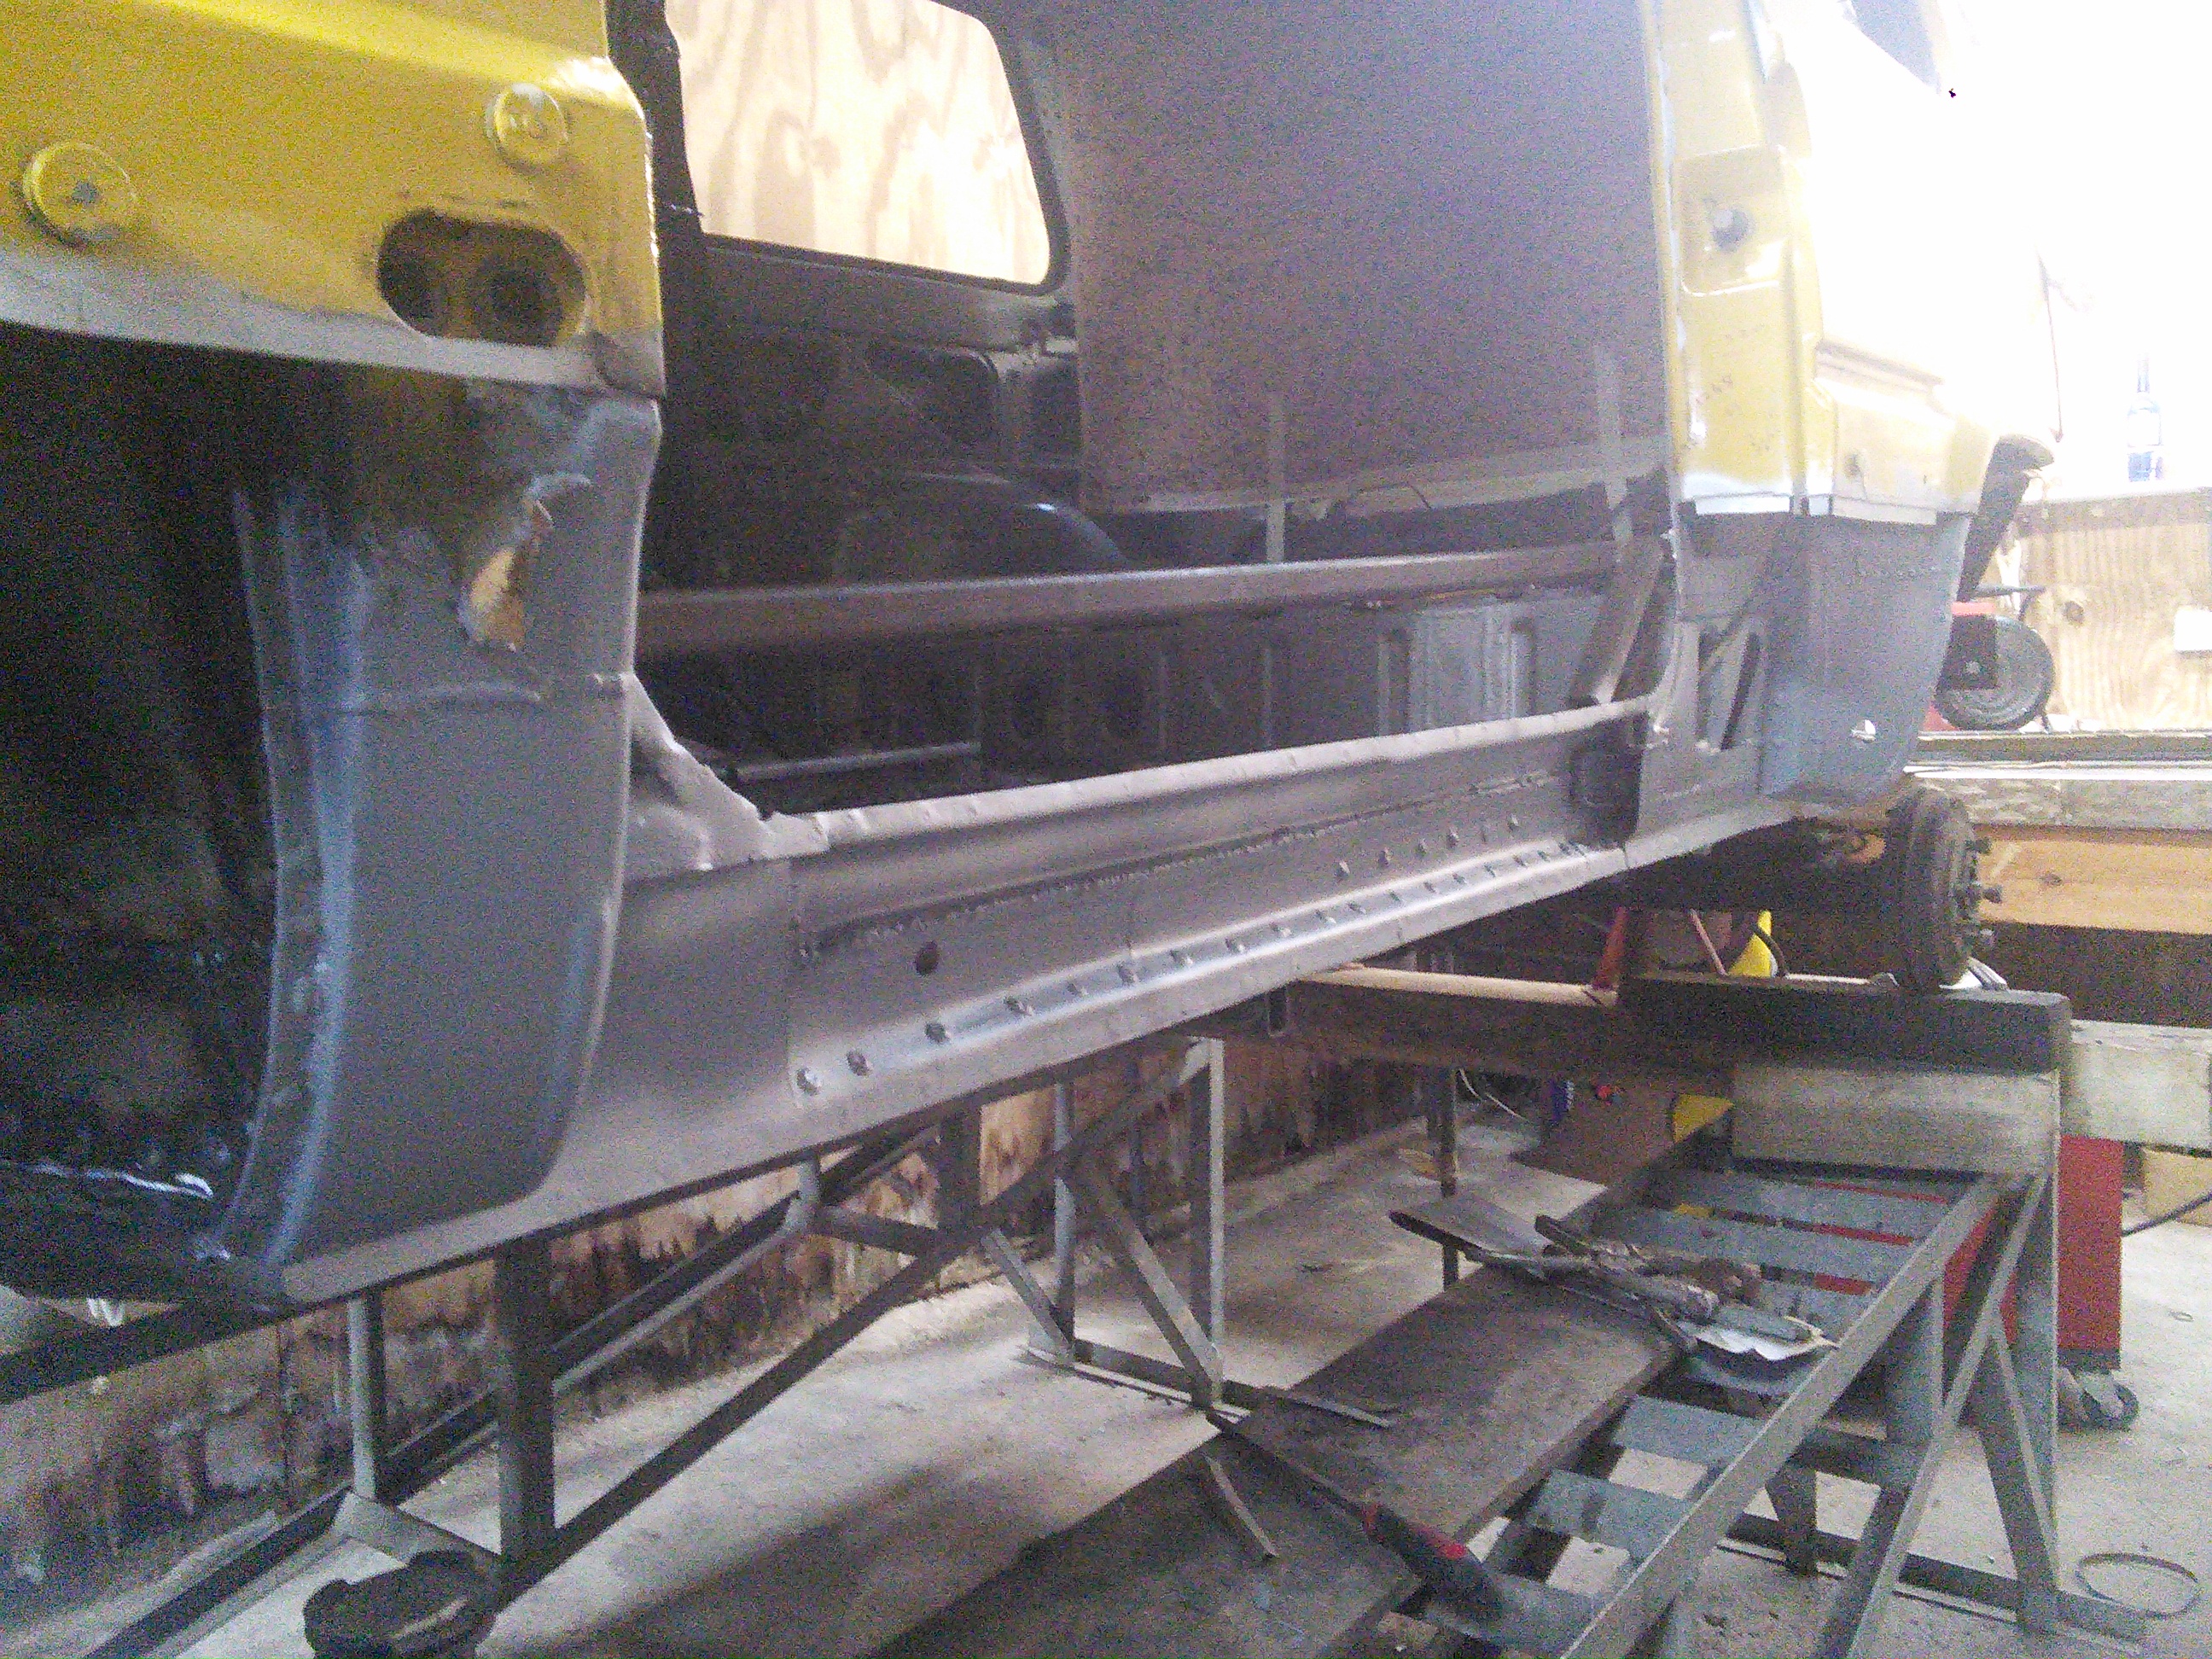
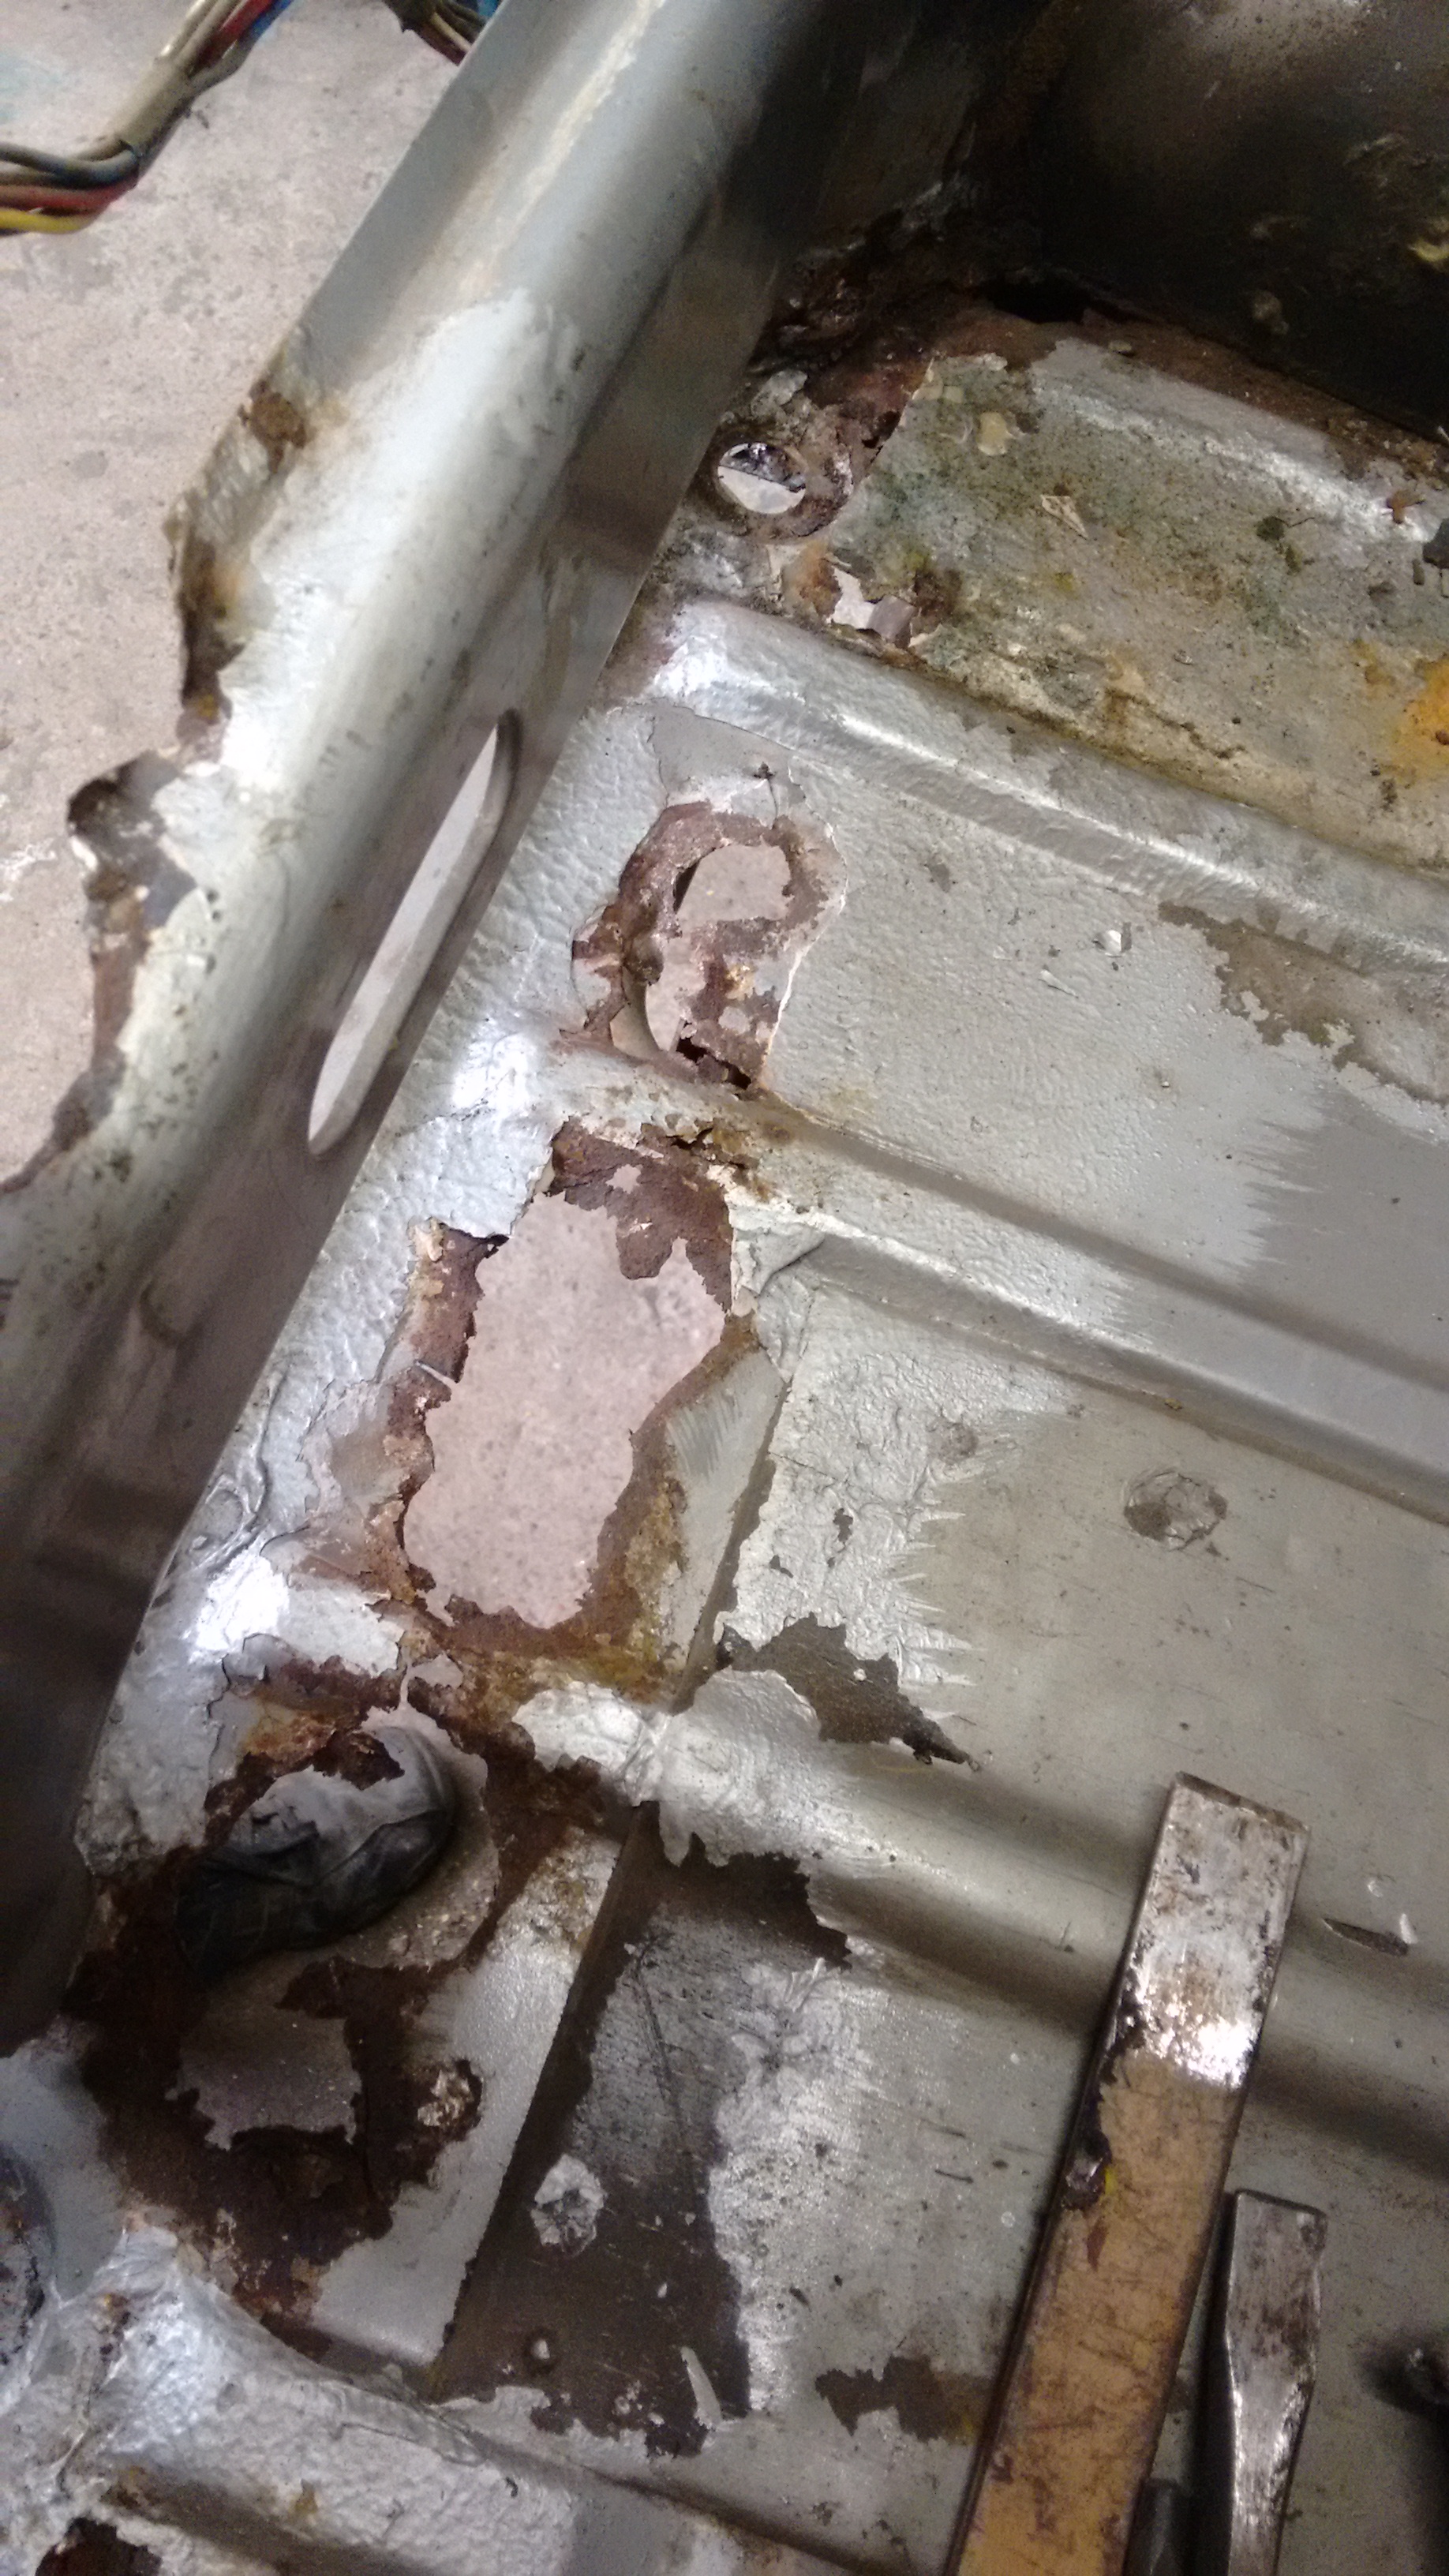
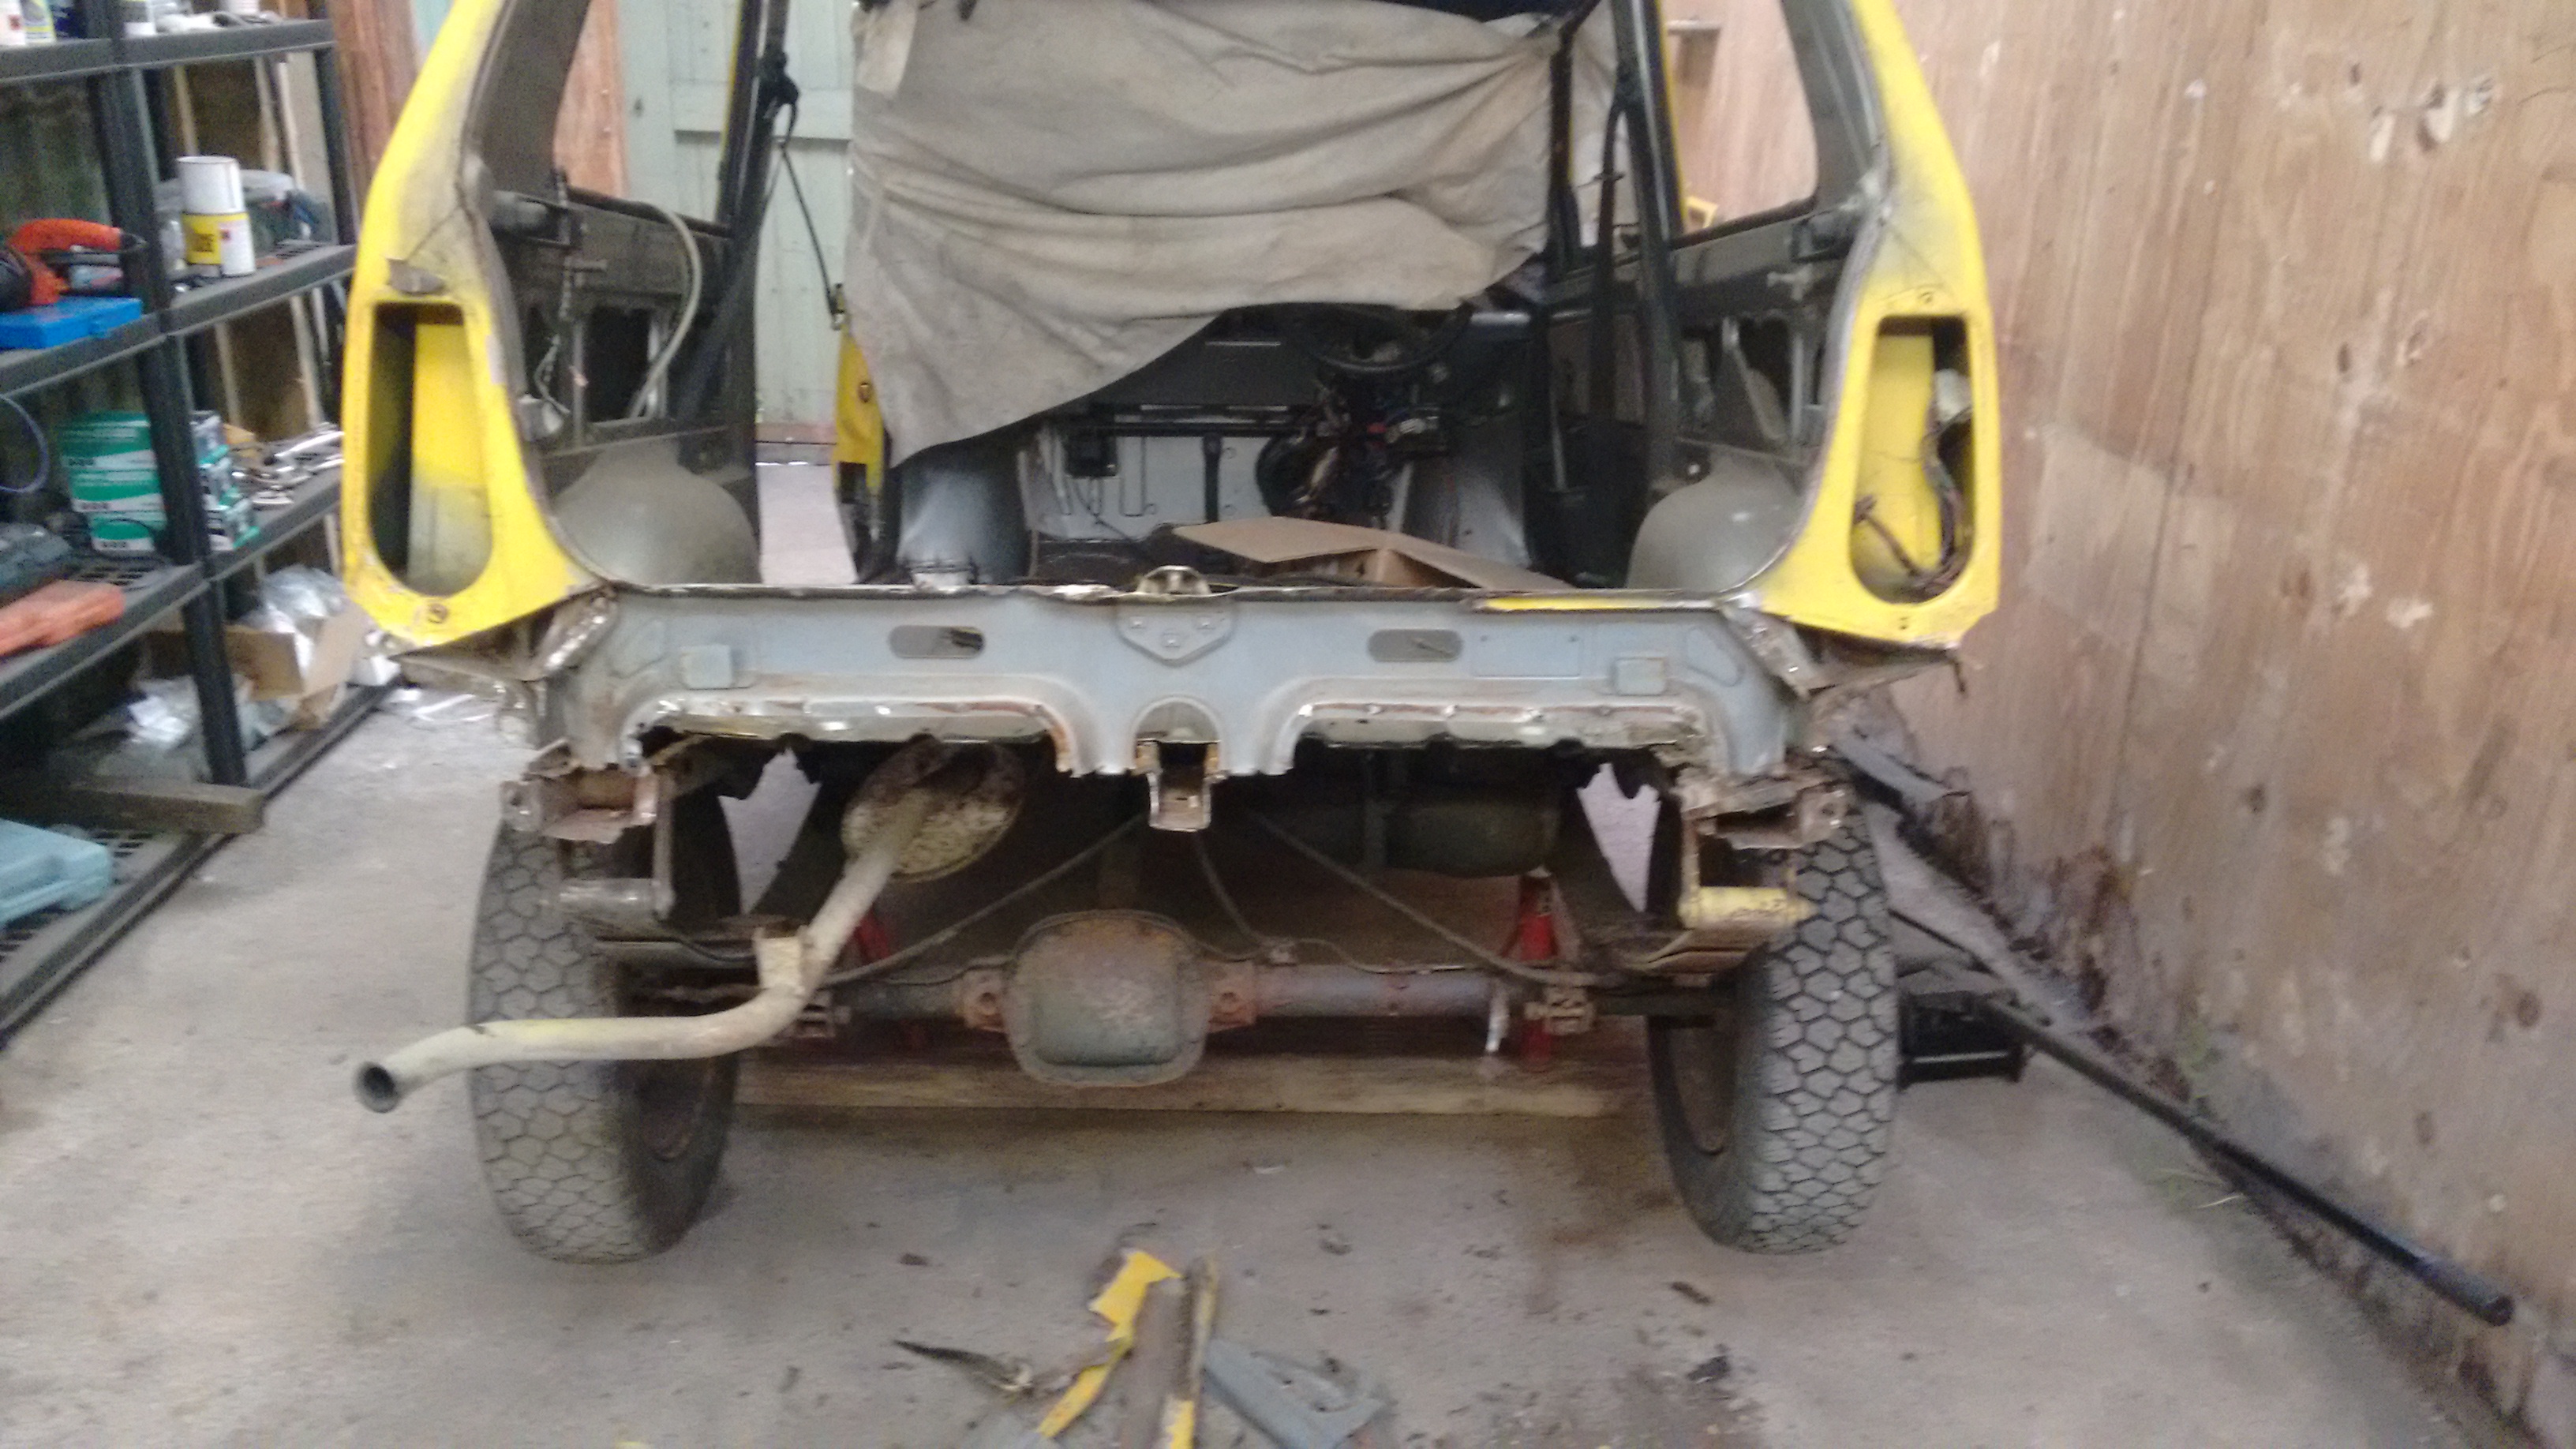
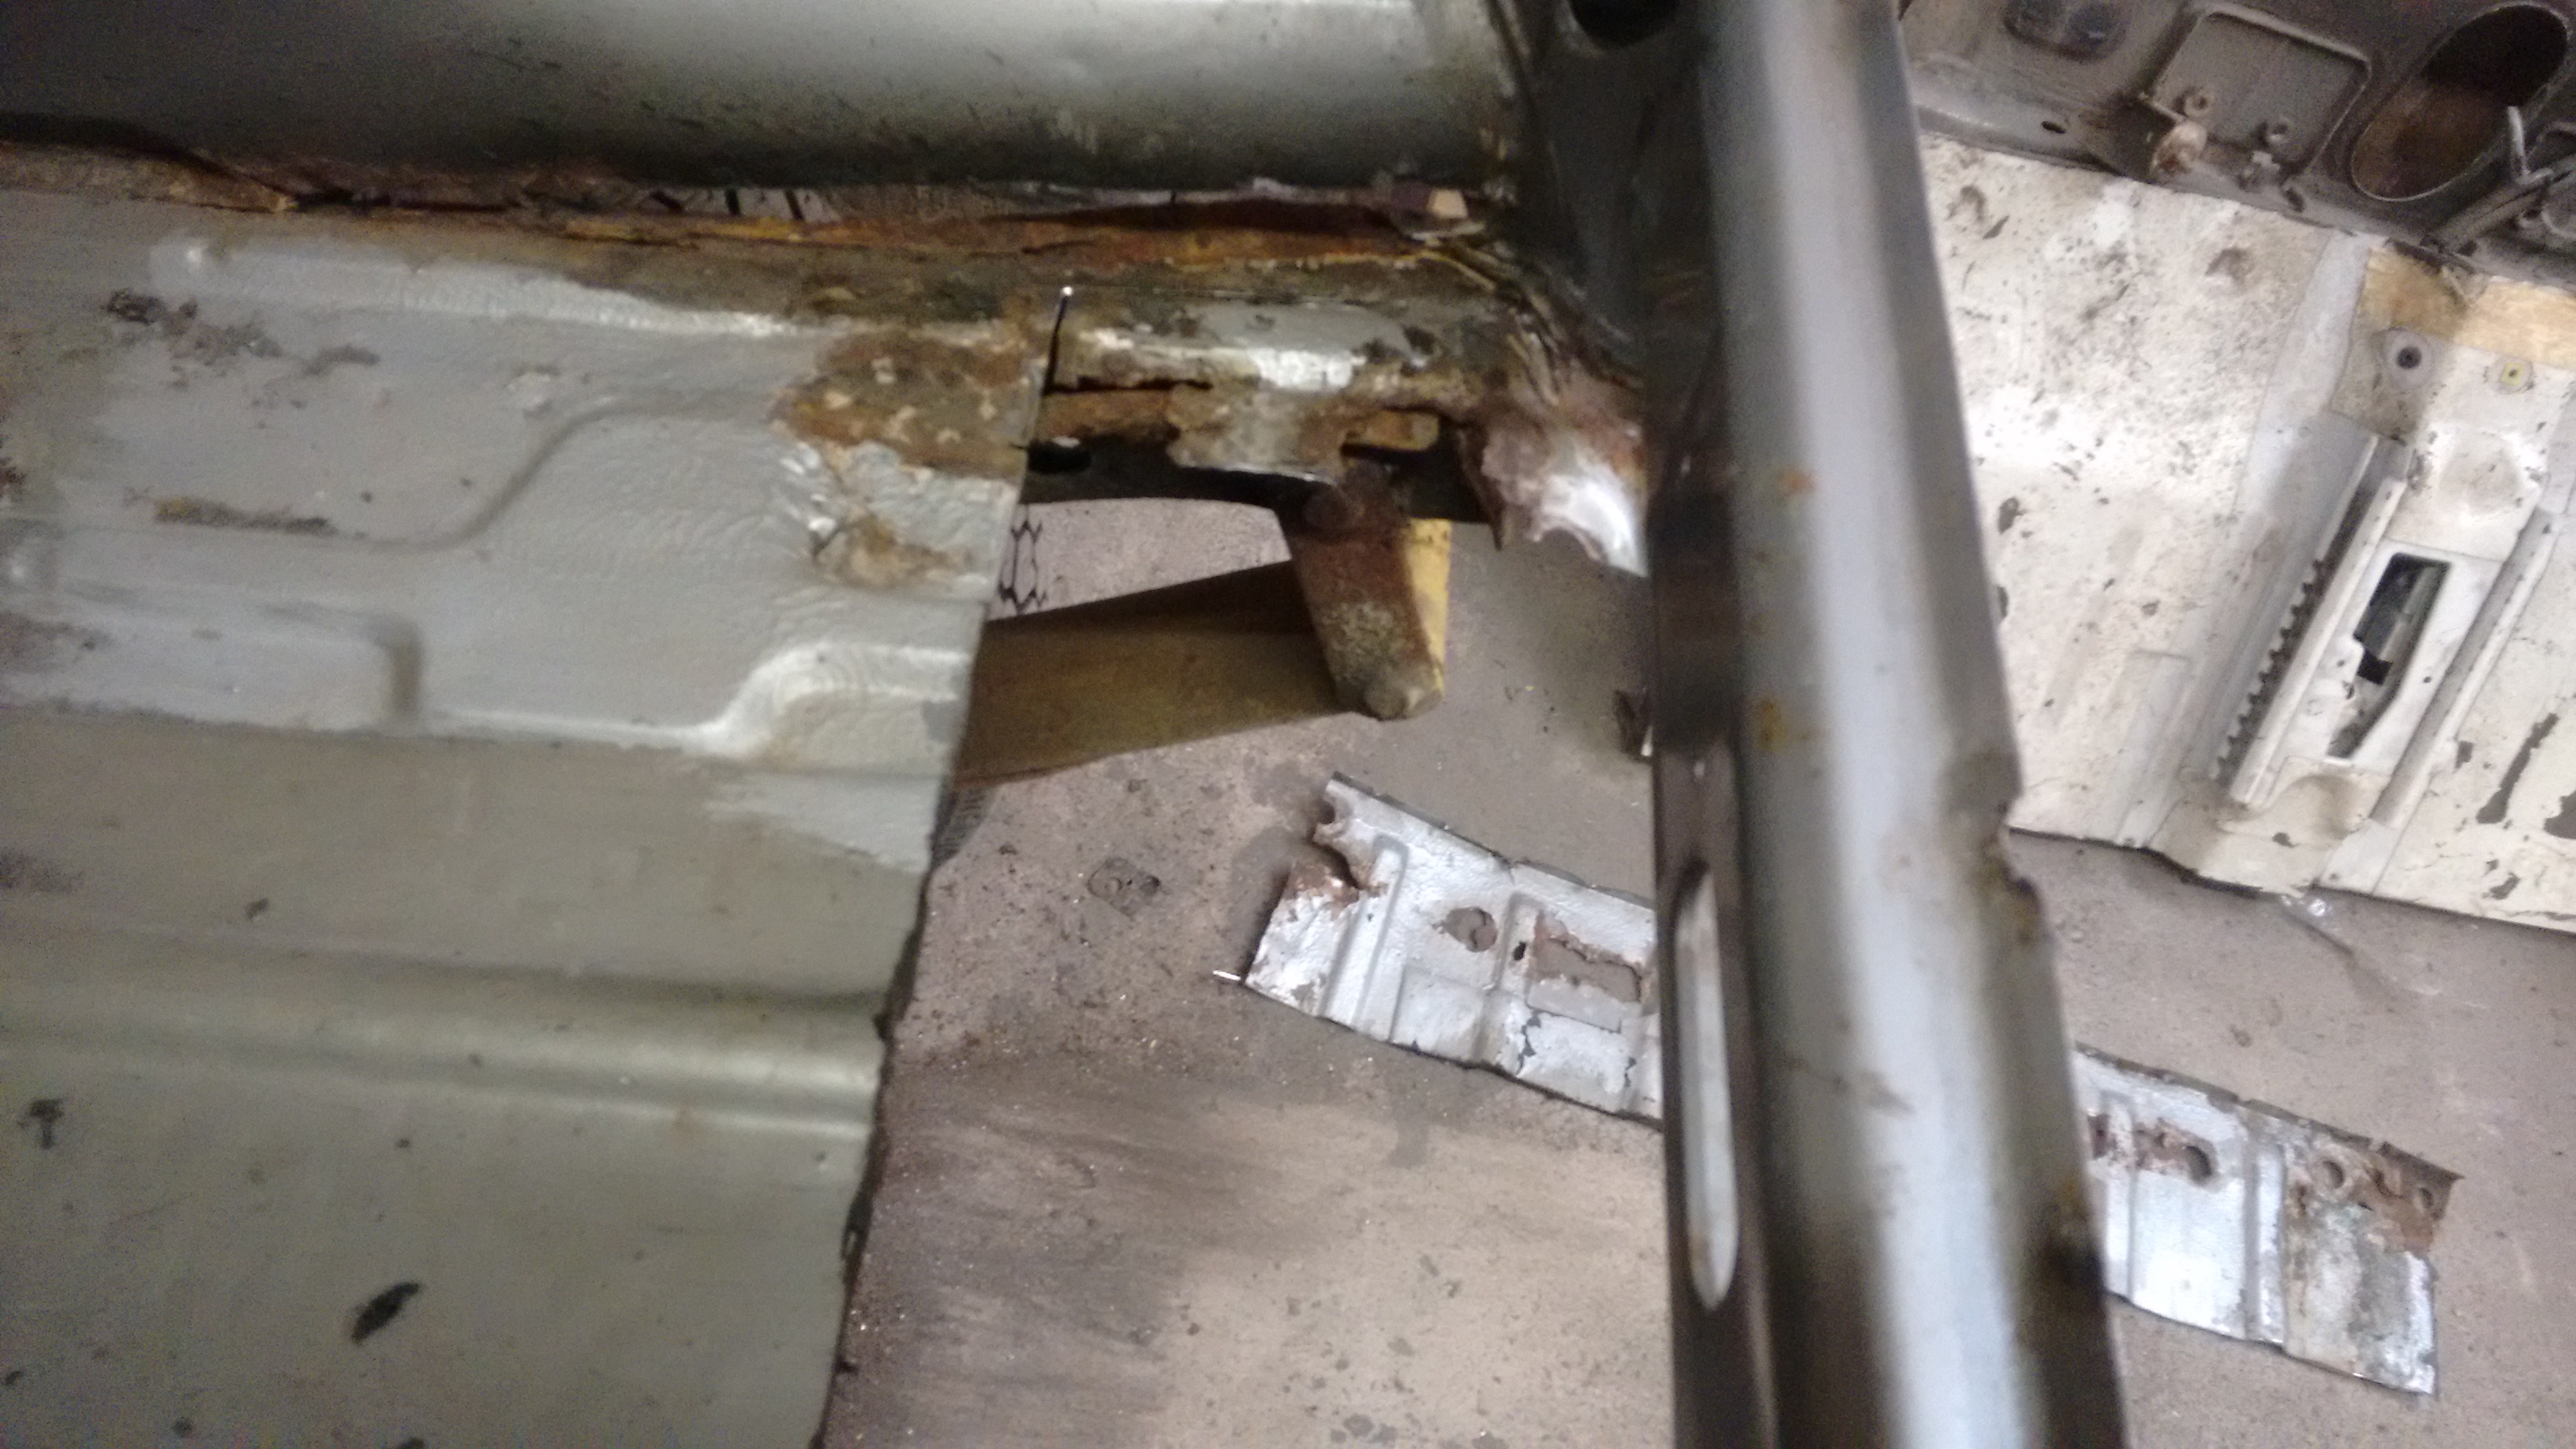
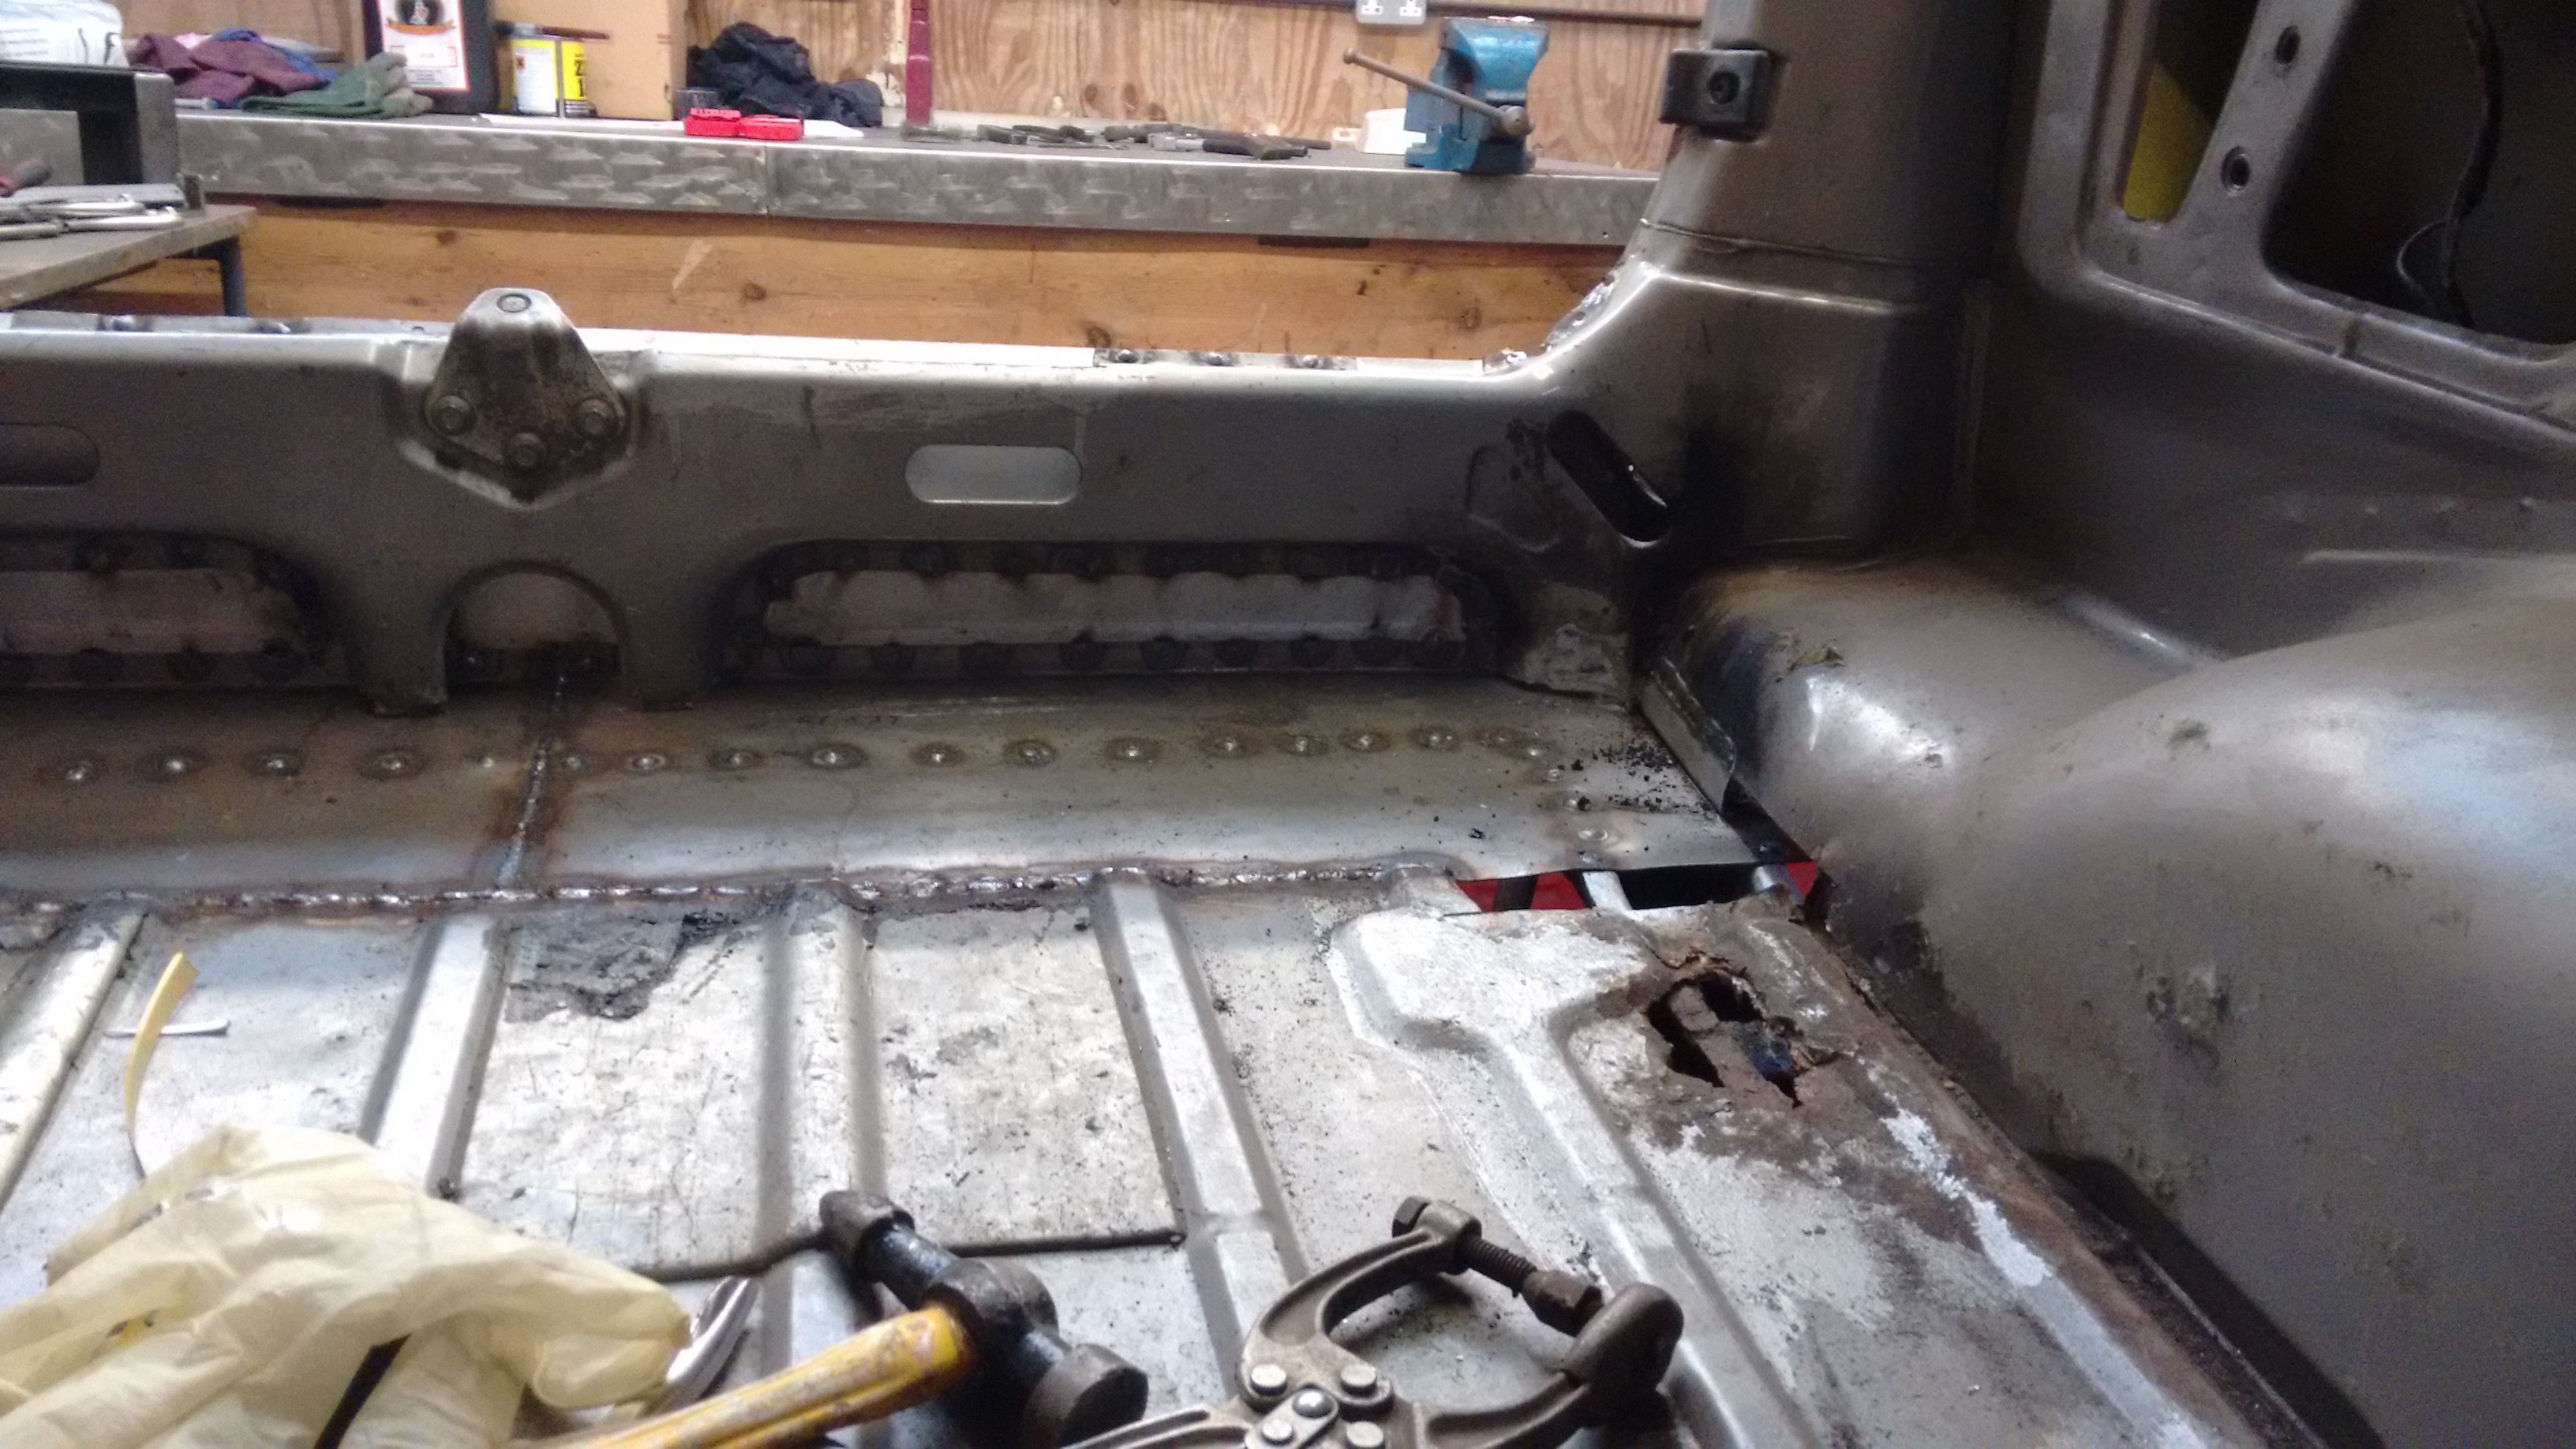
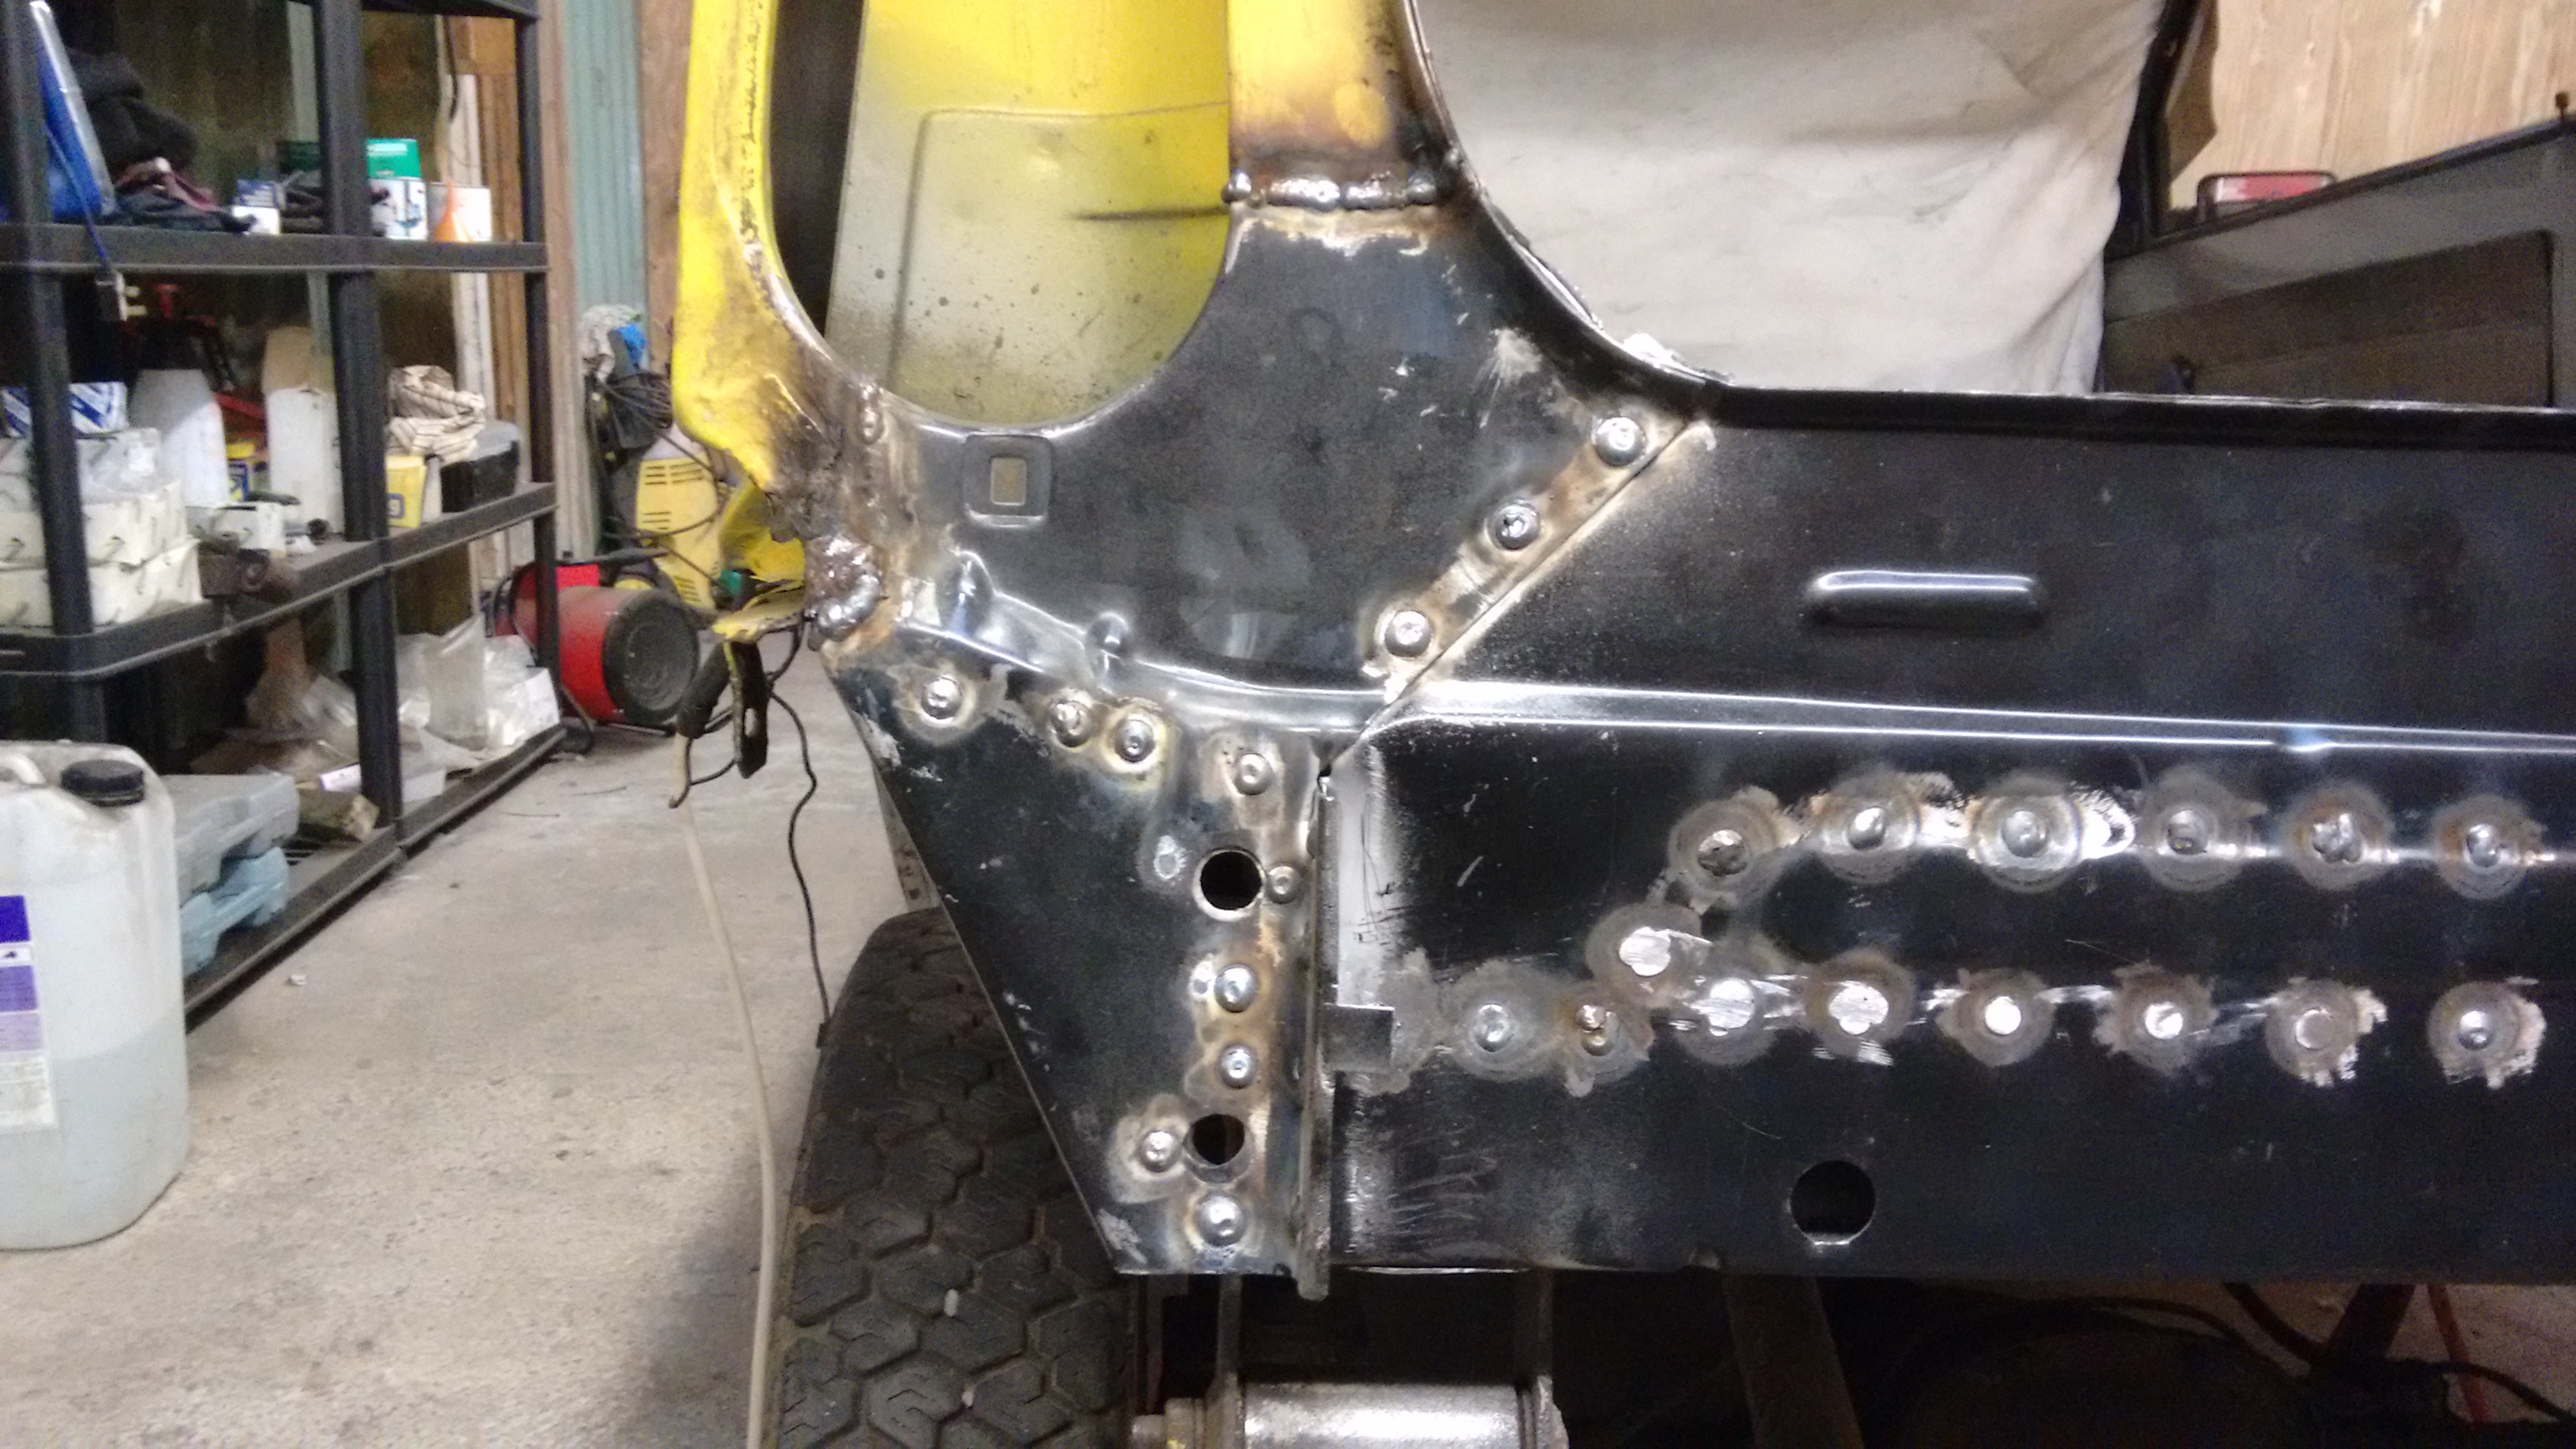
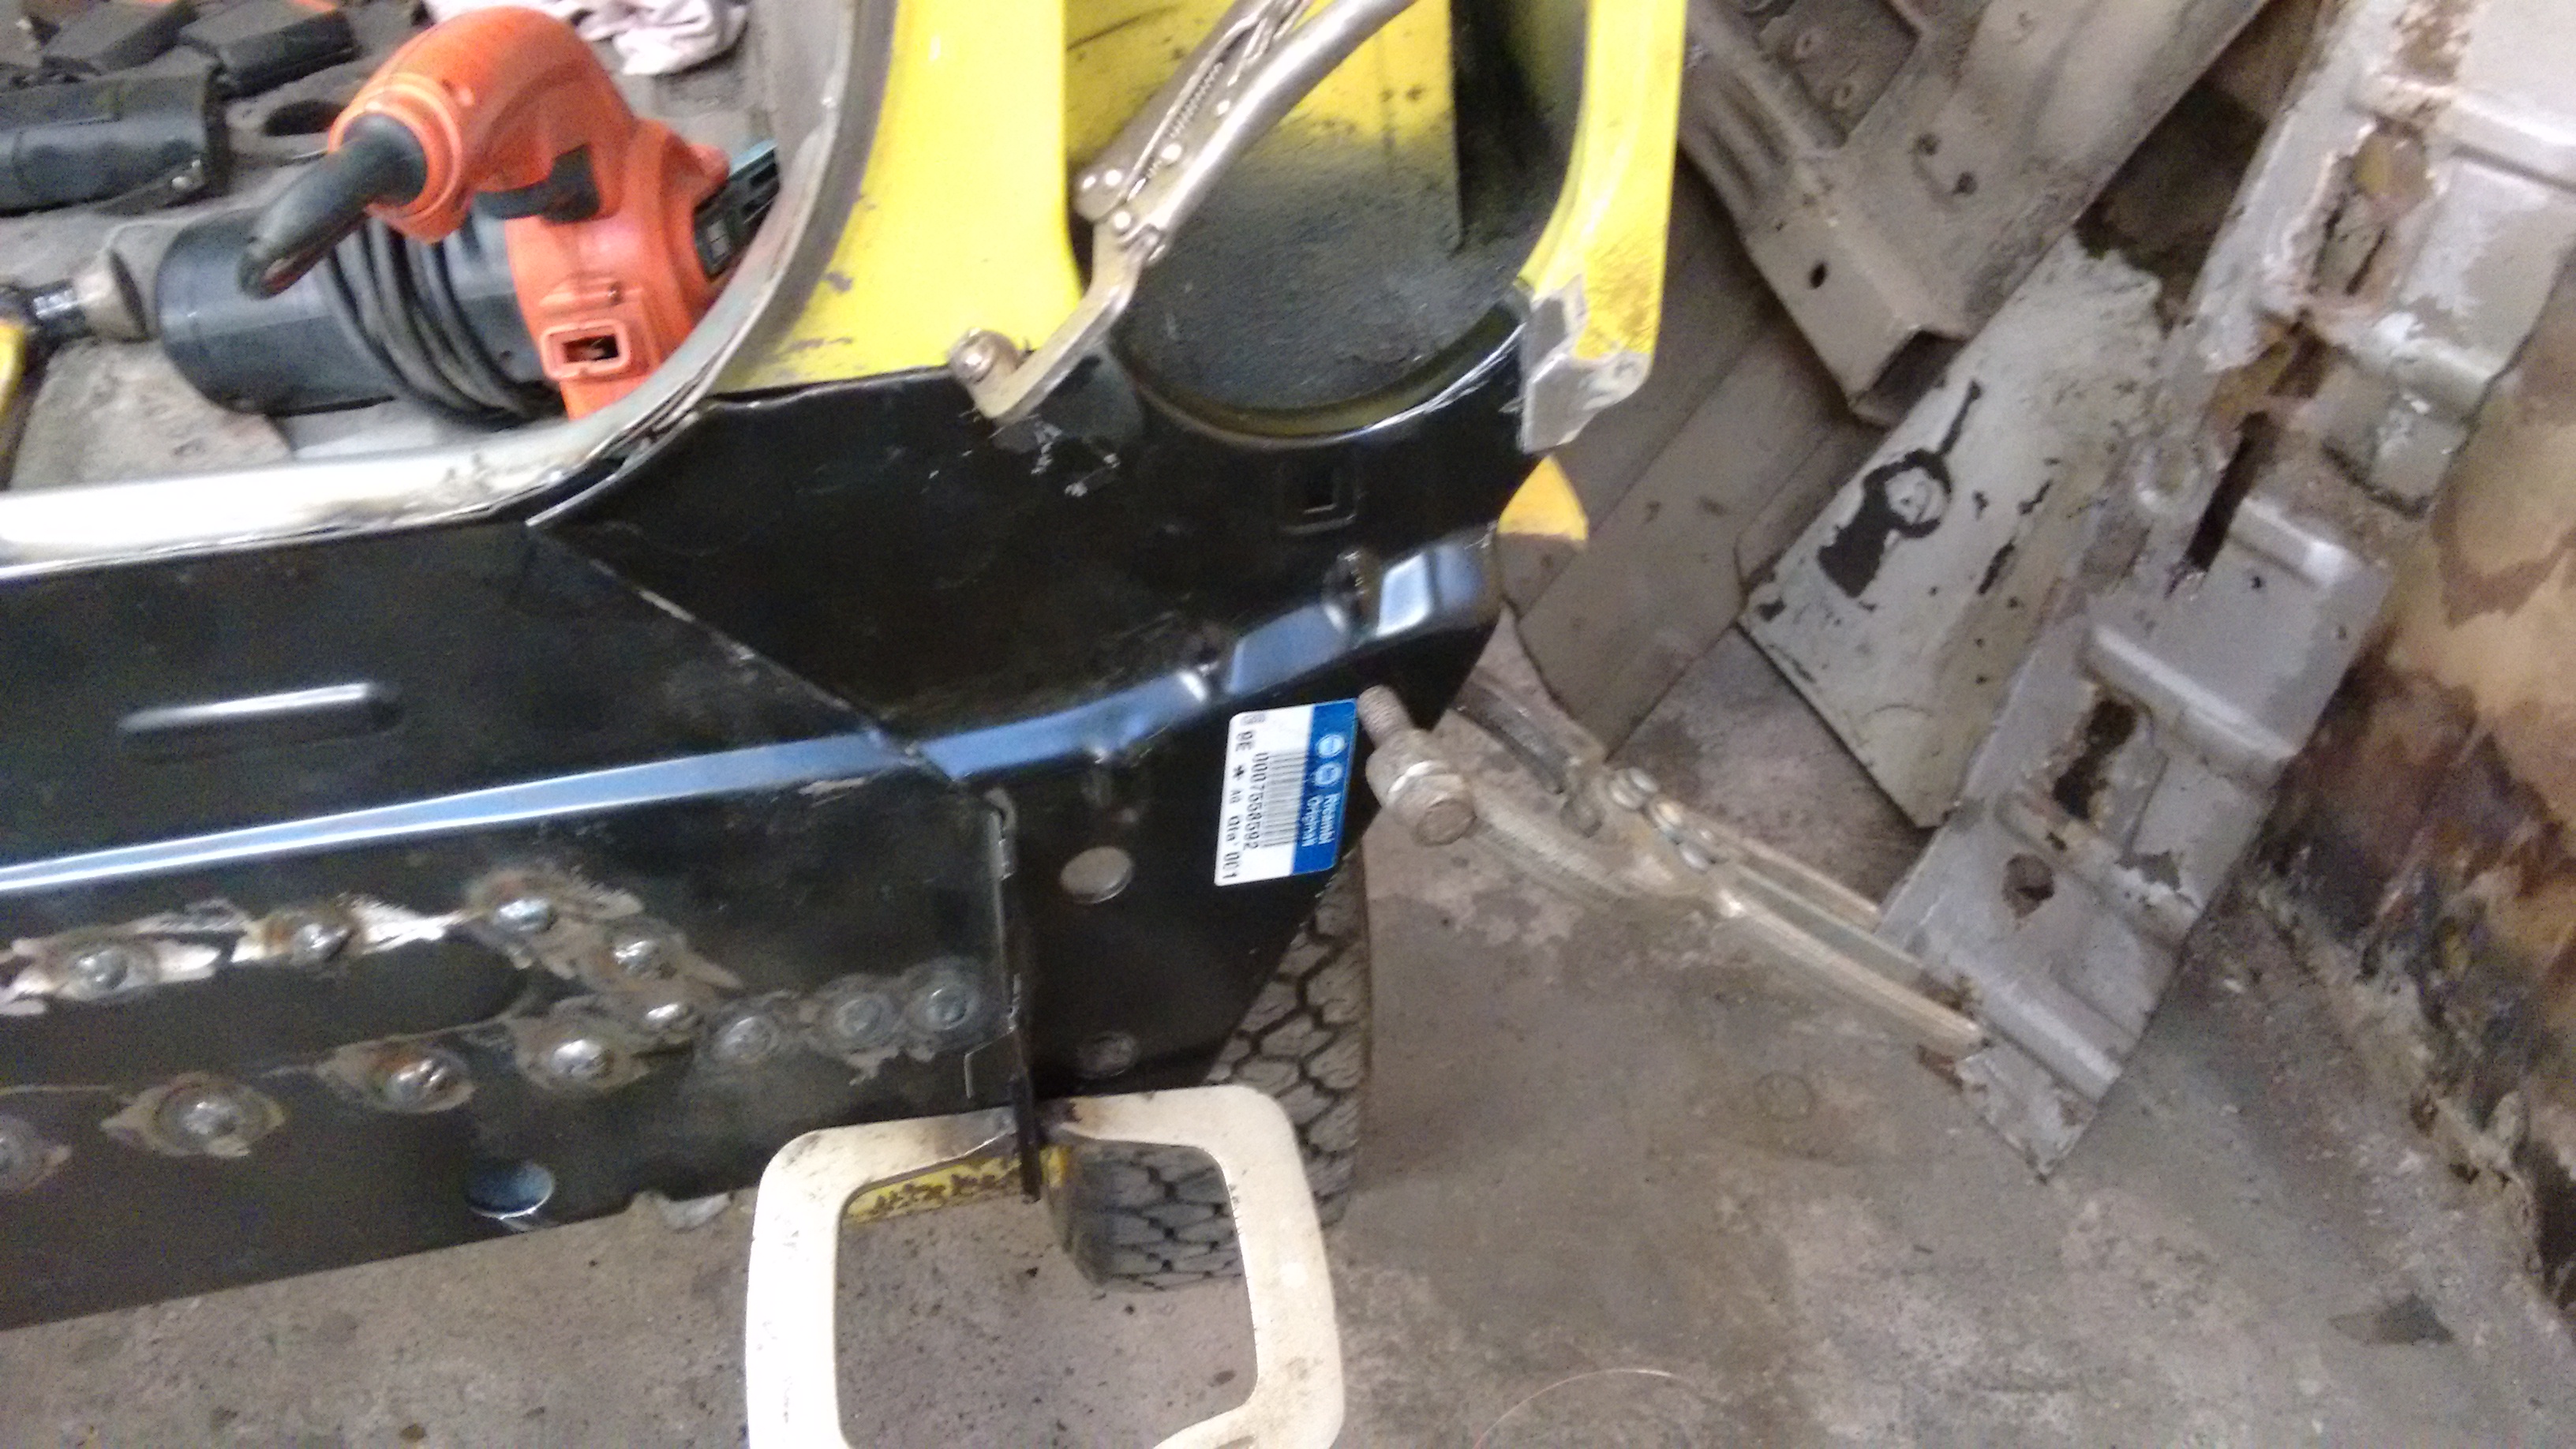
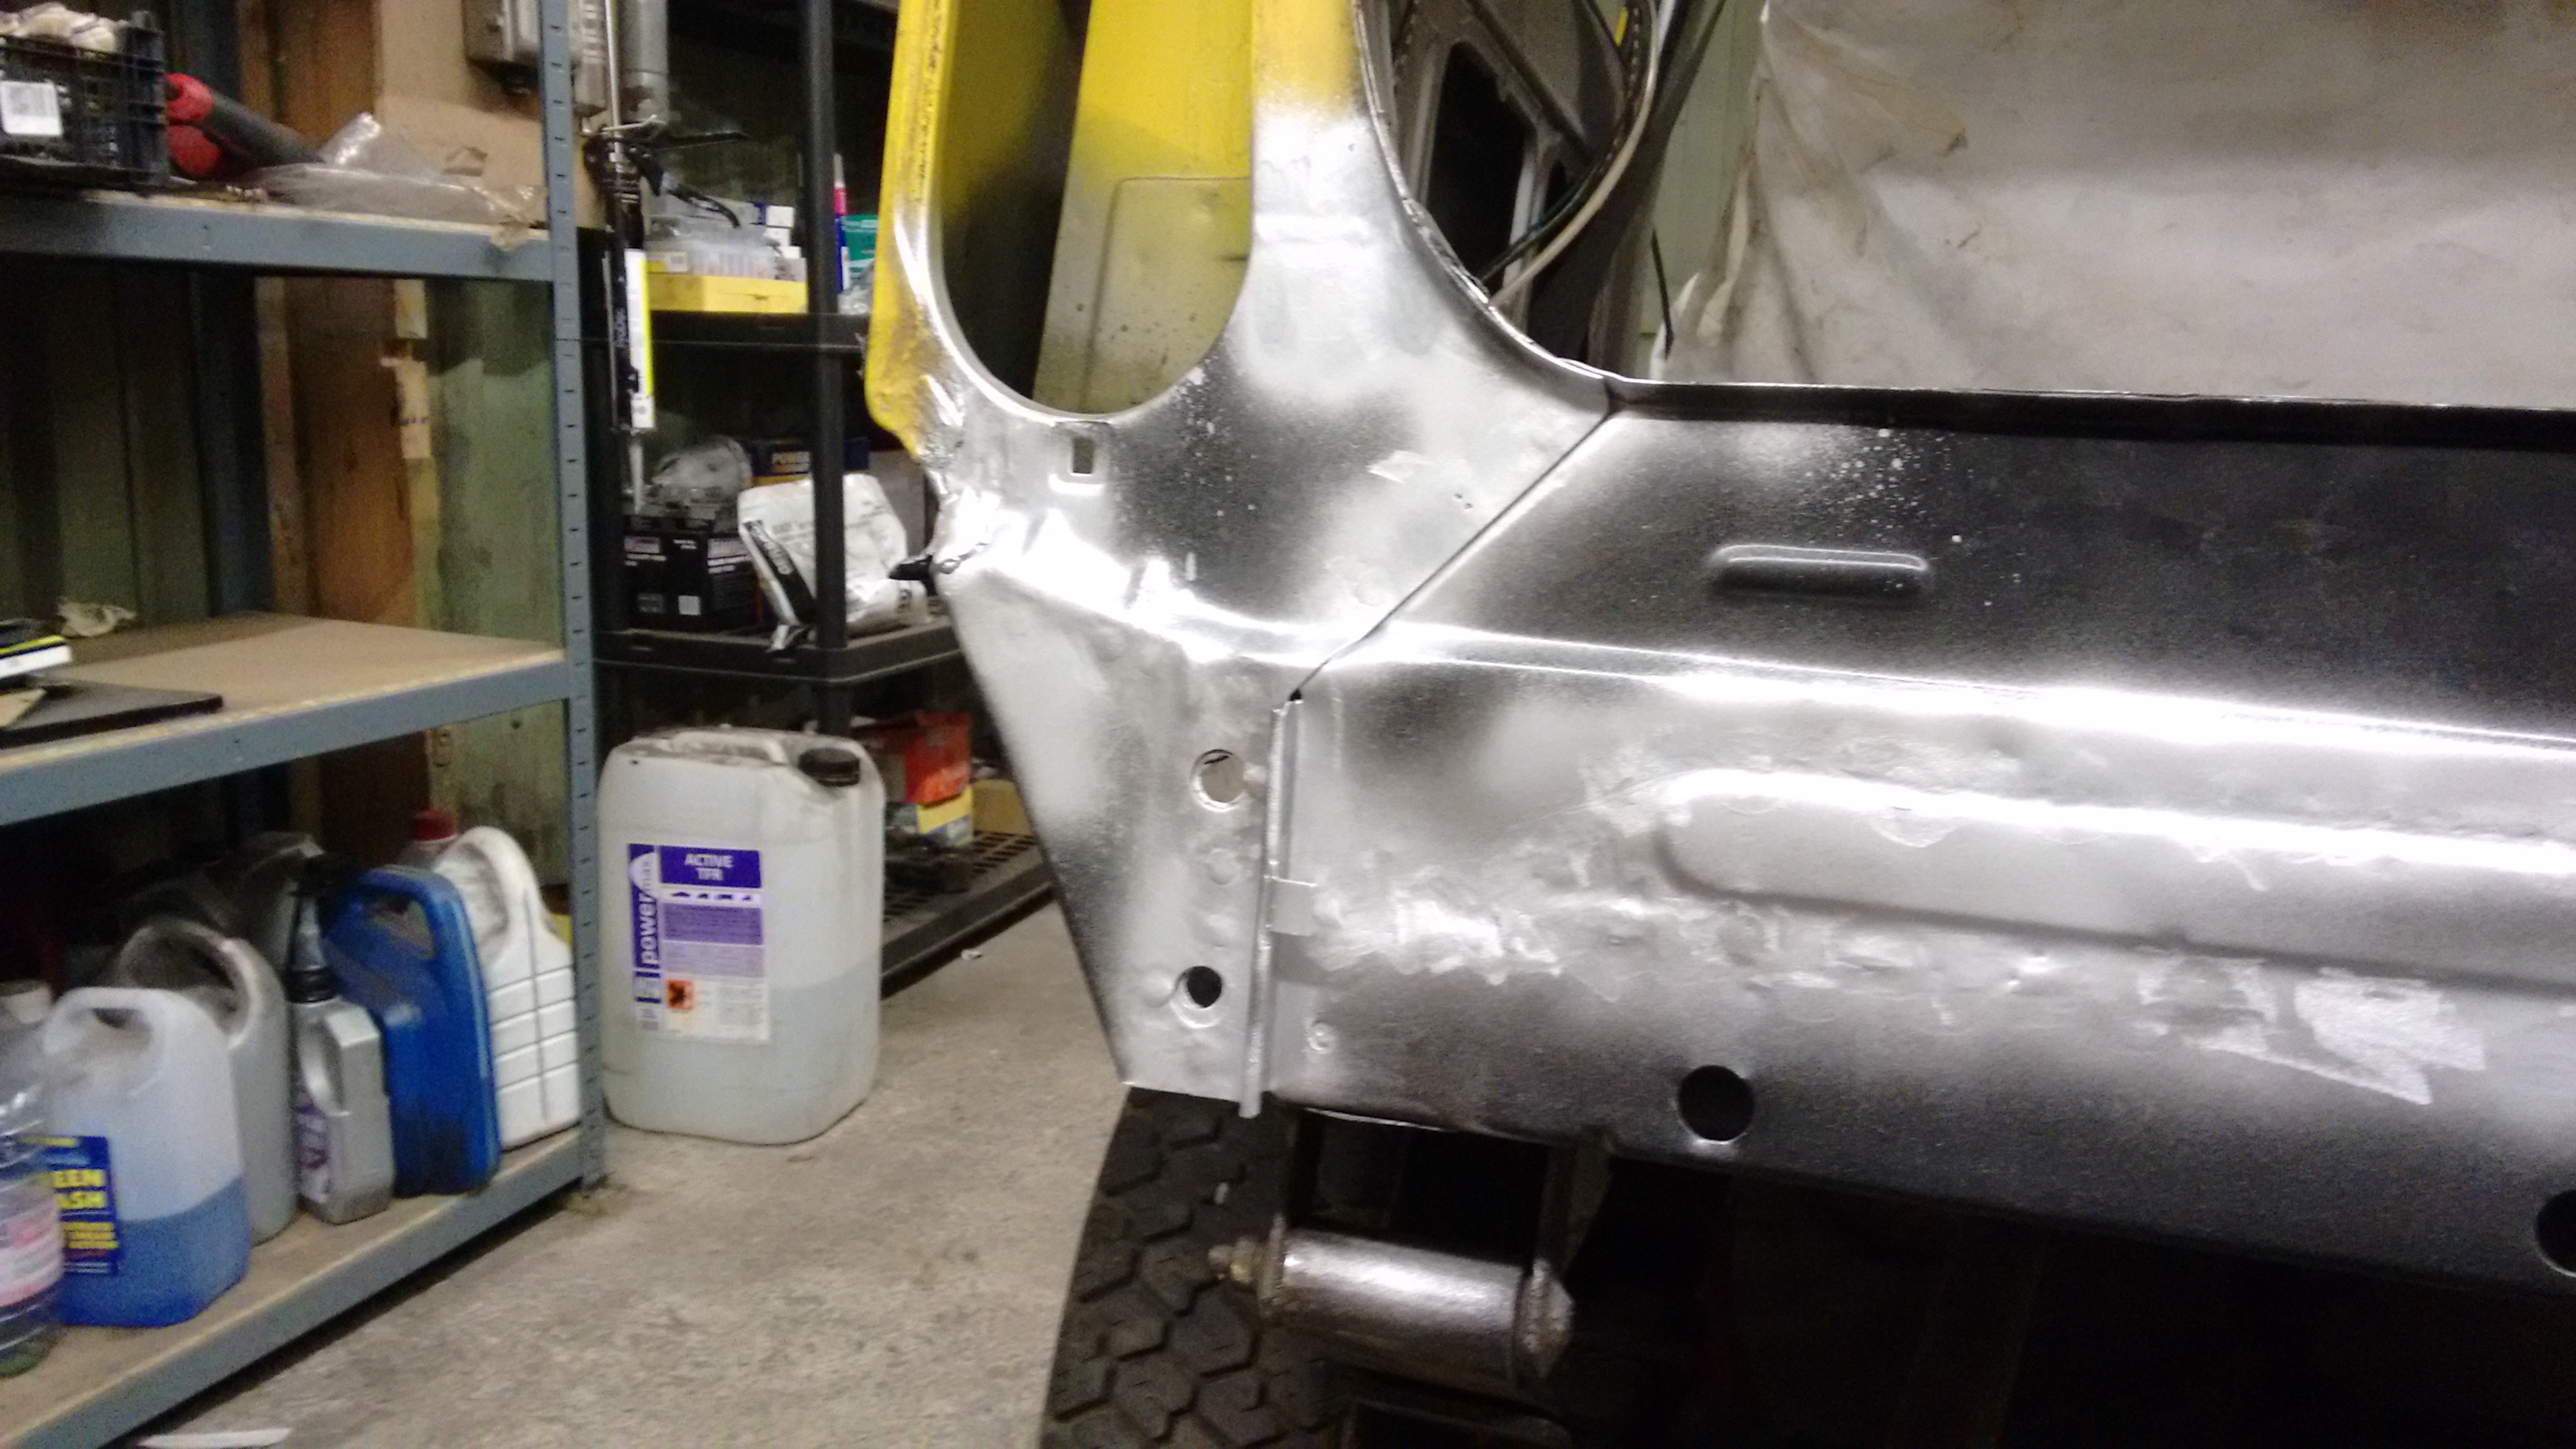
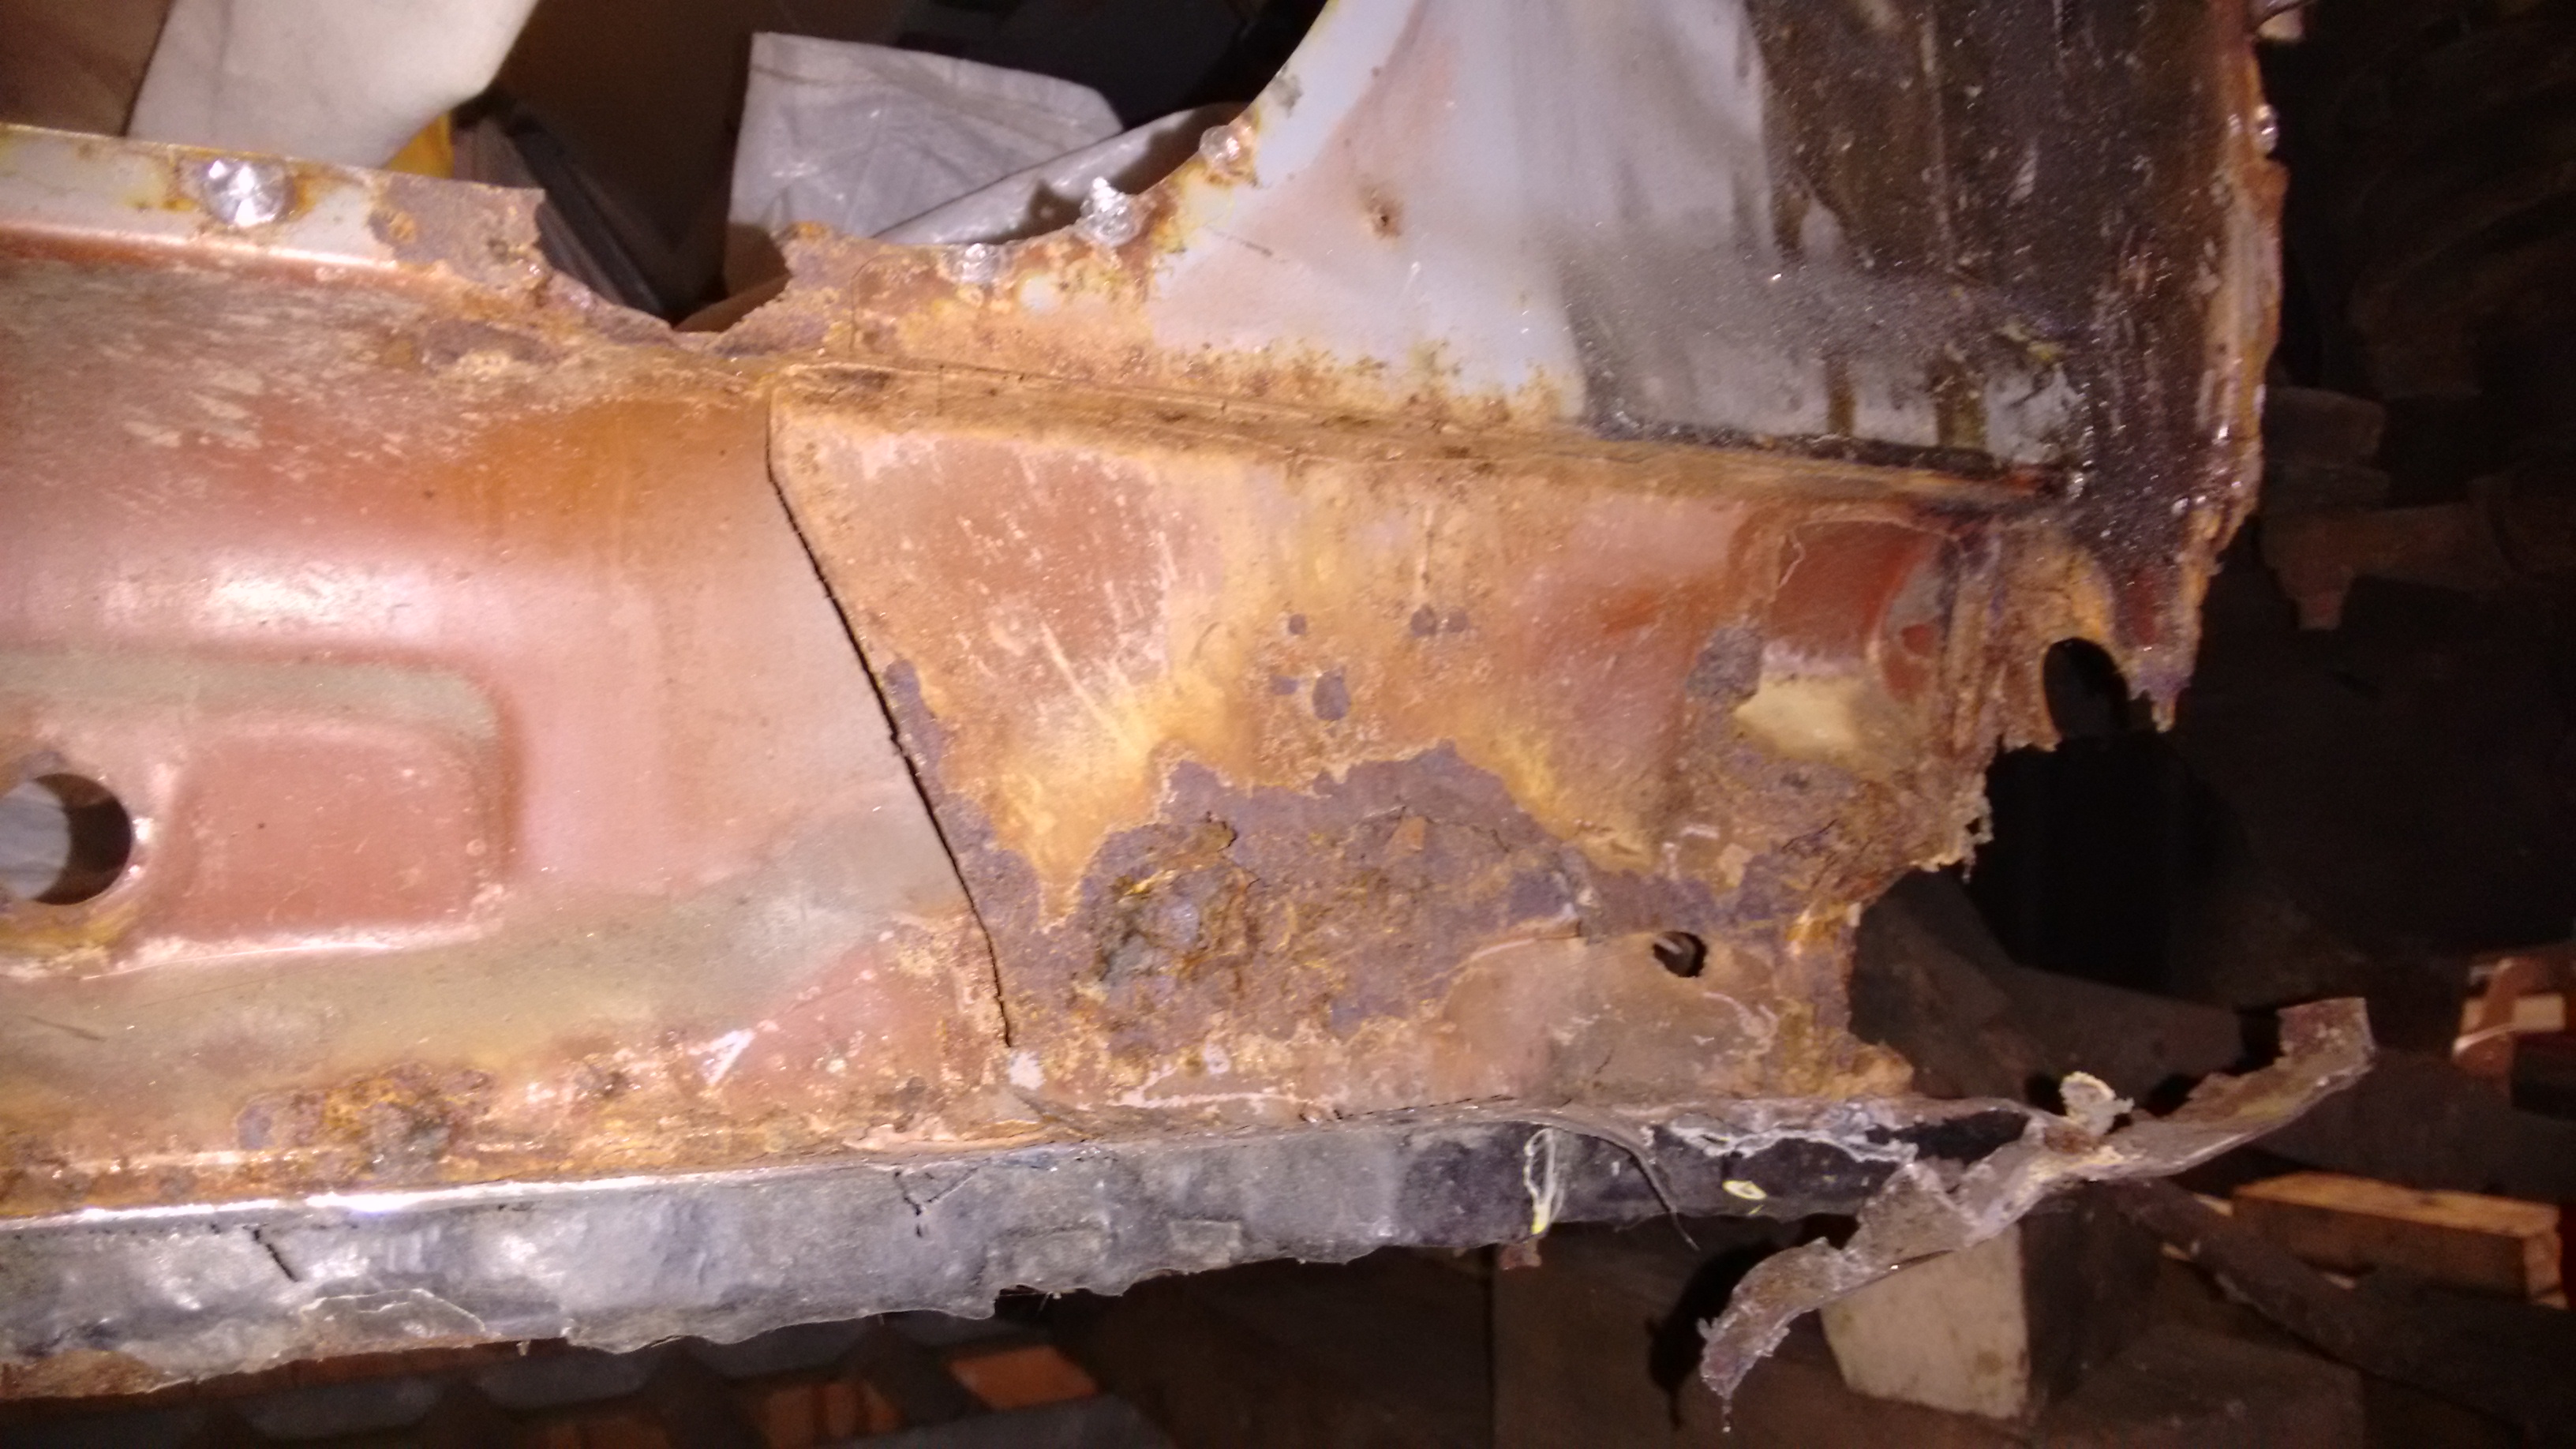
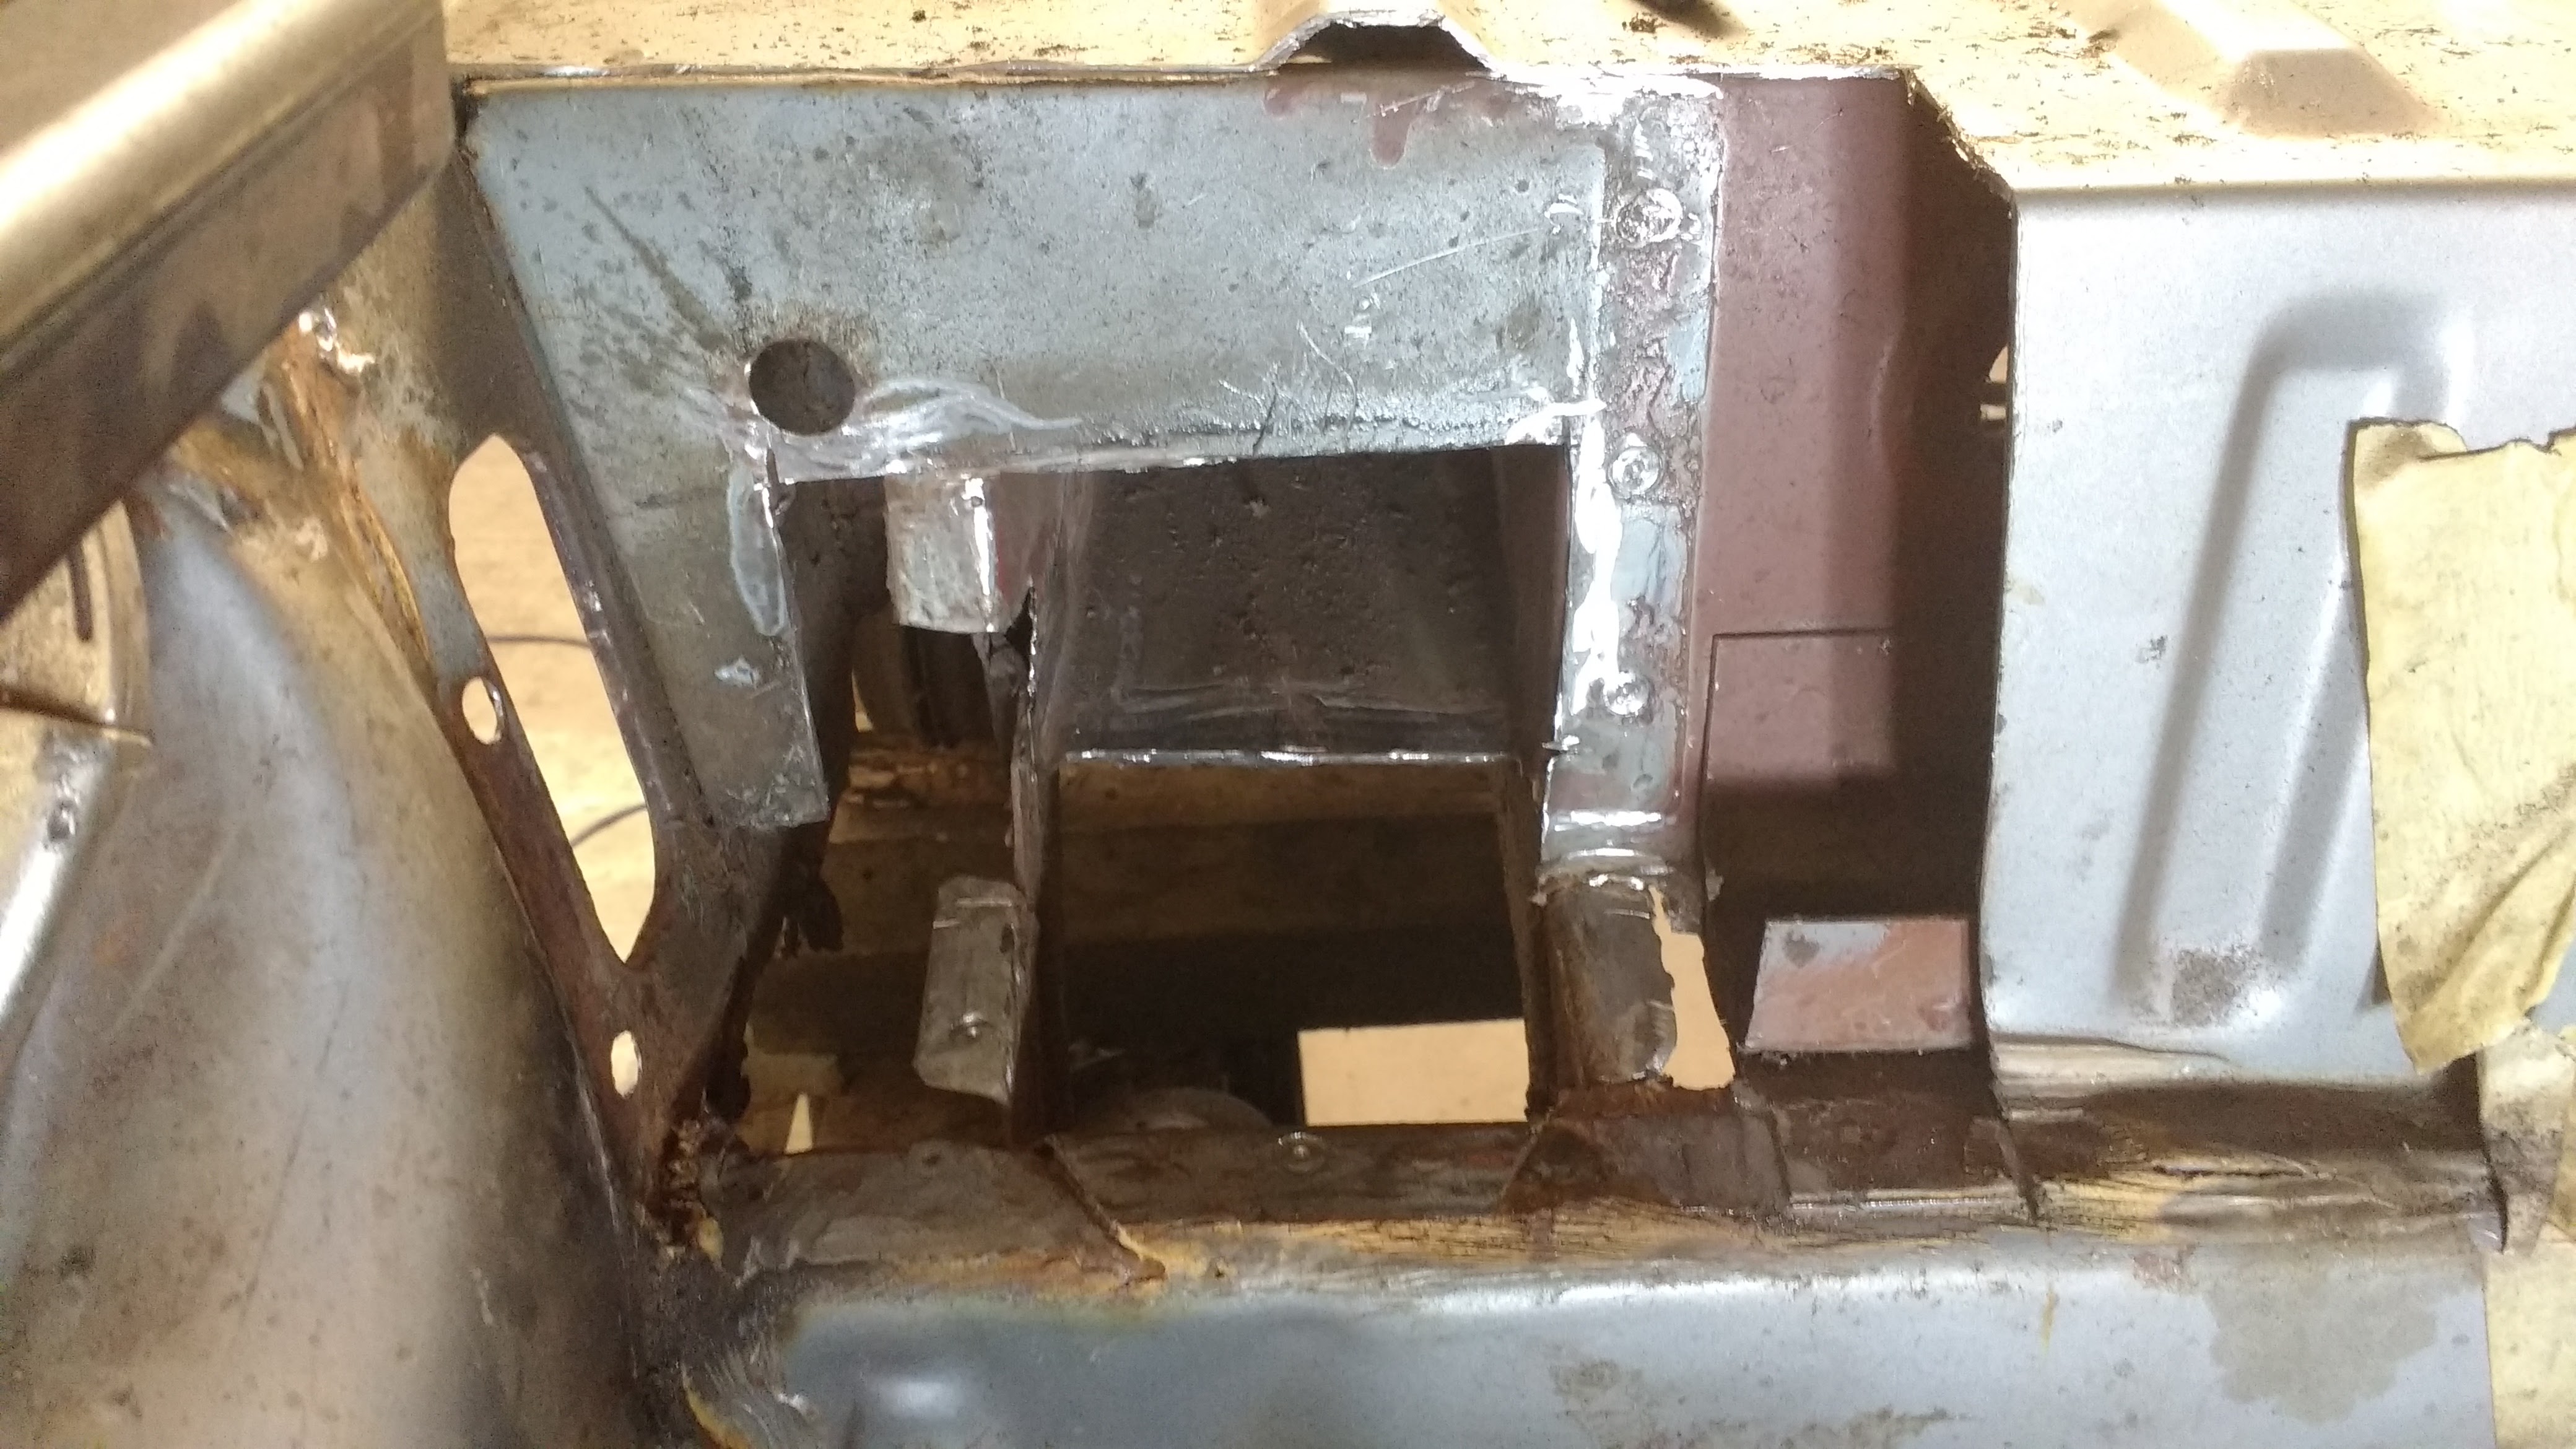
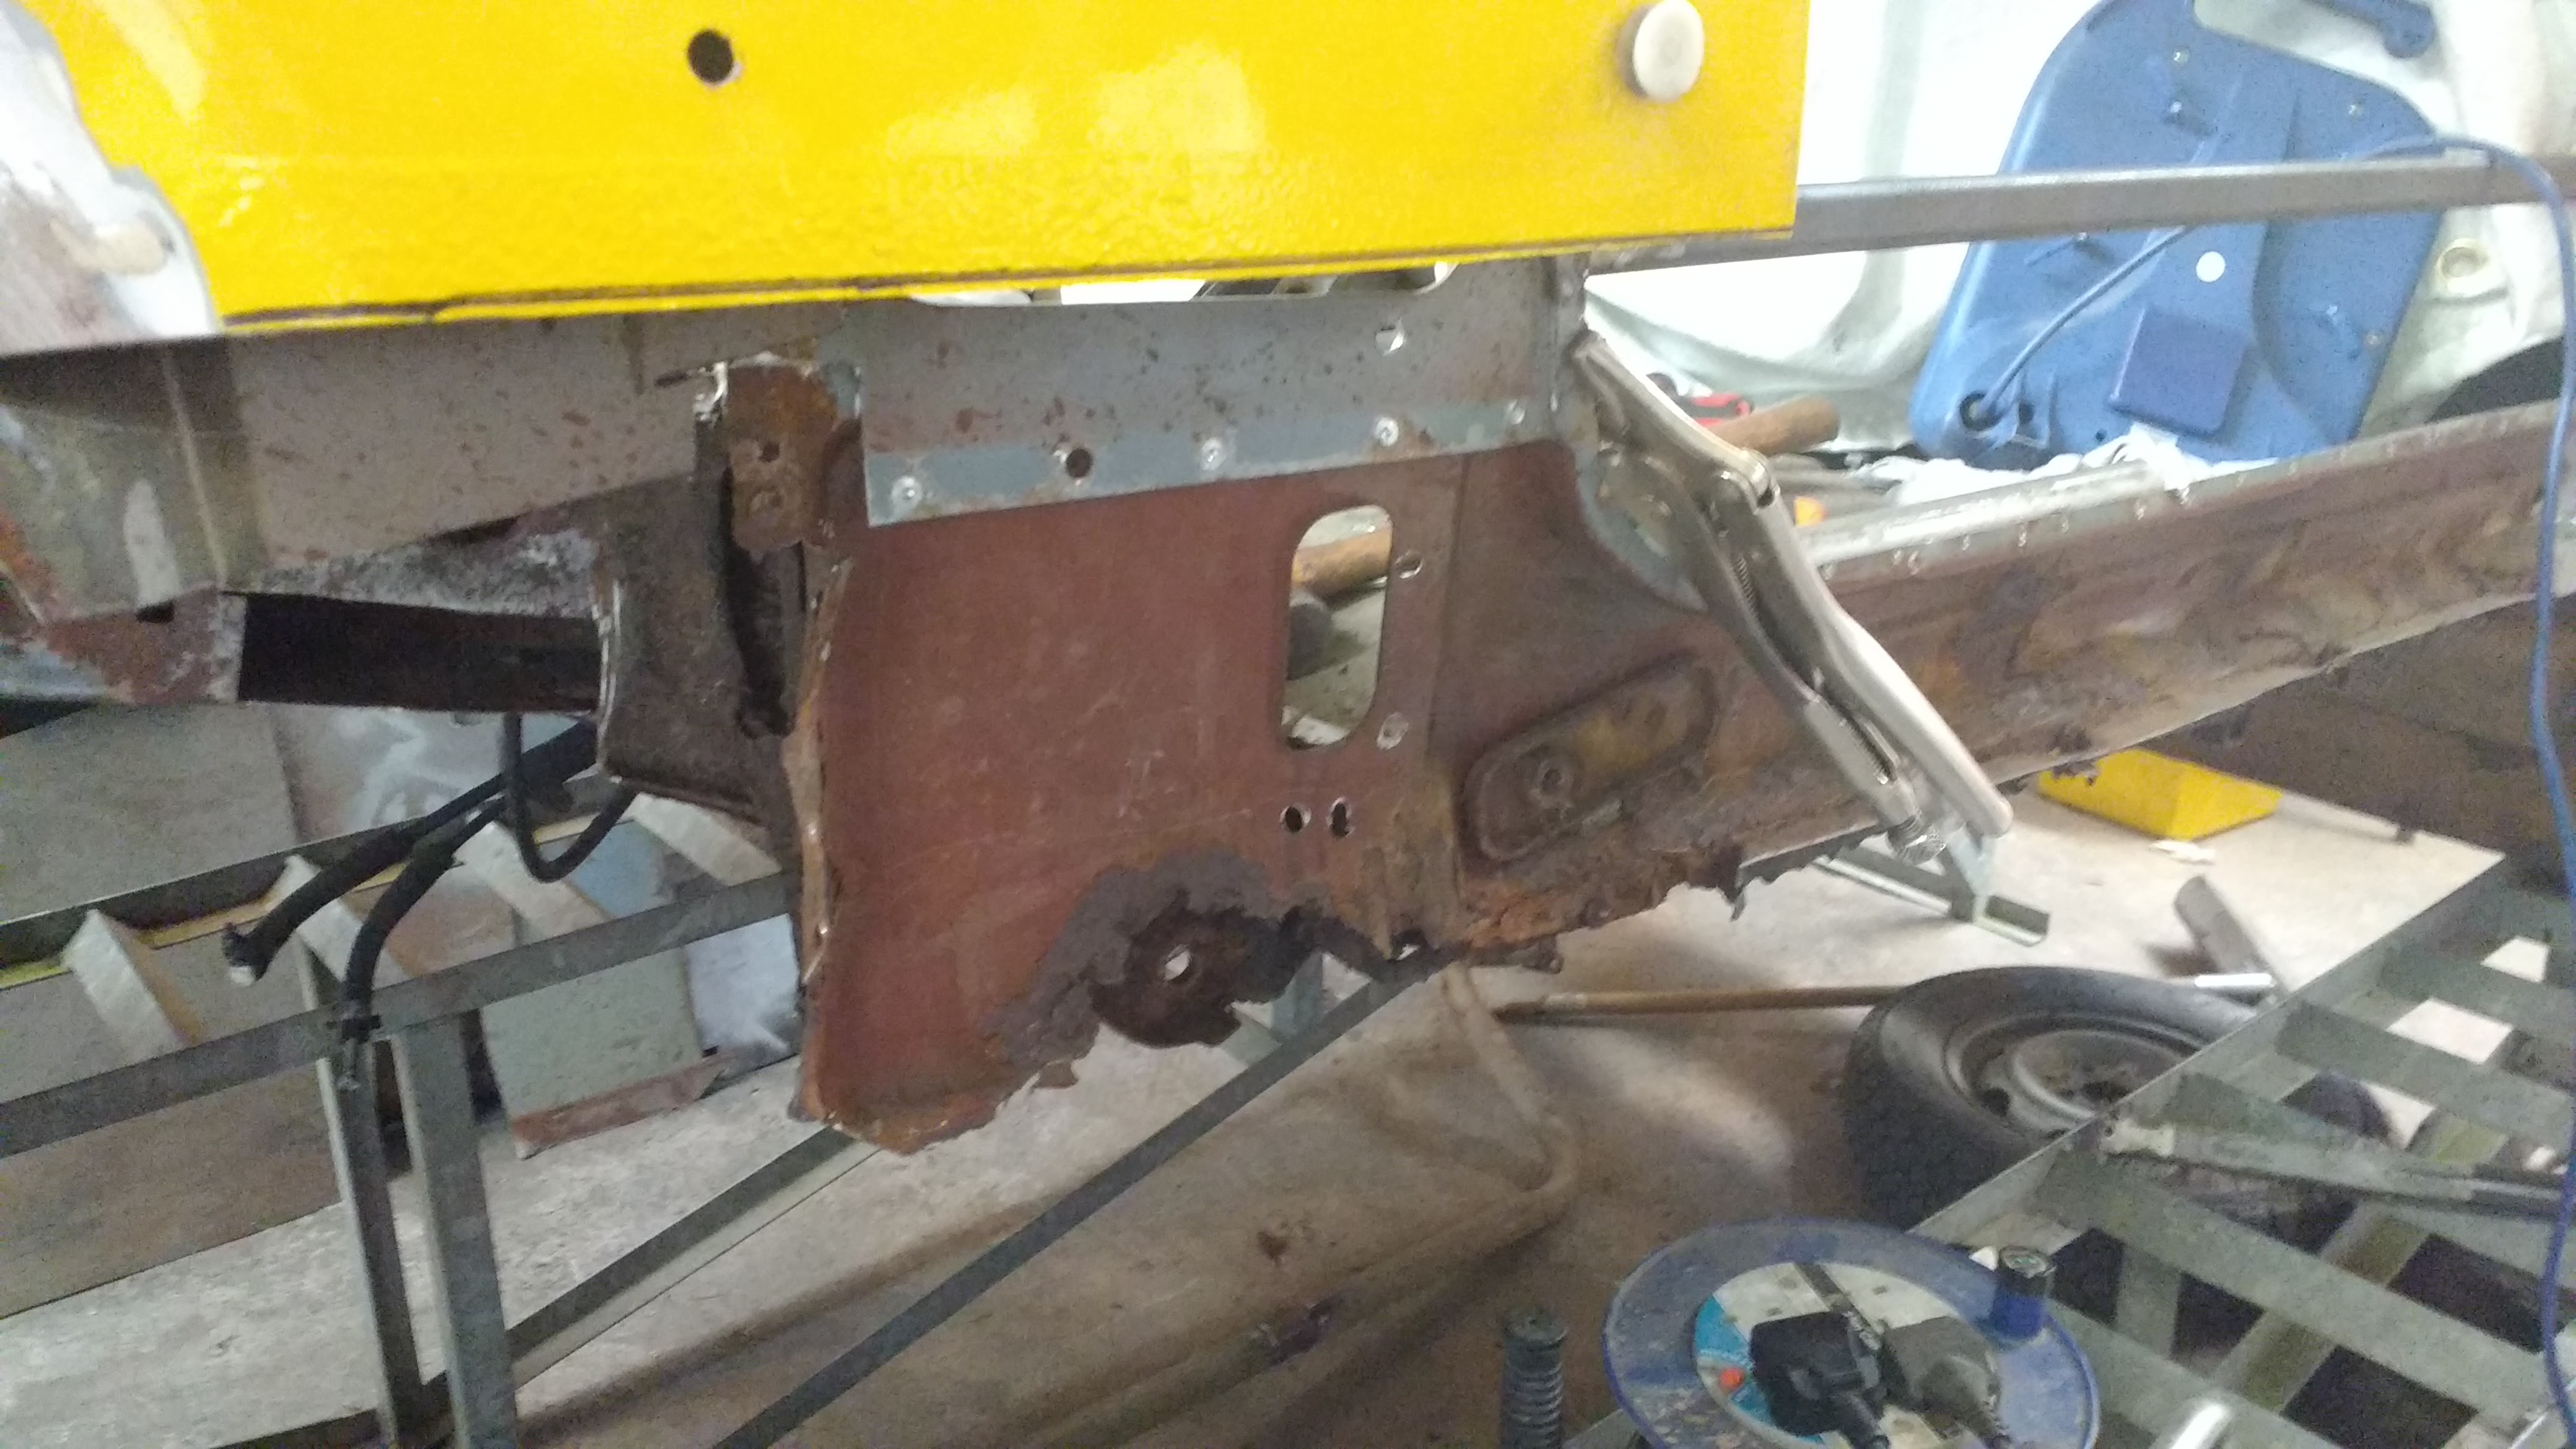
Named by my Dad due to his JCB yellow paint job! He's been off the road for 12 years in dry storage and as to be expected he needs all the usual Panda stuff attending to, the biggest problem being rust of course! Mechanically, he has faired well, and should just need a recommissioning rather than any major surgery.

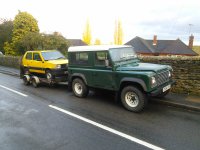
After going to see it last weekend, I was outbid in the last few seconds of the eBay auction, lucky for me, (not so the for the seller) the winning bidder was a complete time waster so I got a second chance offer and arranged collection for today. As usual my Land Rover was on towing duty:


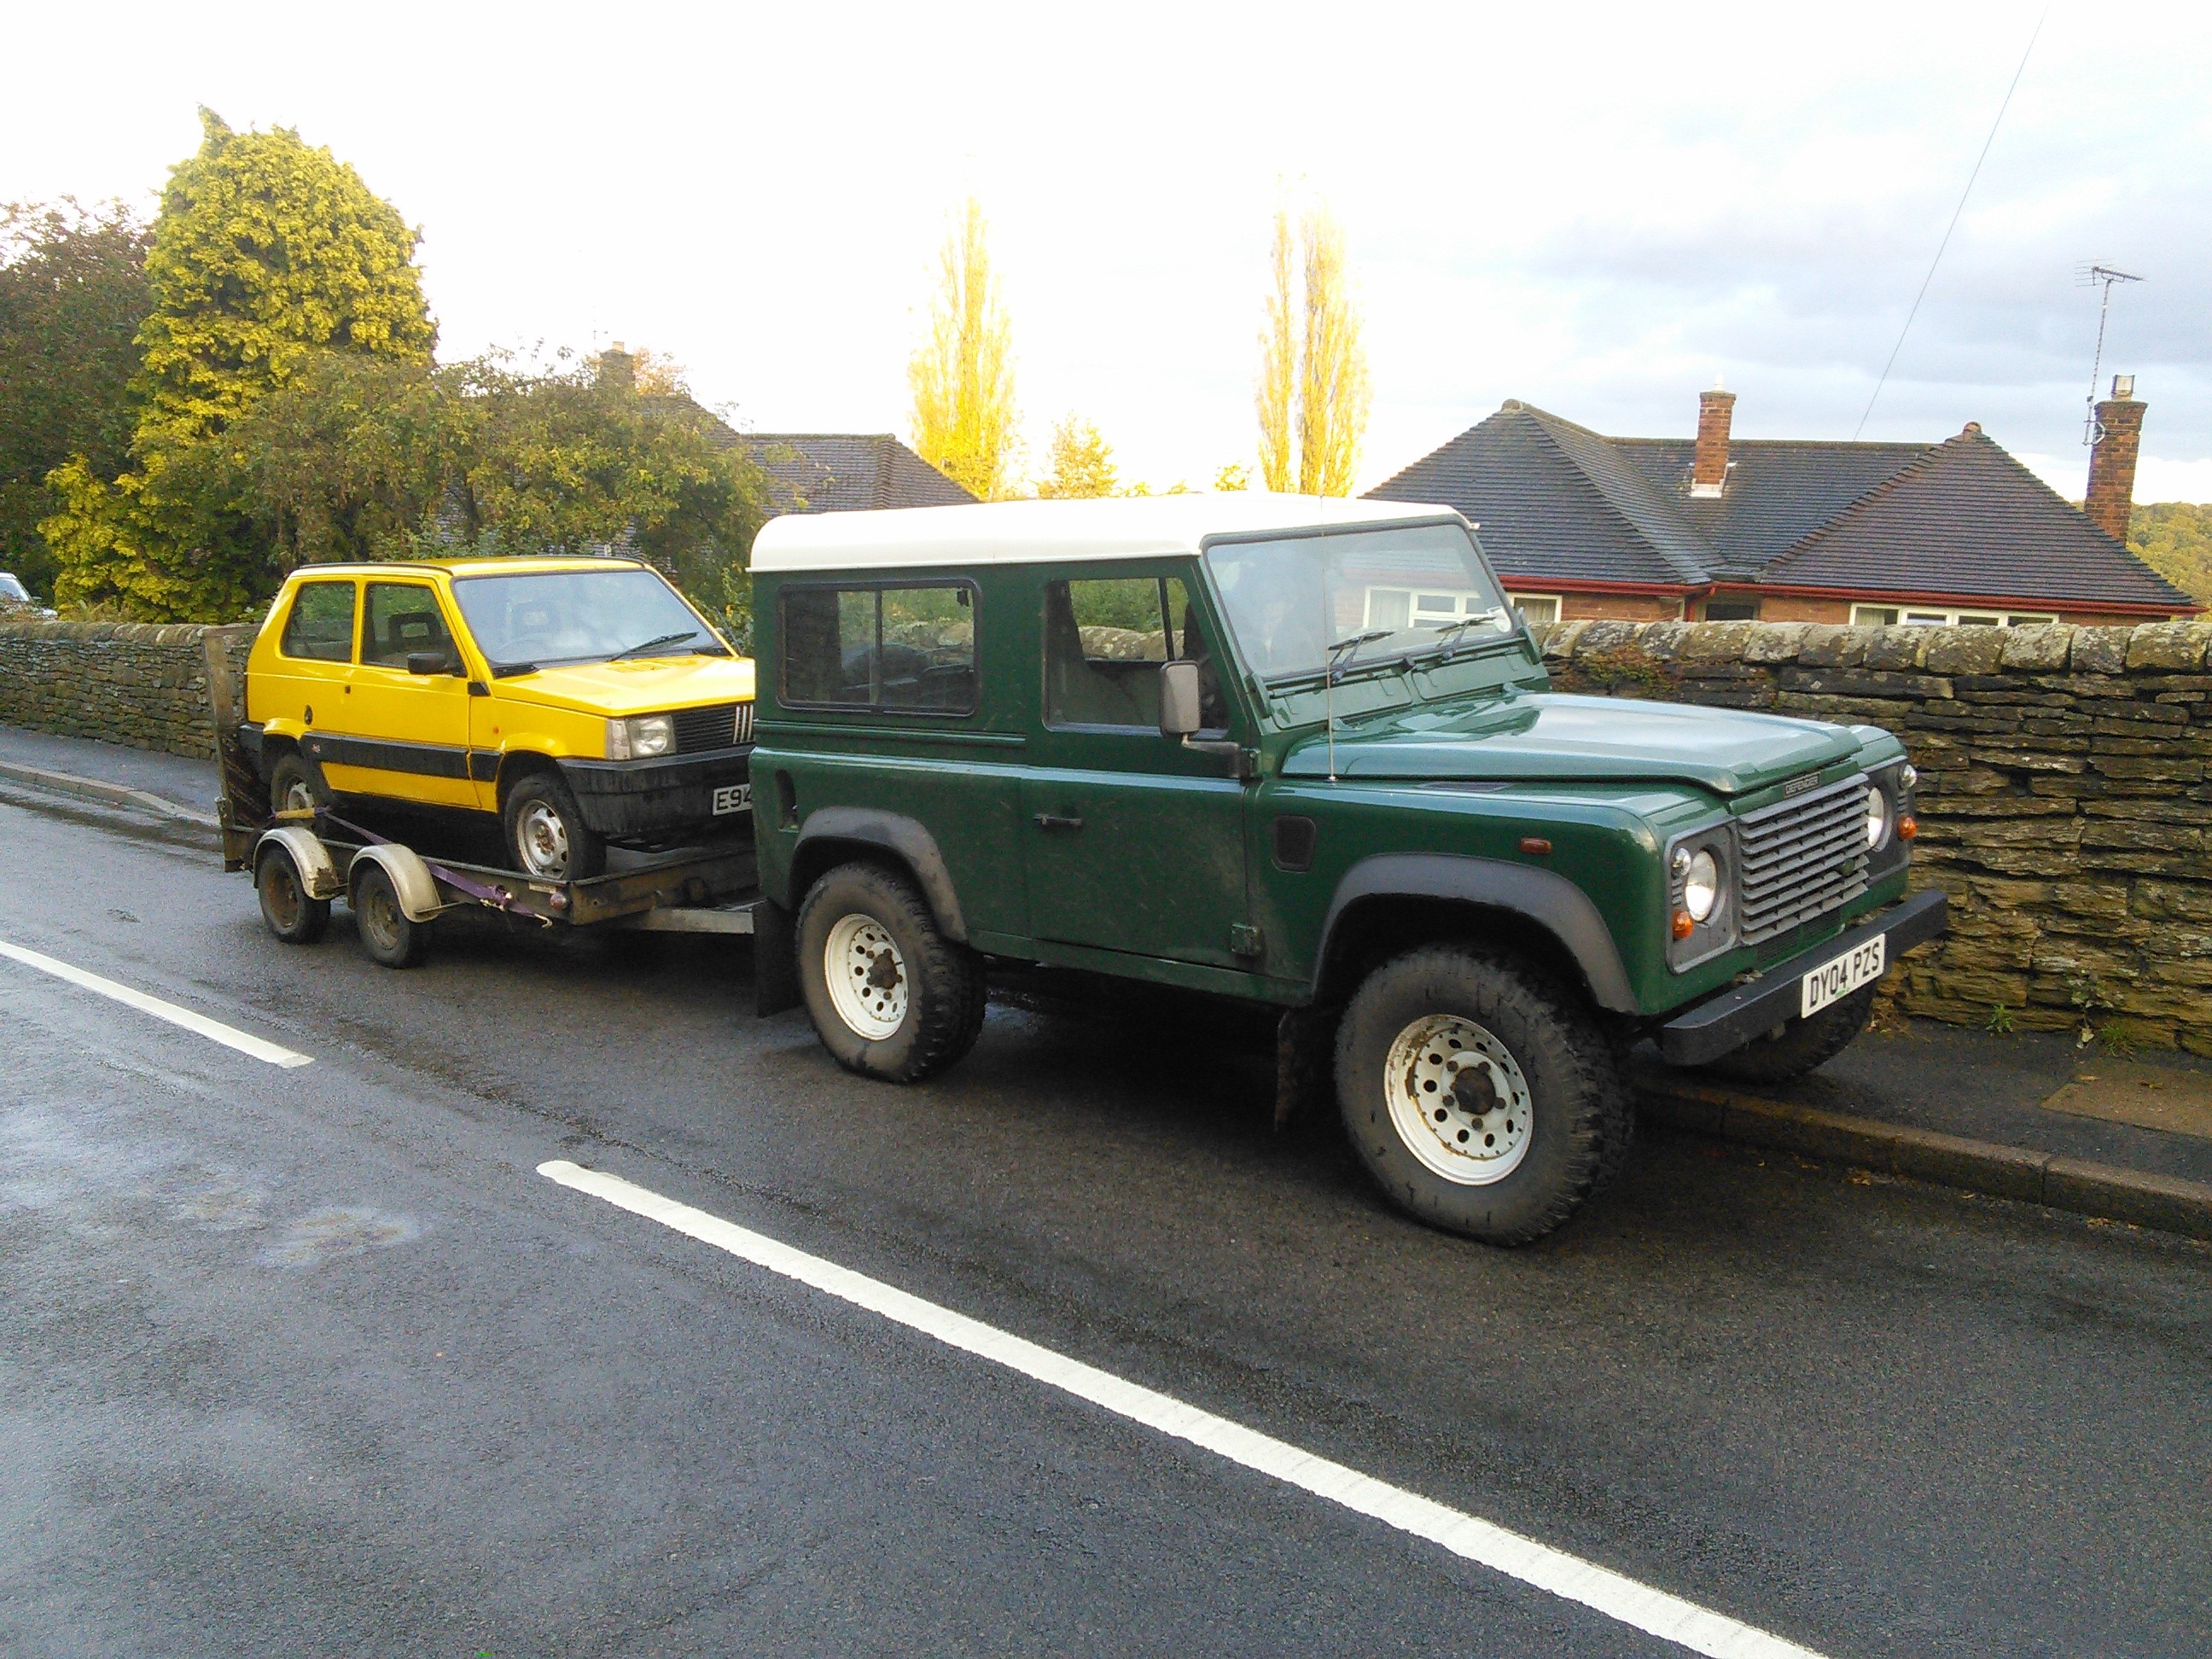
Good job the 4wd on Digger works as I needed it to get onto the trailer! Anyway we dropped him off at my workshop (actually the corner of my Dads warehouse:eek:) and tomorrow I'll give him a good clean (including evicting the many spiders living in the engine bay) and a proper look over.


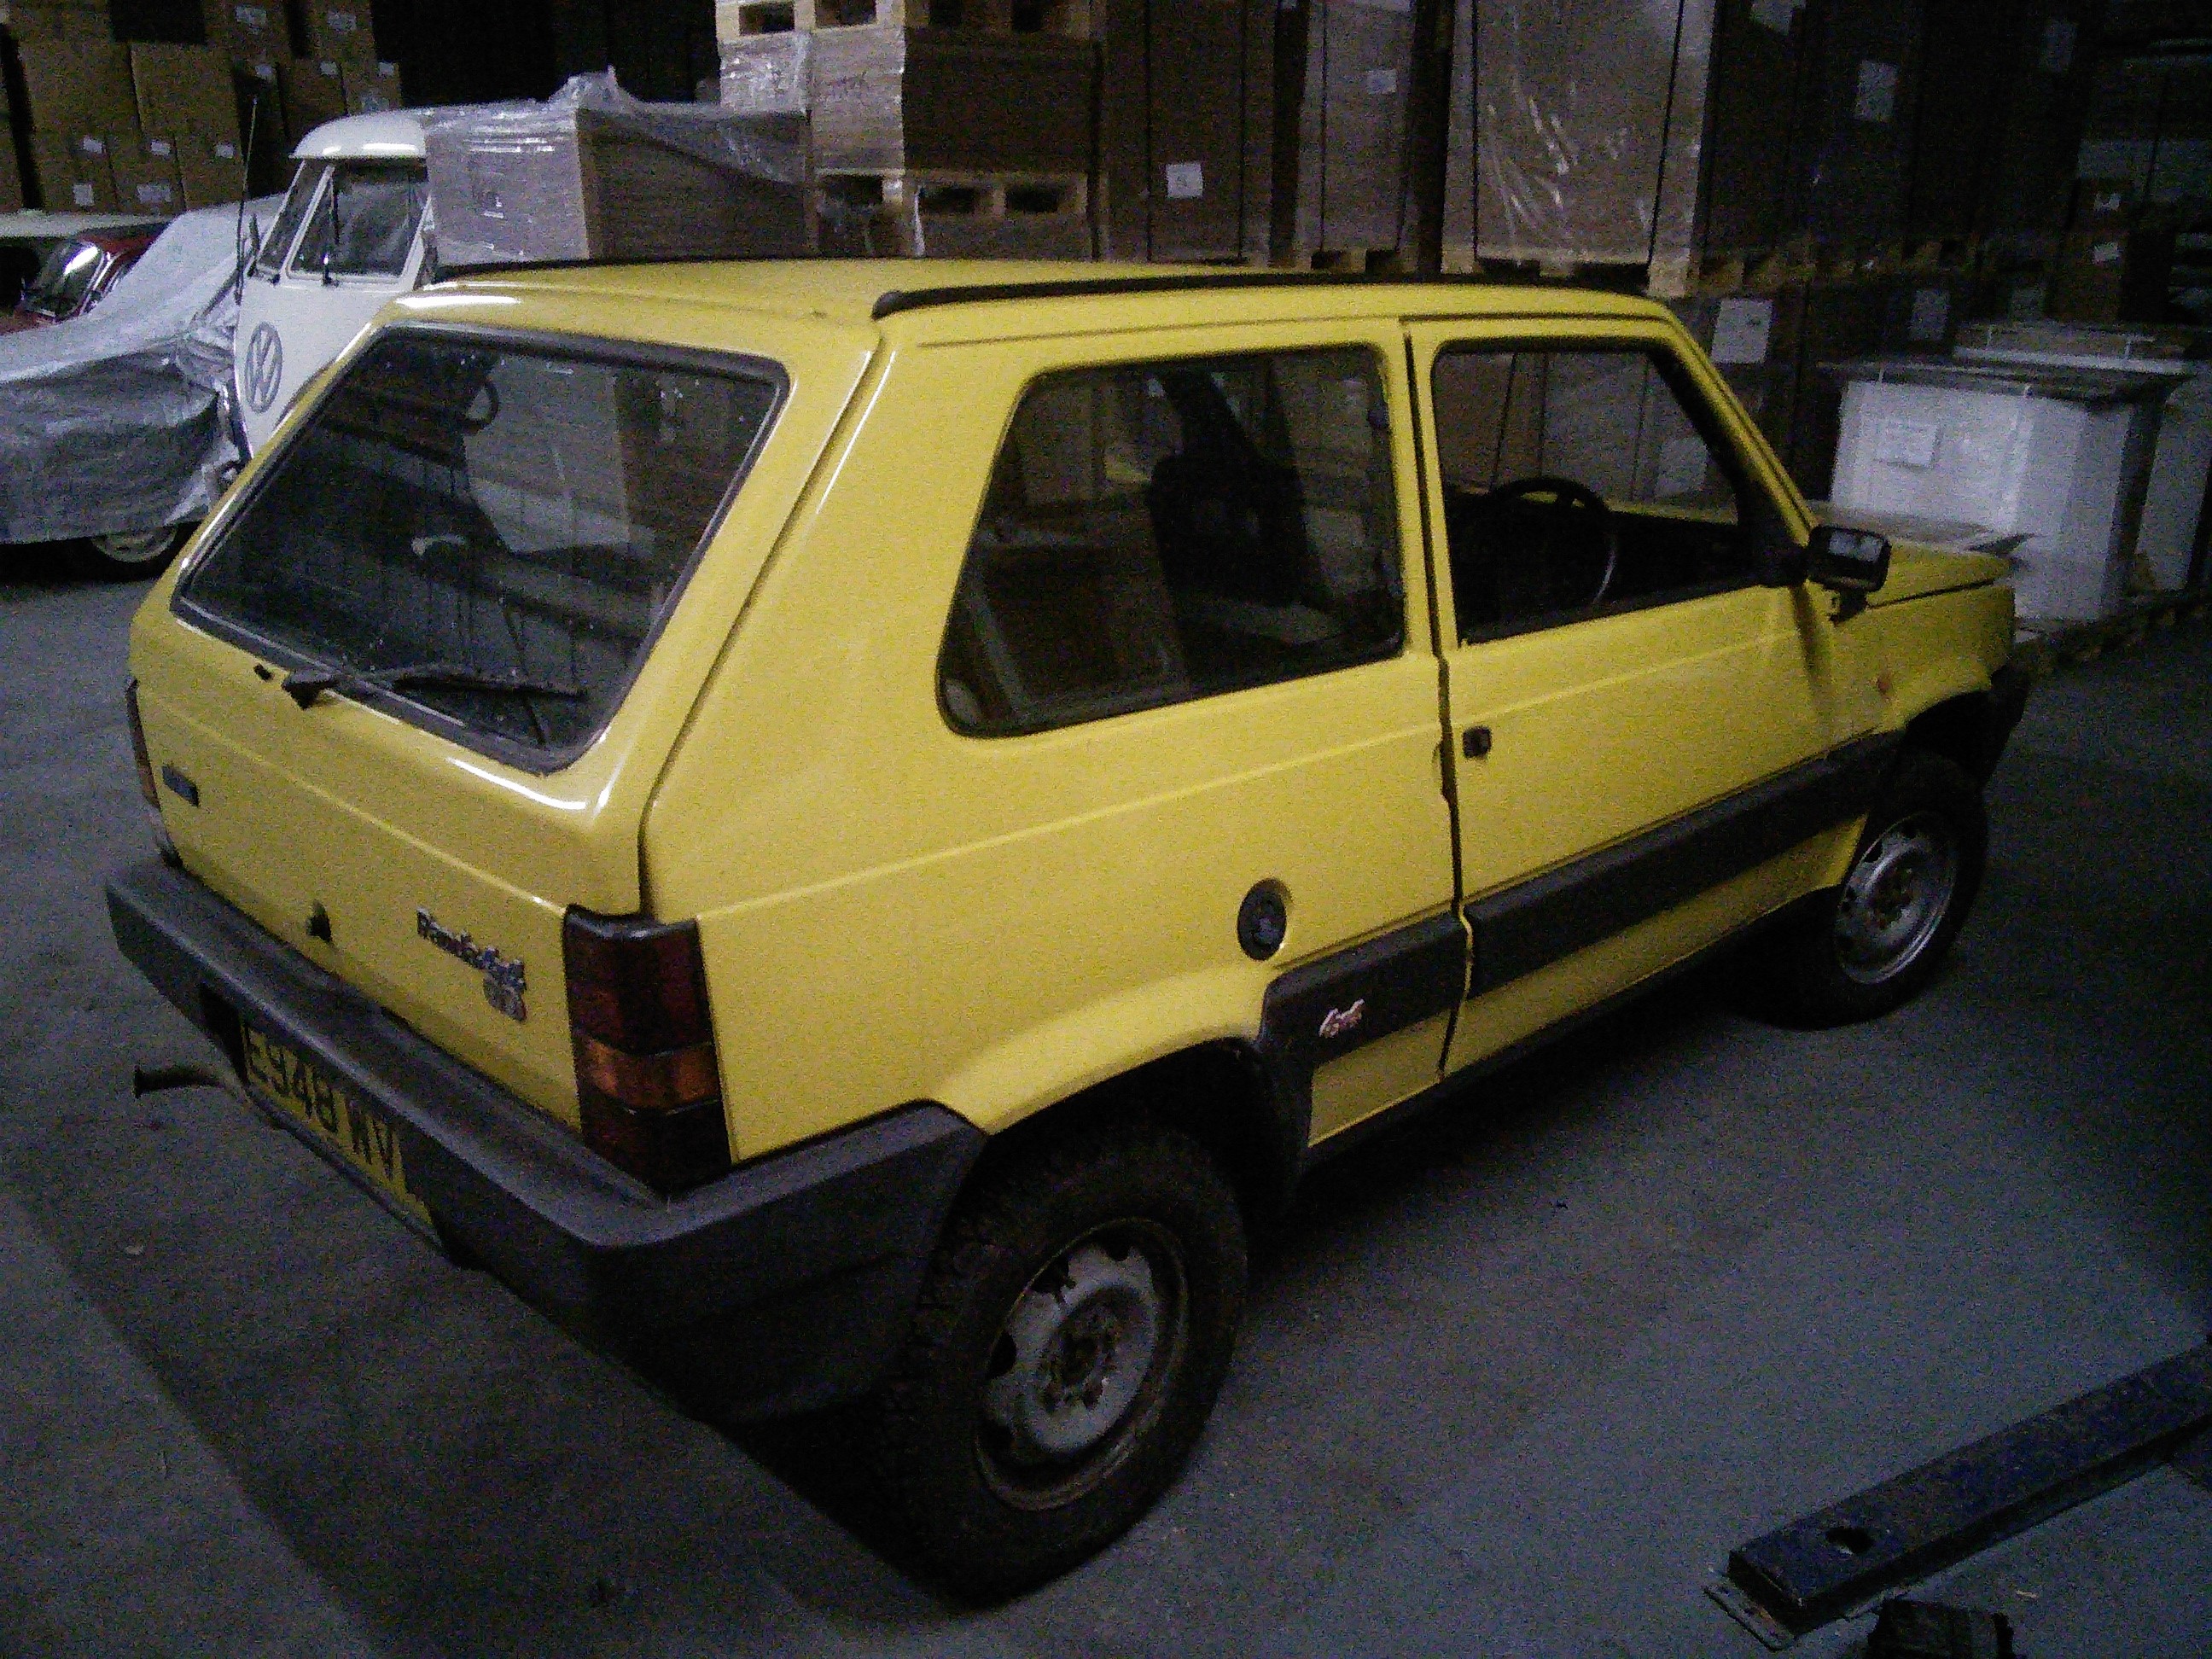
I'd like to get him back on the road fairly quickly, in time for AndyPanda4x4's next Yorkshire weekend;) And then a few mods to improve his off road ability will be on the cards I think.
Hi Freddy, finally got around to making a comment. :eek:

Digger looks great, especially for what you intend using him for. As usual I agree with everything you've said about the rust situation yes he will last you years once you've finished. (y)

Cheers Vern, although I think it's going to take me years to get him finished at this rate, at the moment everytime I do some work on him I find more holes and thats only on one side!
 
Cheers Vern, although I think it's going to take me years to get him finished at this rate, at the moment everytime I do some work on him I find more holes and thats only on one side!

Is the surface rust in the inner sill cleaning up ok?

2014-03-16_14_53_36.jpg
2014-03-18_13_26_46.jpg
2014-03-18_13_29_27.jpg


Oh, suit you sir? Giacosa ;)

You tease :yum: Show me your sill rot!
 
Is the surface rust in the inner sill cleaning up ok?

I've not got to the middle section yet but the back section is going to have to come off, not because it is rusty, but because there are holes in the box section behind it above the spring hanger. I will also have the remove a section of the boot floor to get proper access to it. Ideally I need a new inner sill section, but the likelihood of finding one is pretty low I imagine, so I will have to weld any good bits I have cut off back on and then make my own repair pieces for the rusty bits.
 
A few photos of the progress I've made over Christmas/New Year. Still a long way to go until Digger is solid but he is now less rusty than when I bought him!

The main bit of work I have done is sorting the hole above the spring hanger, unfortunately I didn't take any photos of that doing that, but it meant cutting out good metal in the boot floor and the rear part of the inner sill to get proper access to the rusty bit. I saved the bits I removed so I could weld them back in after. You can see here the sections of boot floor I have welded back in and the join where I cut the inner that is yet to be fully welded.


The rot was just behind the where the large hole for the wiring loom is, you could see it from underneath but it would not be easy to sort from there as the spring hanger and chassis rail is in the way.

With that bit sorted I could start rebuilding the back end of the inner sill and floor which is where I am up to now. Again its a bit tricky as I have very little reference to where the bottom lip should be as it was all so rotten! I need to refit the seatbelt mounting plate and the inner sill strengthener and then I can move to the front section.


Last edited:
Thats some really nice work there. Classy fab & welding work. A quick question about your joddling if I may. Do you leave the excess on the reverse side of the welding and seal with paint, or do you trim it?
 
Thats some really nice work there. Classy fab & welding work. A quick question about your joddling if I may. Do you leave the excess on the reverse side of the welding and seal with paint, or do you trim it?

The patch will be primed and then the overlap seam sealed which should stop any rust forming between the two layers. I also used weld through primer between them aswell so that there is as little bare metal in there as possible.
 
Not posted here on this thread for a while so I thought we were due an update on Digger's progress.

I finished off the back end of the sill by welding the seat belt mounting back in, refitting what was left of the sill stiffener panel and making up a patch to replace the missing bits:


With that done I was able to move to the mess at the front end:


Unfortunately I didn't take many photos (as usual!) but I started by cutting all of the rot out and then reconstructed the floor and inner sill to use as a basis to remake the crossmember/jacking point underneath.

I'm yet to see a Panda where this crossmember has not been bent by someone using it as a jacking point without a suitable piece of wood to spread the weight, so I decided to make the bottom of it out of some 3mm plate, rather than the original 1.2mm. Shouldn't bend too easily now!


With that sorted I moved to the middle, again I cut out the rot (photo of this one!)


Including the centre crossmember that the proper jacking point is mounted to:


Next I made a large patch for the floor:


The crossmember was also remade and welded in aswell as a smaller repair to the third floor crossmember. I could then make up an inner sill section:


I was then in a position to offer the new outer sill panel up and get it fitting properly:


This meant I could make up the rear inner arch section that was missing at the back as I needed the outer sill fitted to ensure it was in the correct place:


After that I cleaned everything up and gave it all a coat of zinc primer


And then did the final fitting of the outer sill before finally welding it on! (after a trial fit of the door to make sure everything was lined up of course!)


I've also replaced the bush in the leaf spring and got that refitted

Remains of the the old bush:


New bush going in:


Spring refitted:


So just the other sill, boot floor and all the rest to go, reading this post back makes it look like not much work at all, but I can't even begin to count how many hours I have put into it so far and I'm not halfway yet!
 
For those not on Facebook, I thought I had better post up some photos of the small amount of progress over the weekend.

Started by removing the rotten rear panel:


Ofcourse this wasn't the only rot in the back end, if only it was that easy, the boot floor was pretty past it aswell:


So that got cut out too, along with the bumper mounts which were not far from falling off by themselves:


I now have one huge hole where the back end of the car used to be. It's all very flimsy and I will have to take care to make sure the chassis legs are properly aligned as they are able to move slightly due to having no support from the boot floor and inner wings.

Next step is to finish removing the remains of the the boot floor and get everything cleaned up, then I can start piecing it all back together.
 
Hard to believe it is 18 months since I last updated this thread! Some people are probably thinking I have given up on Digger but that is certainly not the case!

We will start back in October 2015 when I fitted the new rear panel, bumper mountings and rear section of the boot floor:


I decided not to bother replicating the pressings in the boot floor, it would have added much more work with little advantage. If we were doing a concourse restoration things might be different but flat plates will be more than adequate!


Over Christmas and into the start of this year I finished of the rest of the the boot floor and rear inner wings repairs. Unfortunately I neglected to take any photos of this! I also made repairs to the under floor cross members, these had gone rotten under the sump and propshaft mounting plates. Just one photo here but shows replacing a section of the cross member and also a section of floor above had to be replaced.


After this I quickly made a start on the drivers side sill, the last big bit of welding to be done. The outer sill was cut off:


Which revealed a rusty mess that was to be expected! No where as bad as the other side though! I did do some repairs to the front of the inner sill at the time, but that is where work stopped until this week when I made a start on Digger after about 10 months off!


Not much progress really, but I have made a start by removing the leaf spring and sorting out the cross member above the spring hanger and chassis rail. This involves going in from above by removing a section of the boot floor:


After that is complete I will move on to recreating the inner sill sections at the rear.


Now we are up to date I'll try not to leave it quite as long until there is another update! Hopefully I can steal away enough time to make some good progress in the next couple of months. I have a small hope of getting Digger to the Wales meet in May, but we shall see...
 
I've seen this thread before and was wondering why there weren't recent updates, but glad to see that there is one now! Lots of good work and welding done there. Keep it up, looking forward to seeing this one progress :)

I do really like the yellow colour. It does suit it well, neat little car there, I'll be following the updates (y)
 
Back
Top