IMG_1355.JPG

Panda (Classic) Snatch Panda

Introduction

It's taken a while but I'm going to try uploading some photos..

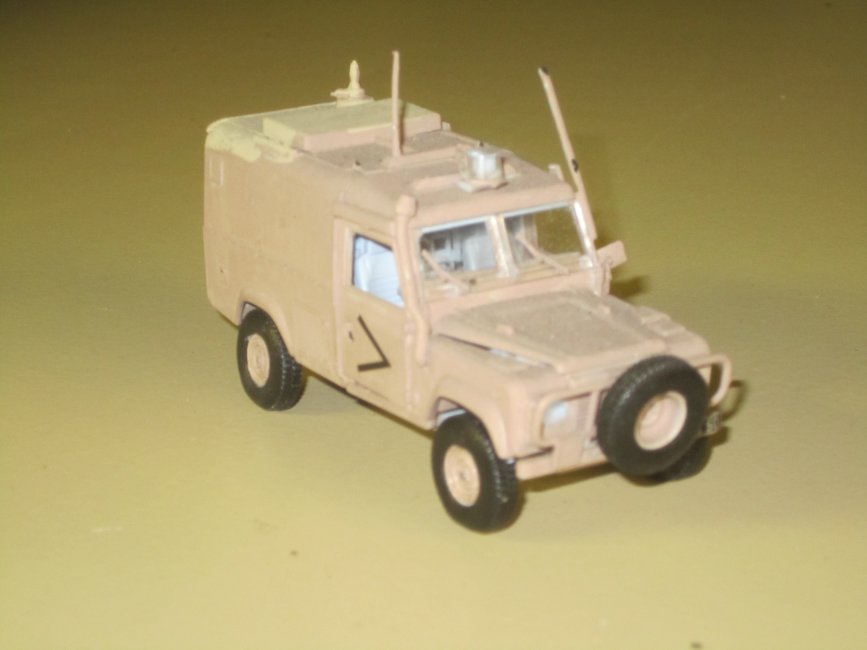
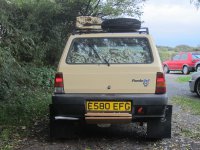
Inspired by Snatch Land Rovers deployed to Gulf War I, Afghanistan and previously in Northern Ireland, I wondered how the Panda version might have turned out..

Dragonman gave me a useful kick early on and David, Aquamarine has been wonderfully helpful throughout -thank you both.

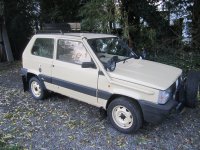
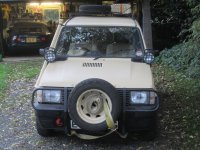
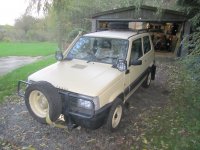
Things got a bit loose with the interpretation as I got carried away - so the mudflaps aren't necessary (but I like how rally cars look) and the bonnet lamps are because of a soft spot for the Matra Rancho. - Please be reassured that only a rusty bonnet was harmed in the making of this modification.

Similarly - all the changes can be undone fairly easily if Sisley prices continue to head for the stratosphere.. So I didn't paint the grill and I have kept a good unmodified bullbar to one side.

Hope you like it. Let me know what you think.
Mounted the ECU today.

An earlier post suggests removing the headlamp wash/ballast tank to make space, but the loom allows it to be located behind and above the strut tower. - I've got the later expansion tank integrated in the radiator set up so there's a space where the original tank was. Using the original Punto bracket helped to make locating it securely quite easy.
Also got the tyres mounted.

That's the good news but the Punto downpipe's flexi fouls the gear linkeage rods so that's going to need modifying somehow..
 
Last edited:
Good question - I assumed they weren't concurrently produced and that the integrated version was just a later simplification.

Maybe my flippant suggestion is not so hard to believe.. - I doubt it was that thoroughly developed though.

Any thoughts?
 
if you cut all the tape from off the loom you will find that it would become long enough to hide the ECU behind the battery ;)
that is where Fallouts ecu is.

while you are at it you can remove the unused wires that will be in the loom..
theres quite a few wires in the loom that you wont need to use as you can use the original cars loom. (temp gauge, oil light, starter solenoid wire, alternator "battery light" wire)
 
Last edited:
May be easier to see from here -


And on the left, propshaft rebuilt and installed, after a bit of a fight. - AndyPanda4x4 suggested around 30 minutes to strip it down. The Yorkshire/Lancashire difference here is about 5 hours!
That thing fought me every step of the way and I ended up 'welding' the cast uj yolk to heat it up enough for the lump hammer to free it from the splines. Both CV joints were gritty with missing boots but they came apart completely and easily to allow proper cleaning, which was nice.
So a whole day lost to a prop shaft. Is it just me or is the Italy ferry starting to loom over the horizon a bit?... Andy, Jacob..?

But. To earn a "1st International Meeting" sticker, surely worth it.

 
hmm yes.. does the flange actually hit the gearshifter rod?

it does look pretty damn close. how does the original centre section mate up to it?

could you get away with cutting the 3 bolt flange off and just using the original 4x4 flange?

hmm then i guess you have the issue with the pipe not being wide enough.

other than routing the exhaust making your own mounting points as you go along.. i cant really see any other way of doing it.

do you have a full complete exhaust or just the downpipe?
 
An exhausting day (sorry) but enjoyable, - welding nice thick pipes, flanges and mounts into position. As John suggested, it was 'fabricate your way towards the rear', which I didn't find easy to get the bits; aligned, strong, symmetrically supportive, neat... etc (In fact I didn't manage any of this, but it was fun anyway.)

I didn't even make it to the rear, but gave up near a rear wheel.
 
Last edited:
hey it looks good! that is what Fallout is going to have..... one day.
i need to find a place that will sell me cheap flexible stainless 2 inch wide ducting...

oh and that sticker.. awesome.. just awesome.

i will hide my 600watt (1.2kw SSB) signal amp when you next come around.
 
Last edited:
It lives!

..Sort of. Wiring mystery solved (see "how to fit a 16v thread") but as I haven't replaced the filler tube yet I can't put fuel in the tank for a proper test. Couldn't resist squirting some brake cleaner down the inlet just to check it ran, and away it went first crank, almost.


Also fitted dragonman's wiper conversion - thanks John, and in the absence of a Cinq arm found that a driver's side MX5 one works okay too.

Plenty still to do before departure, but good progress today.

The wiper conversion is brilliant! I have it on both of mine :)
 
And a video of it running? I bet it sounds nice with that short exhaust on it and only 1? Silencer :slayer:

Microphone on phone struggling with the db level from the exhaust. But at least it does run.

Unfortunately it doesn't stop. Key off, out, in pocket, still runs. Hmmm from not starting to not stopping. I'm not great at this electricity down wires thing.(n)
 
you did wire the orange wire to an ignition live... right? like the old coil live.. or the white wire that went to the carburettor..

i cant see any other way you have done that???

do you get your fuel pump prime when you connect the battery? or only when you turn the key to ignition?

this is from Fallouts thread (yes i know its a 8v engine but the looms i think are the same!)
a big thick RED wire, is a constant live from the battery.
ORANGE wire, its an ignition live.
BROWN with WHITE stripe is the fuel pump
BLUE wire, it is for the REV counter
LIGHT GREY with GREEN stripe goes to the CODE box (ECU pin 7)(wire colours match on ECU and CODE box connector!)
BLUE with GREEN stripe goes to the injector/engine management light (ECU pin 6)
LIGHT GREY with YELLOW stripe goes to the oil light
LIGHT GREY with BLACK stripe goes to the battery/Alternator light
LIGHT GREY only wire goes to the temperature gauge

us panda guys dont need the last 3 wires.. :D
 
Last edited:
Back
Top