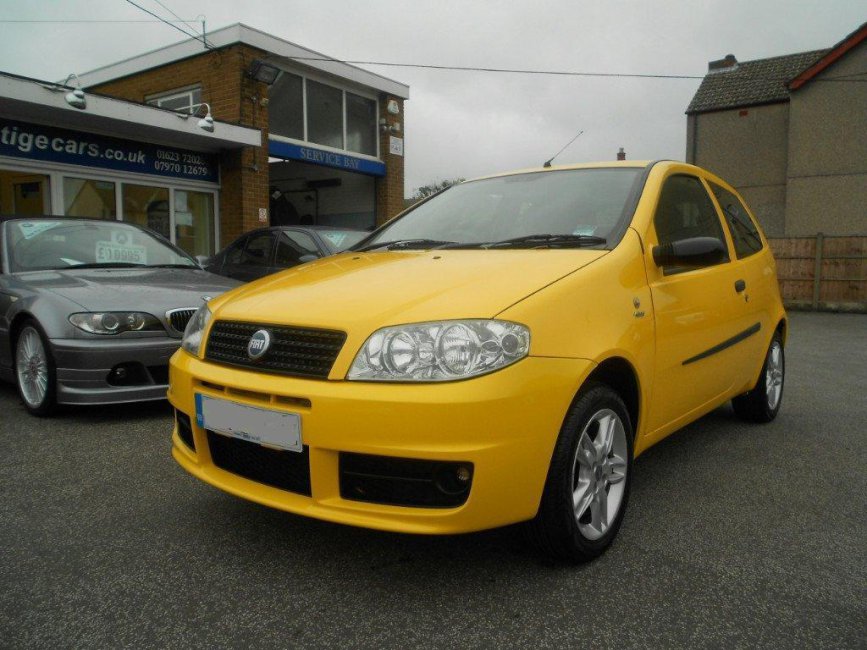
Dealer 2 (No plate).JPG

Punto (Mk2/2b) Meet Bumble-Bee

Introduction

Meet Bumble bee
replacing my beloved but now scrapped Mk2 Blue punto

Needs some bits doing to it - but i never leave cars alone anyway :)

So here he is
2004 on a 53 plate
58K
Yellow Active Sport (8v engine)
Alloys - nice grey interior and generally nice tidy motor that needs a little more tlc to make him better :)

Dealer 2 (No plate).JPG
Dealer 3.jpg
Dealer 4 (no plate).jpg

So what has been done so far? Well its got a fairly new backbox - but middle pipe went, replaced under its warrenty

Given him a darn good clean and wash, but lasts all of 5 mins been yellow :(

Pulled all the roof gutter seals out and cleaned the rubbish out from there
Also had the windows screen trim rubber and cleaned all around there :)

what i wanna do is get everything cleaned up, tidy alot up
add a few features i want back in :)

But here we go :)

So i did the roof gutters - they were really really ready.... which means all the cack runs down the rear lights.....

So out they come
2012-07-25 12.15.05.jpg
2012-07-25 12.35.03.jpg

1hr later they are all cleaned - dried and waxed to prevent it getting bad anytime soon

2012-07-25 12.48.47.jpg
2012-07-25 12.48.56.jpg

Keep posted :)

Ziggy
Power steering blipped yesterday
I asked a friend if I could borrow his snap on scanner

Decided todo a full sweep and do all the systems

Airbags reporting power issues

1420825290098.jpg

Engine saying canbus and no key
1420825373893.jpg

Power steering the danger code of torque sensor, speed sensor and power issues
1420825452793.jpg


Gonna keep an eye on it
 
Well not much has really happened again tbh
Its Stopping - starting and been a nice little drive as always :)

Recent puncture - forced back onto summer tyres now, fronts worn - ready for replacing tbh

Fixed the squeeking handbrake cables with a dollop of copper grease again when i did the rear wheels

Found front pads to be ready for replacement
Done that with the front tyres :)

So new brakes and alloy time again :)

Images are on my blog

ziggy
 
Went out for breaky one morning, and the powersteering yet again decided to have a hissey fit, total loss of assistance

So i again borrows the code reader
Not good - Torque sensor fault :(
Power Steering.jpg

Airbags im aware of the fault code - i left my stereo on while doing my drums, and when pressing the brake pedal put the light on (and the stereo off lol)

Airbag.jpg

Body computer keeps saying
Body computer.jpg
Key code fault - yet no starting issues
the voltage issues is also odd.... suspect from bumping car with flat battery :devil:

Again codes cleared, leaving it for now, P/Steering works fine 99.9% of the time, and i suspect it was because battery was still low, causing a duff reading via the torque sensors....

Ziggy
 
Well its time i sorted my faded/cloudy/manky lights

I keep driving at night, and there was slowly become less of a difference between High and low beams
There was a little more light spread, but no actual brighter output if that makes sense
old picture of flared light.jpg
An old picture here back in 2013, it was clear the lens were starting go funny
You can see the headlight beam just hitting all the tiny scratch's/imperfections resulting in the light been deflected away to where it was meant to go


So i decided to tackle the job. I've been umming and arrr ing about getting a 3m Kit to-do it
but tbh this will do me perfectly for now instead
I used a 2000grit wet and dry and 3000wet and dry
A Medium density Halfords polishing pad, with Swirl-boys Swirl Remover 2.5 and Merzerna Final Finish
Carlack 68 long life sealant

Spent about 10mins each on the 2500 and 3000, sanding the light clusters down with plenty of water, i had a 1Litre spray bottle pressured up and spraying most of the time

Followed by about 15mins of polishing on the swirl remover (more corse) And then the final finish

Results :) There not perfect but they are 10x better!


3x Coats of sealant to help prevent the UV damage, but this is gonna needed to be reapplied constantly

Before (Passenger Side example)
Before Haze.jpg

Driver Side Improved
Improved Left.jpg

The Comparison
Left Vs Right (no plate).jpg

And together :)
After.jpg

The lights when switched on actually hidden now - as all that light is escaping through the lens as intended :)

Ziggy
 
They look spot on buddy, really nice job you have done, i need to do mine when i get a spare minute

Adrian
 
Well its time i sorted my faded/cloudy/manky lights

I keep driving at night, and there was slowly become less of a difference between High and low beams
There was a little more light spread, but no actual brighter output if that makes sense
View attachment 151974
An old picture here back in 2013, it was clear the lens were starting go funny
You can see the headlight beam just hitting all the tiny scratch's/imperfections resulting in the light been deflected away to where it was meant to go


So i decided to tackle the job. I've been umming and arrr ing about getting a 3m Kit to-do it
but tbh this will do me perfectly for now instead
I used a 2000grit wet and dry and 3000wet and dry
A Medium density Halfords polishing pad, with Swirl-boys Swirl Remover 2.5 and Merzerna Final Finish
Carlack 68 long life sealant

Spent about 10mins each on the 2500 and 3000, sanding the light clusters down with plenty of water, i had a 1Litre spray bottle pressured up and spraying most of the time

Followed by about 15mins of polishing on the swirl remover (more corse) And then the final finish

Results :) There not perfect but they are 10x better!


3x Coats of sealant to help prevent the UV damage, but this is gonna needed to be reapplied constantly

Before (Passenger Side example)
View attachment 151977

Driver Side Improved
View attachment 151976

The Comparison
View attachment 151975

And together :)
View attachment 151978

The lights when switched on actually hidden now - as all that light is escaping through the lens as intended :)

Ziggy
nice job mate i can learn a lot from u. ;D
 
Well i was working somebody elses car and i left the boot open several times for like 30mins each
(so boot light stays on 20min's each)
Plus when using the air compressor (12v version thing) it also leaves my DRL'S on

As a result
i got a flat battery, but id didnt think anything of checking, but it made me wonder should of it gone flat so quick?
Answer

well its a Bosch S4 - 390CCA, - returned a reading of 319
Thats not bad really, im at about 80% capacity)

I also took my spare after a fresh charge from storage
Same Bosch s4 - 390CCA, Returned 322cca / 390

So at about 82% cacapity (and its not getting used much)

Makes your wonder :)

Ziggy
 
boot light is like what 5w ?
55ah battery 5w/12v = 0,41 amps
55/0,41 = 134 hours

battery should last 134 hours with boot light on, you sure it wasnt already empty?

unless that air compressor was used constantly between these 90mins
 
boot light is like what 5w ?
55ah battery 5w/12v = 0,41 amps
55/0,41 = 134 hours

battery should last 134 hours with boot light on, you sure it wasnt already empty?

unless that air compressor was used constantly between these 90mins

Include DRL's at 400ma (.4 Amps)
Include door open light Another .4amps (total .8)
Boot light = .4amps (Total 1.2)
Ignition system active + Dash (say half amp?) (1.7amps)
I think stereo may have been on too - but volume at 0 (so sub's awake too)
And add the sudden bursts of a little compressor pulling upto 15amps i think
It no wonder after 1hr or 2 i killed the little fella

Bearing in mind the stereo and lights will remain to work with the lower voltage
the starter needs a huge juice which wasn't availible

The car bump started with ease, so probably at the 11v ish range

Ziggy
 
Back
Top