


Introduction
the black box's box- engine purchase

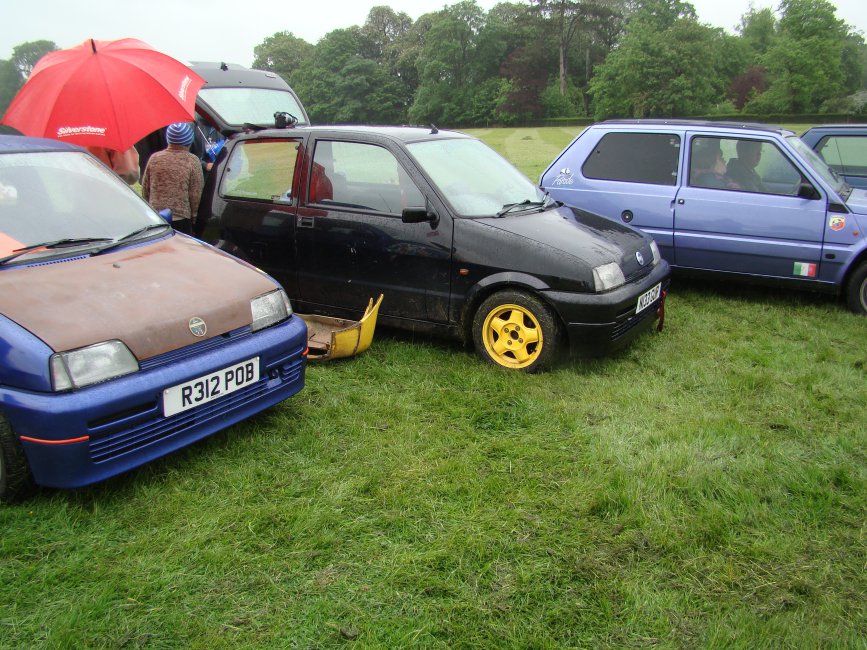
photo taken from the gallery on here ill get some more up soon. not nessecerialy in the right order just what i remember
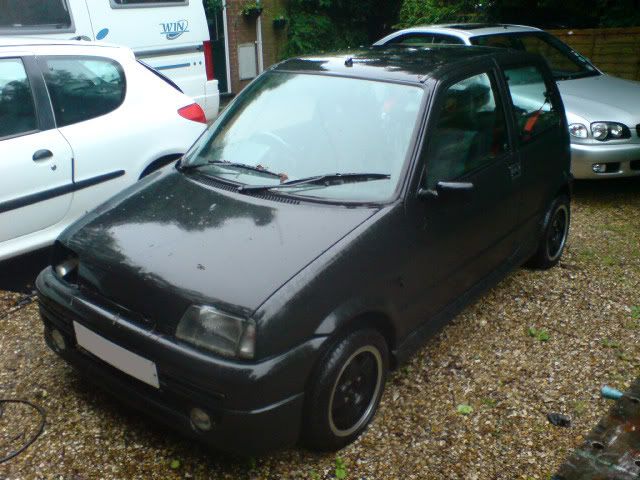
The story started back when i was 17 (now 21) when i had my first cento an 899 had far too much fun in it. Brought a second 899 for £30 did the HG then sold it.Then brought a new car and cento no1 sat on my drive looking very sad. Fast forward to the beginning of last year and i spotted an ad on here for a cento shell needed so i offer her up and swapped for my 3rd cinq a crashed yellow sporting from purf. i only was going to use parts for my now deceased 126. part of the swap also included a set of wheels and some other parts. stripped cento no3 to a shell learning a lot about how they go togeather faults etc and most importantly collecting a big pile of parts, bolts, clips i kept everything.
Of course i could never be cento-less so spotted on ebay cento no4. described as needing a new engine (big ends gone) but having some new bits and a new set of tyres. Brought unseen but it seems i did well. The big ends turns out to be only an alternator (which i had). Did the handbrake with parts i already had, lowered with new shocks and using springs off cento no3 (40mm lower), insured for a rediculous ammount and drove it around relighting my enthusiasm for these cars. once tax and mot was up there were a few problems that needed sorting so it came off the road for a rebuild.
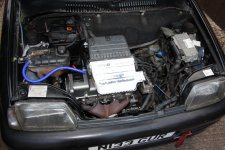
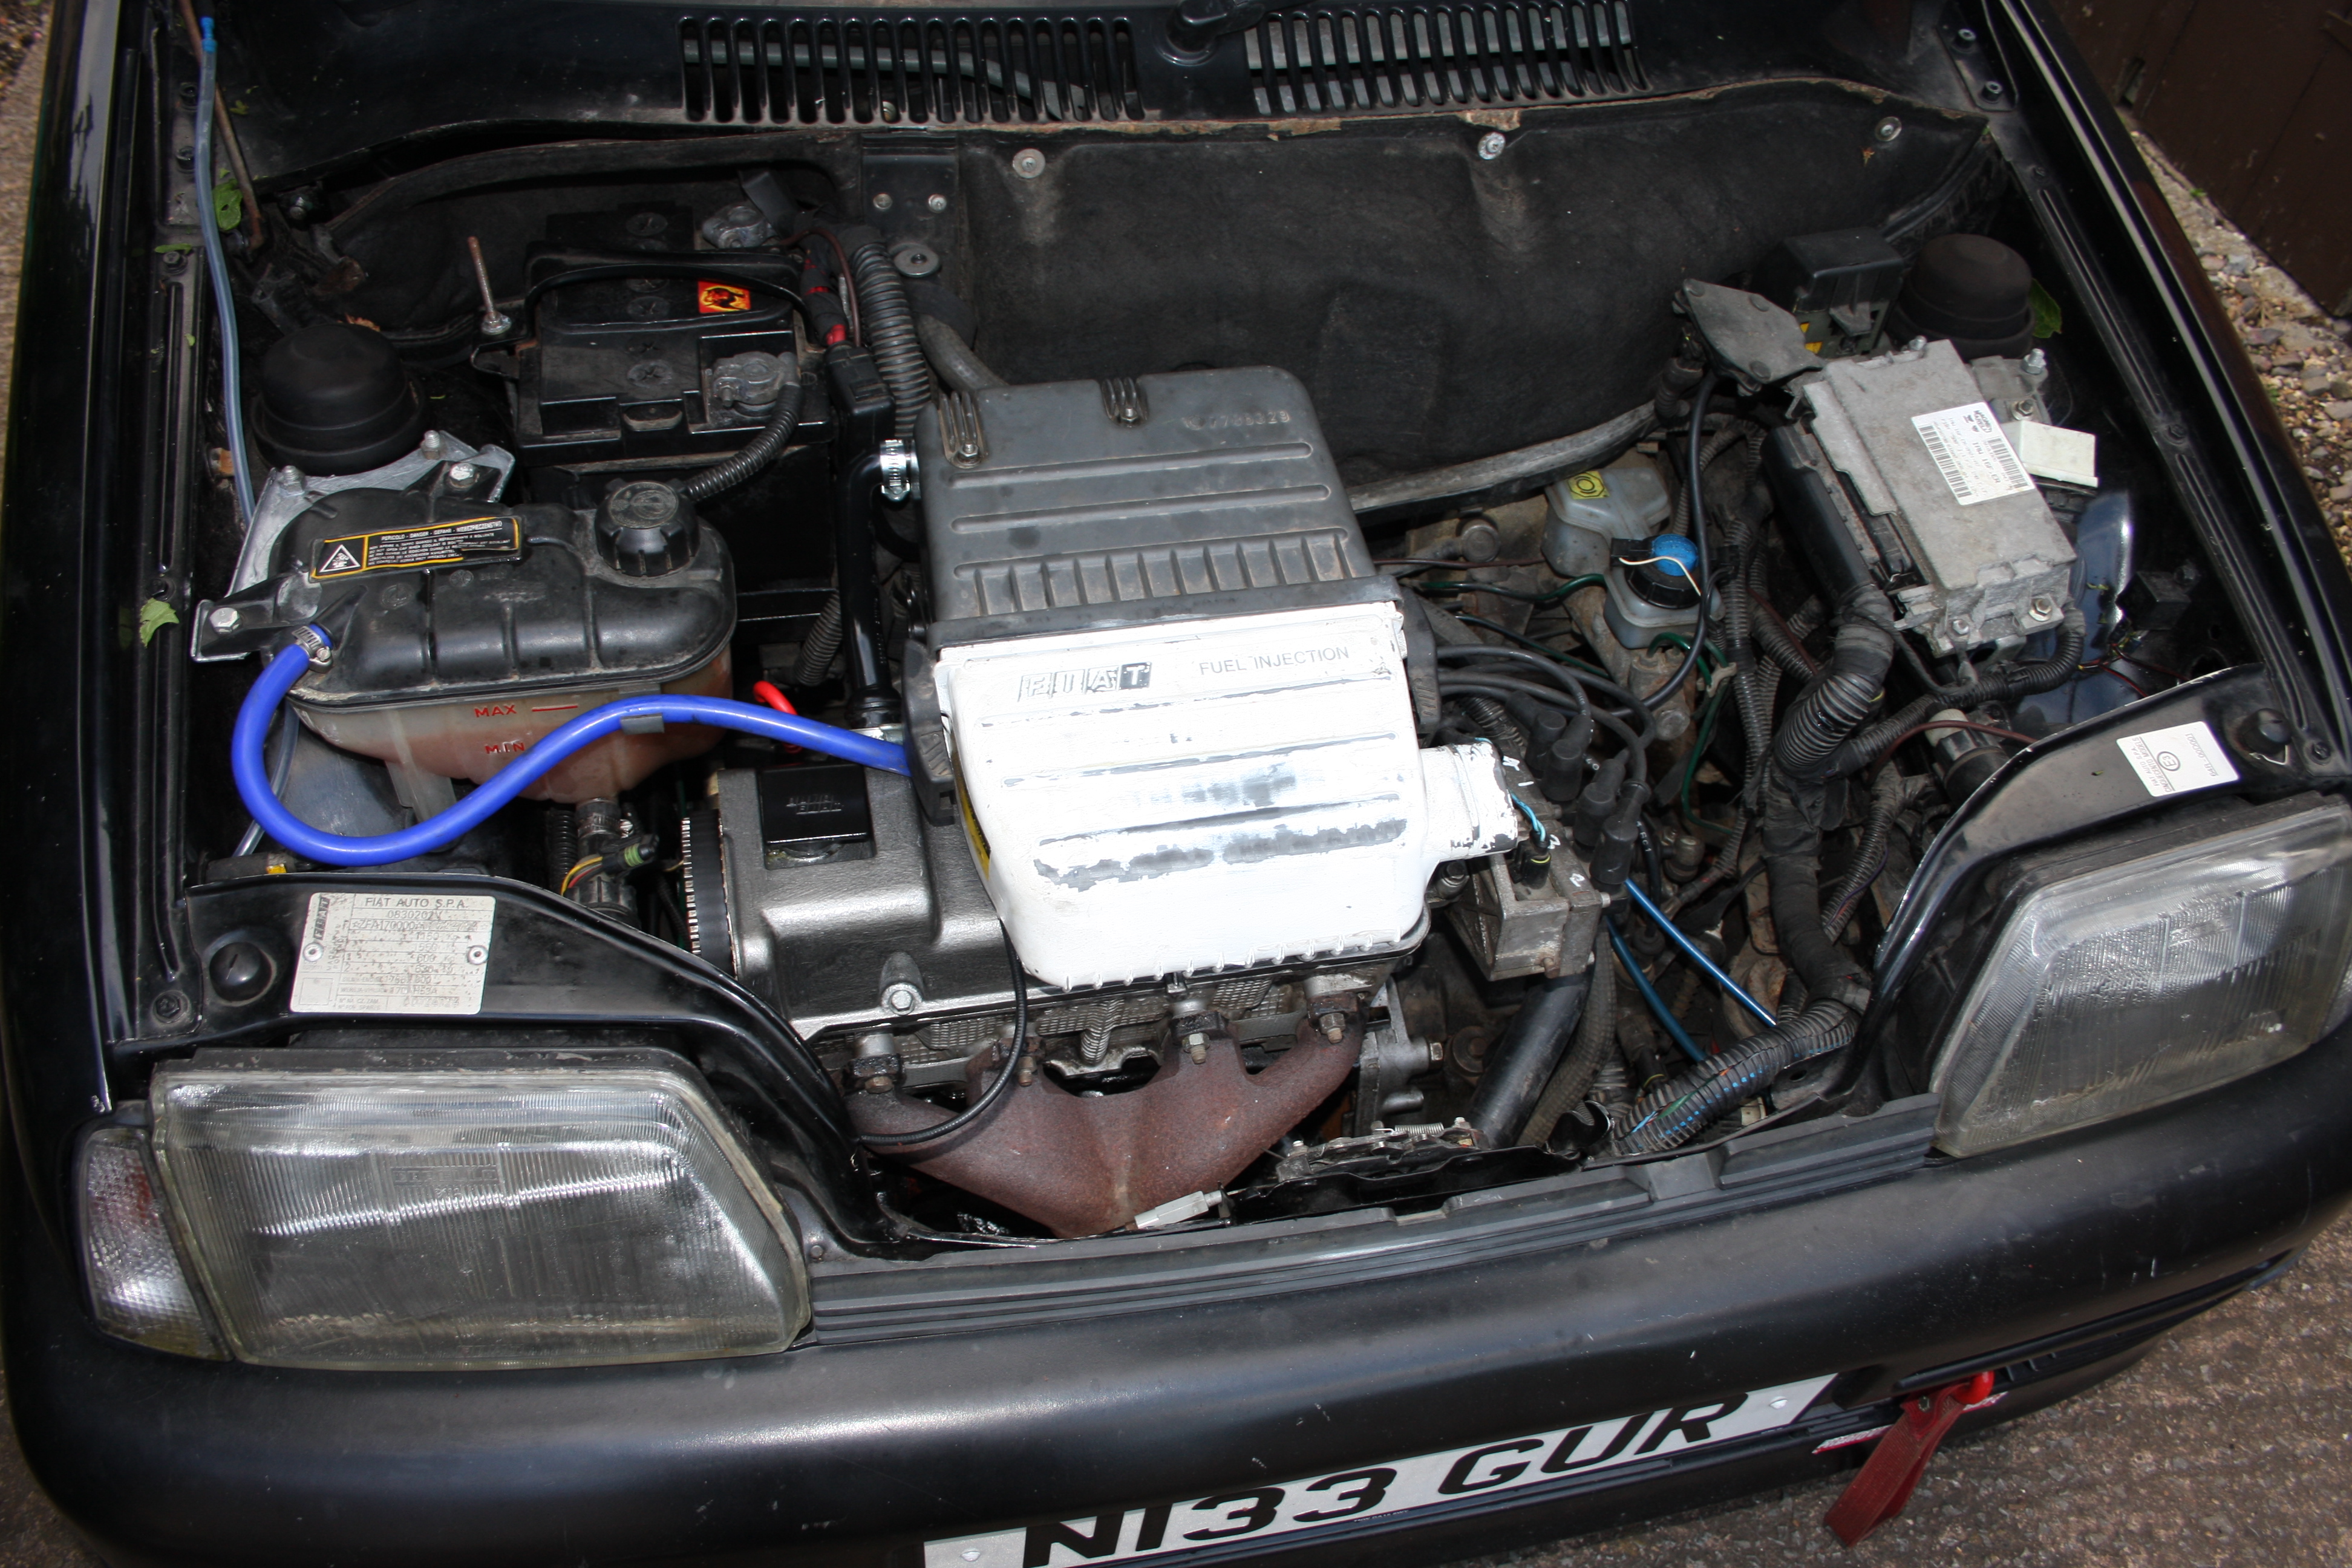
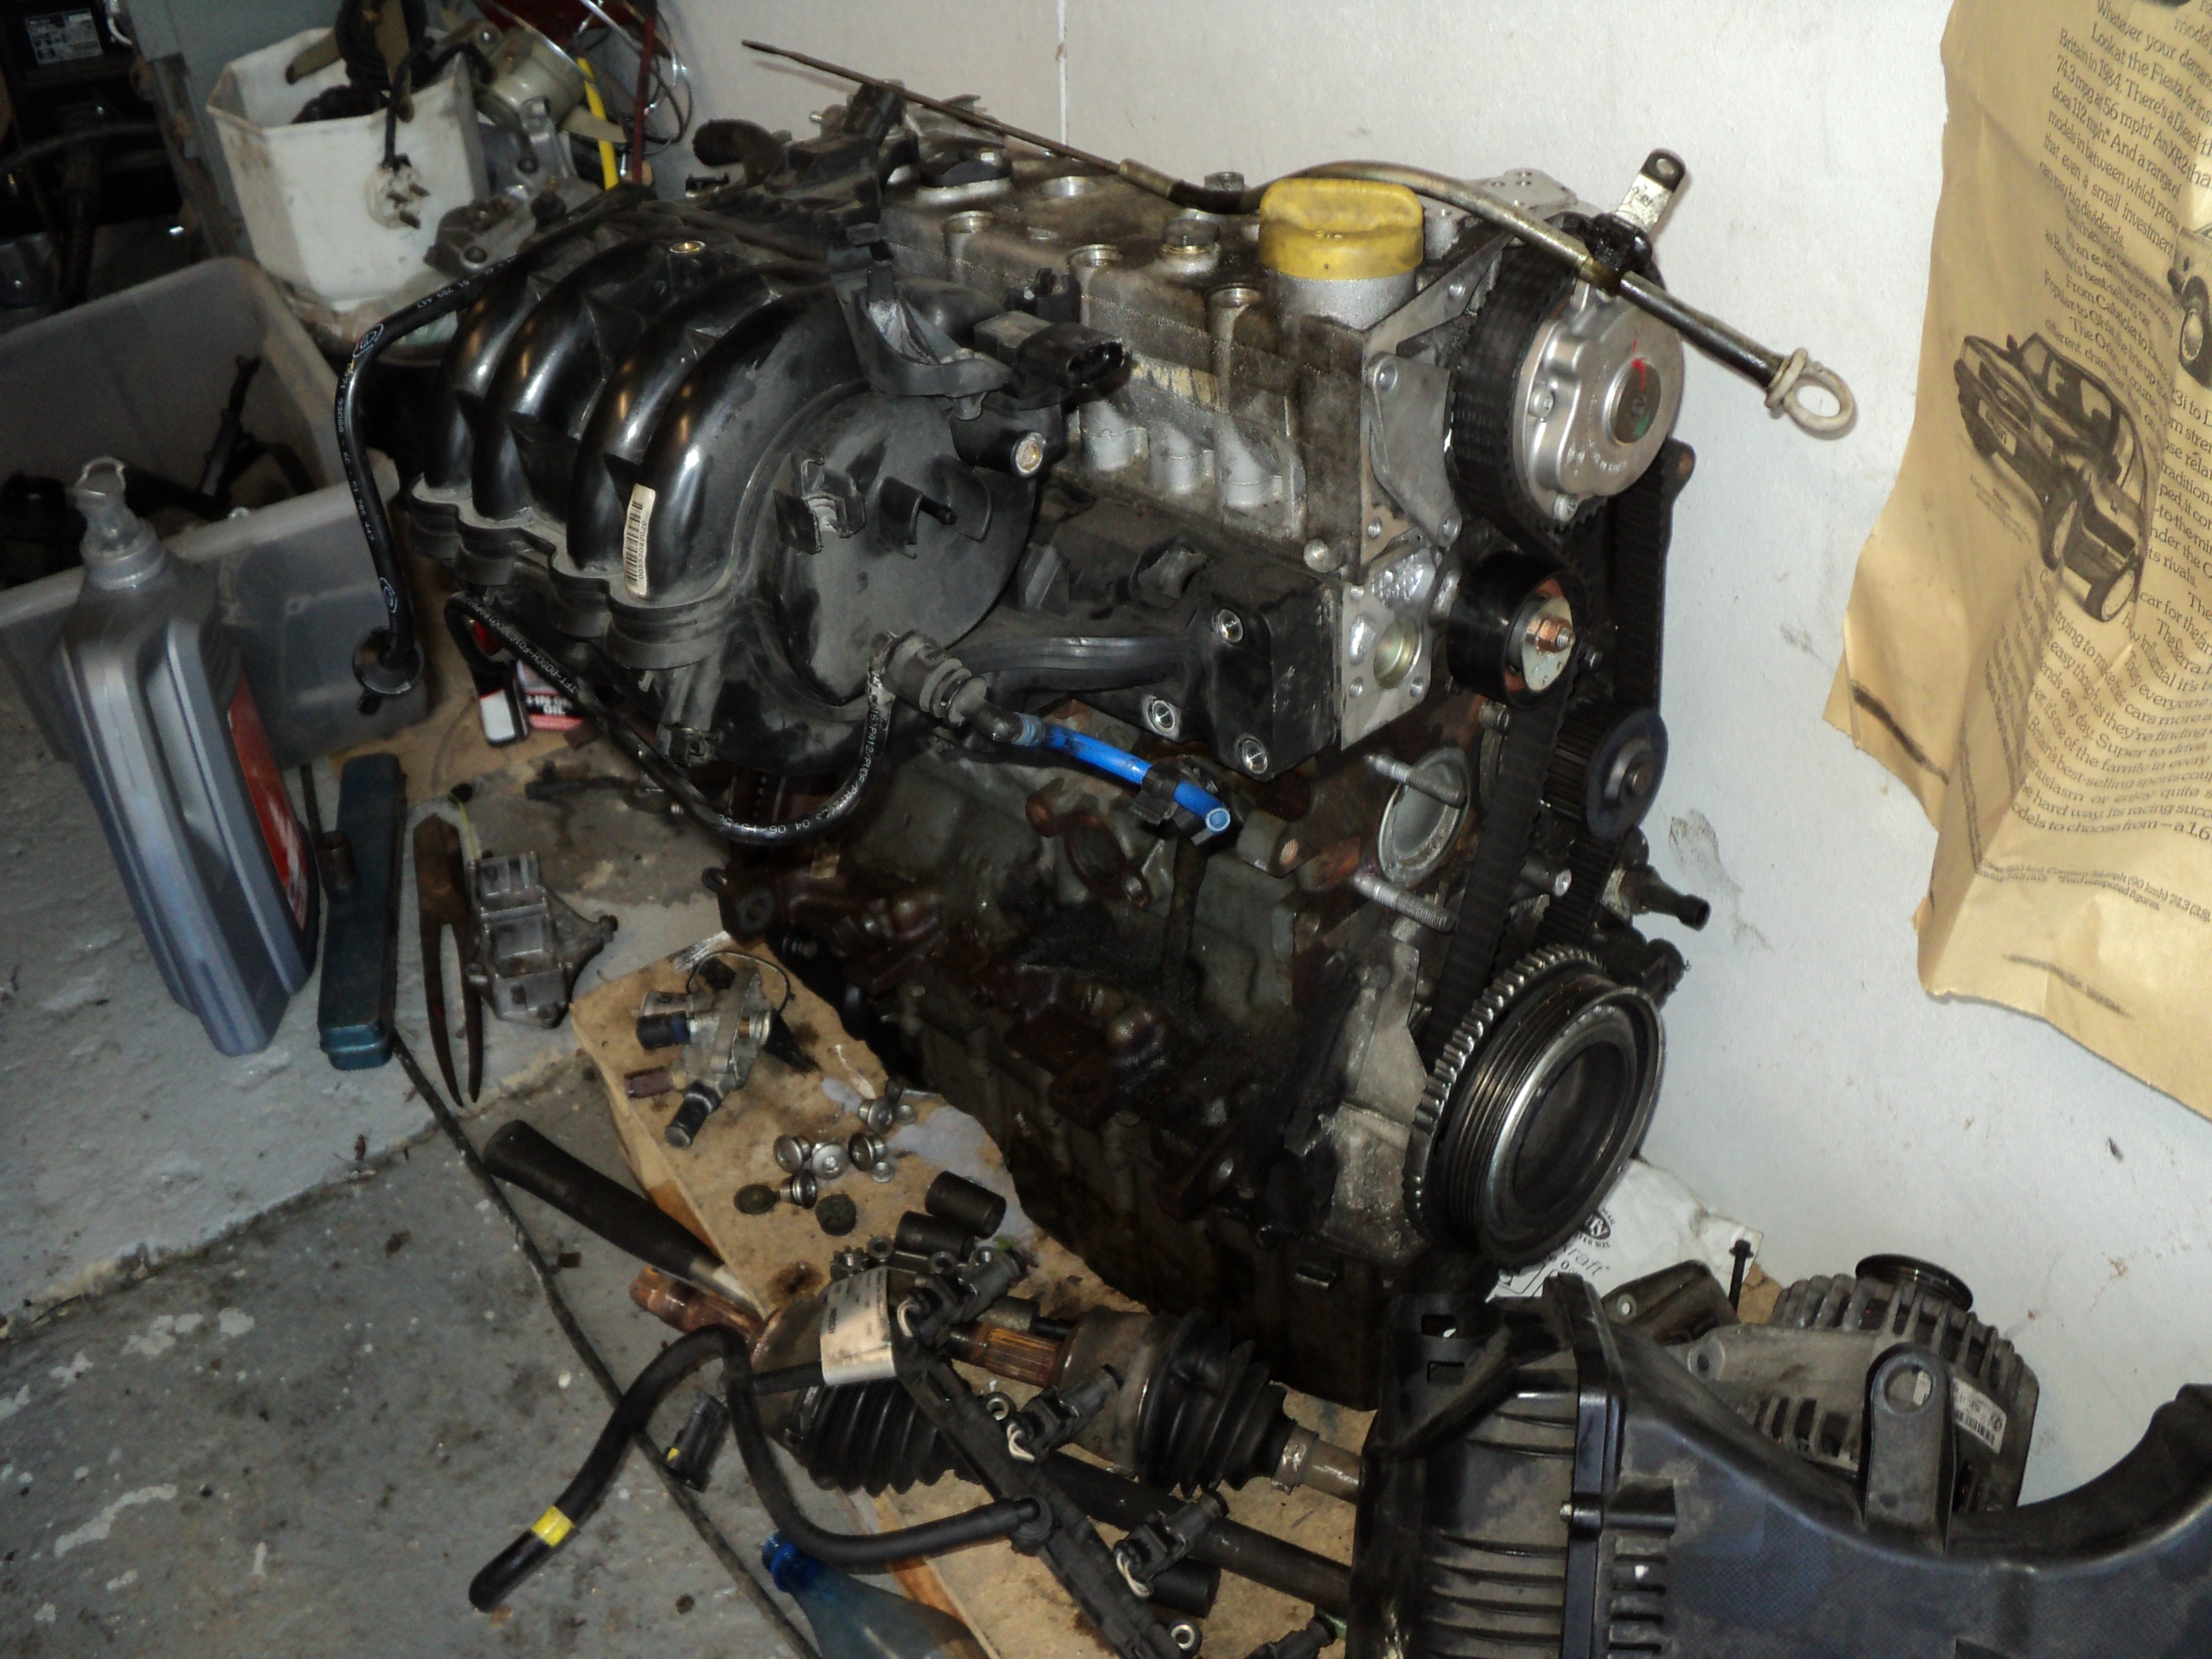
i needed more power and this came in the from of a 1242 8v that i removed in the rain from an x reg punto (mpi setup). this turned out to have HG faliure and had never been serviced came complete with treacle oil which stank and needed old engine oil to flush it out (wouldnt move at all). I ported and polished the head from cento no3. Got the flywheel lightened and balanced with the crank assembly (4kg), put a 866 cam in and cleaned, painted replaced as much as i could.
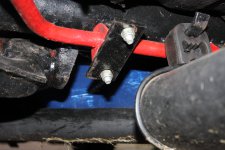
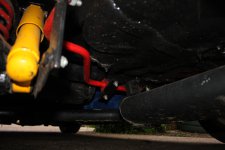
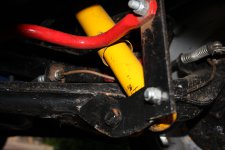
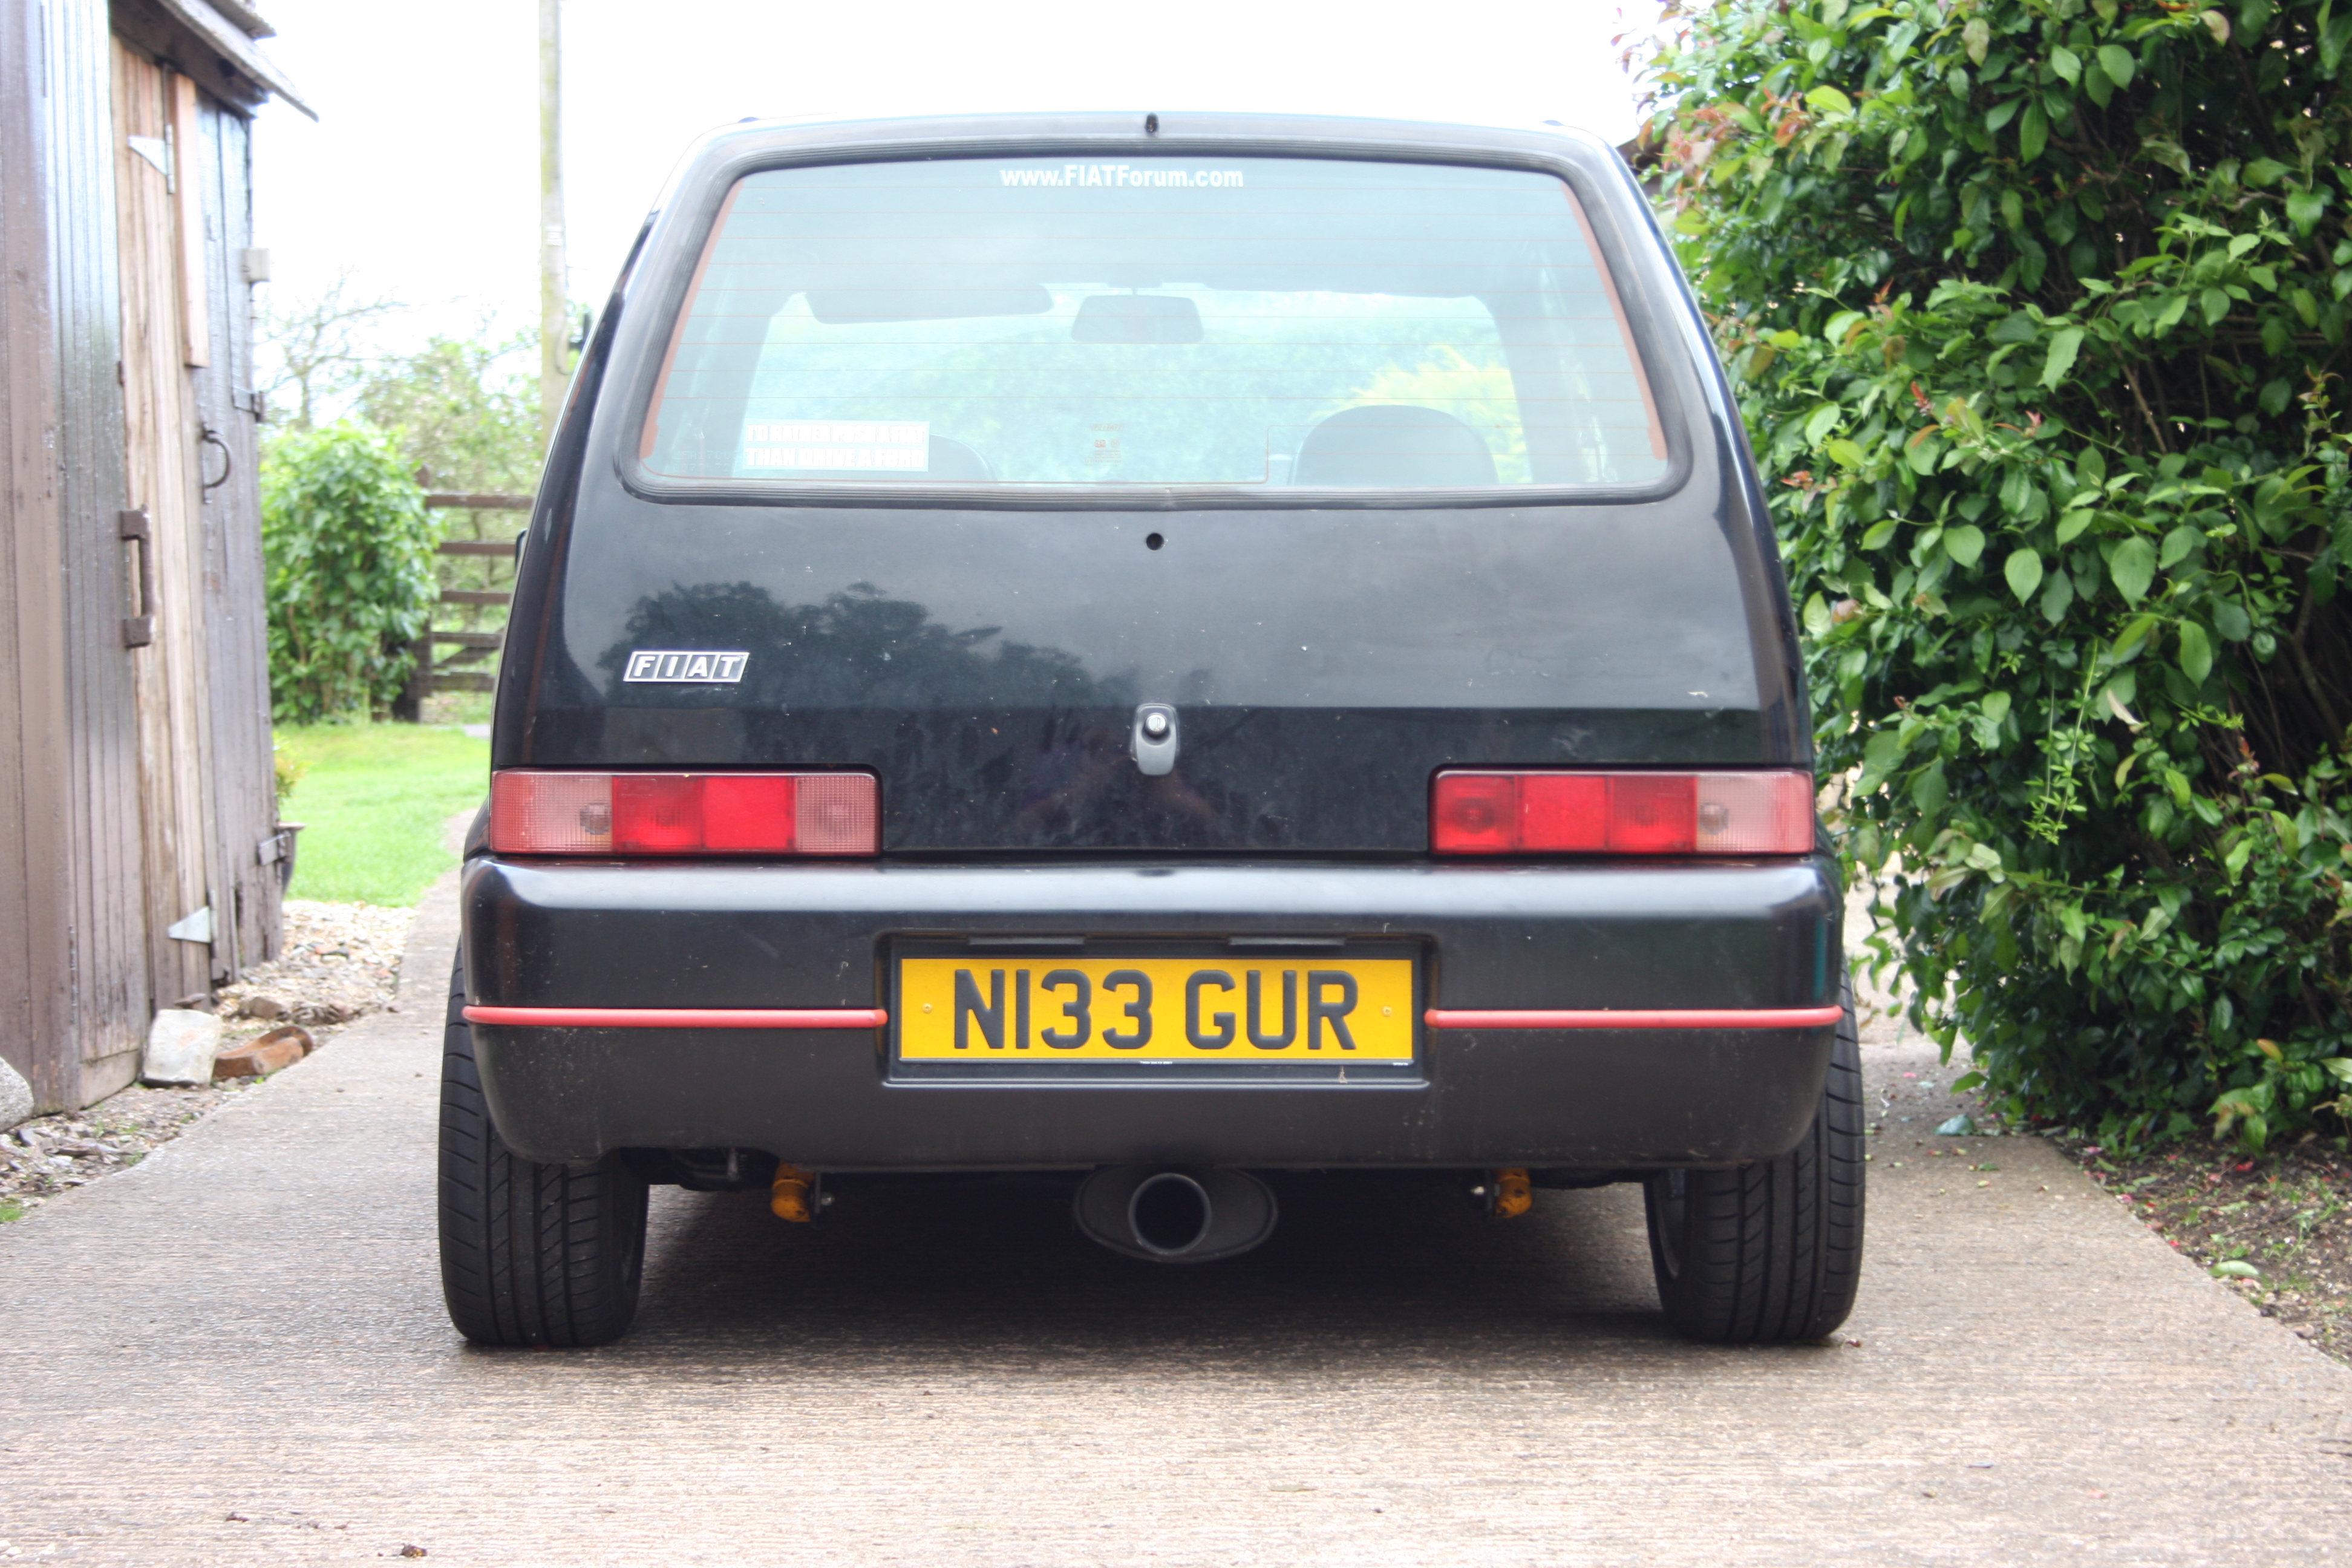
It was the cars turn next first was the rear. I removed everything stripped, painted with new poly bushes. I read on the forum about rear ARB and decided I had to have one so MGF bar order for £15. I cut out the centre section and welded the two halves together. I made up some plates to weld onto the lower shock mounts. To mount to the rear beam I used standard outer ARB brackets and welded them upside down so the open side faces out. The exhaust hanger was cut of and a new one from an old back box was welded on. The drop links were made from a piece of flat bar as i decided adjustables were not needed and the same bar was used to close the brackets on the beam. It all bolted up with front strong flex ARB used. The tank mountings were retapped for bigger bolts. The tank itself was bare metalled then painted although this turned out to be a waste of time. New brake lines were run. I then turned my attention to painting the underside while it was all off paying close attention to the inner rear arches. The whole rear was reassembled. I made a new number bracket and used a nos one that came of cento no3.


hope these explain how it all works
rear end
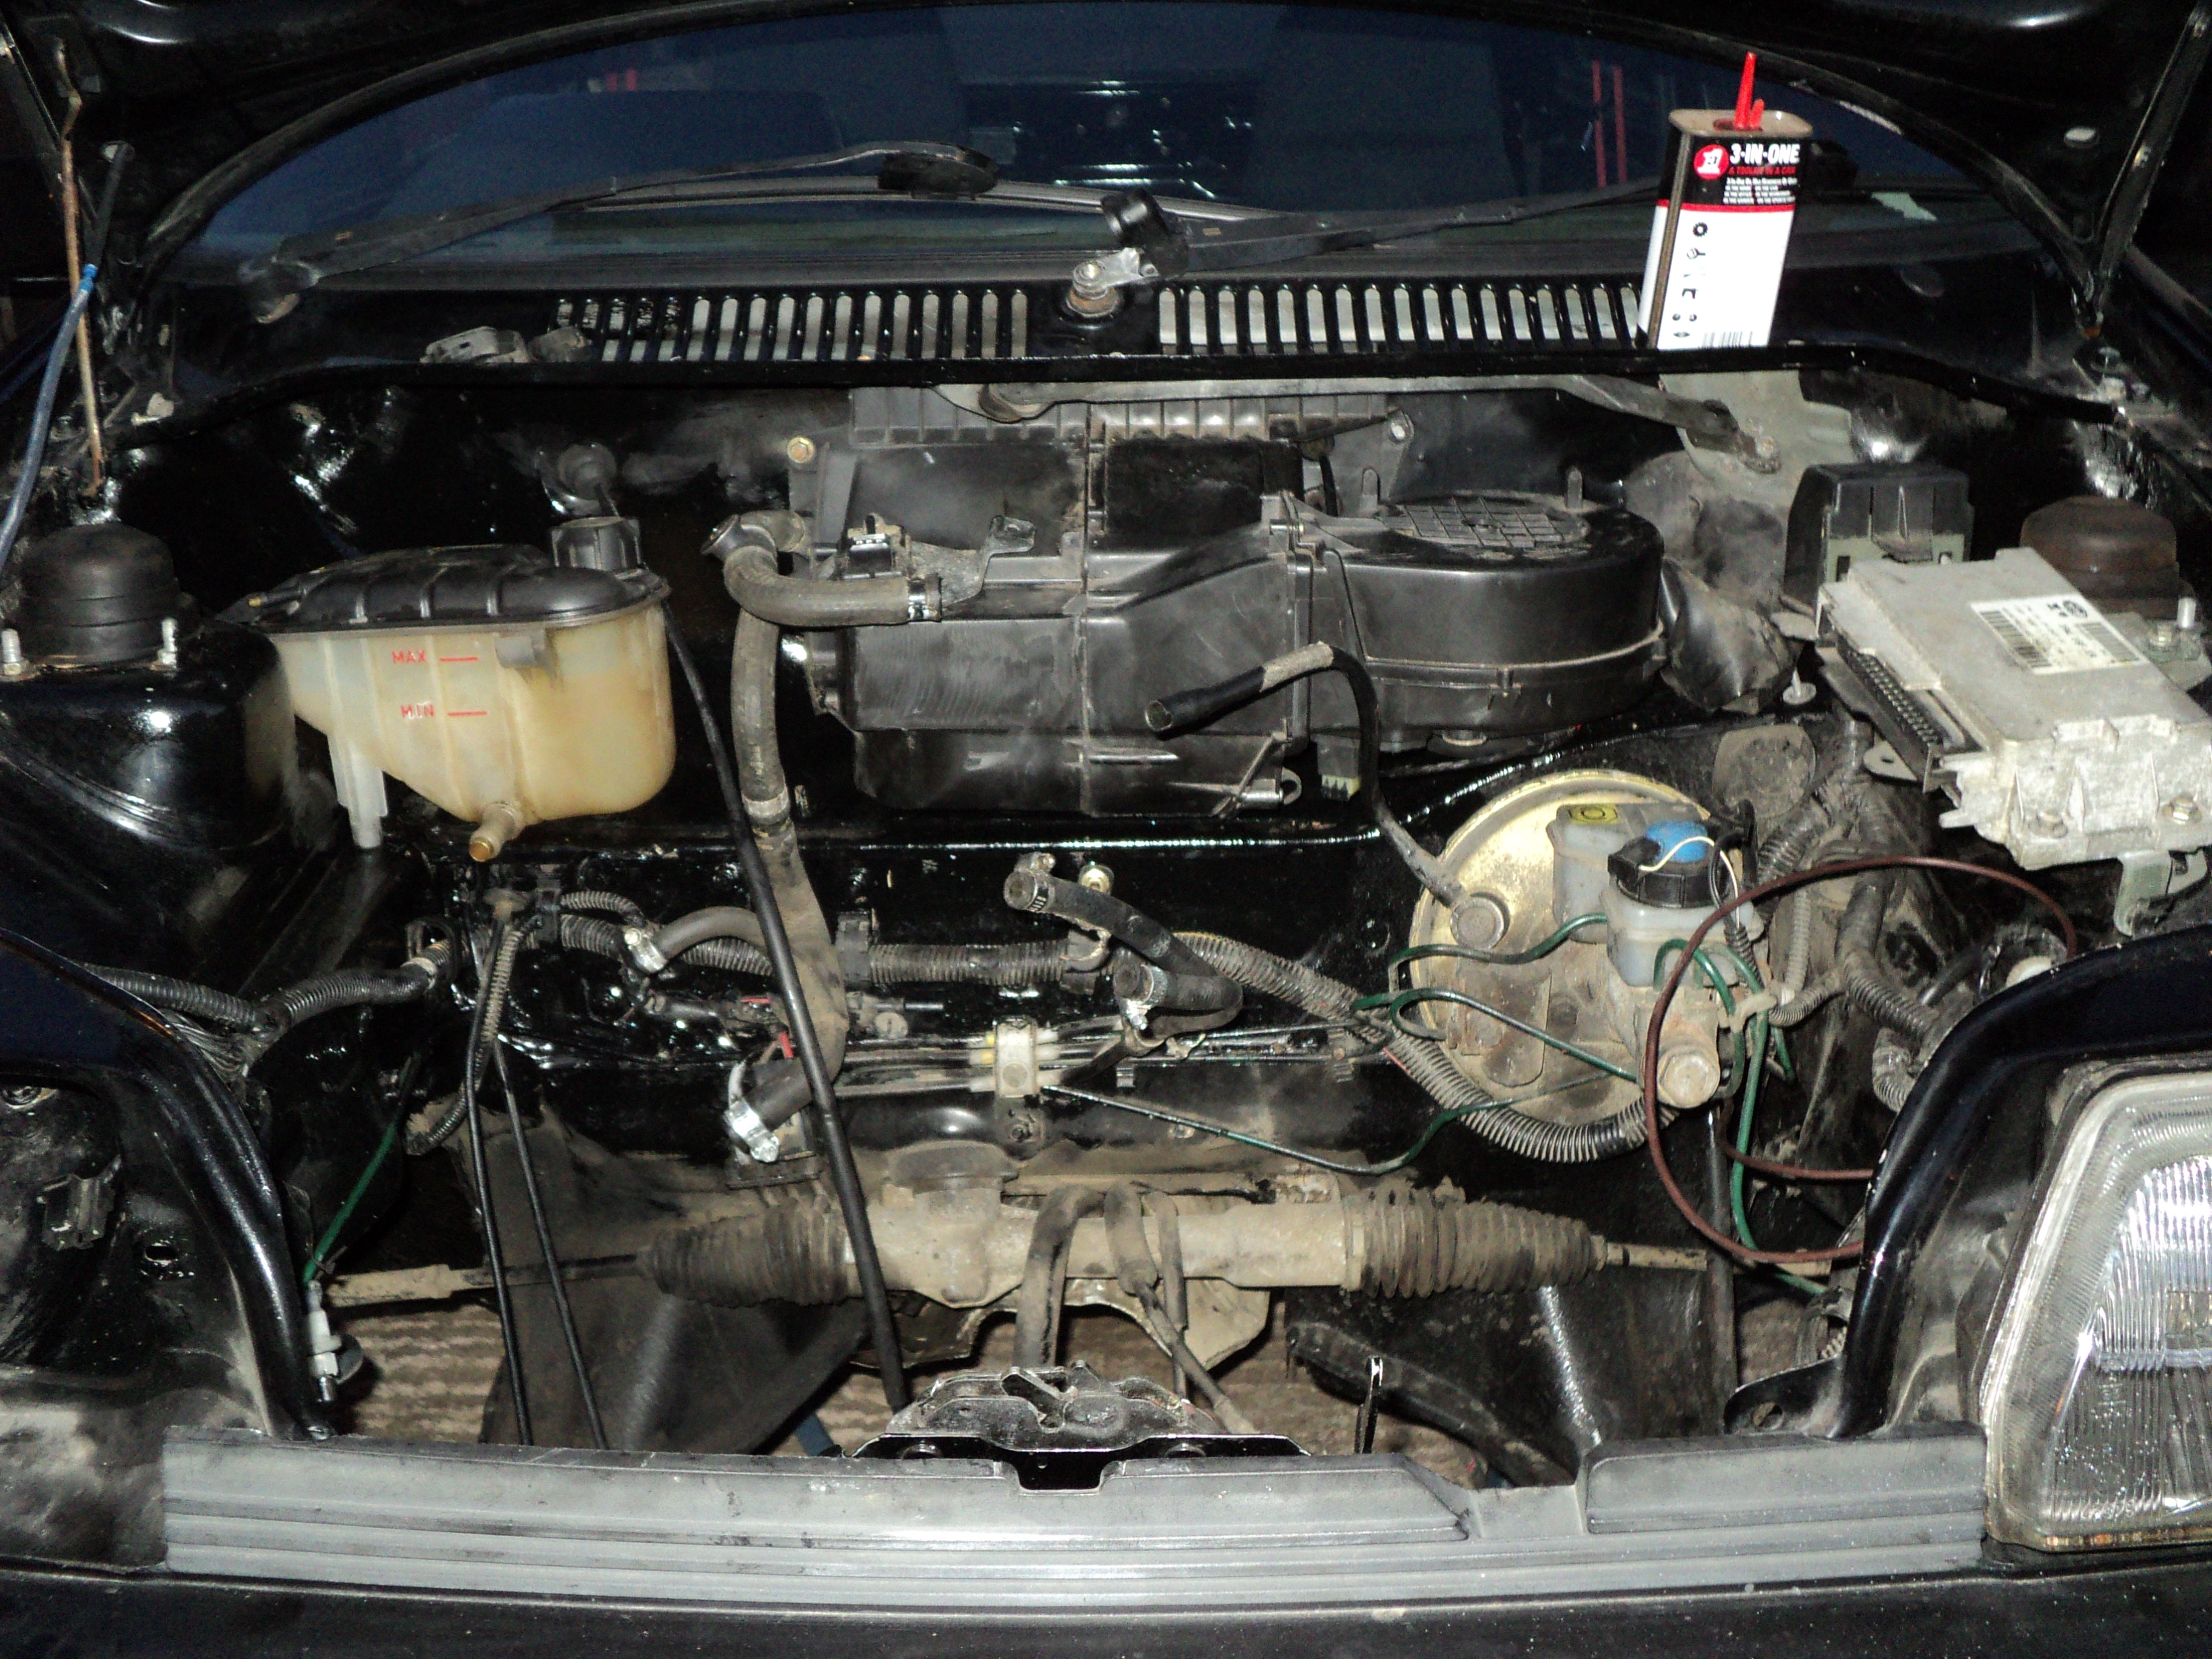
I then turned my attention to the front. The little 1108 was removed, ancillaries swapped to the new engine and the gearbox cleaned. The bay was cleaned and in places repainted. I put in a new rad and tested the fan and switch. The front arms were polybushed as was the ARB I made a new ARB bracket as the old one wasn't good. The ballpoint gaiters were sourced from a Massey ferguson tractor of all places brought on a whim at a local show. The shocks were treated to new top mounts. New brake lines weren't needed at the front so the brakes were cleaned and new pads and disks were put on from cento no3. The engine and gearbox mounts were polybushed with strong flex inserts. Like the rear the underside was repainted. Then it was all bolted in, the exhaust was fettled for the extra height.
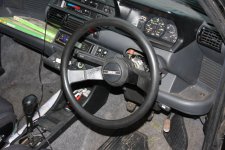
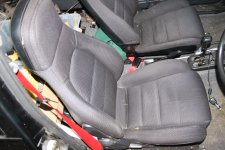
The interior was next. I removed all the rear excluding the door cards. I then tracked down a pair of seats from an mx5 collected them. To mount I had modify the runners and then fabricated some mounts from box section which the seat bolts to and then bolts to the floor using the original mounting points. For front seatbelts I used the rear fabric stalks bolted to the floor. The carpet was removed scrubbed and the underfloor material removed the carpet was then replaced. Since I was now sitting a lot lower the steering column was lowered with spacers made from solid bar. The gear stick was also shortened. The handbrake came out of my 126 as it was slightly shorter than the cento on. The steering wheel was a bit more involved. This came from my 126 but had a different spline so I removed that one very carefully and welded in a cento one I had I then used the horn push from the 126 although I do have an 899 one that I can switch it to.
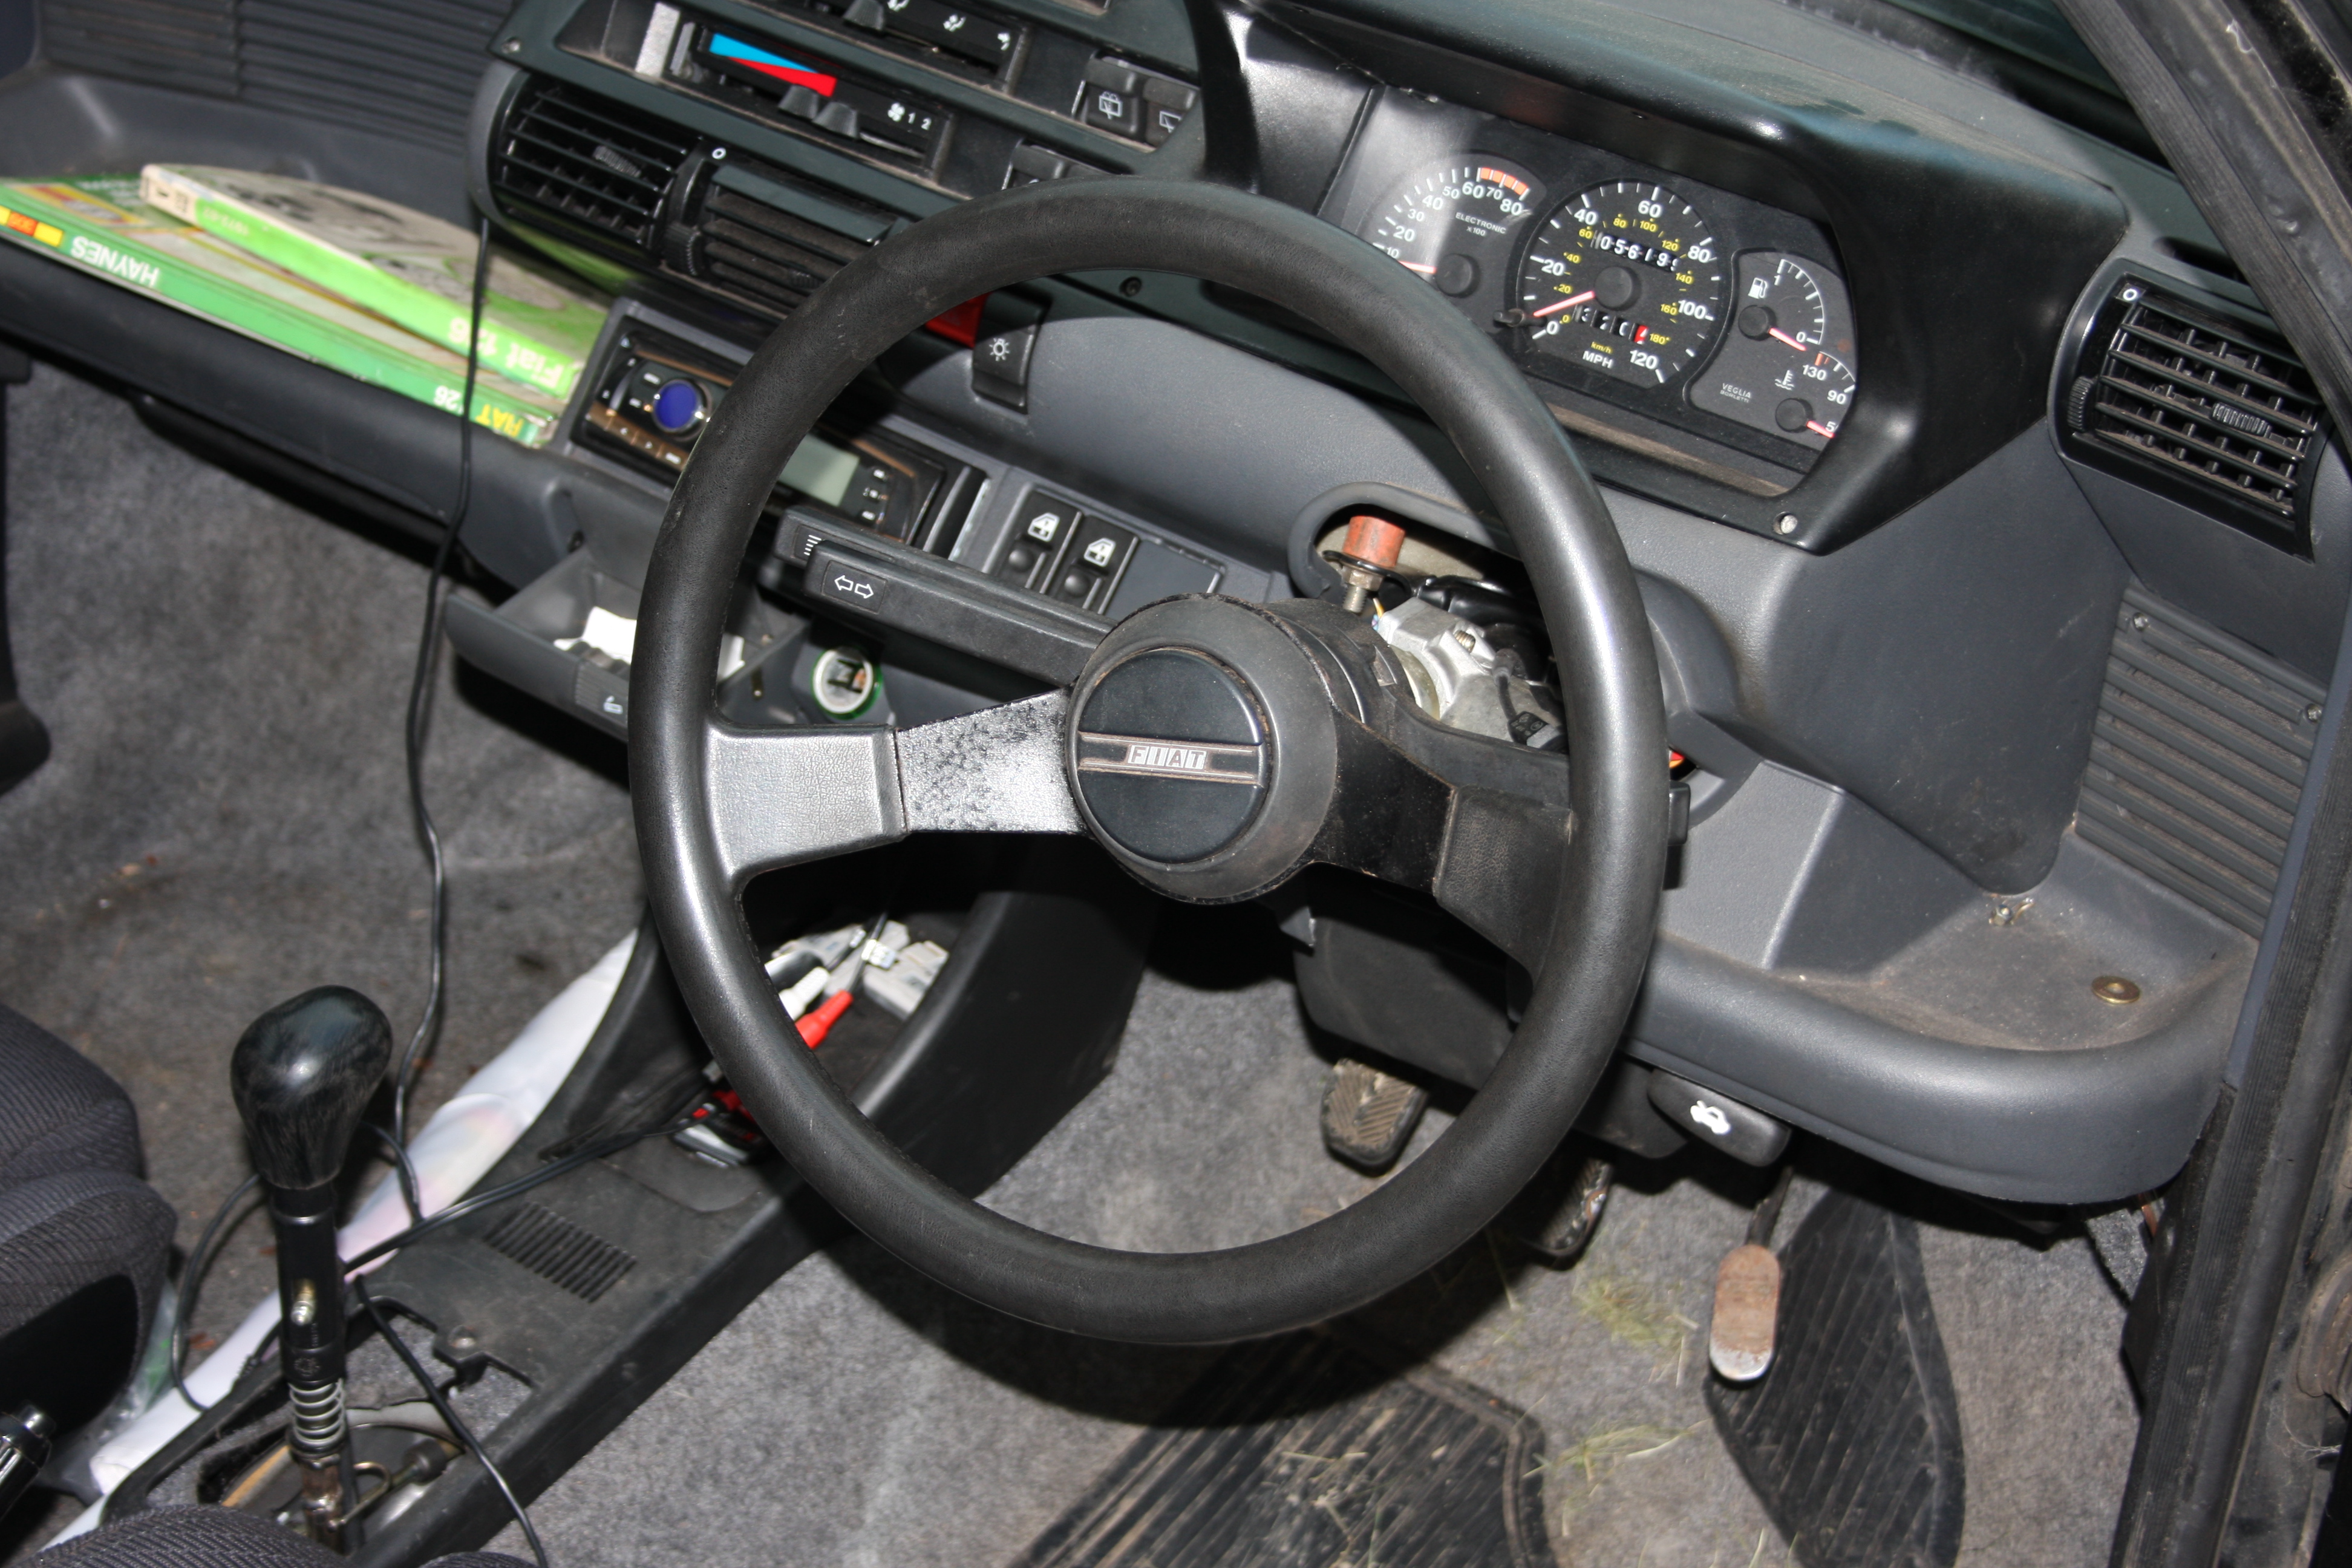
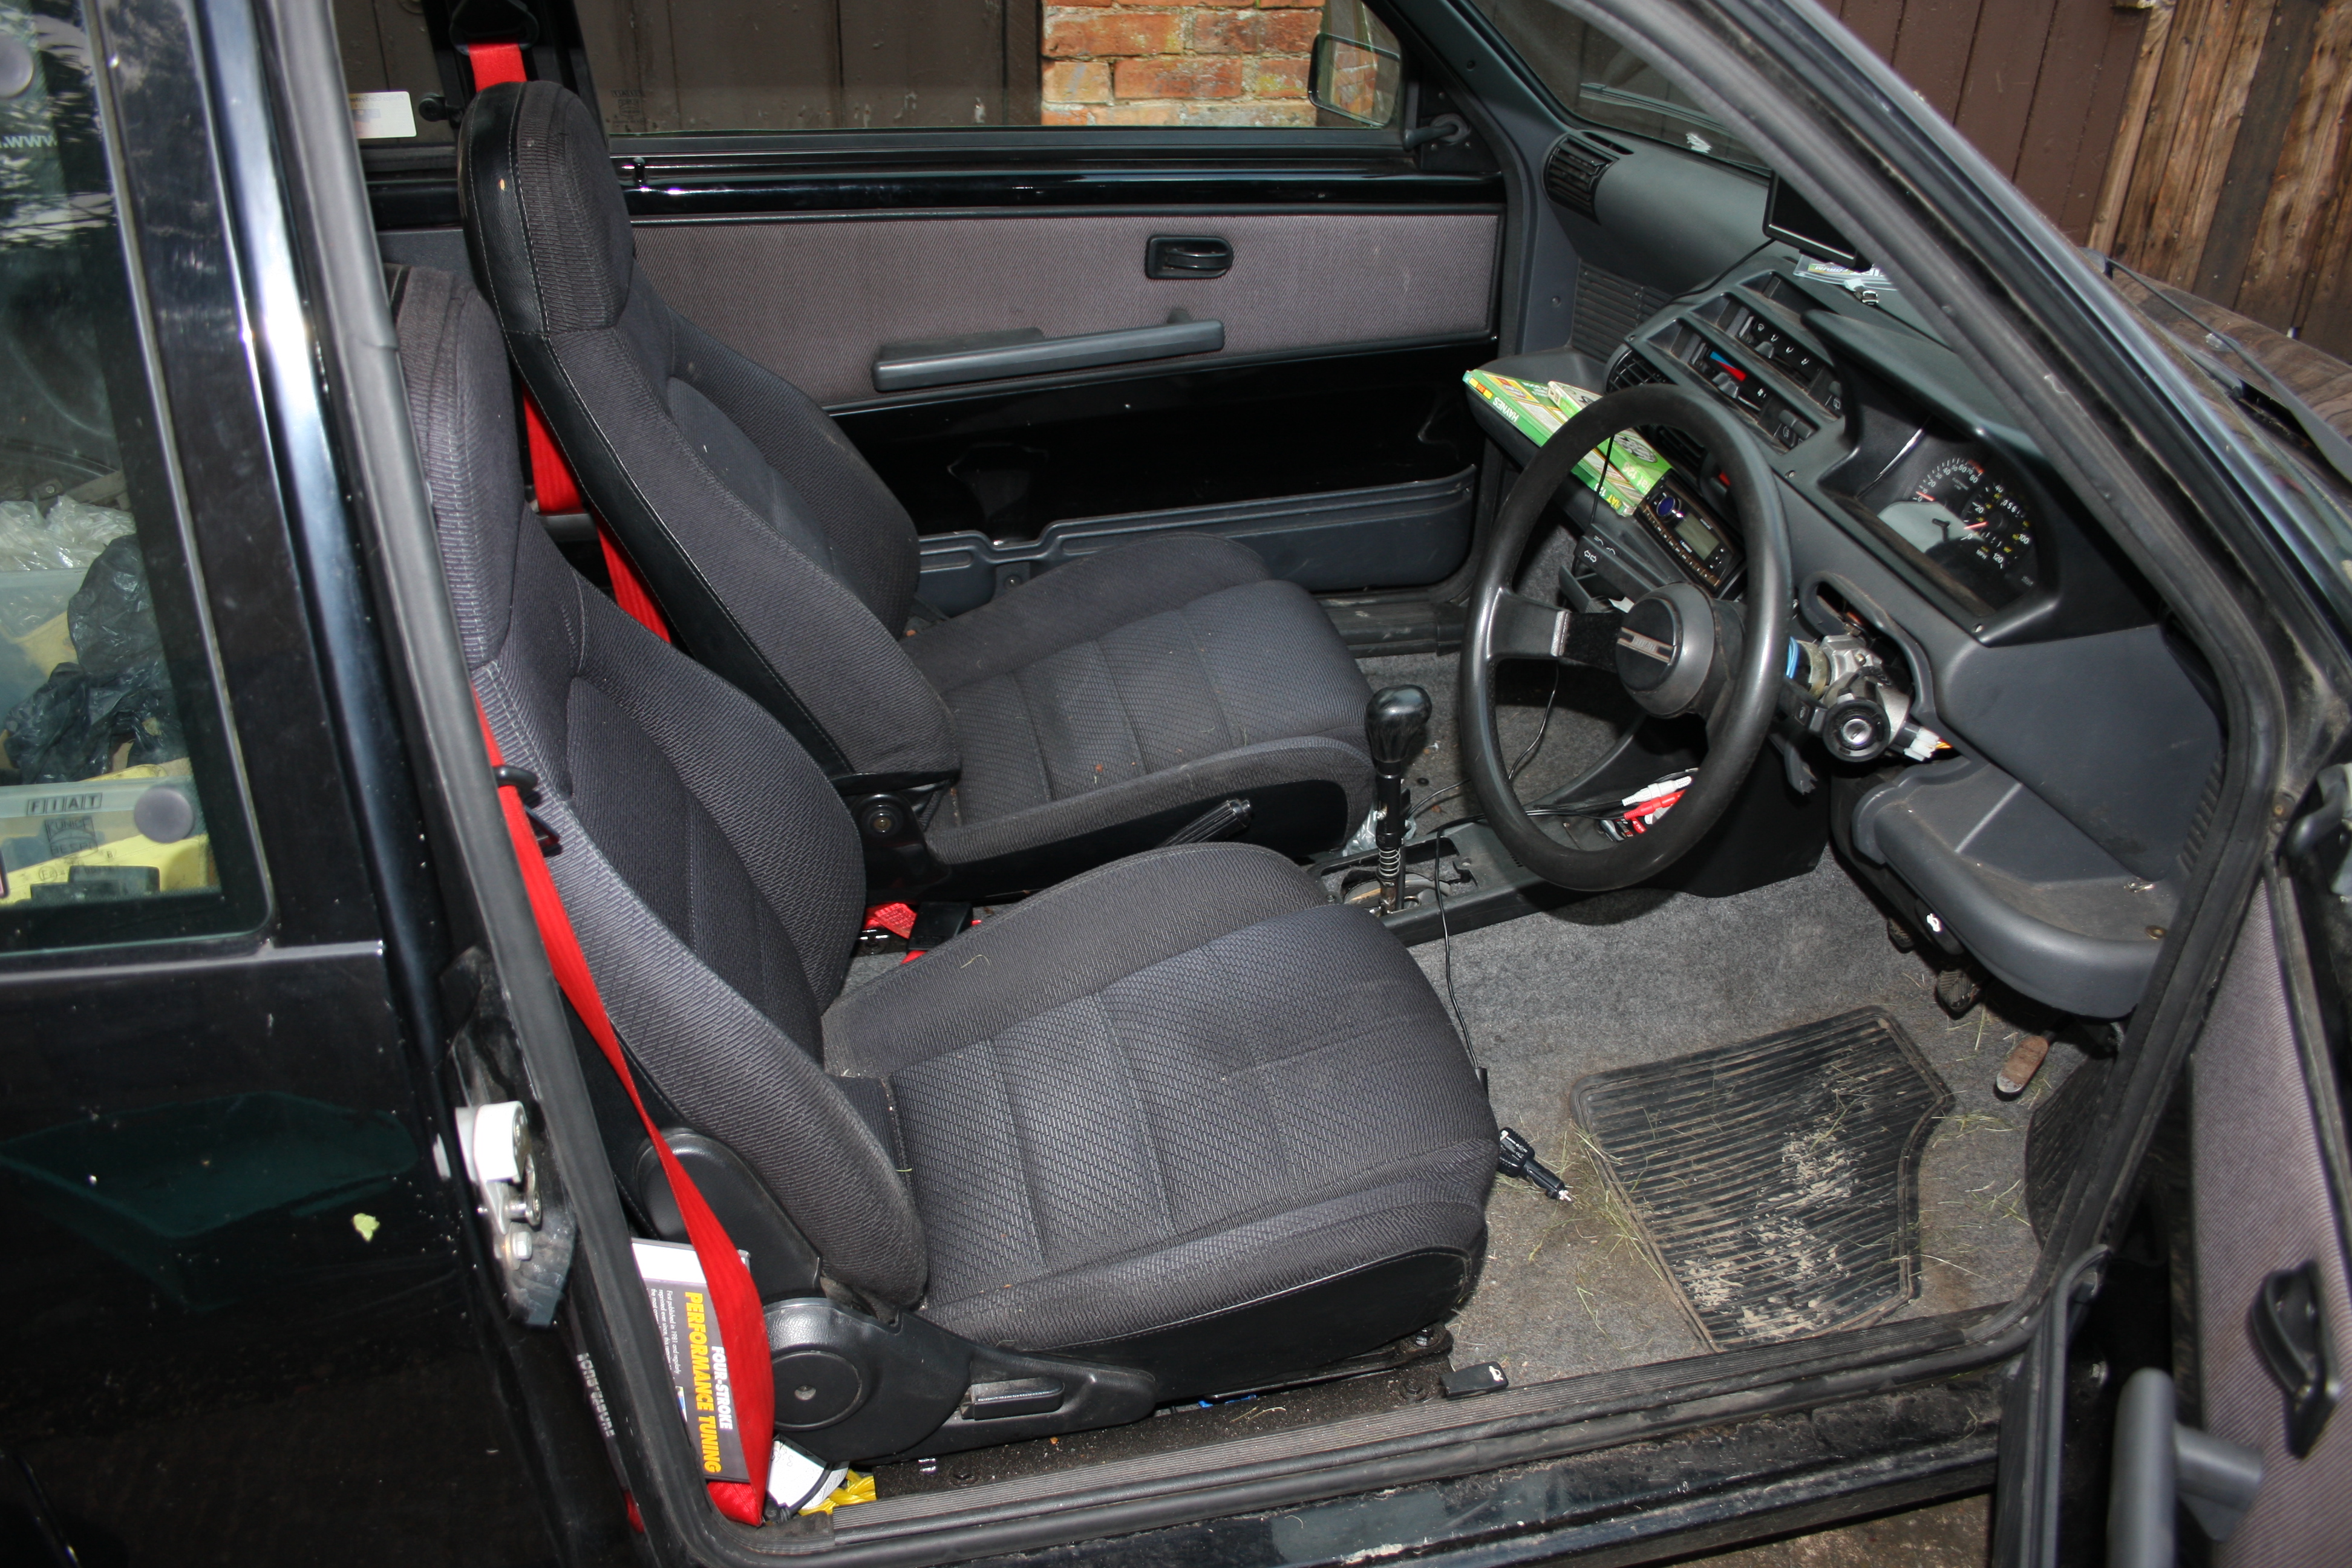

8 months after I started I Moted tax etc after a few hiccups. It was worth it the car corners flat the turn in is amazing serious grin factor inducing. The interior turns out to be the best mod ever sitting with my shoulders level with the window bottoms the wheel straight into my hands no aches or pains anymore.
Enter the abarth bumpers found at my local scrappy prised out of their hands with one side skirt the other had gone AWOL and the spoiler was destroyed all mine for £30 these are yet to be fitted and are being prepped
It quickly became apparent that I was burning oil a quick thought appeared that I had snagged the stem seals when fitting so head removed a week before Stanford hall and cento no3 head was put on but when doing so I noticed that the pistons had lots of play in their bores not good how I never noticed it I do not know. So I slung it back together turning my attention to more important matters wheels. The wheels puff had given me were some revo rfx 13x6 in 4x98 fitment. So 15mm spacers ordered. Now with days to go to Stanford they needed painting so grabbed some yellow metal paint that I had slapped that on and got them fitted.
Stanford arrived the journey was good comfortable only issue was stalling at junctions and using lots of oil using 4.5 litres for 320 miles not good at all something needs to be done an abarth spoiler was collected from whitz
Up to date pics to follow and more soon
photo taken from the gallery on here ill get some more up soon. not nessecerialy in the right order just what i remember
The story started back when i was 17 (now 21) when i had my first cento an 899 had far too much fun in it. Brought a second 899 for £30 did the HG then sold it.Then brought a new car and cento no1 sat on my drive looking very sad. Fast forward to the beginning of last year and i spotted an ad on here for a cento shell needed so i offer her up and swapped for my 3rd cinq a crashed yellow sporting from purf. i only was going to use parts for my now deceased 126. part of the swap also included a set of wheels and some other parts. stripped cento no3 to a shell learning a lot about how they go togeather faults etc and most importantly collecting a big pile of parts, bolts, clips i kept everything.
Of course i could never be cento-less so spotted on ebay cento no4. described as needing a new engine (big ends gone) but having some new bits and a new set of tyres. Brought unseen but it seems i did well. The big ends turns out to be only an alternator (which i had). Did the handbrake with parts i already had, lowered with new shocks and using springs off cento no3 (40mm lower), insured for a rediculous ammount and drove it around relighting my enthusiasm for these cars. once tax and mot was up there were a few problems that needed sorting so it came off the road for a rebuild.
i needed more power and this came in the from of a 1242 8v that i removed in the rain from an x reg punto (mpi setup). this turned out to have HG faliure and had never been serviced came complete with treacle oil which stank and needed old engine oil to flush it out (wouldnt move at all). I ported and polished the head from cento no3. Got the flywheel lightened and balanced with the crank assembly (4kg), put a 866 cam in and cleaned, painted replaced as much as i could.
It was the cars turn next first was the rear. I removed everything stripped, painted with new poly bushes. I read on the forum about rear ARB and decided I had to have one so MGF bar order for £15. I cut out the centre section and welded the two halves together. I made up some plates to weld onto the lower shock mounts. To mount to the rear beam I used standard outer ARB brackets and welded them upside down so the open side faces out. The exhaust hanger was cut of and a new one from an old back box was welded on. The drop links were made from a piece of flat bar as i decided adjustables were not needed and the same bar was used to close the brackets on the beam. It all bolted up with front strong flex ARB used. The tank mountings were retapped for bigger bolts. The tank itself was bare metalled then painted although this turned out to be a waste of time. New brake lines were run. I then turned my attention to painting the underside while it was all off paying close attention to the inner rear arches. The whole rear was reassembled. I made a new number bracket and used a nos one that came of cento no3.
hope these explain how it all works
rear end
I then turned my attention to the front. The little 1108 was removed, ancillaries swapped to the new engine and the gearbox cleaned. The bay was cleaned and in places repainted. I put in a new rad and tested the fan and switch. The front arms were polybushed as was the ARB I made a new ARB bracket as the old one wasn't good. The ballpoint gaiters were sourced from a Massey ferguson tractor of all places brought on a whim at a local show. The shocks were treated to new top mounts. New brake lines weren't needed at the front so the brakes were cleaned and new pads and disks were put on from cento no3. The engine and gearbox mounts were polybushed with strong flex inserts. Like the rear the underside was repainted. Then it was all bolted in, the exhaust was fettled for the extra height.
The interior was next. I removed all the rear excluding the door cards. I then tracked down a pair of seats from an mx5 collected them. To mount I had modify the runners and then fabricated some mounts from box section which the seat bolts to and then bolts to the floor using the original mounting points. For front seatbelts I used the rear fabric stalks bolted to the floor. The carpet was removed scrubbed and the underfloor material removed the carpet was then replaced. Since I was now sitting a lot lower the steering column was lowered with spacers made from solid bar. The gear stick was also shortened. The handbrake came out of my 126 as it was slightly shorter than the cento on. The steering wheel was a bit more involved. This came from my 126 but had a different spline so I removed that one very carefully and welded in a cento one I had I then used the horn push from the 126 although I do have an 899 one that I can switch it to.
8 months after I started I Moted tax etc after a few hiccups. It was worth it the car corners flat the turn in is amazing serious grin factor inducing. The interior turns out to be the best mod ever sitting with my shoulders level with the window bottoms the wheel straight into my hands no aches or pains anymore.
Enter the abarth bumpers found at my local scrappy prised out of their hands with one side skirt the other had gone AWOL and the spoiler was destroyed all mine for £30 these are yet to be fitted and are being prepped
It quickly became apparent that I was burning oil a quick thought appeared that I had snagged the stem seals when fitting so head removed a week before Stanford hall and cento no3 head was put on but when doing so I noticed that the pistons had lots of play in their bores not good how I never noticed it I do not know. So I slung it back together turning my attention to more important matters wheels. The wheels puff had given me were some revo rfx 13x6 in 4x98 fitment. So 15mm spacers ordered. Now with days to go to Stanford they needed painting so grabbed some yellow metal paint that I had slapped that on and got them fitted.
Stanford arrived the journey was good comfortable only issue was stalling at junctions and using lots of oil using 4.5 litres for 320 miles not good at all something needs to be done an abarth spoiler was collected from whitz
Up to date pics to follow and more soon


