


Introduction
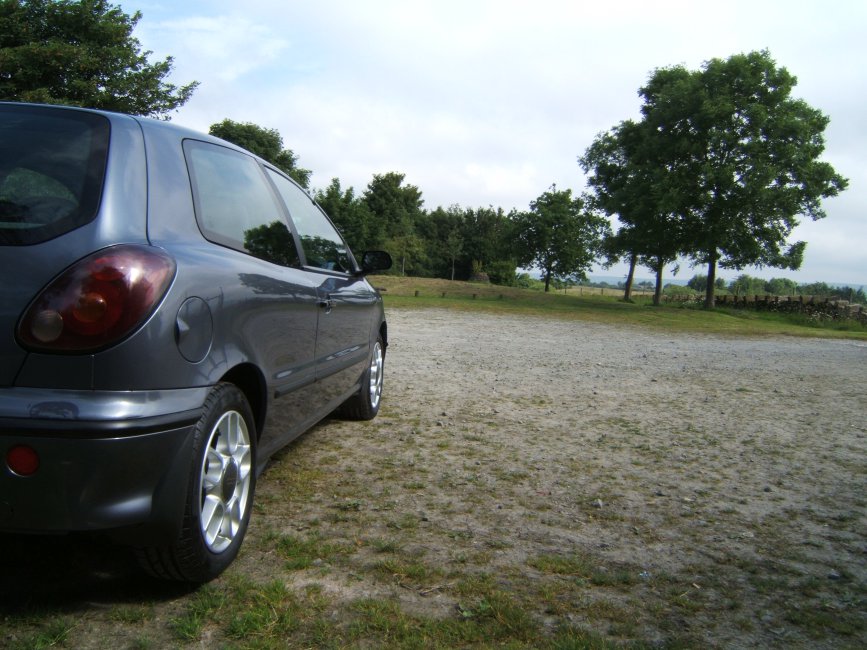
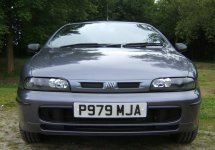
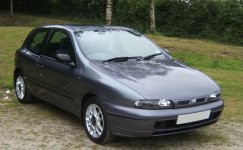
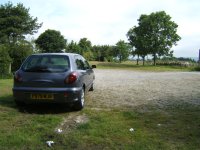
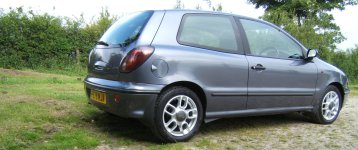
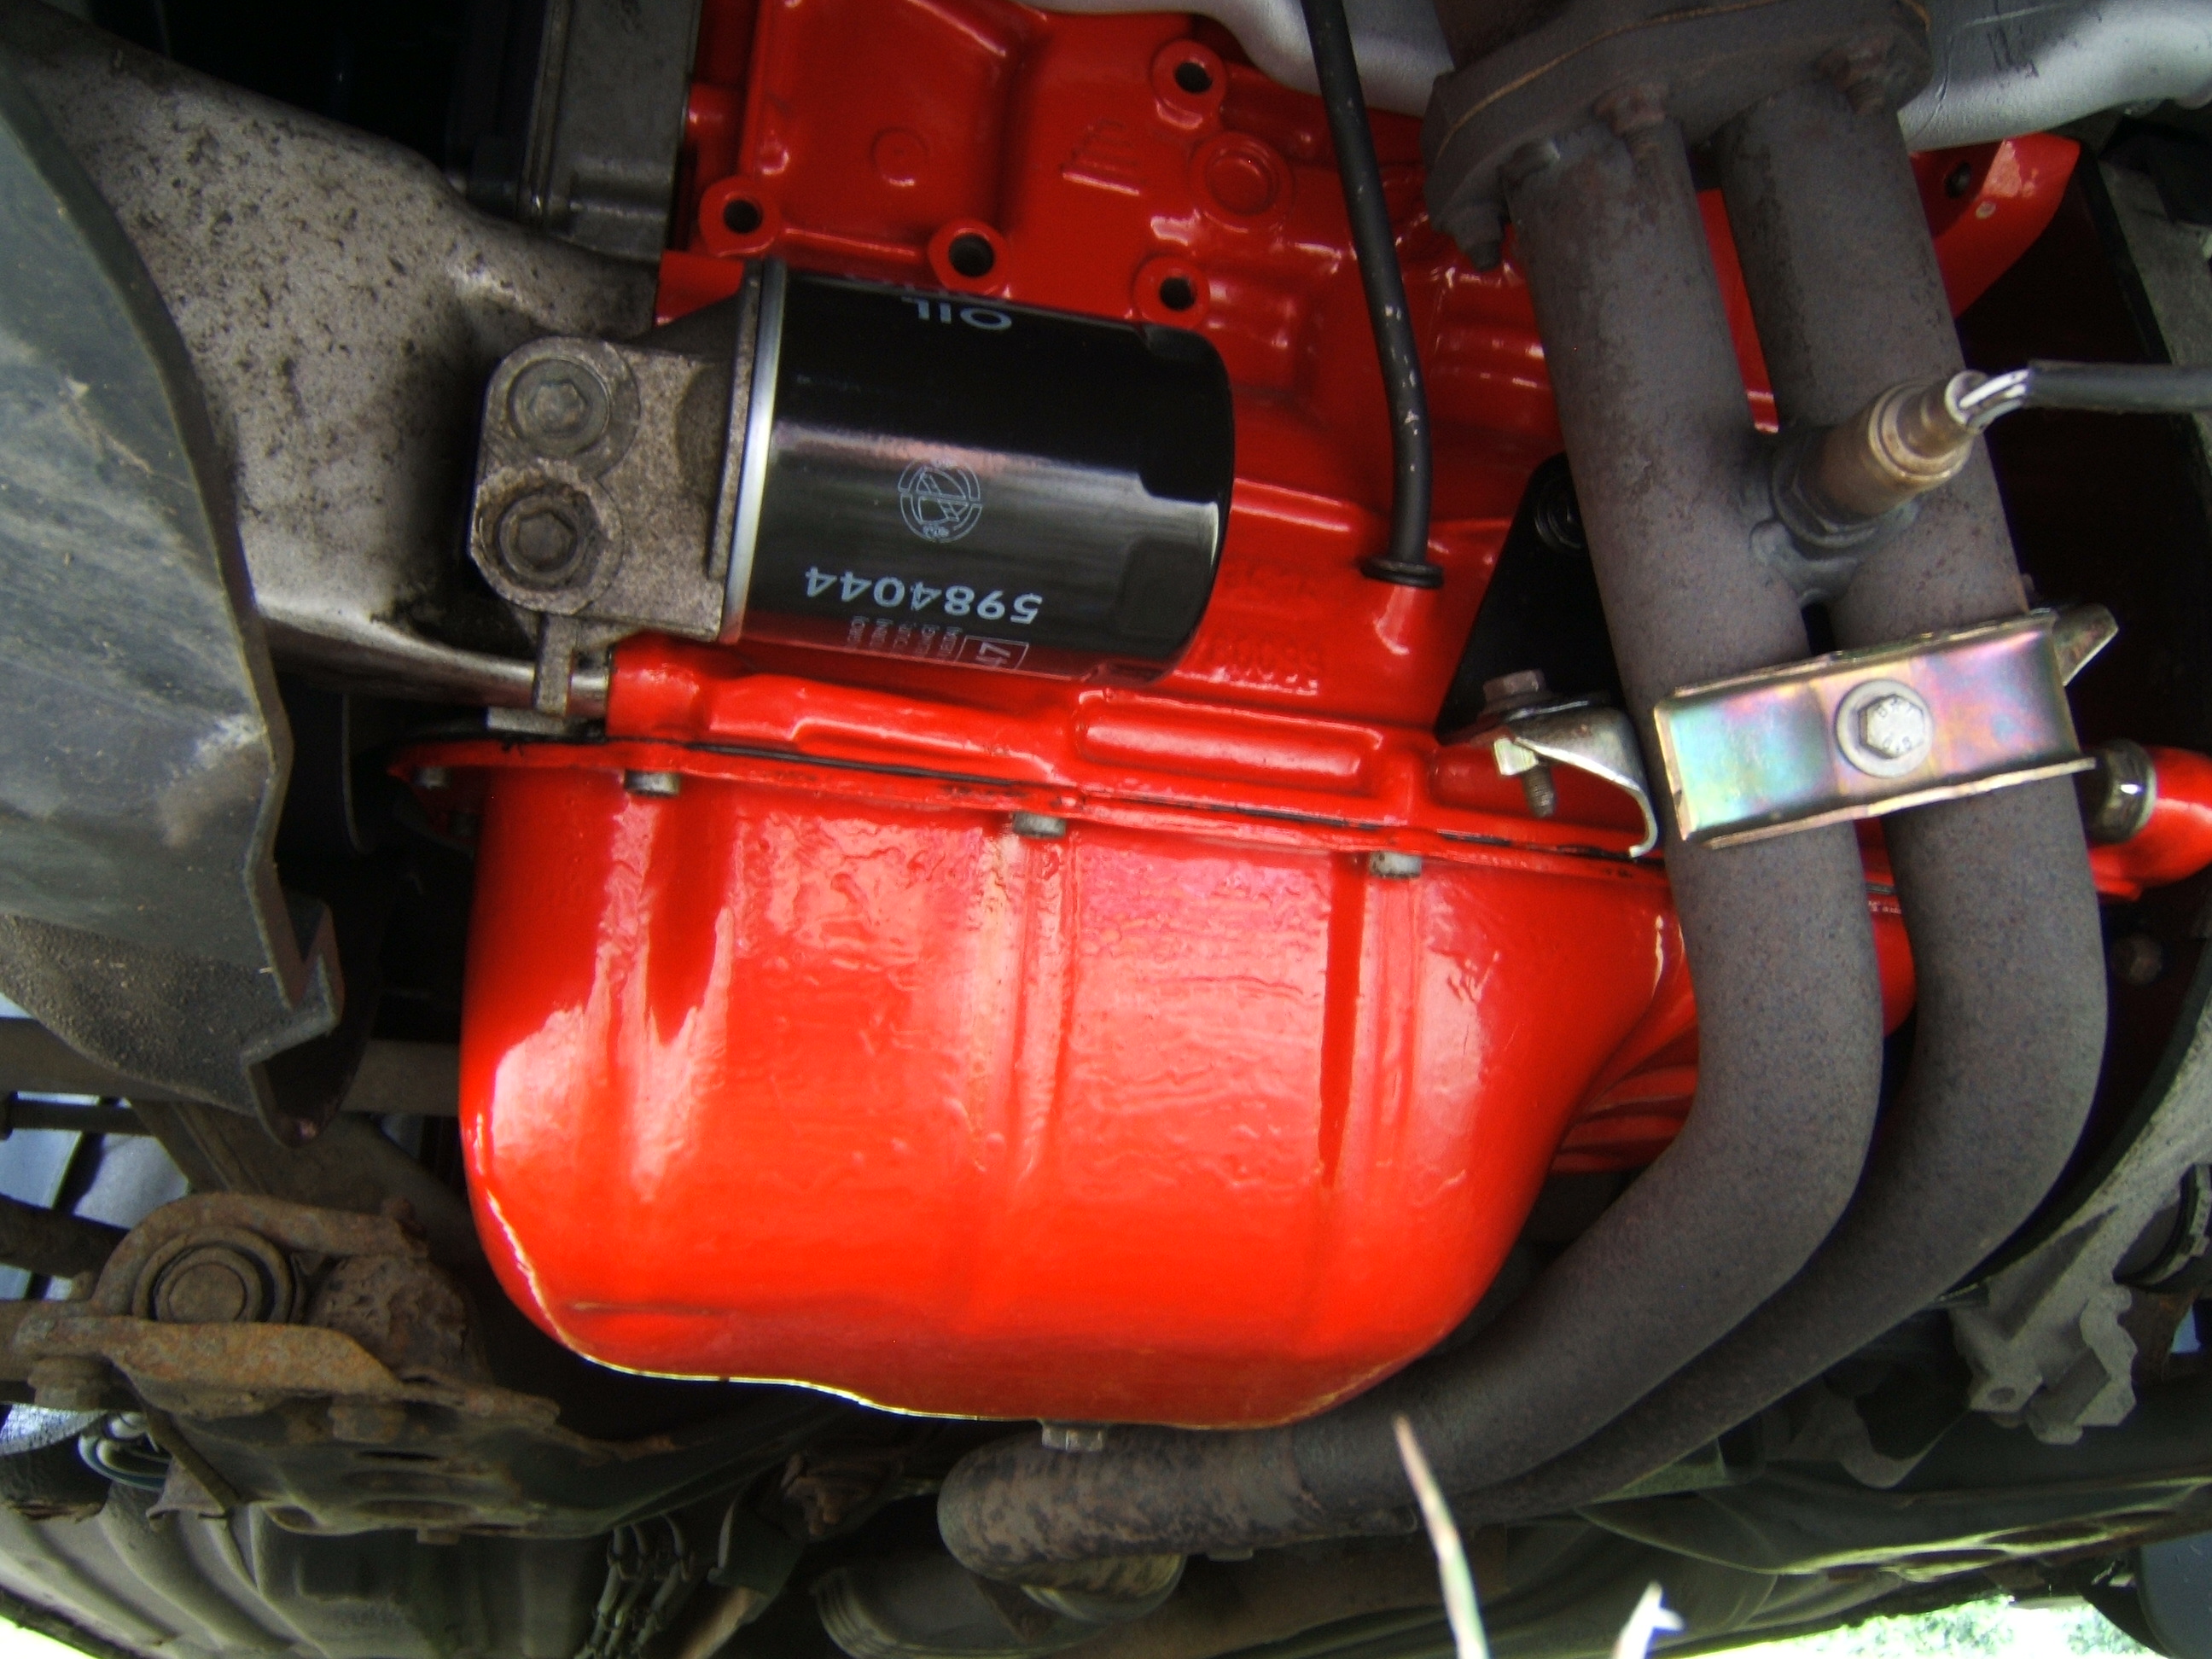
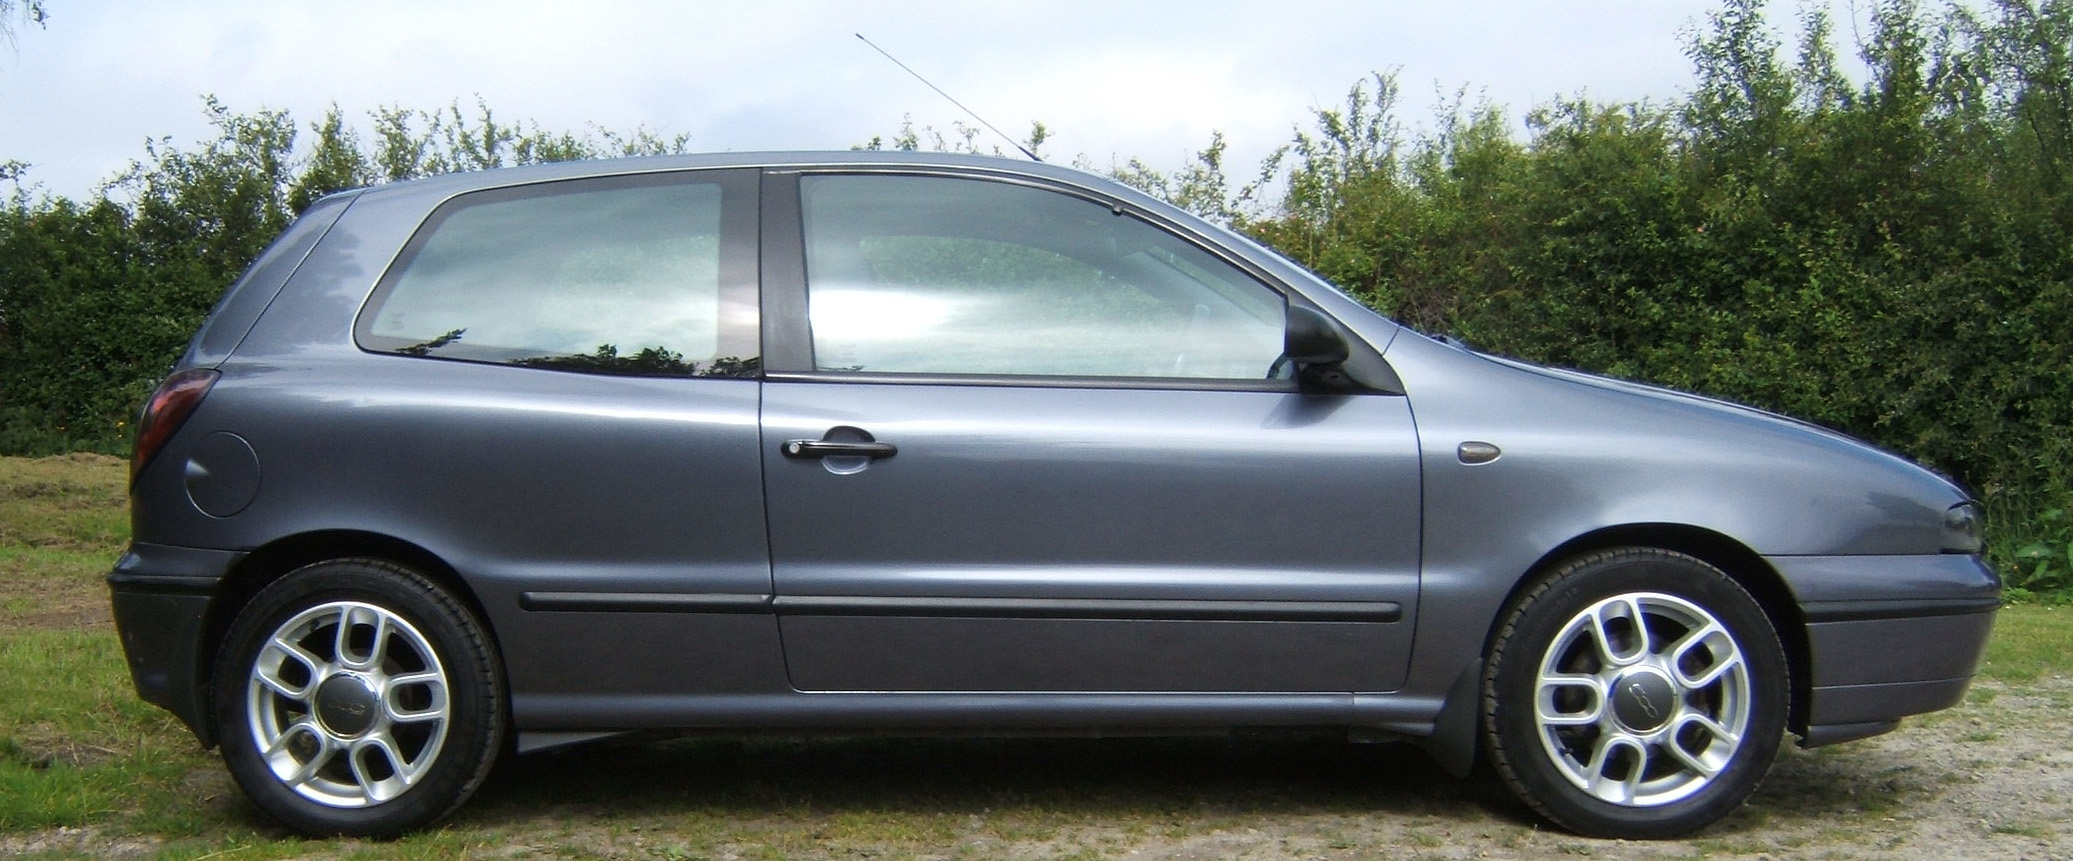
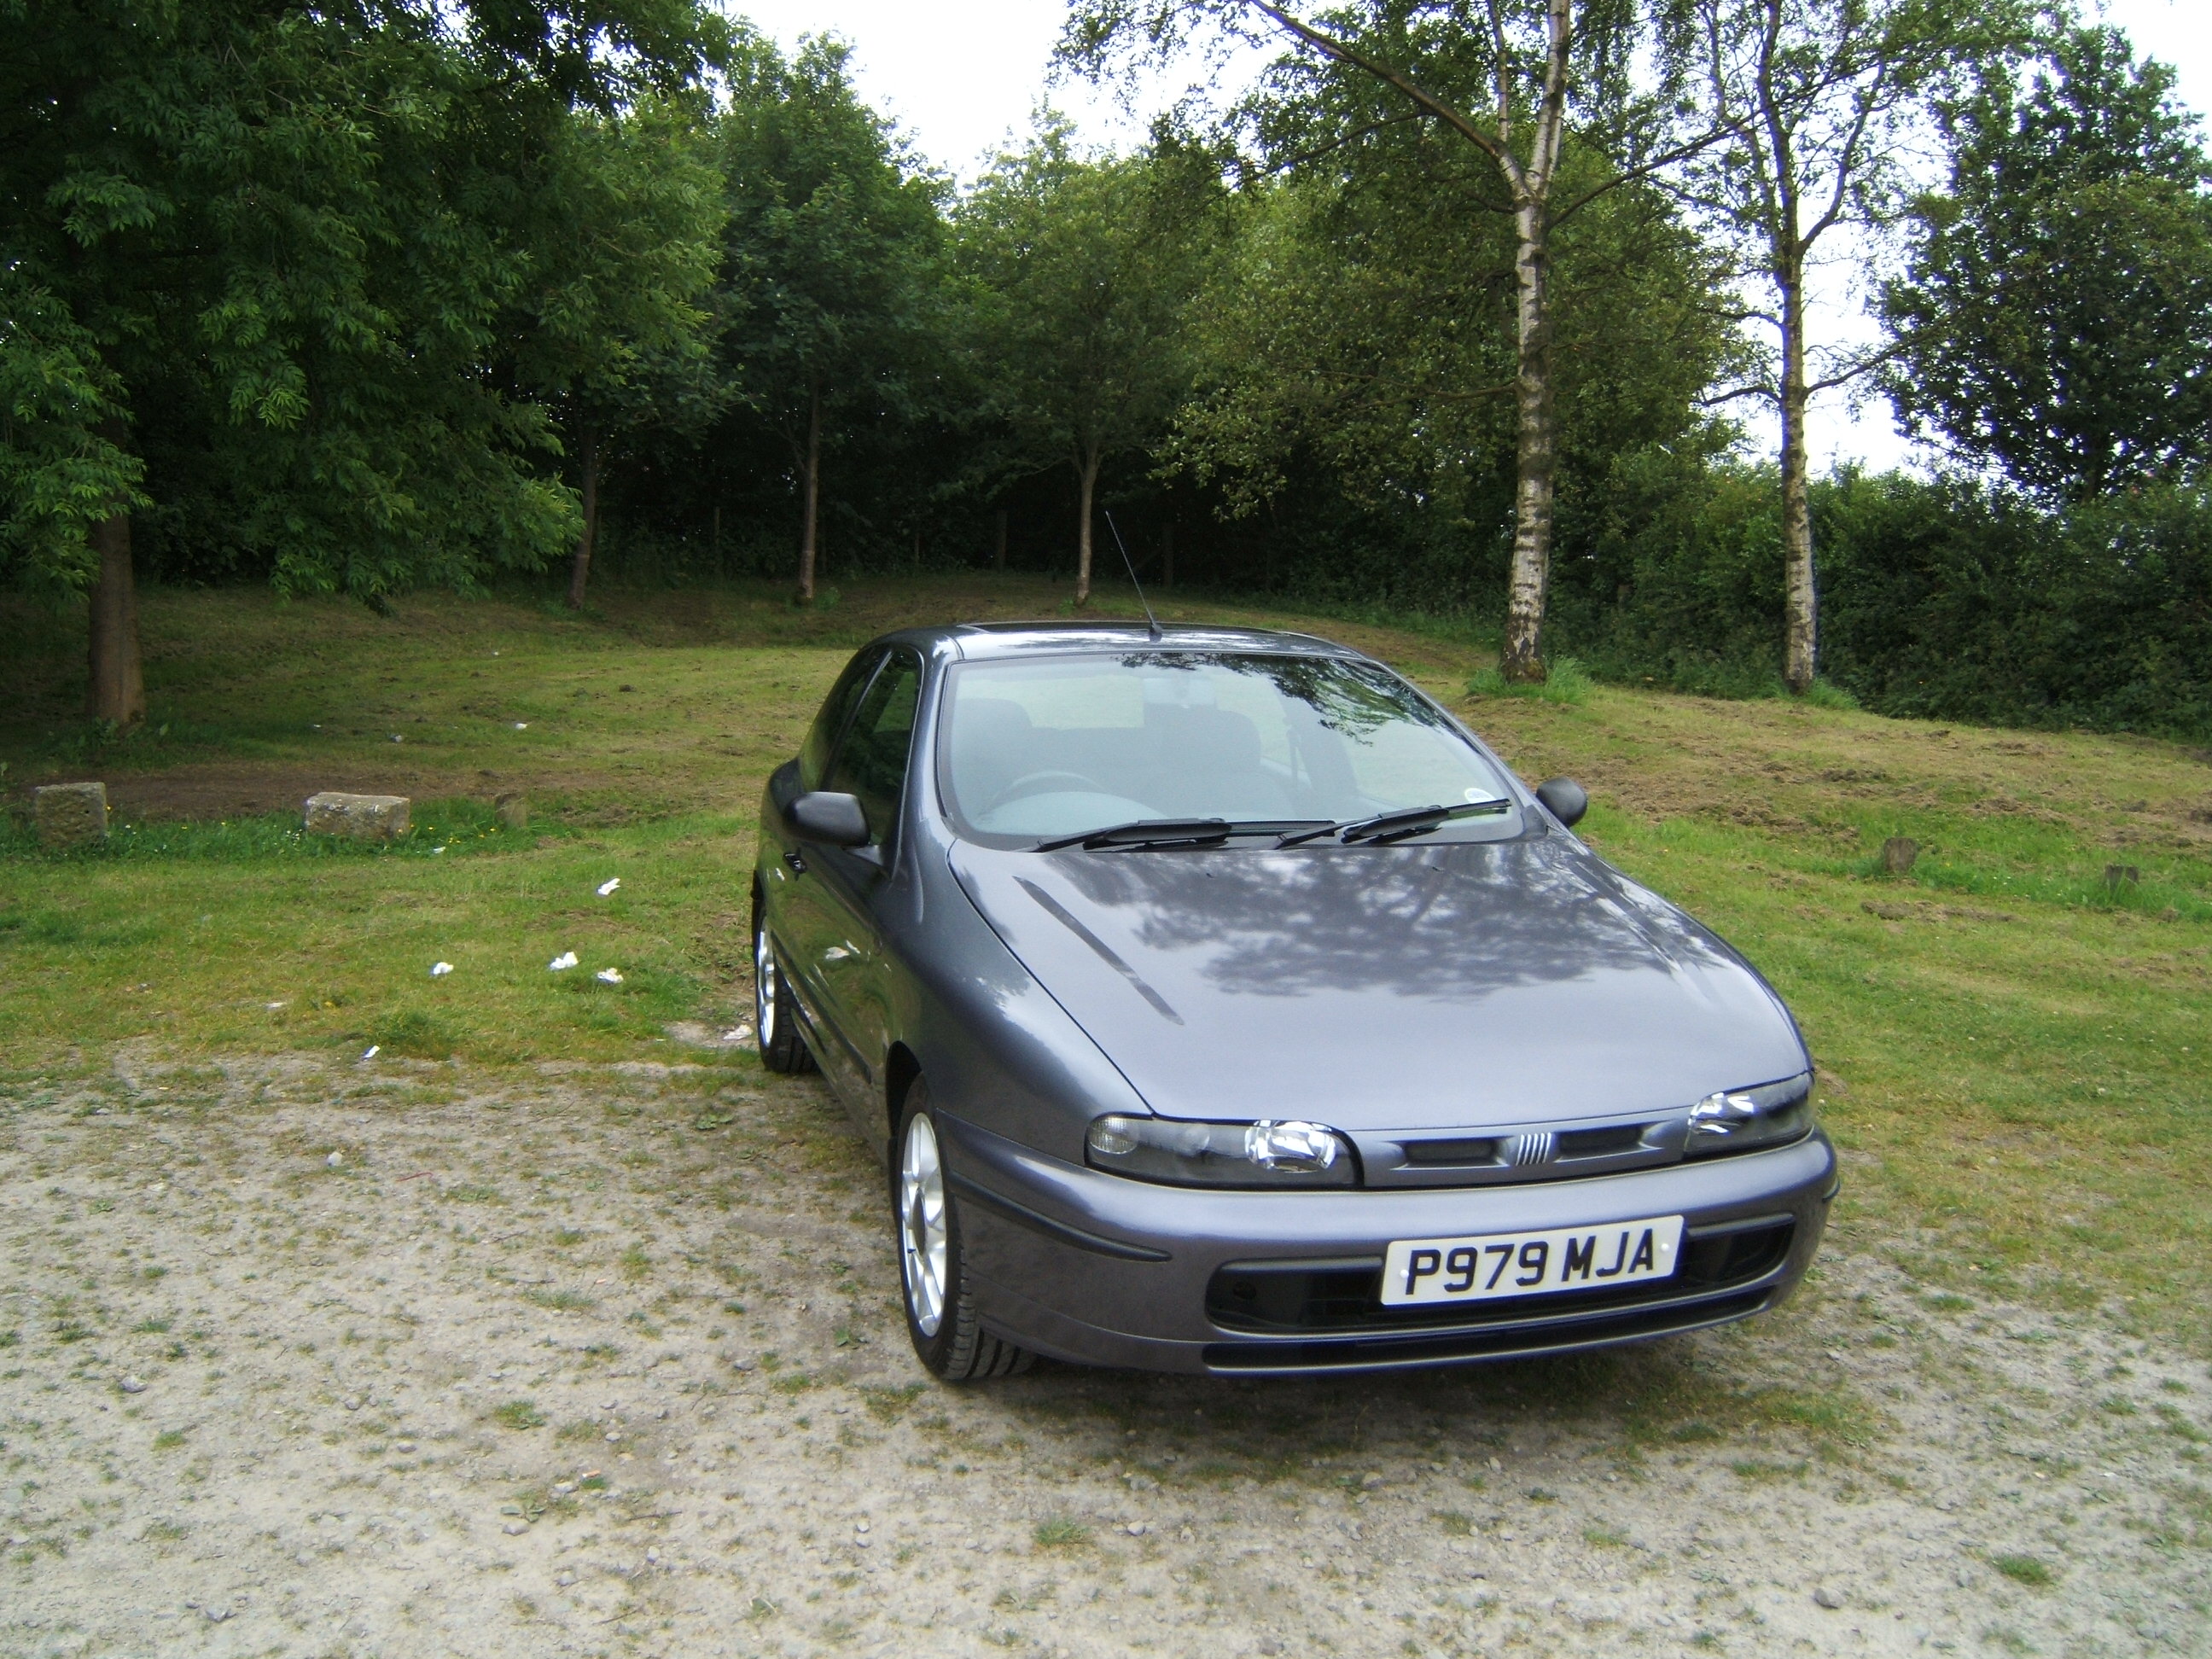
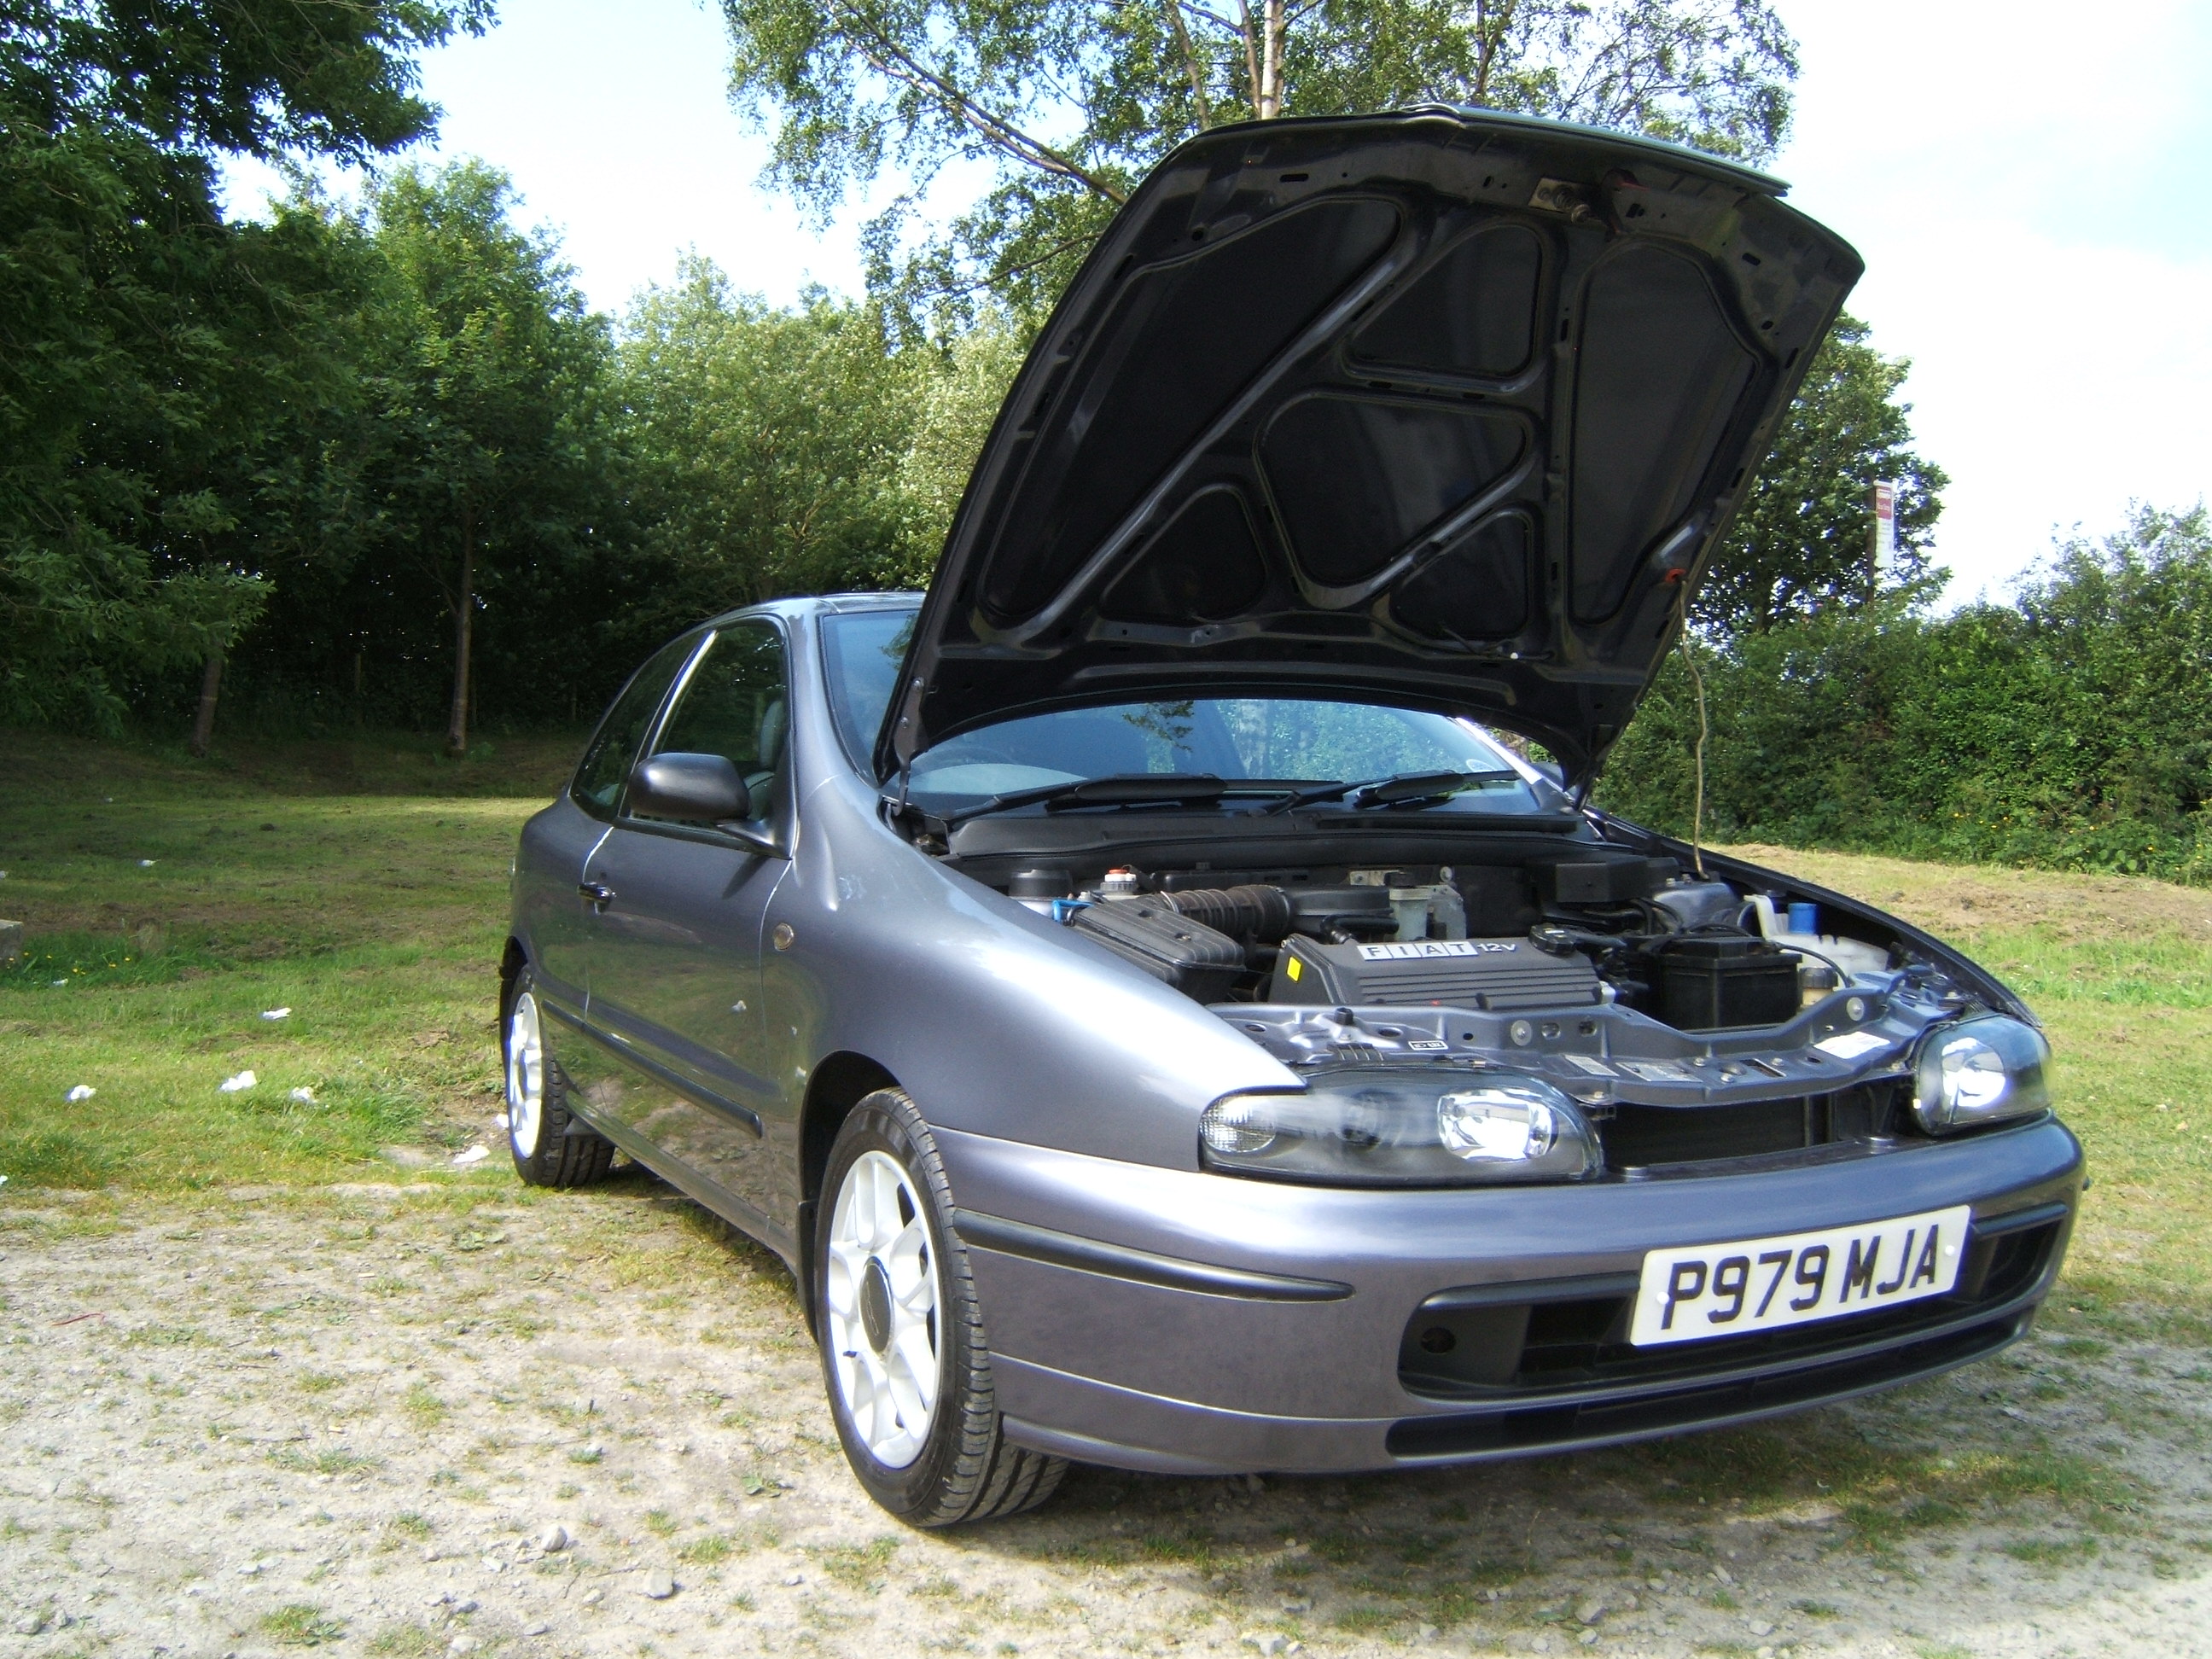
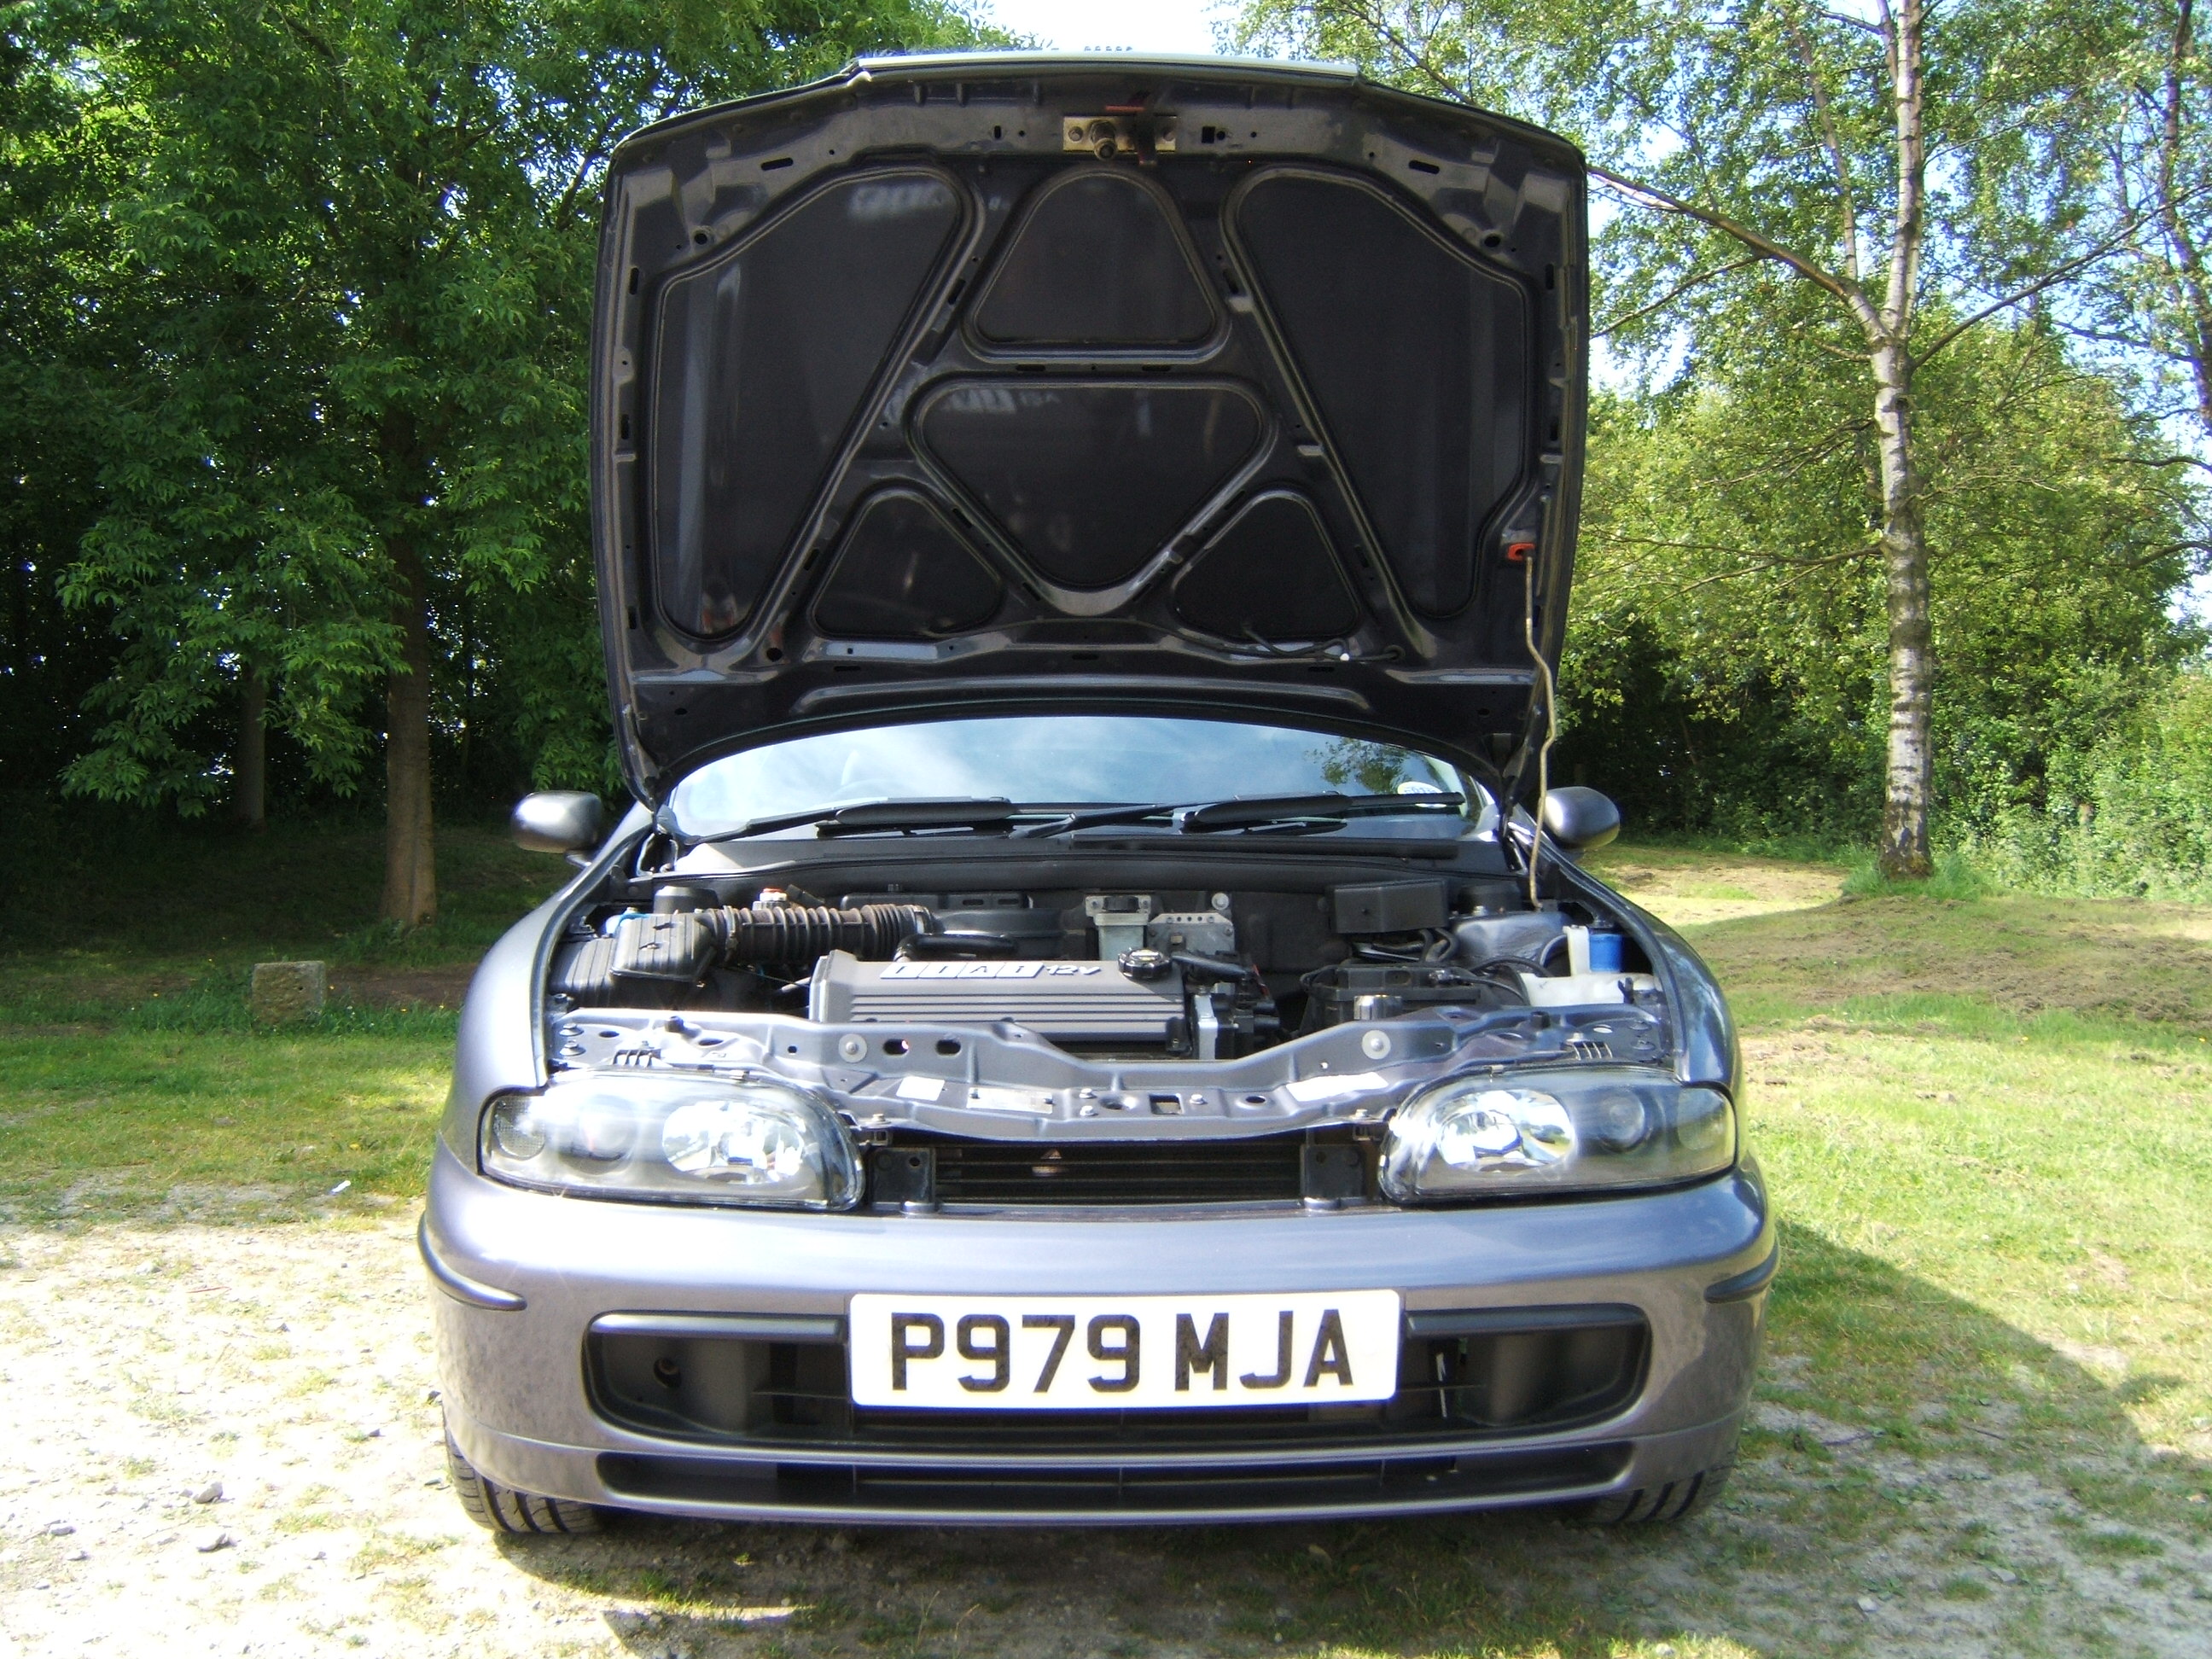
Fiat Bravo 1.4 12v 1997 Degas Grey
Fiat Bravo 1.4 12v 1997 Degas Grey
Specification
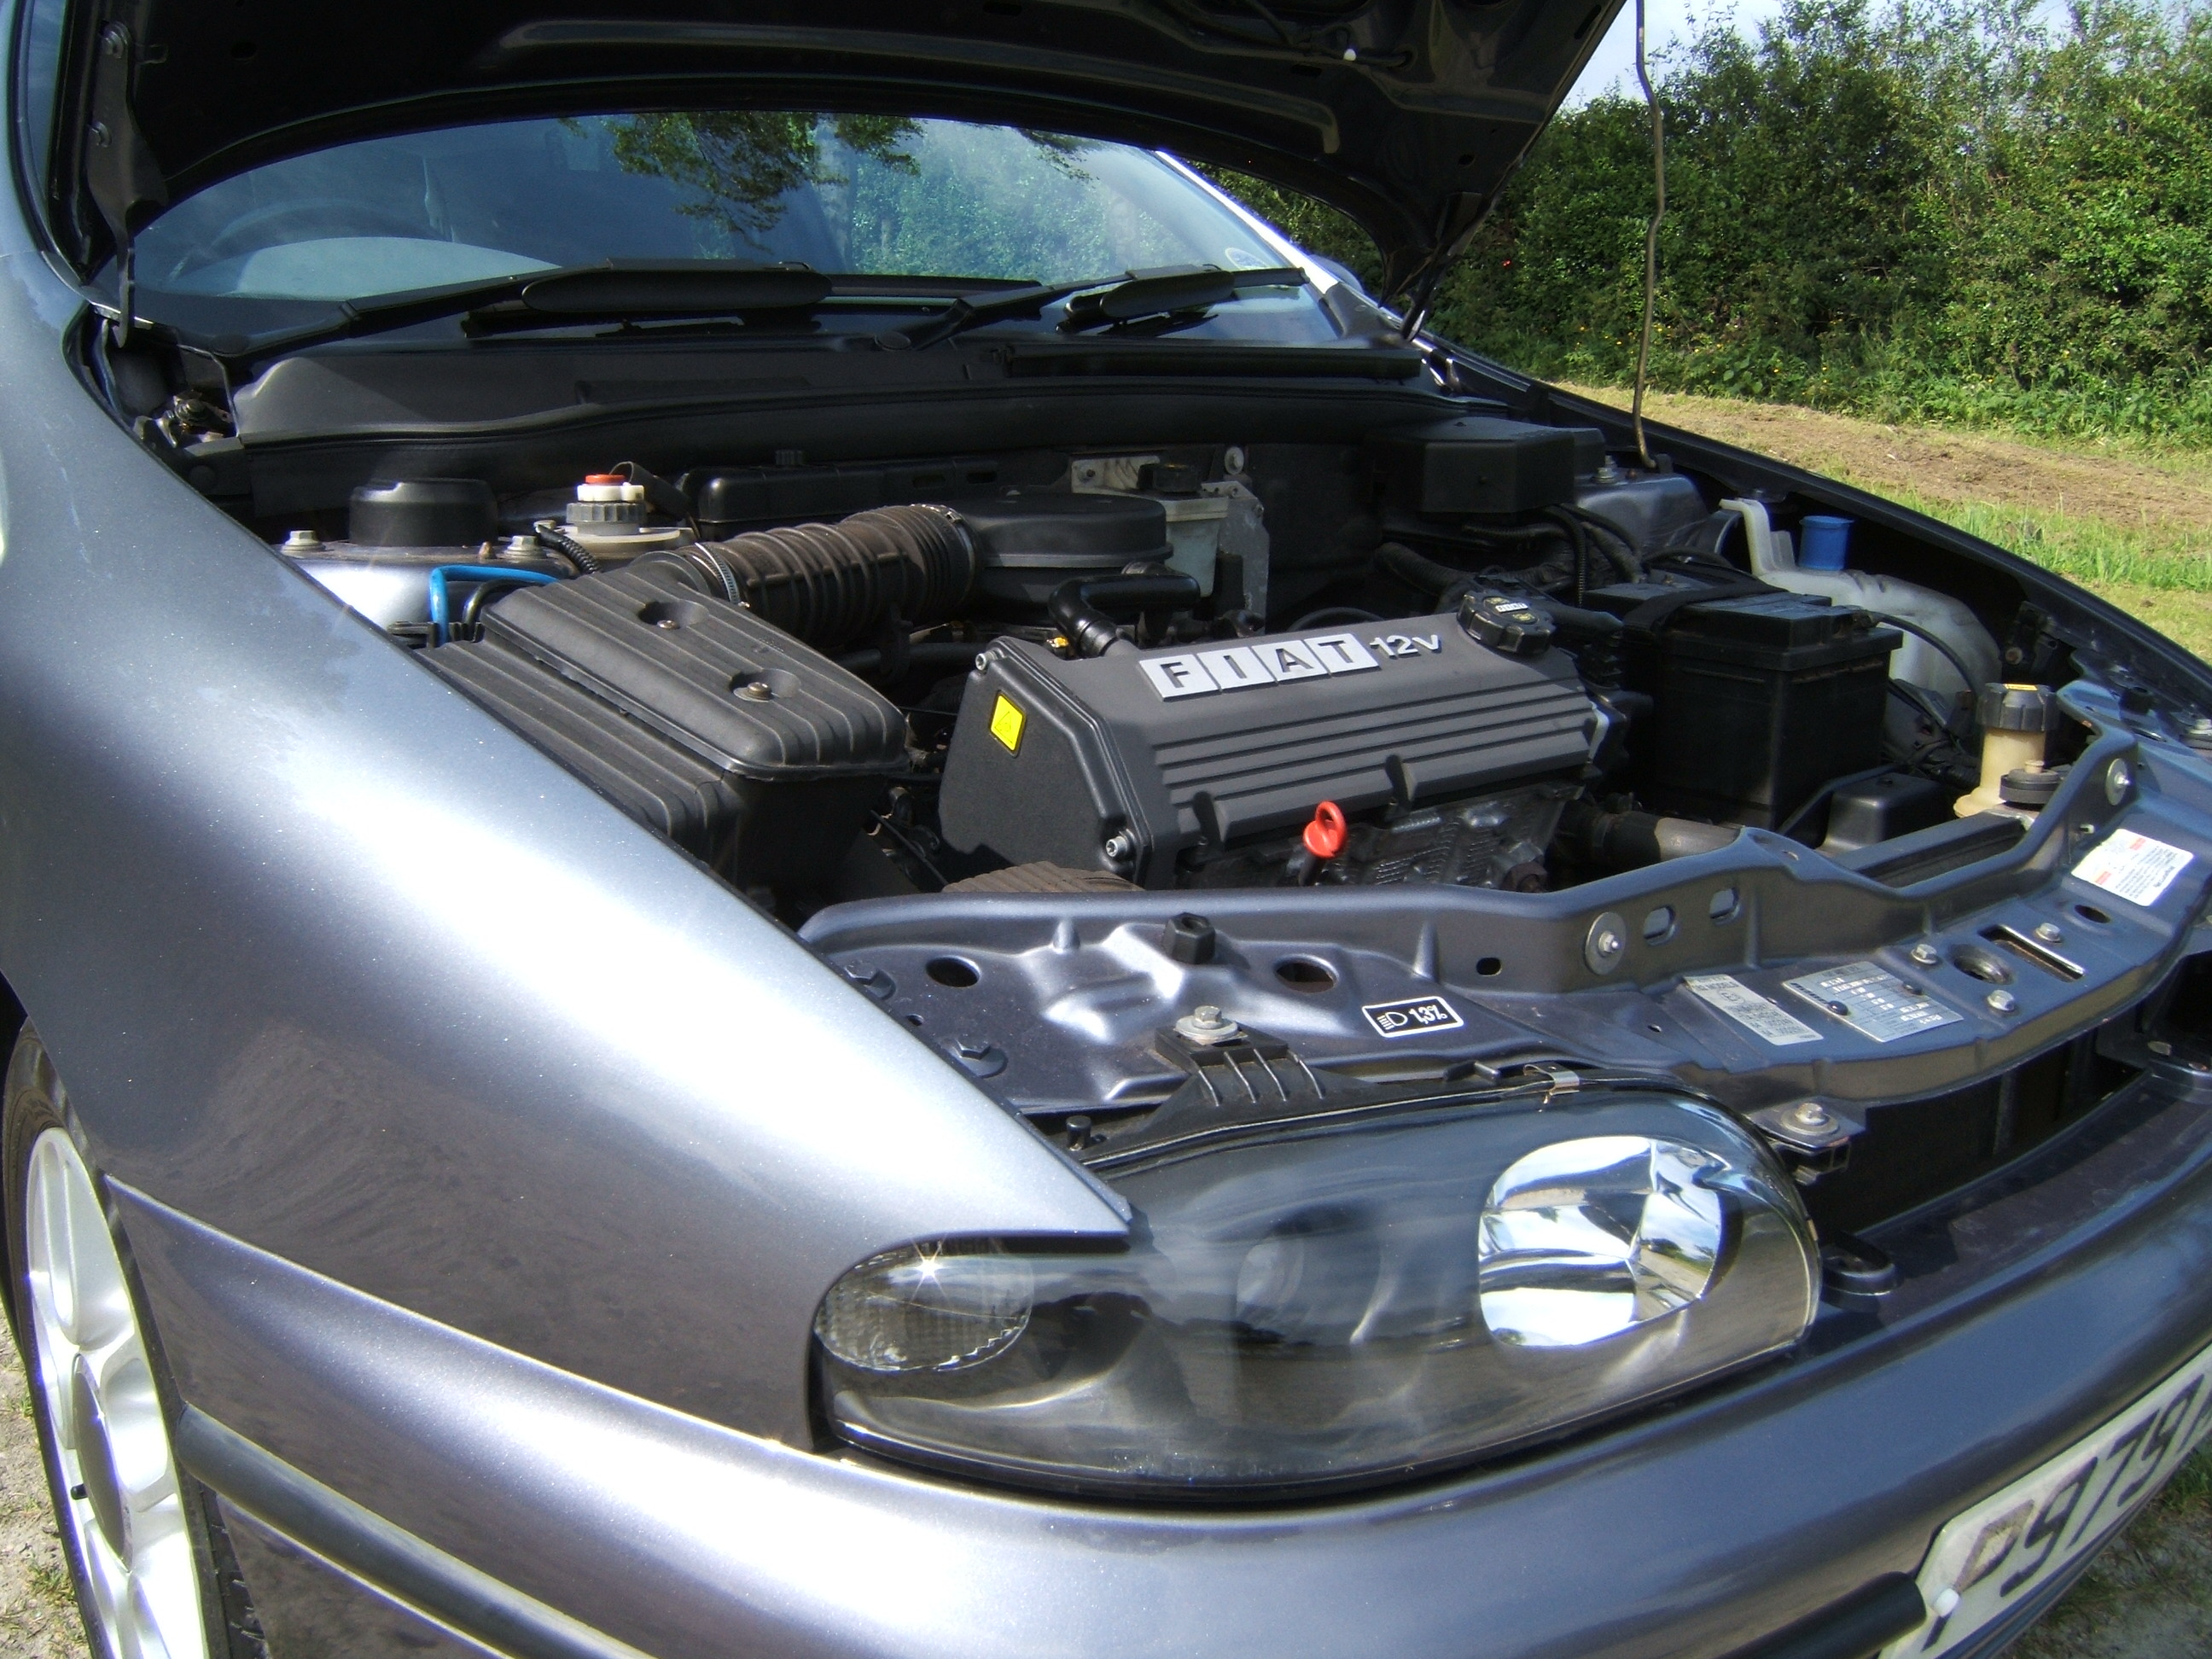
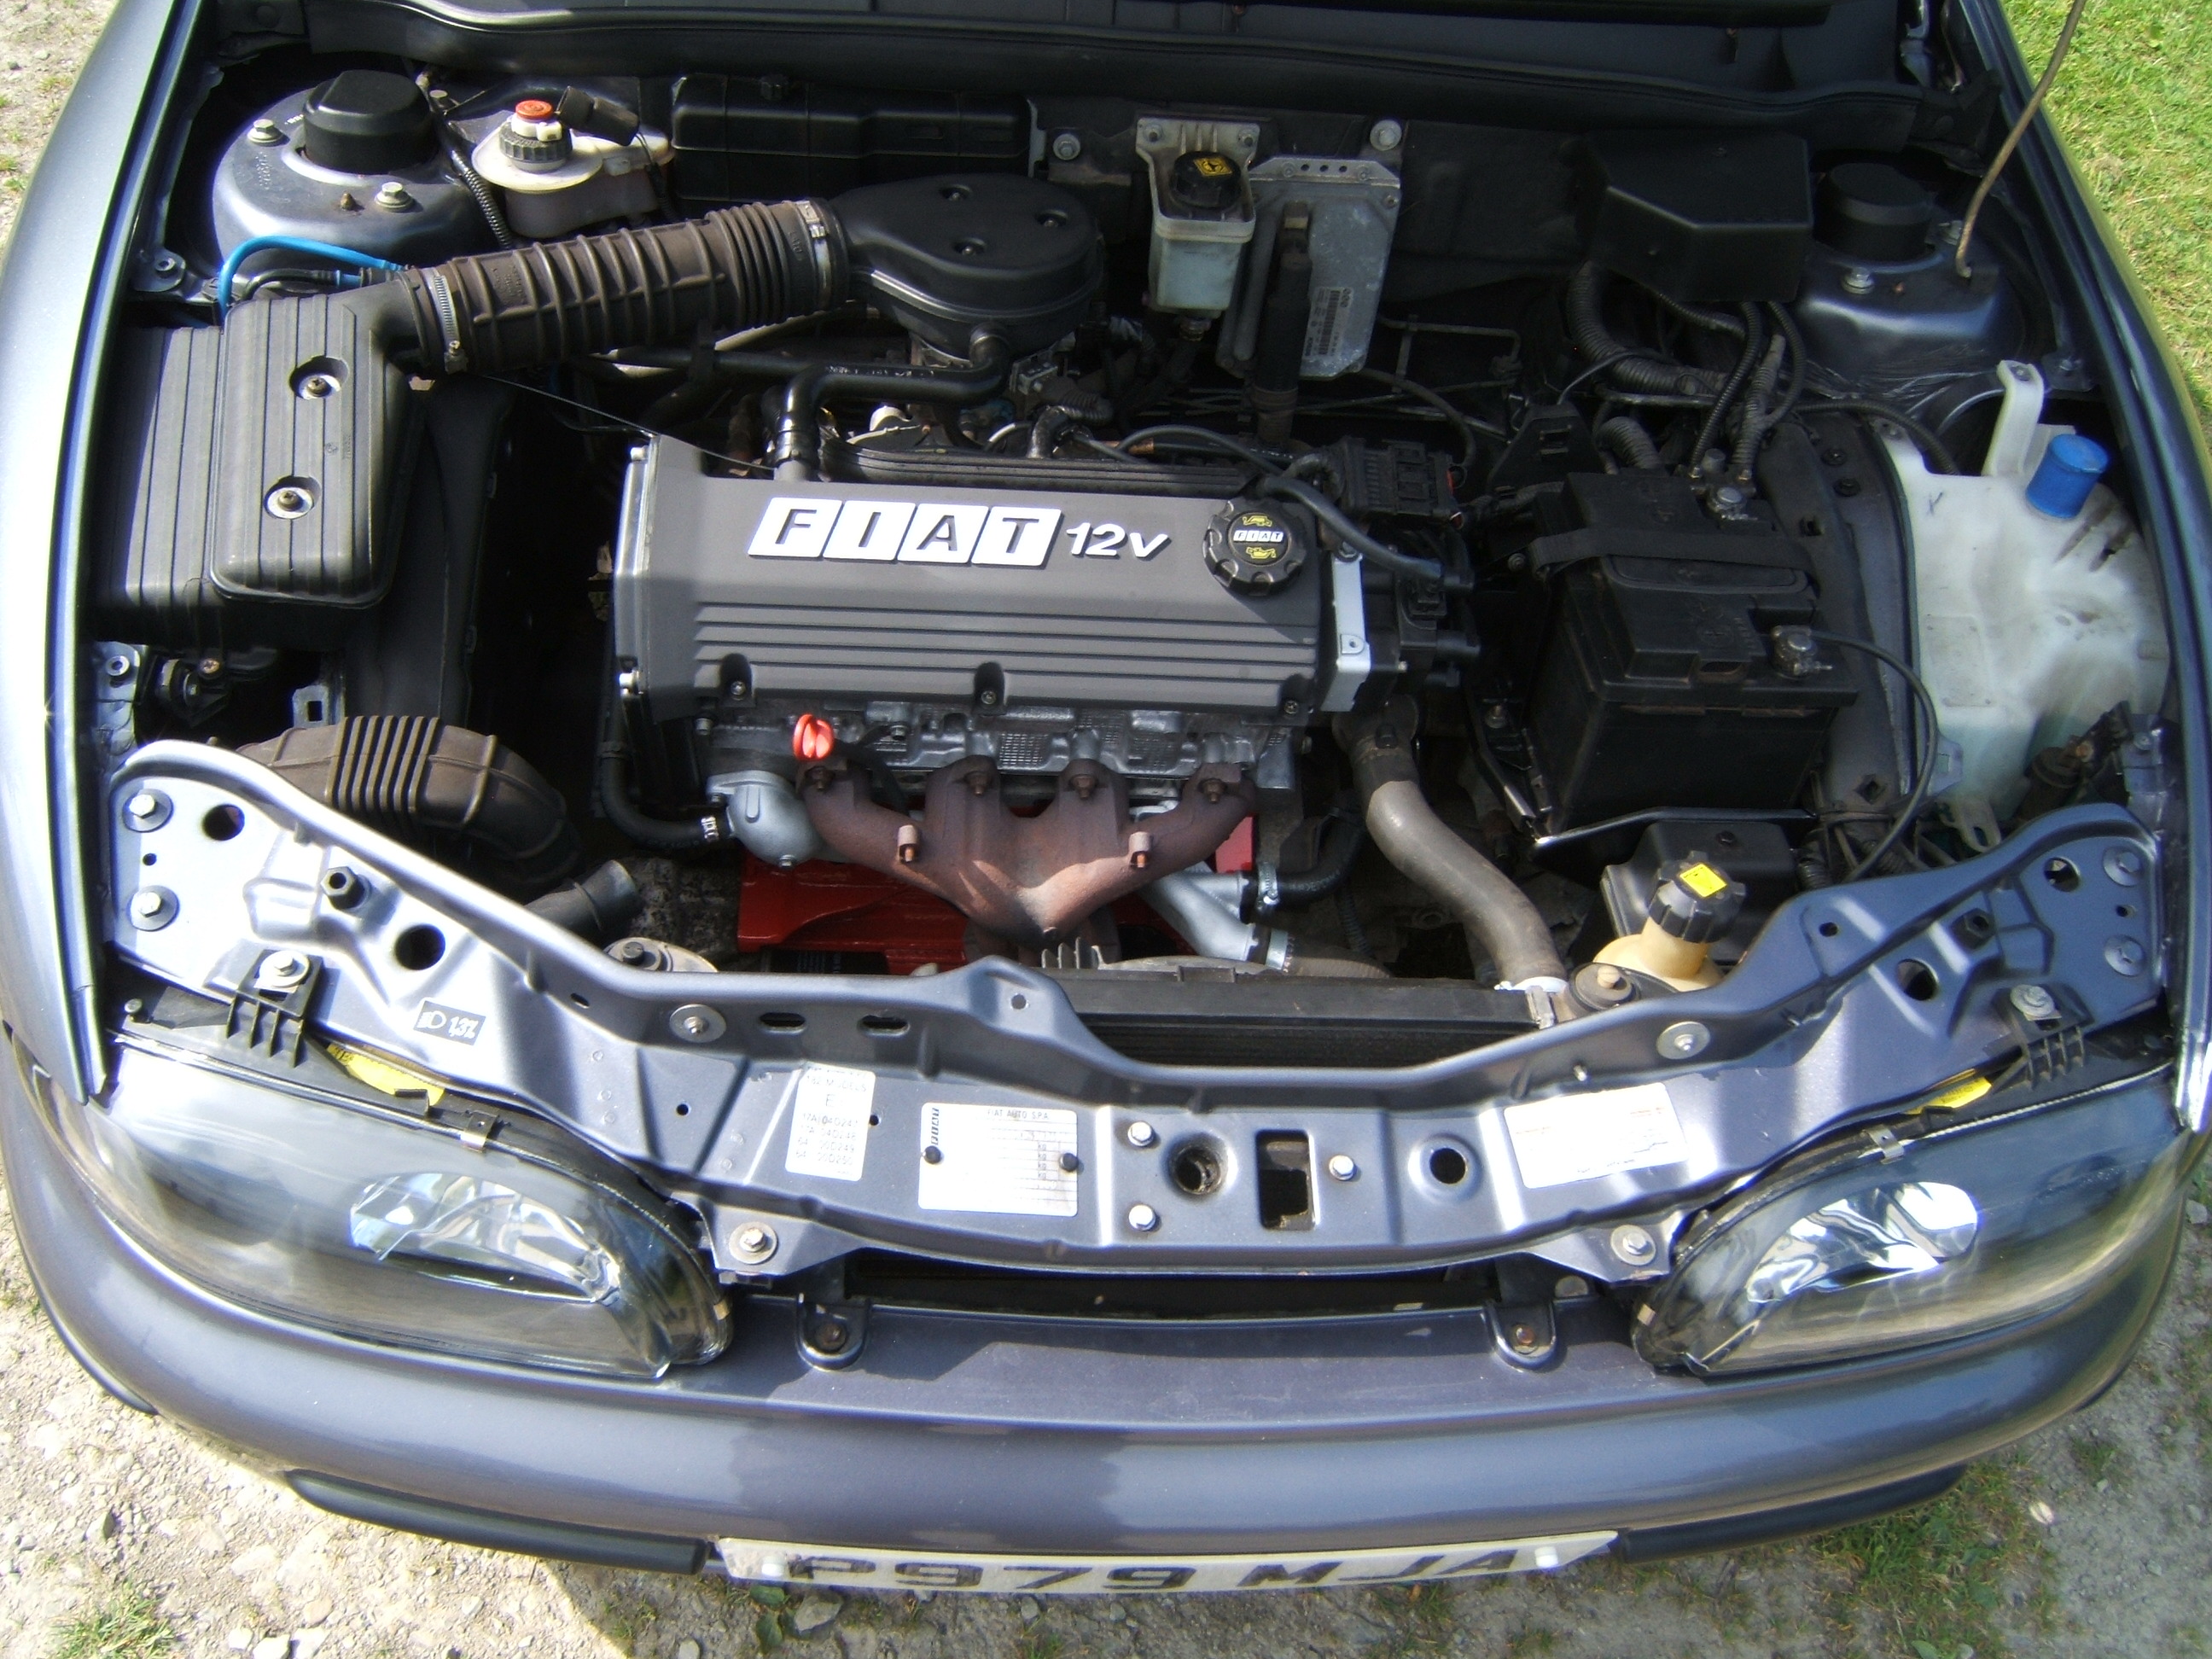
-Engine is a 1.4 12v 80Bhp (I rebuilt myself)
-Colour 623/A Metallic Degas Grey
-Original Trim Level SX: Sunroof, Electric Windows, Central Locking, Manual Mirrors.
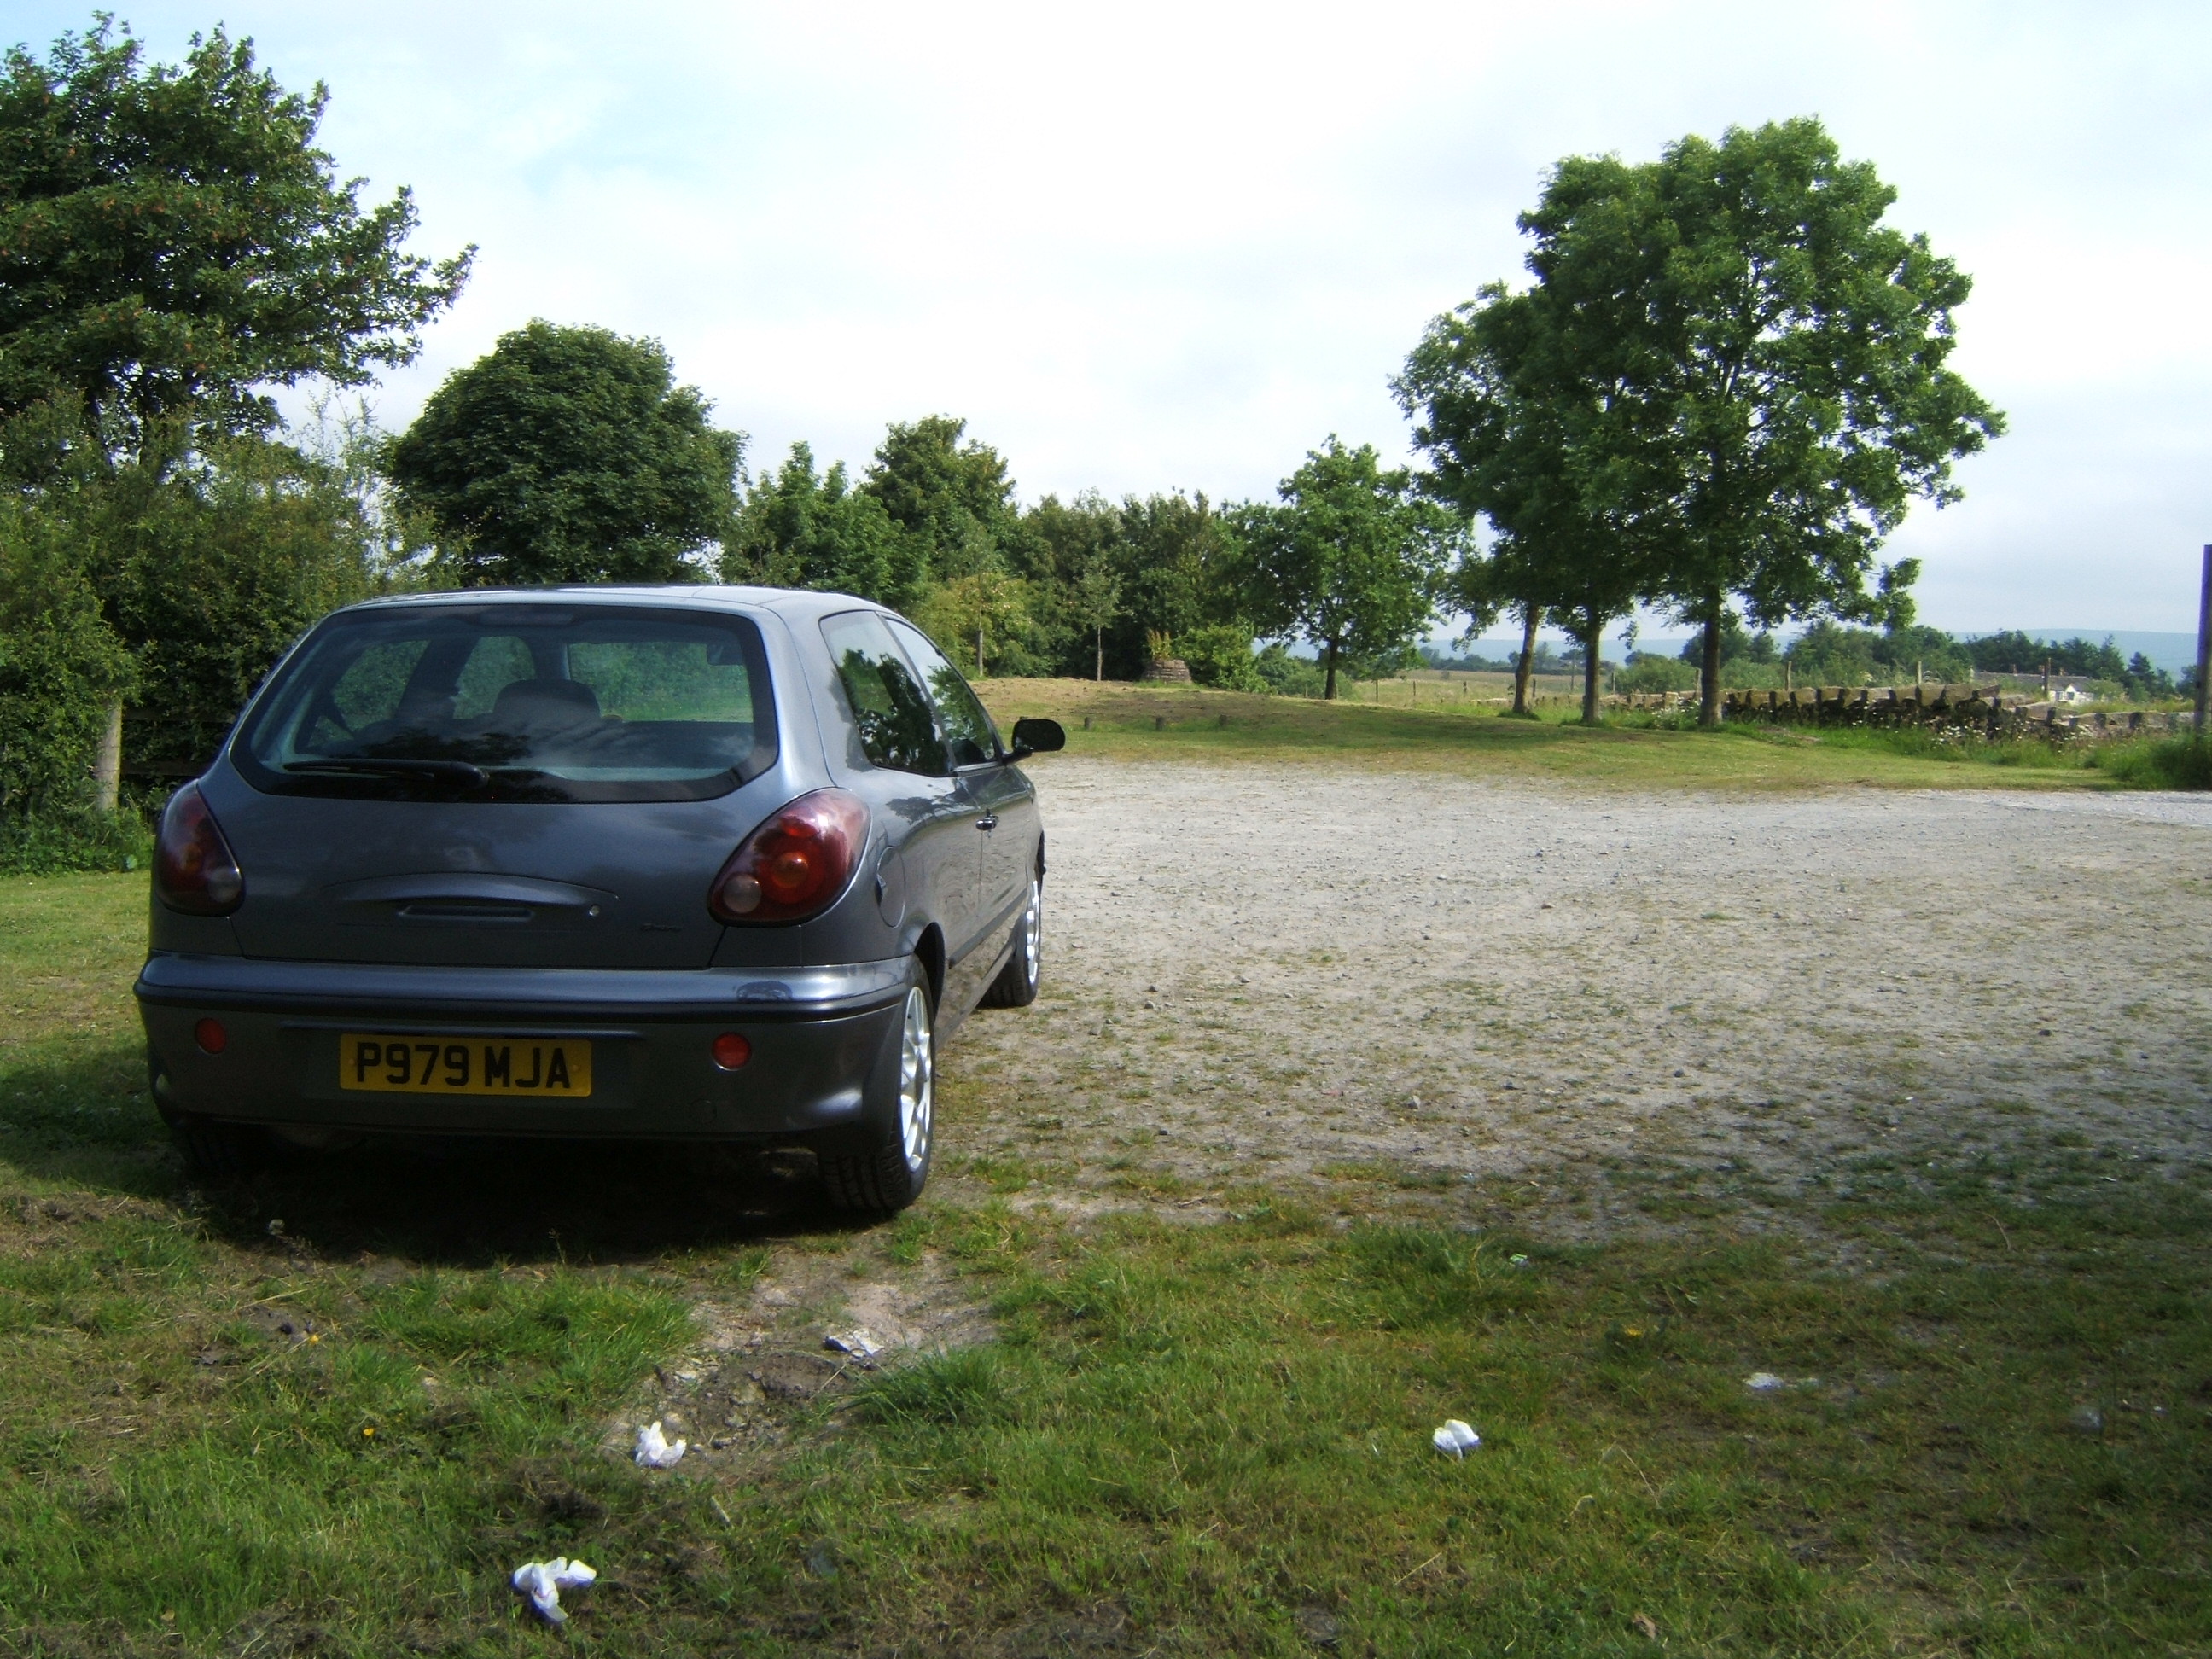
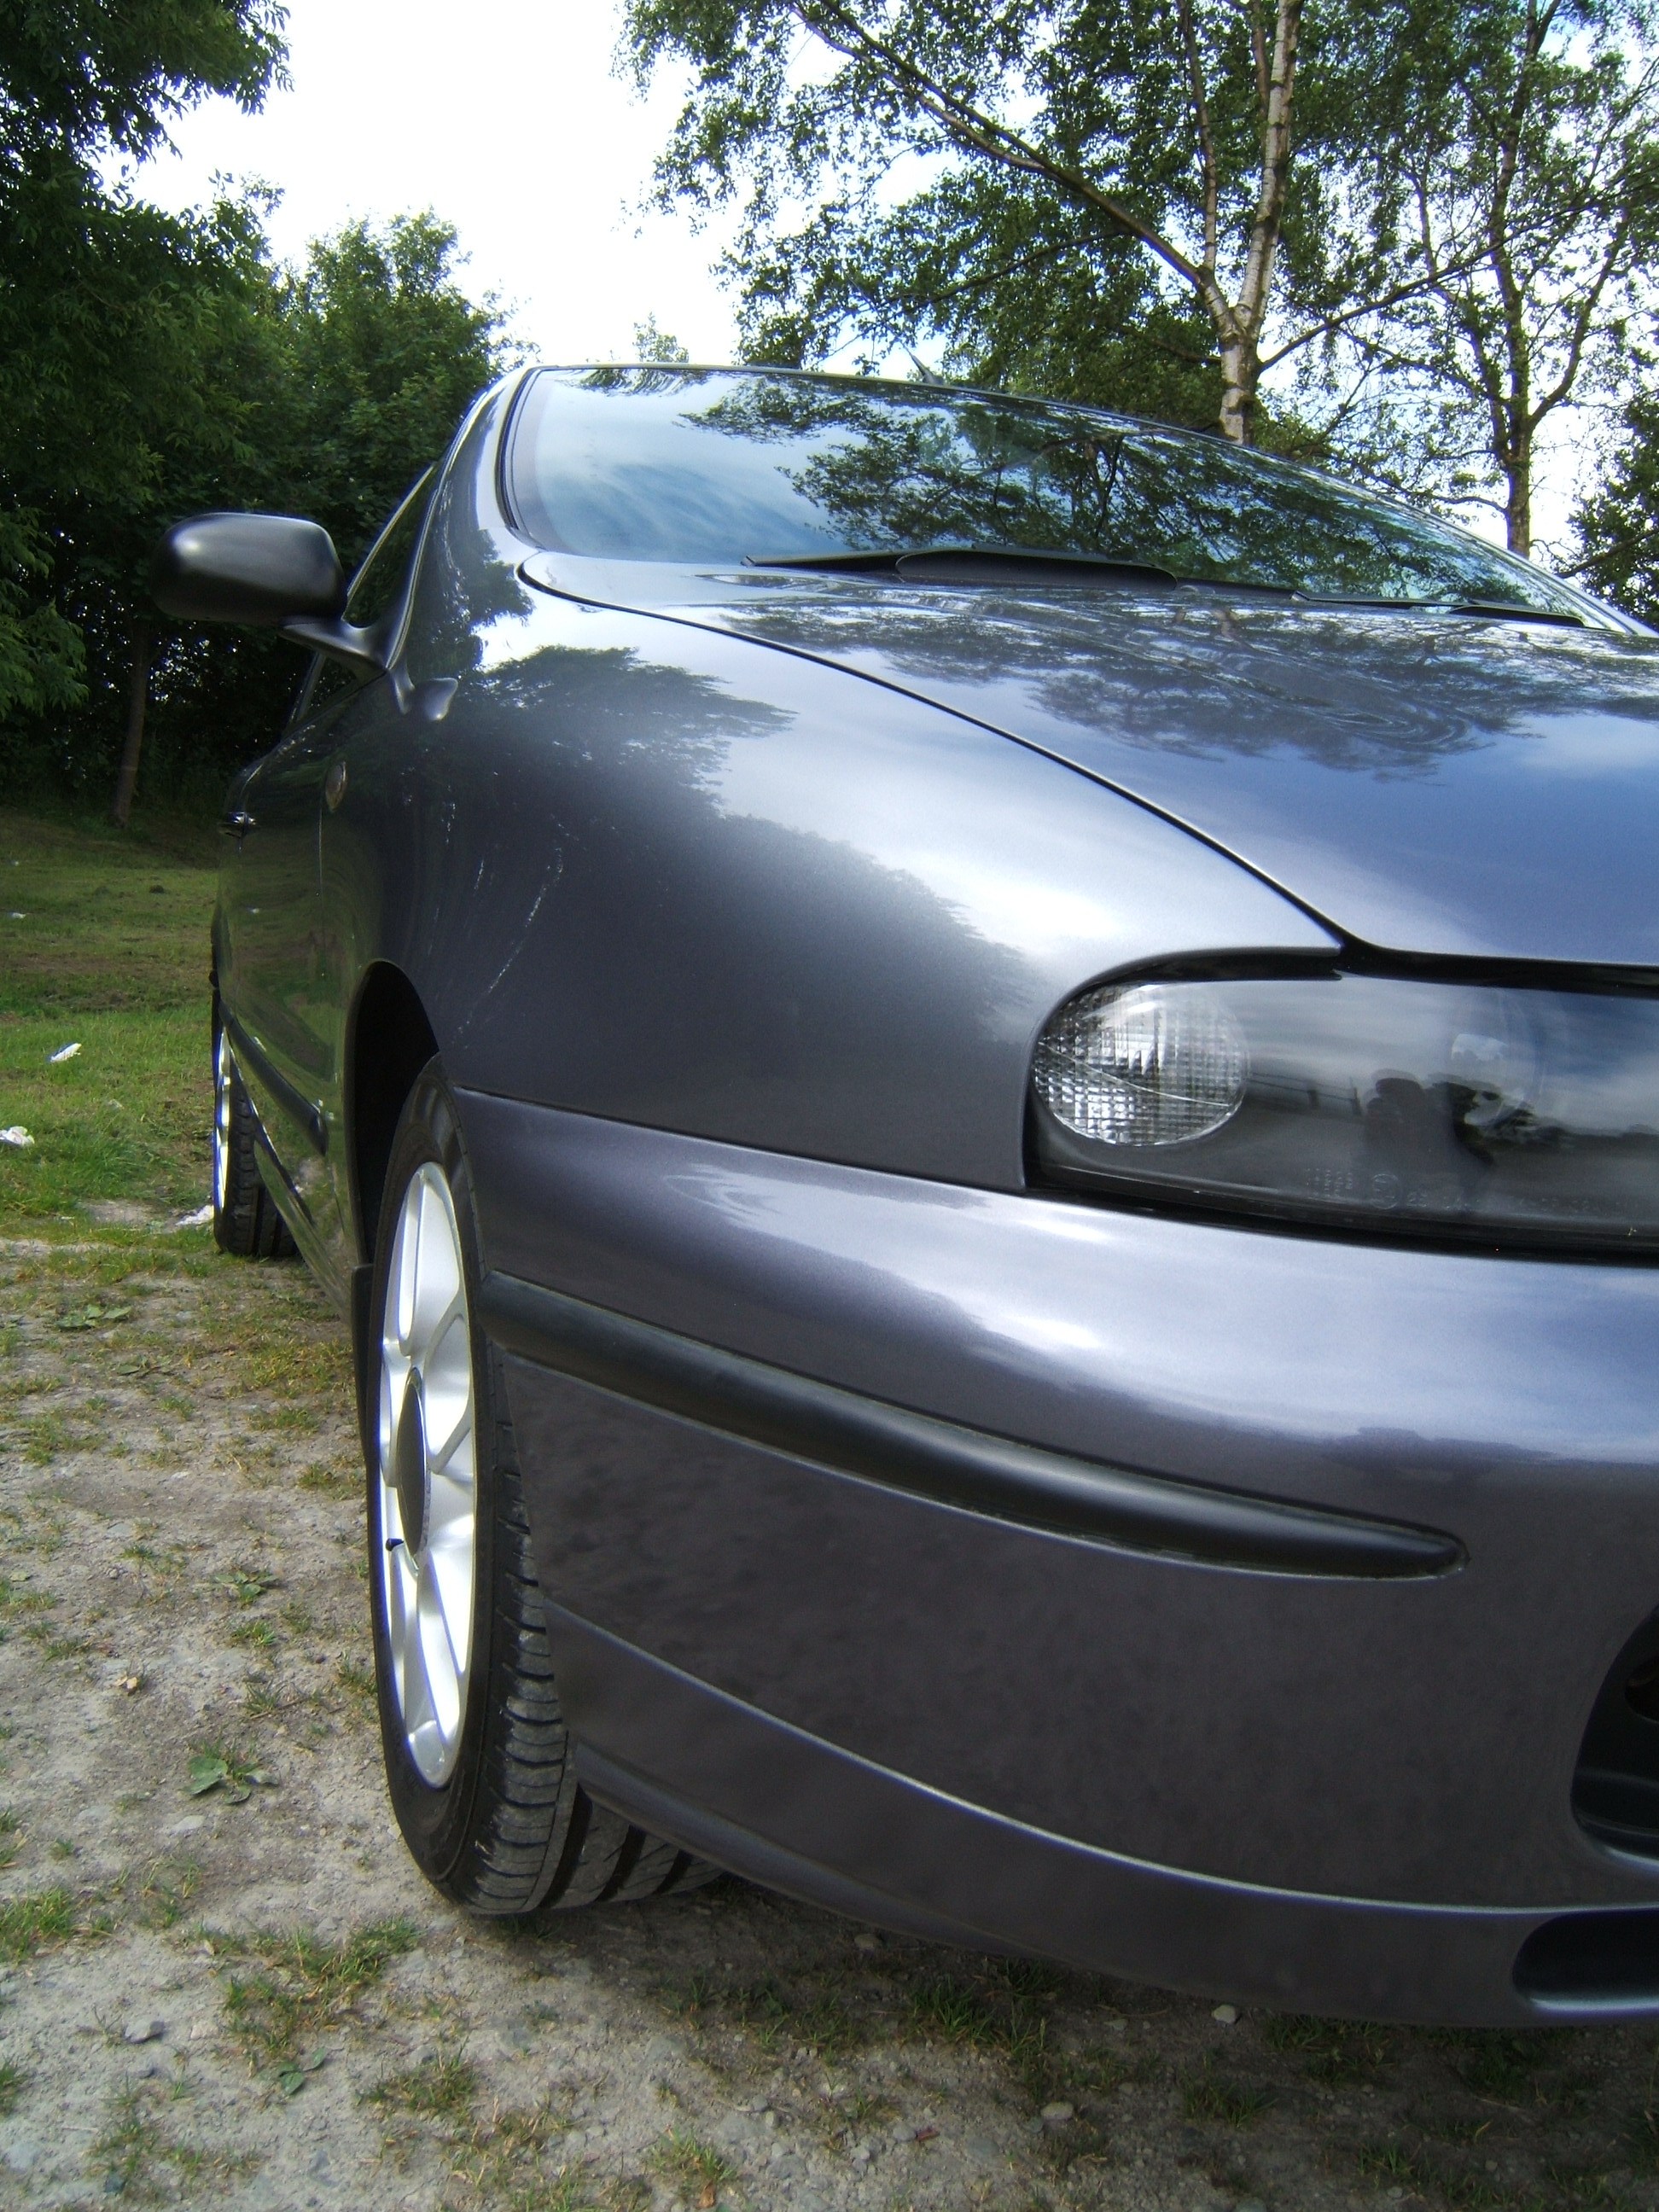
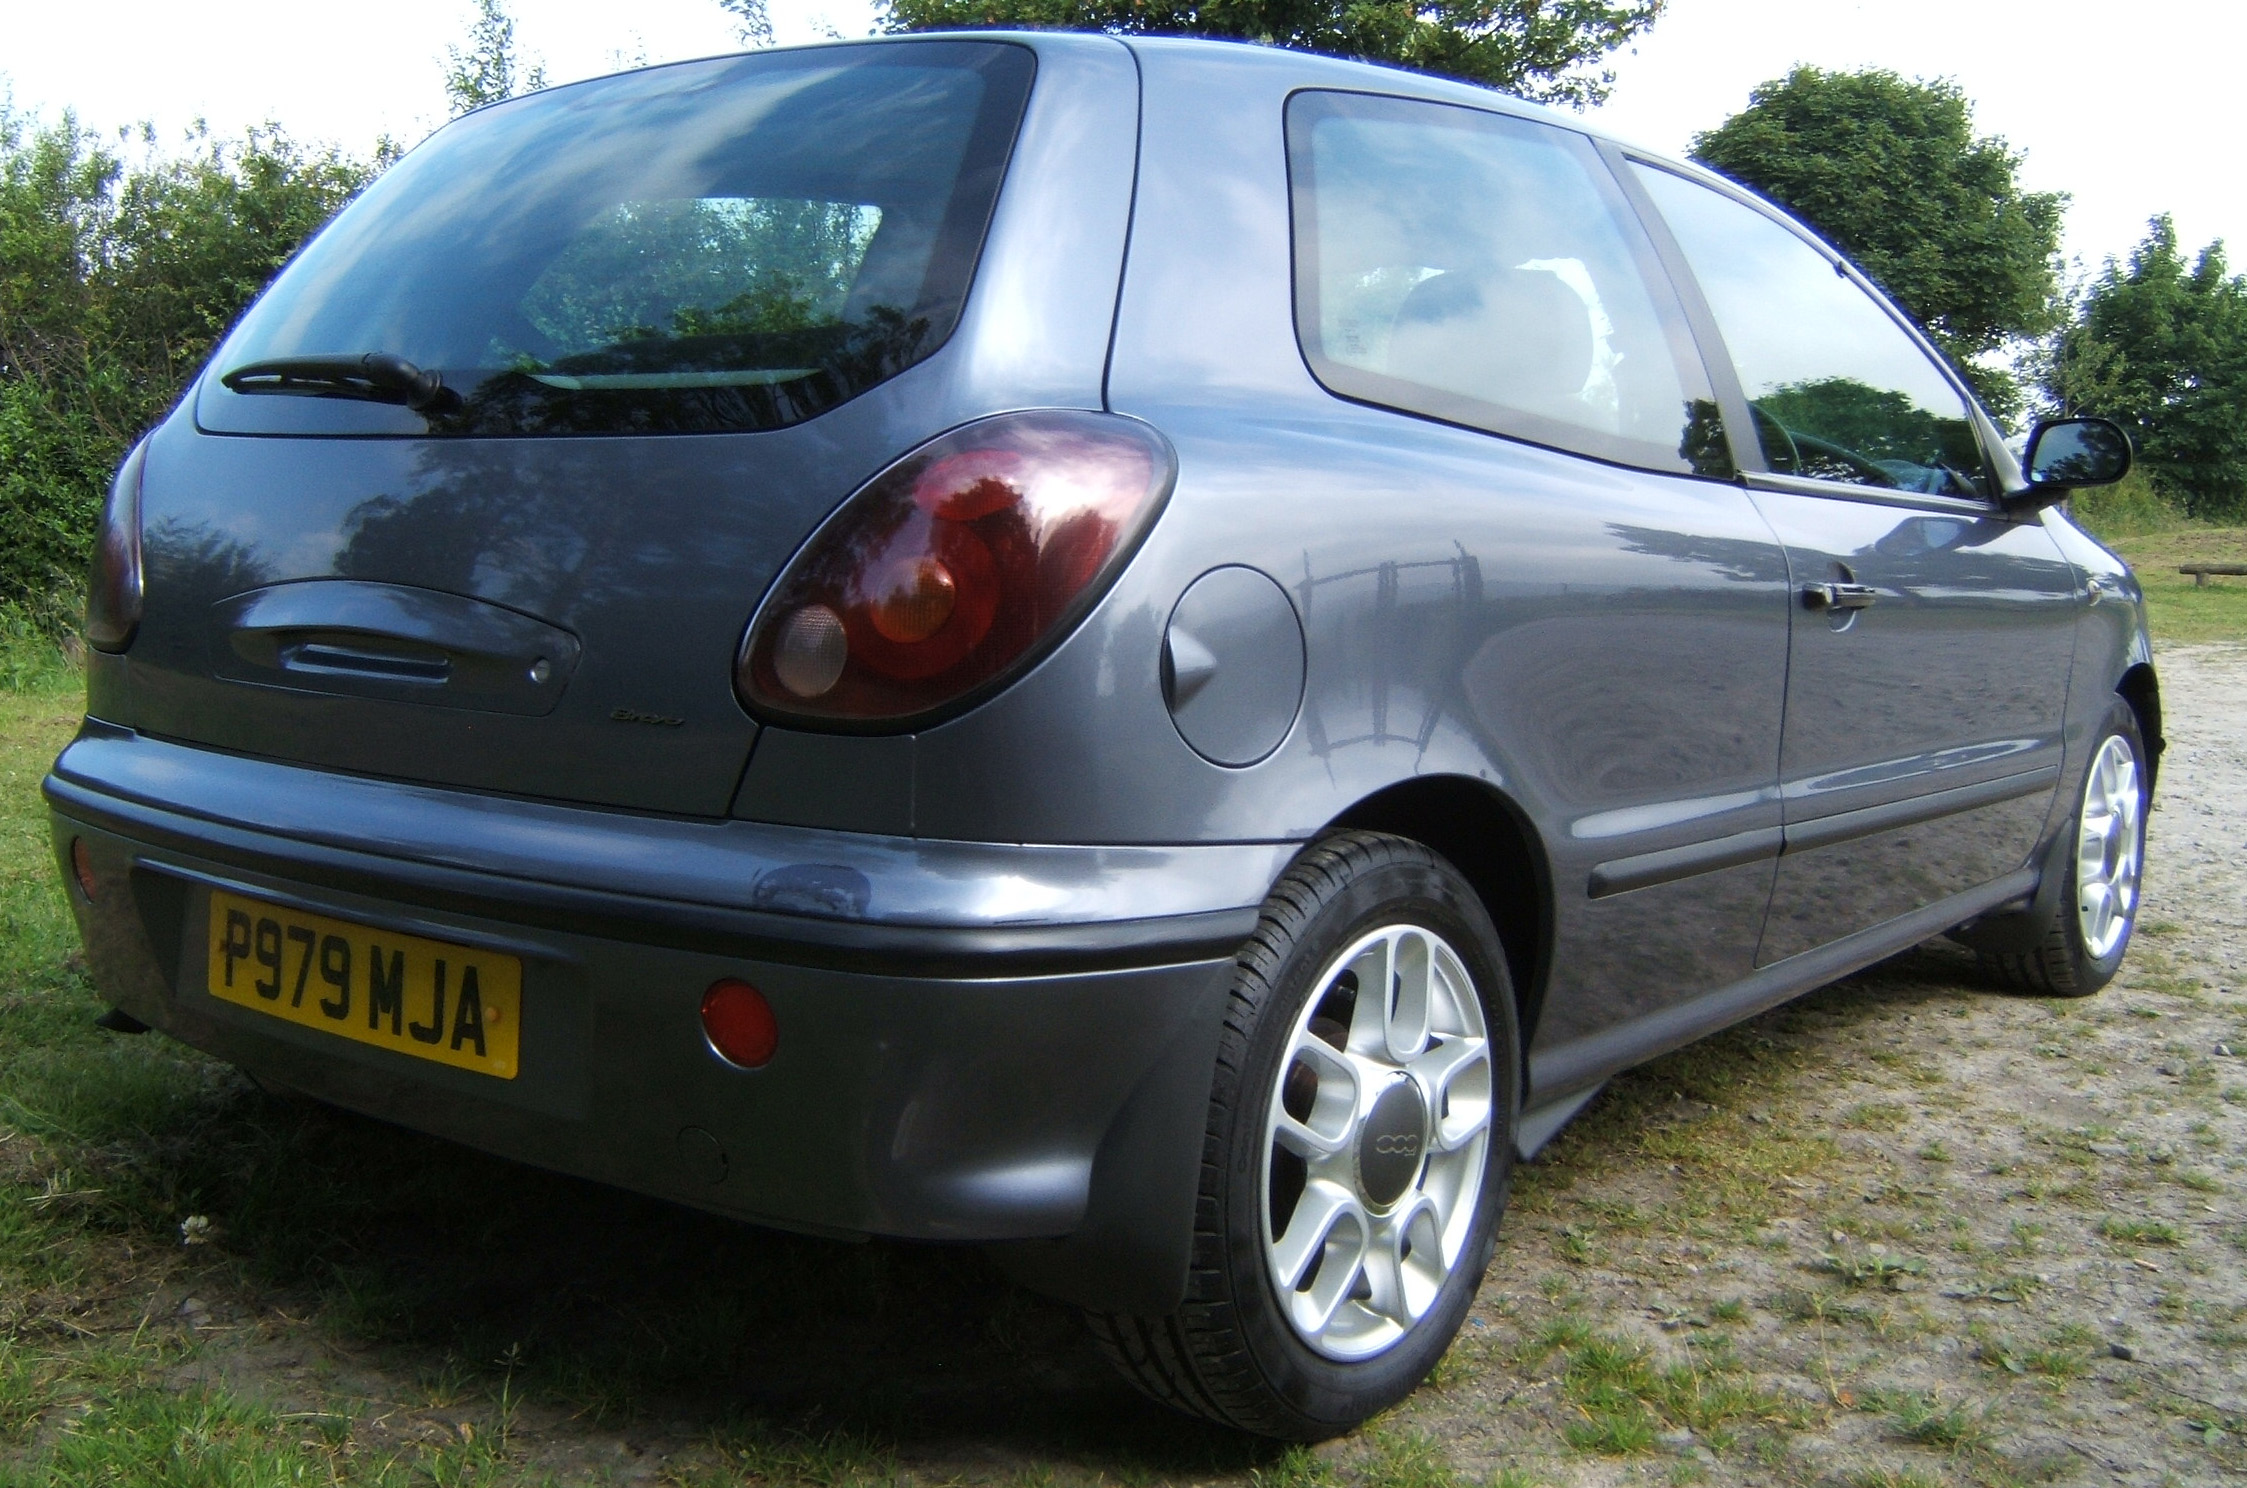
Mods/Extras
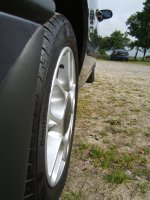
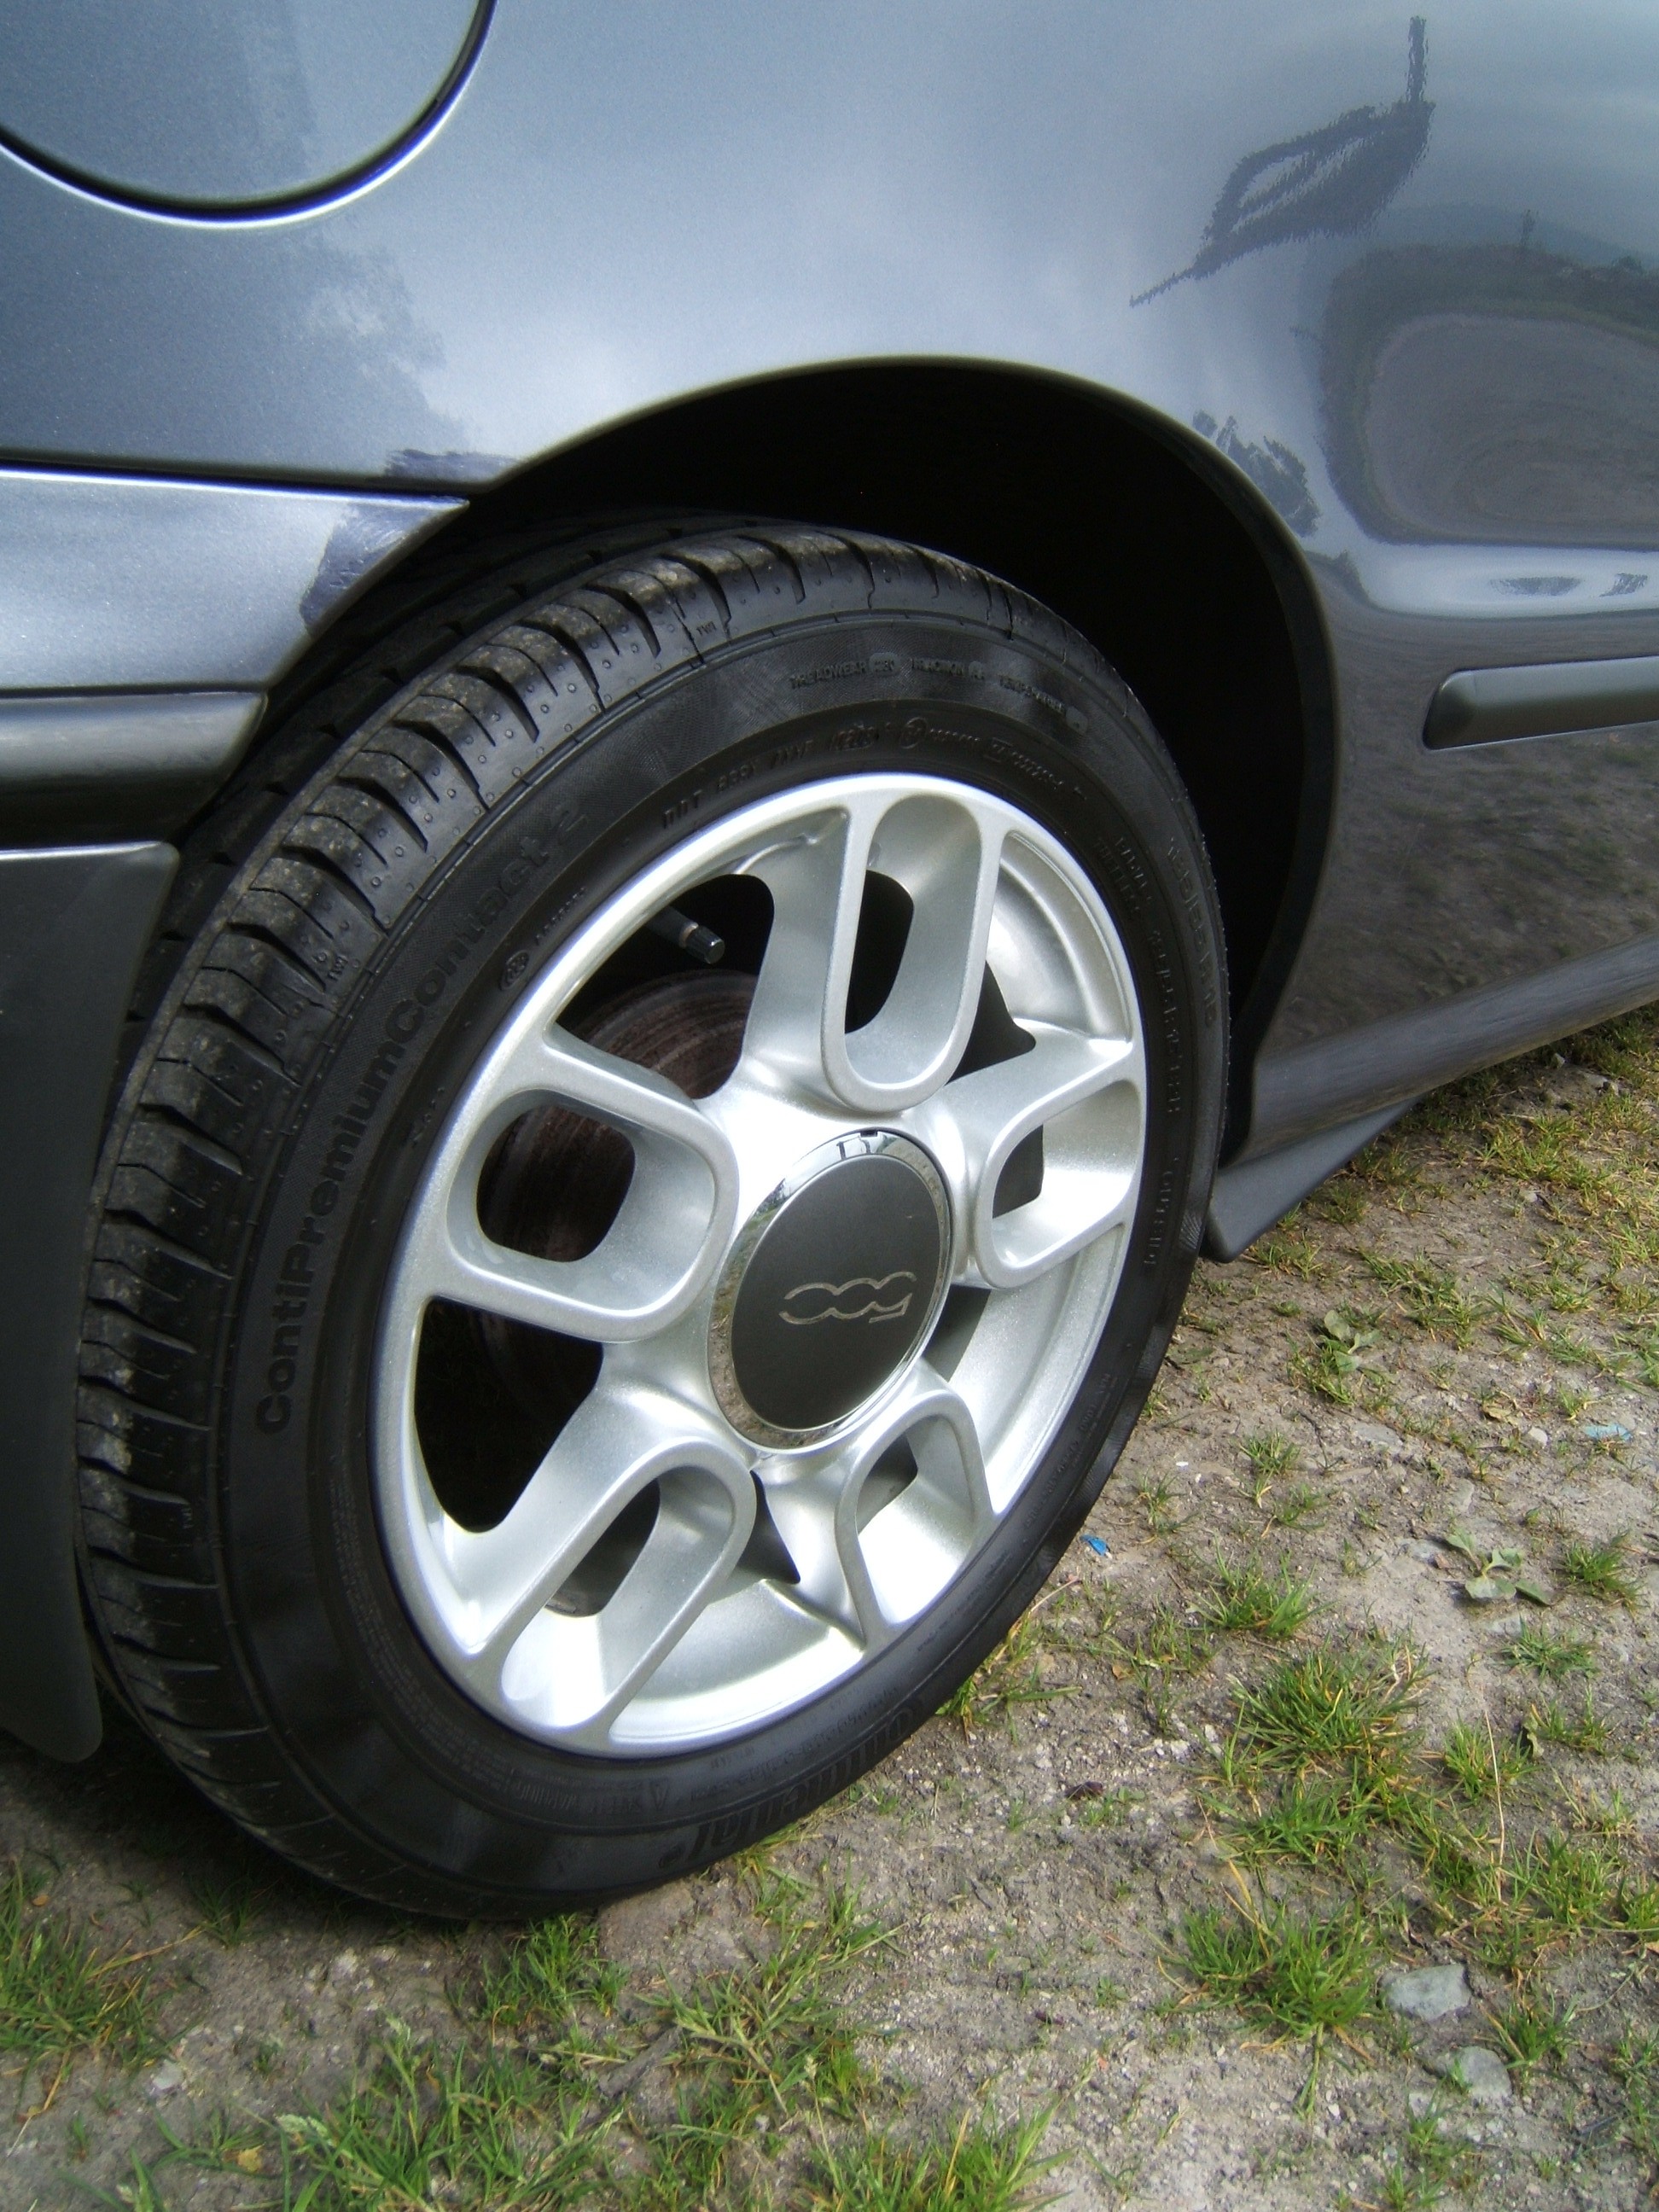
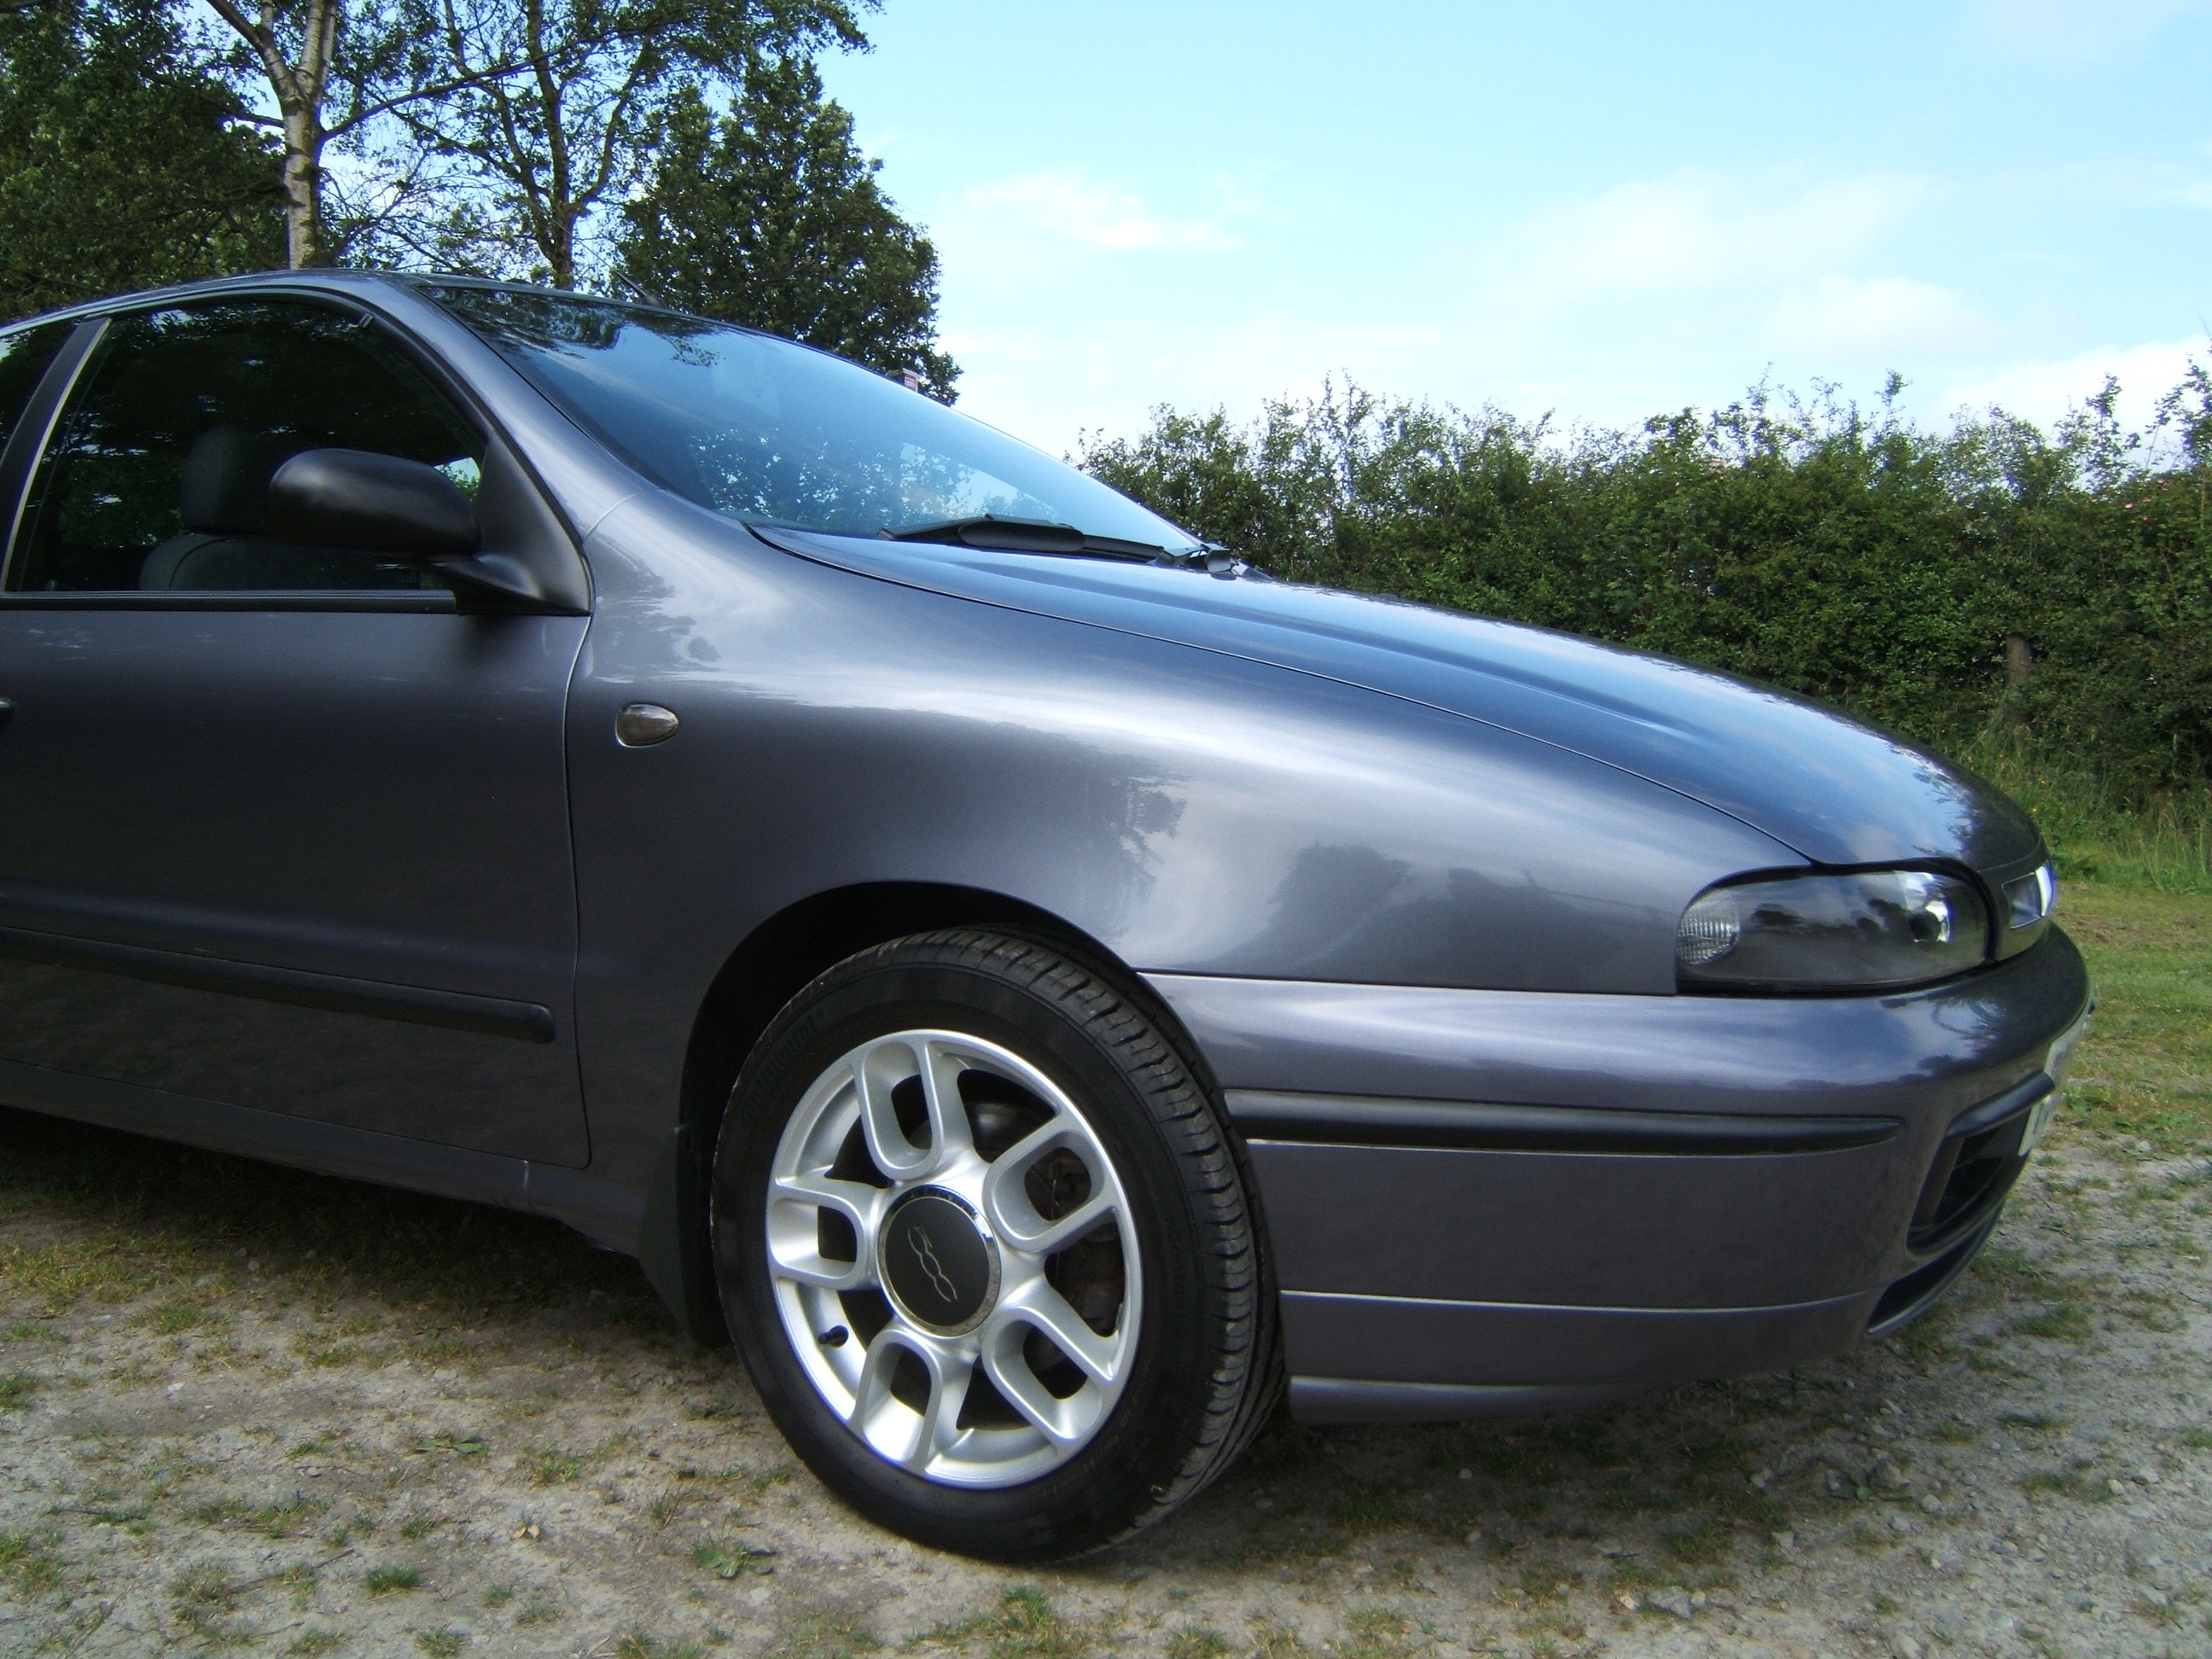
-Wheels from Fiat 500 '15" Sport Alloys'
-Continental Contact Premium 2 Tyre’s (185/55/R15)
-Marea plastic door handles
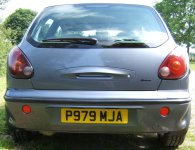
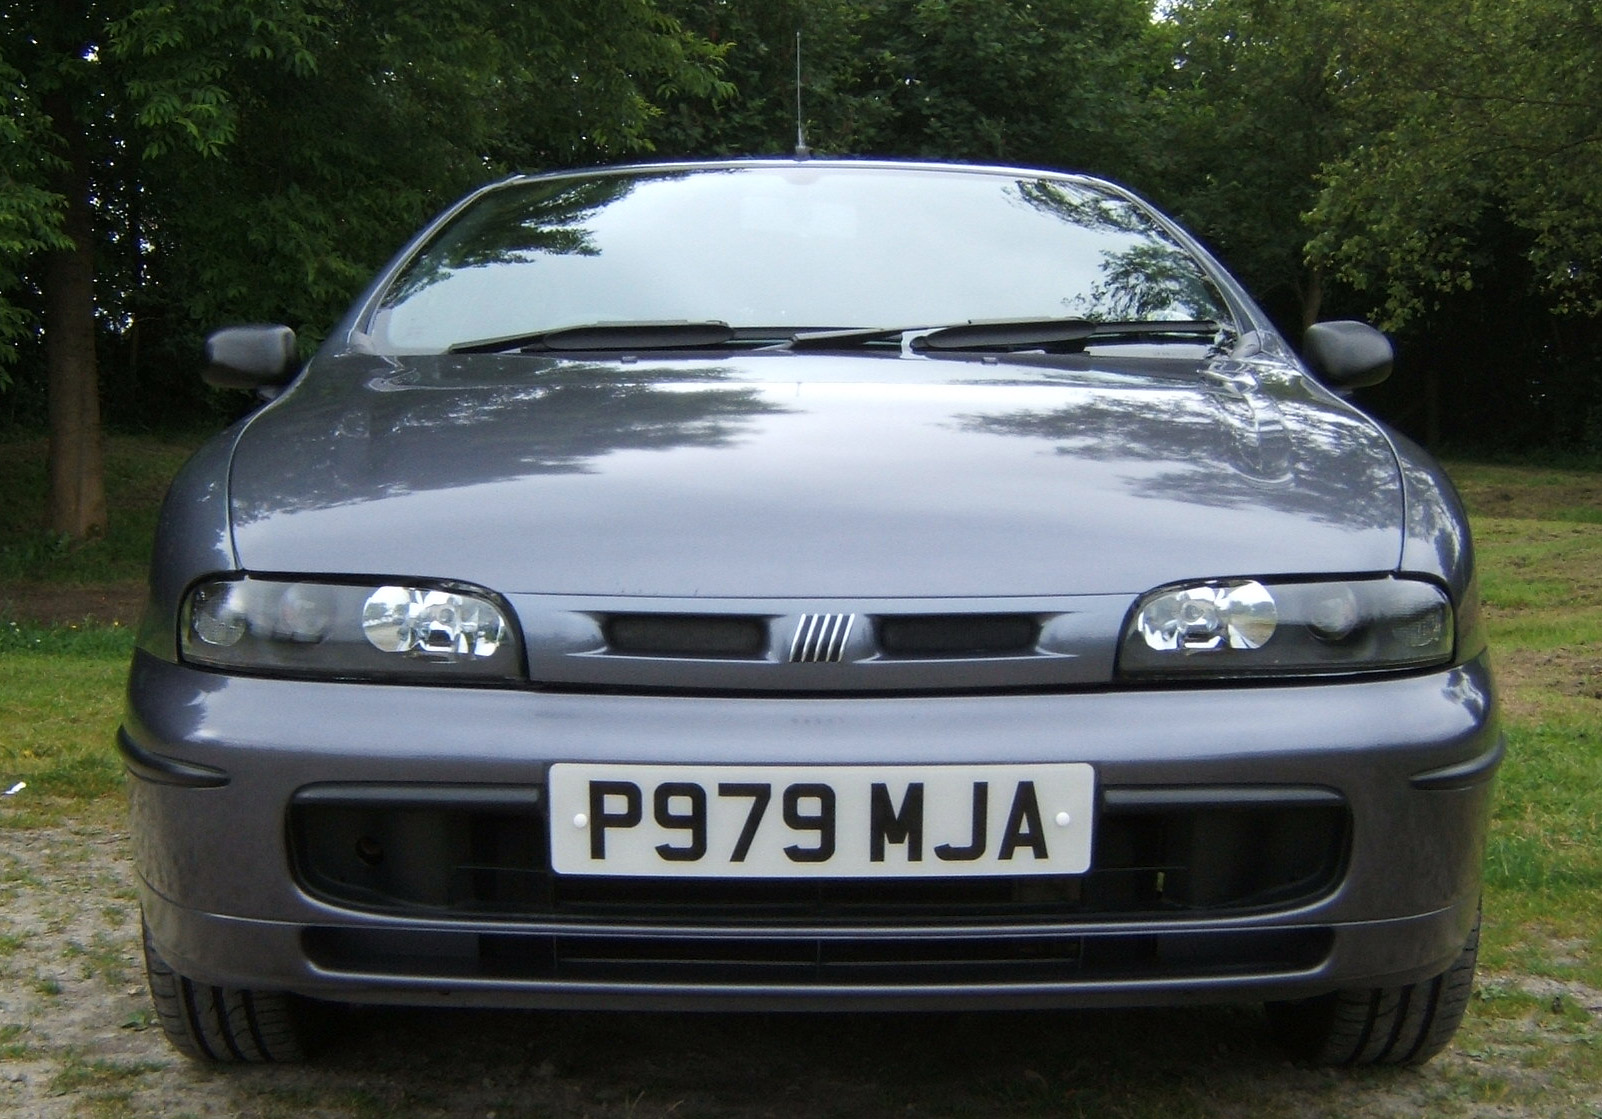
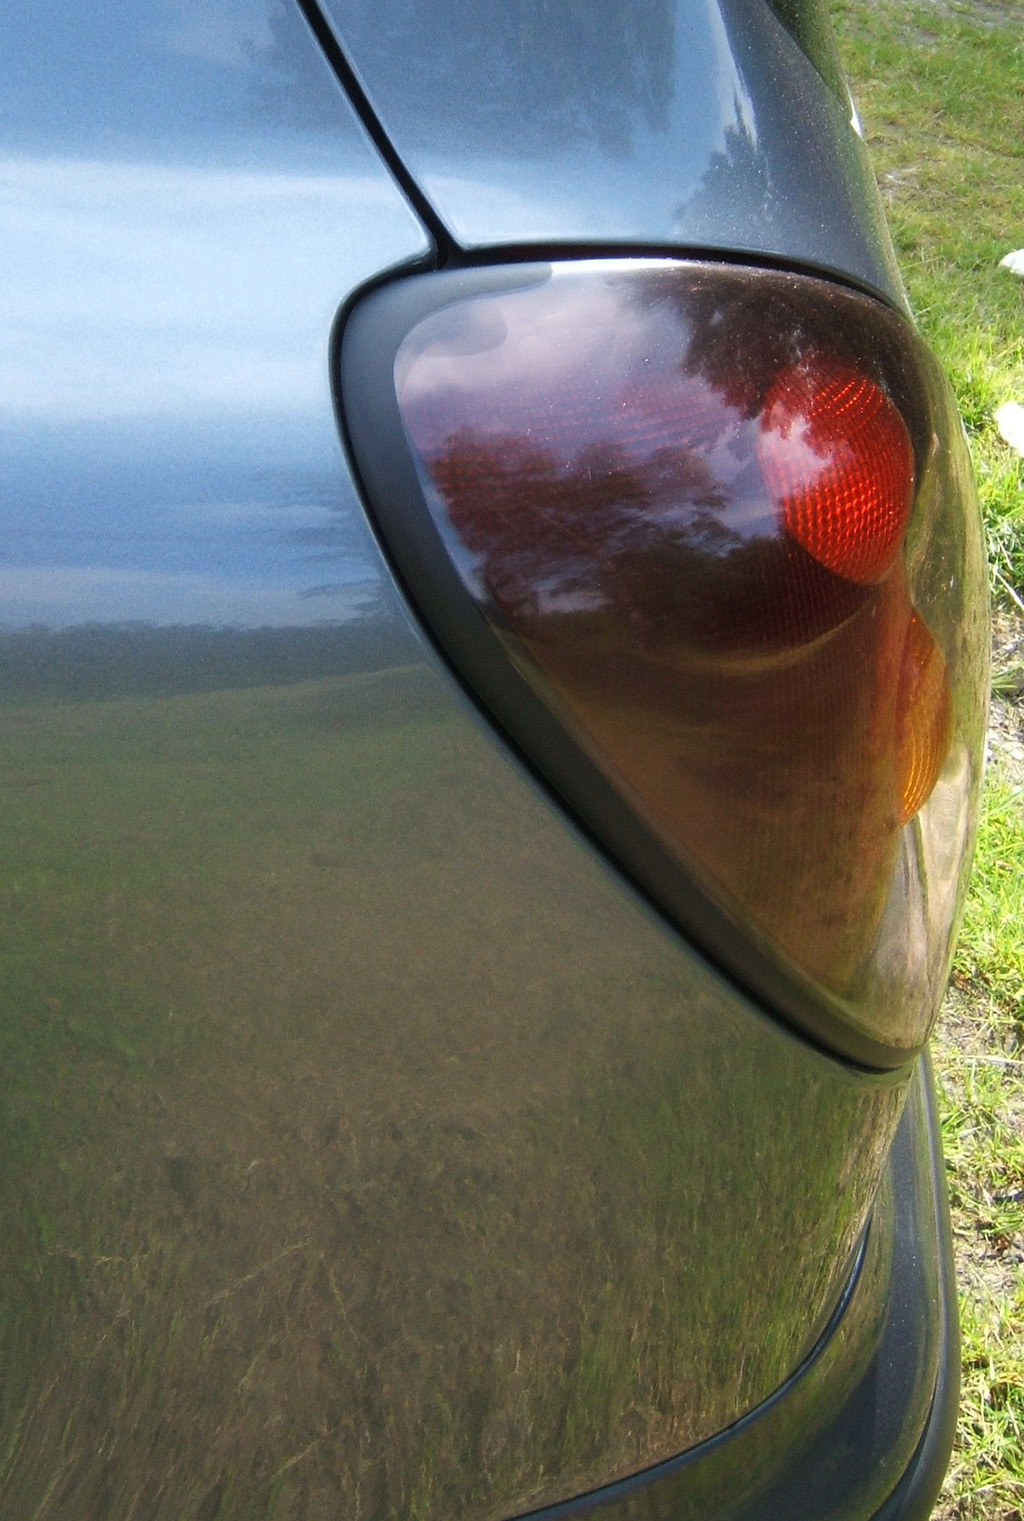
-European rear right cluster for extra symmetry PN:7779097
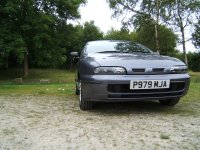
-Fiat Marea Poly Elliptical Headlights With modified wiring
-Black In-Pro Side repeaters
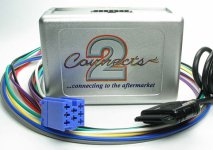
-Ipod/cd changer tricker interface to OEM stereo
-Main Wiper wind deflector (Fiat original)
-Passenger Wiper wind deflector (Modified/Fiat original)
-Bosch Aero Twin Wipers
-Front Mud Flaps (Fiat original)
-Rear mud flaps (Fiat original)
-Refurbished wing mirror mounts
-Leather Steering Wheel from HGT
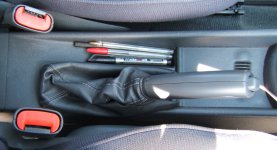
-Vinyl Handbrake Gaiter
-Bravo 2007 Mist Washer Jets
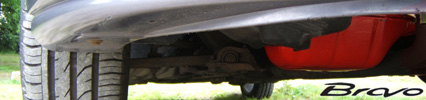
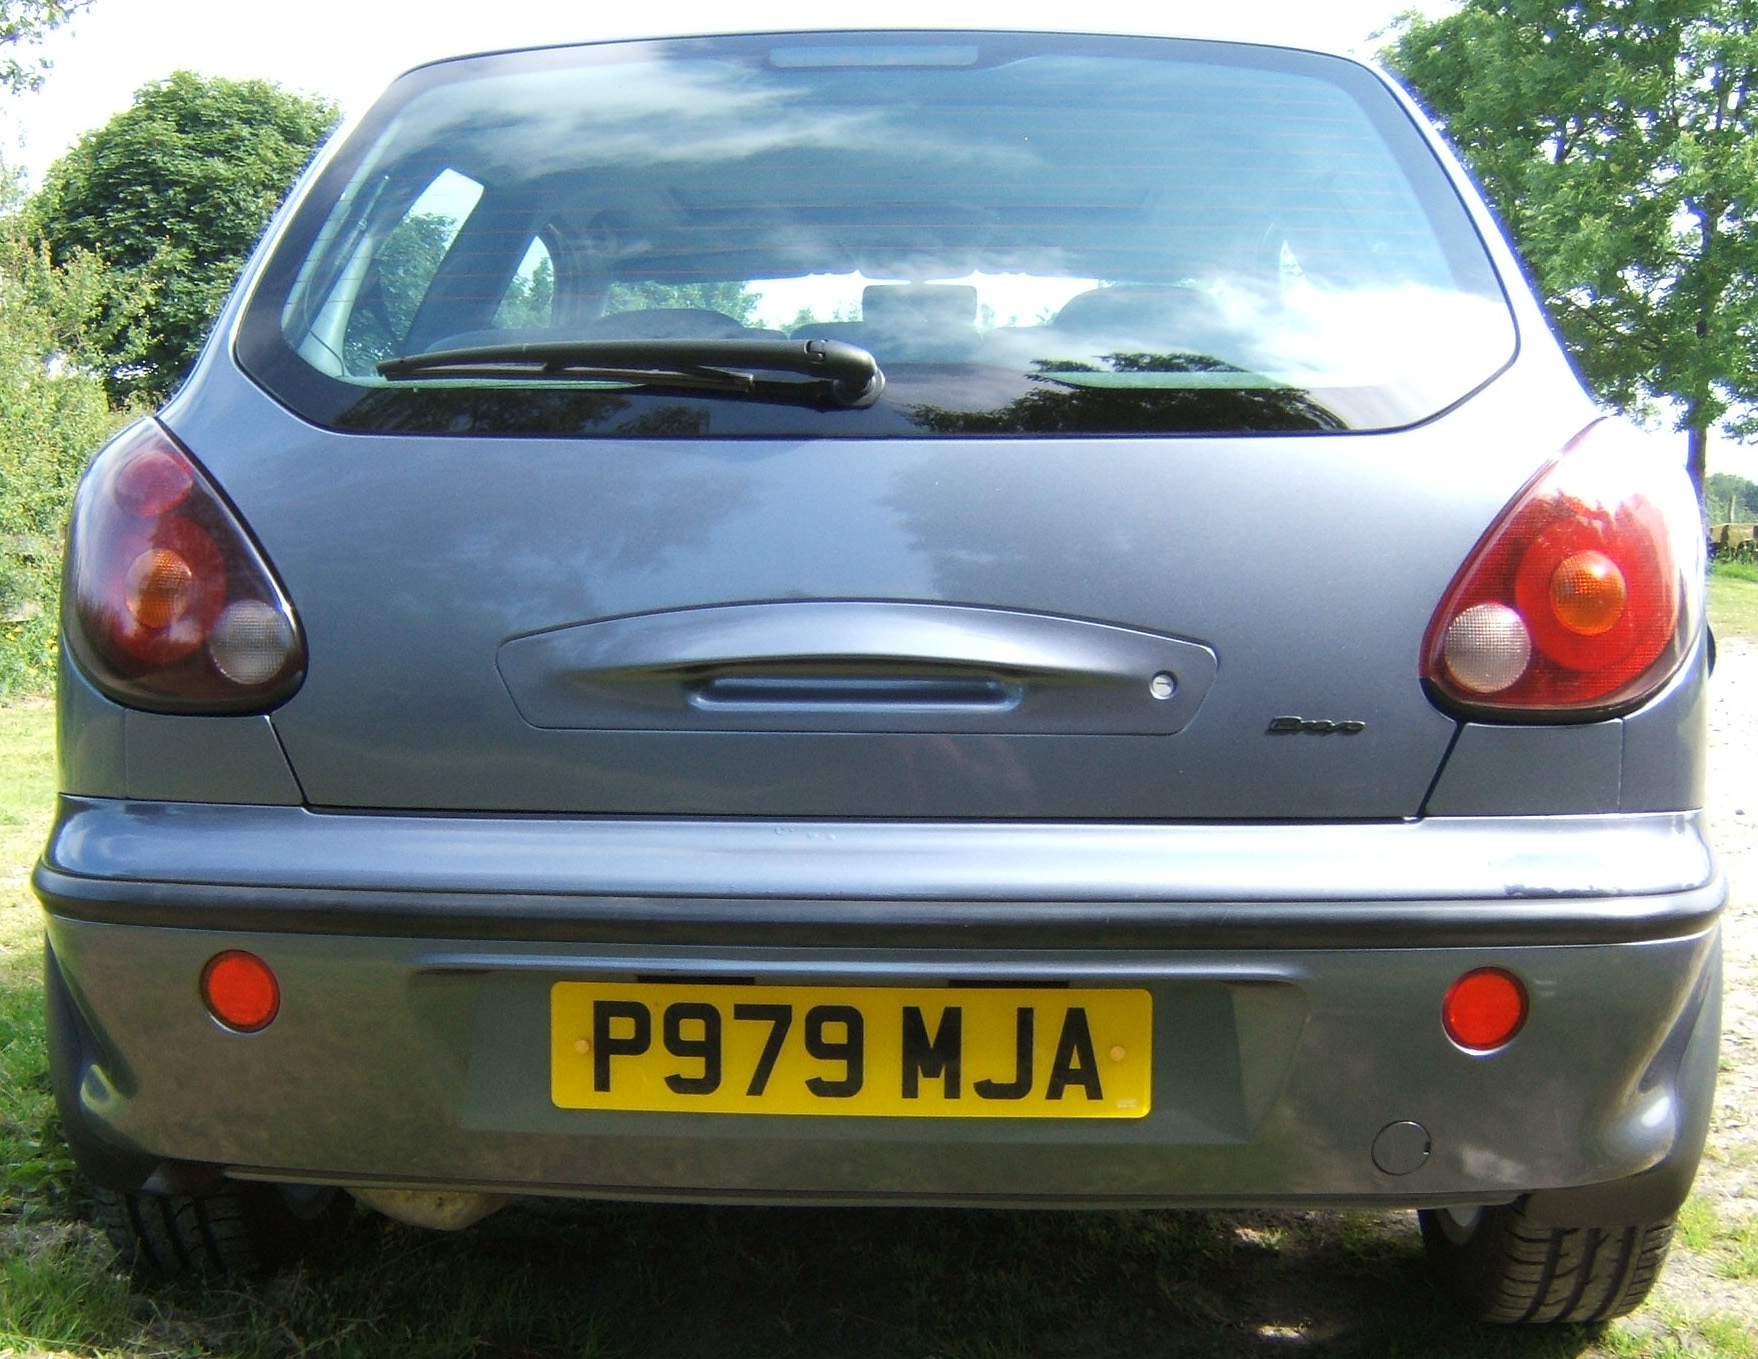
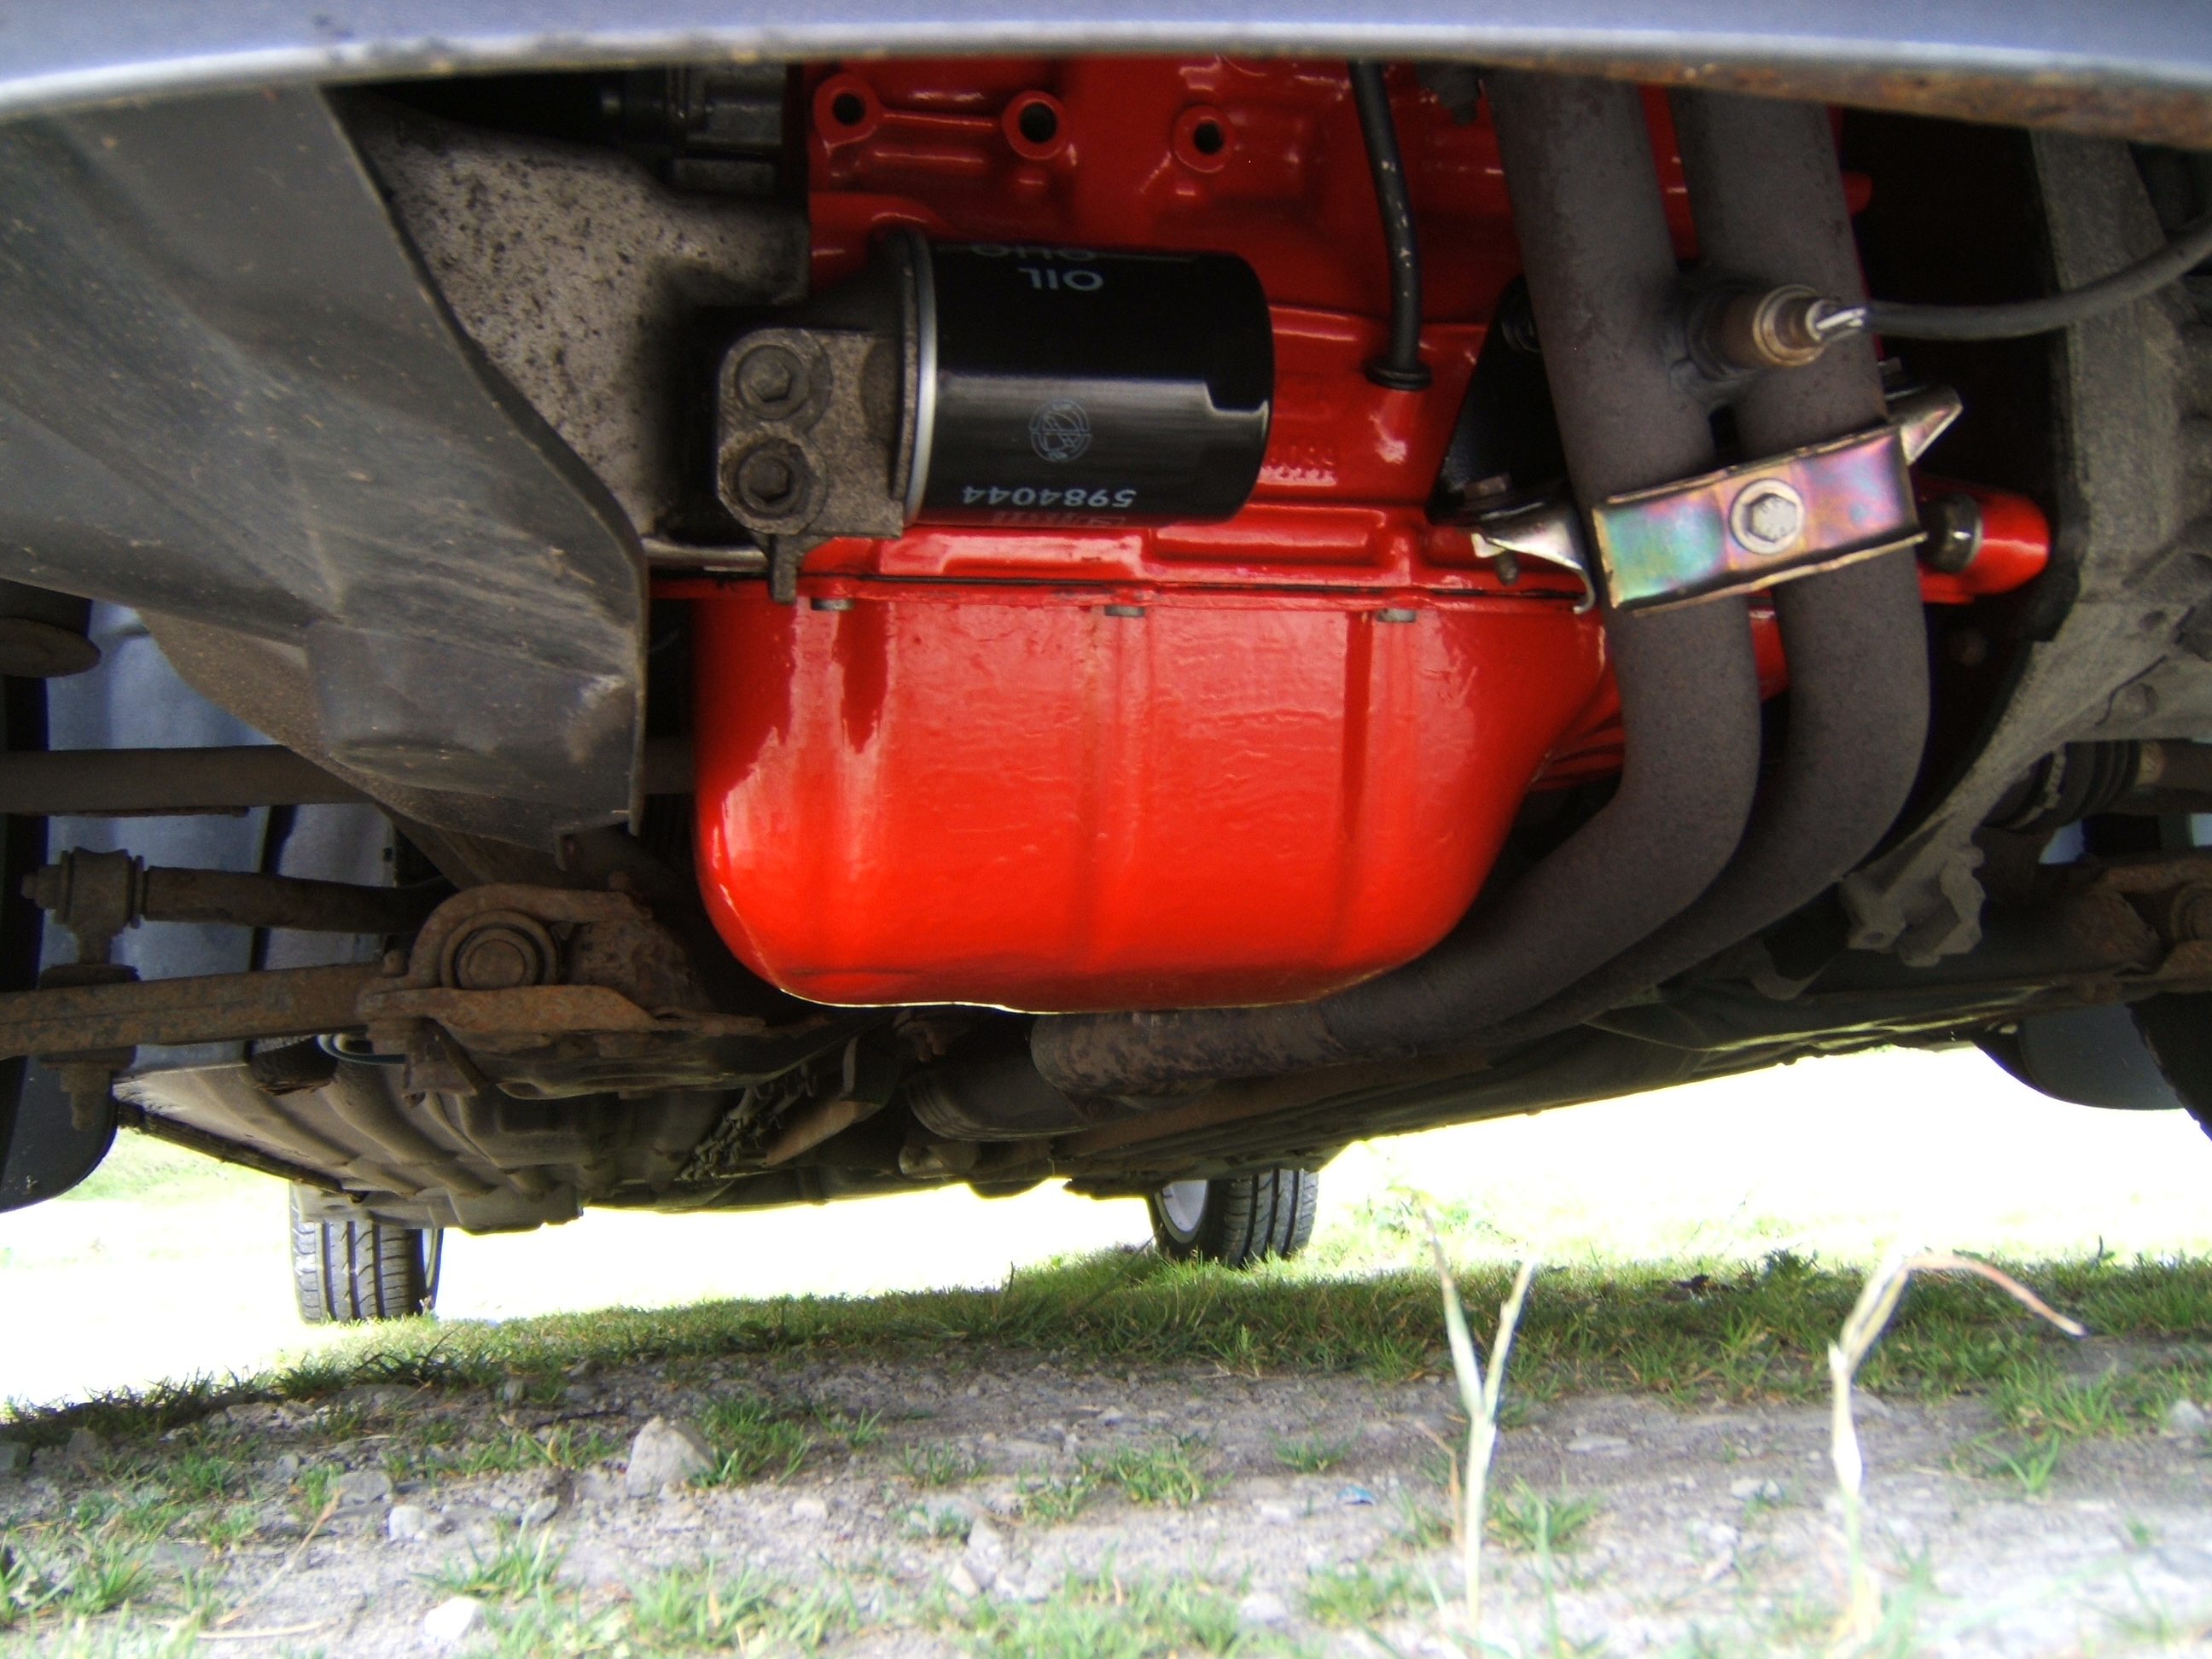
-Rebuilt Engine Myself
-painted Engine sump and rocker cover
-New totally plane number plates
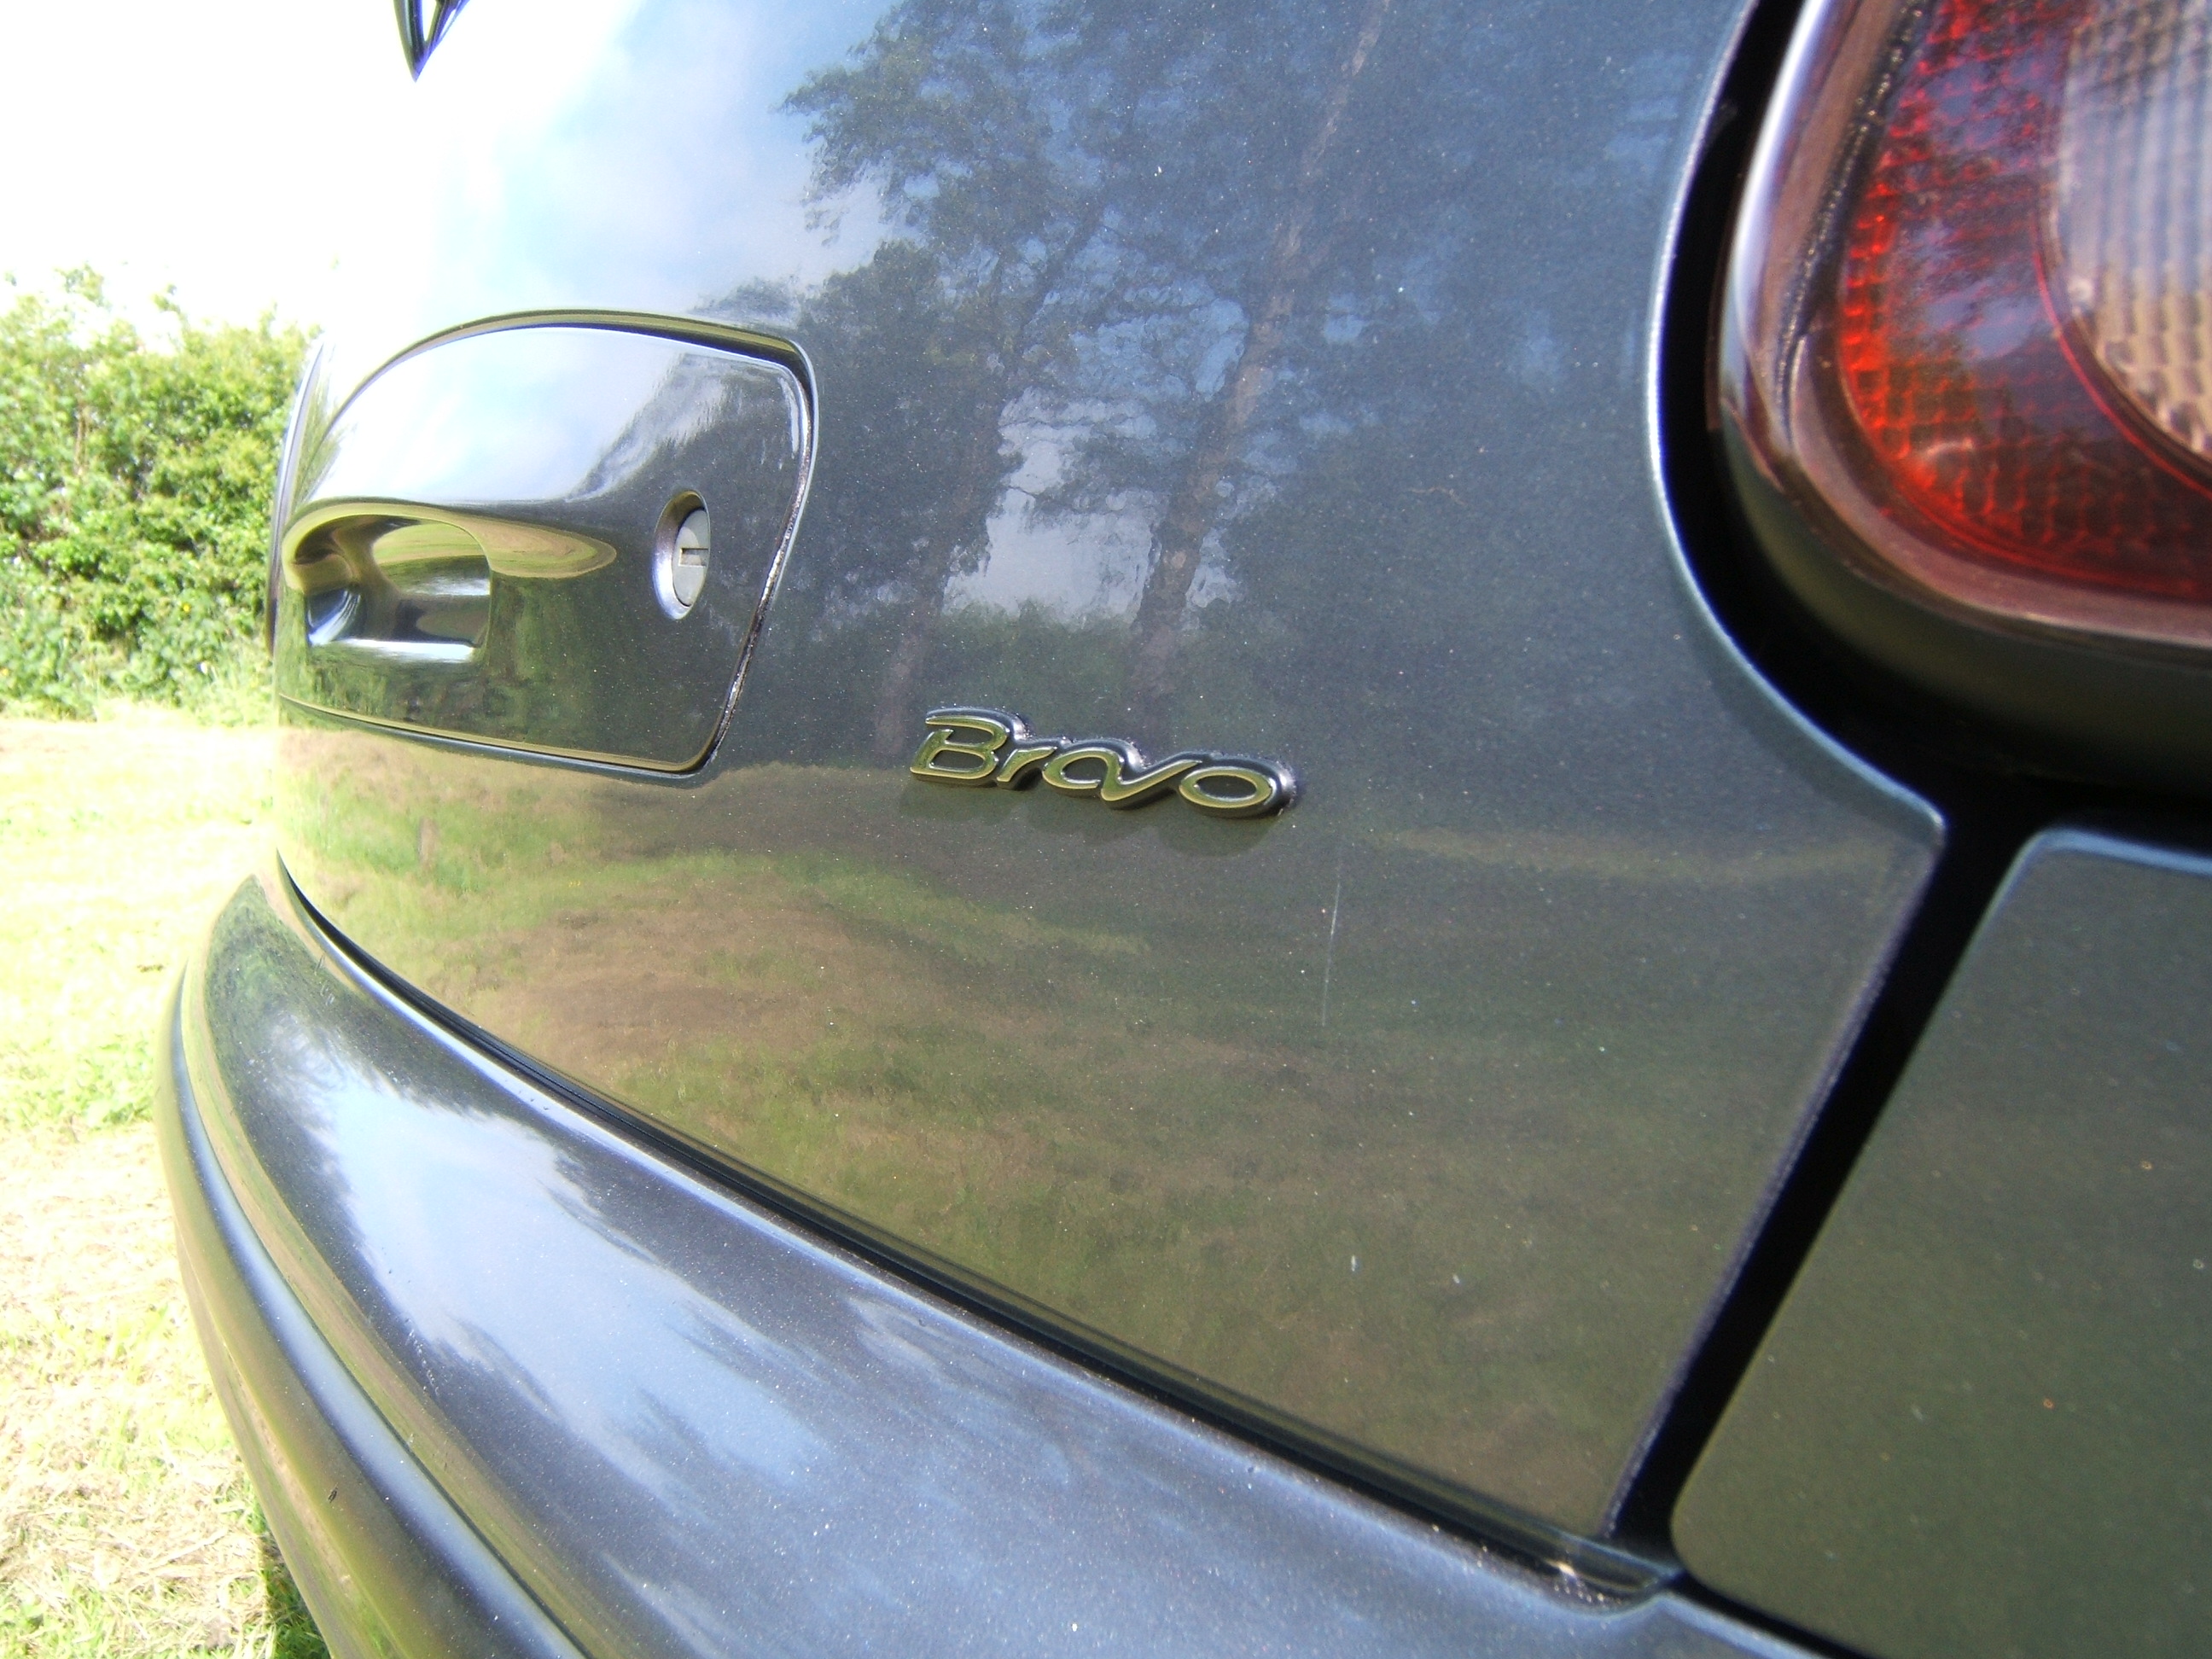
-Bravo 2007 Dash Badge on Boot
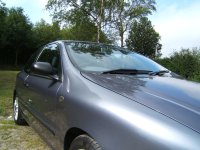
-De-badged Wings
-Painted Front Badge detail Black
-K&N Panel Filter
-Shaped Grey Floor Mats
-Remote Central Locking
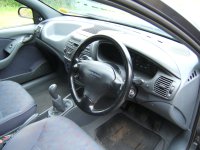
-Mk2 Passenger air vent Black
-Cap that reads 12V rather than a lighter
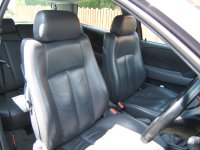
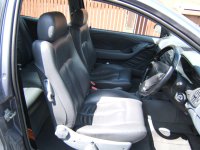
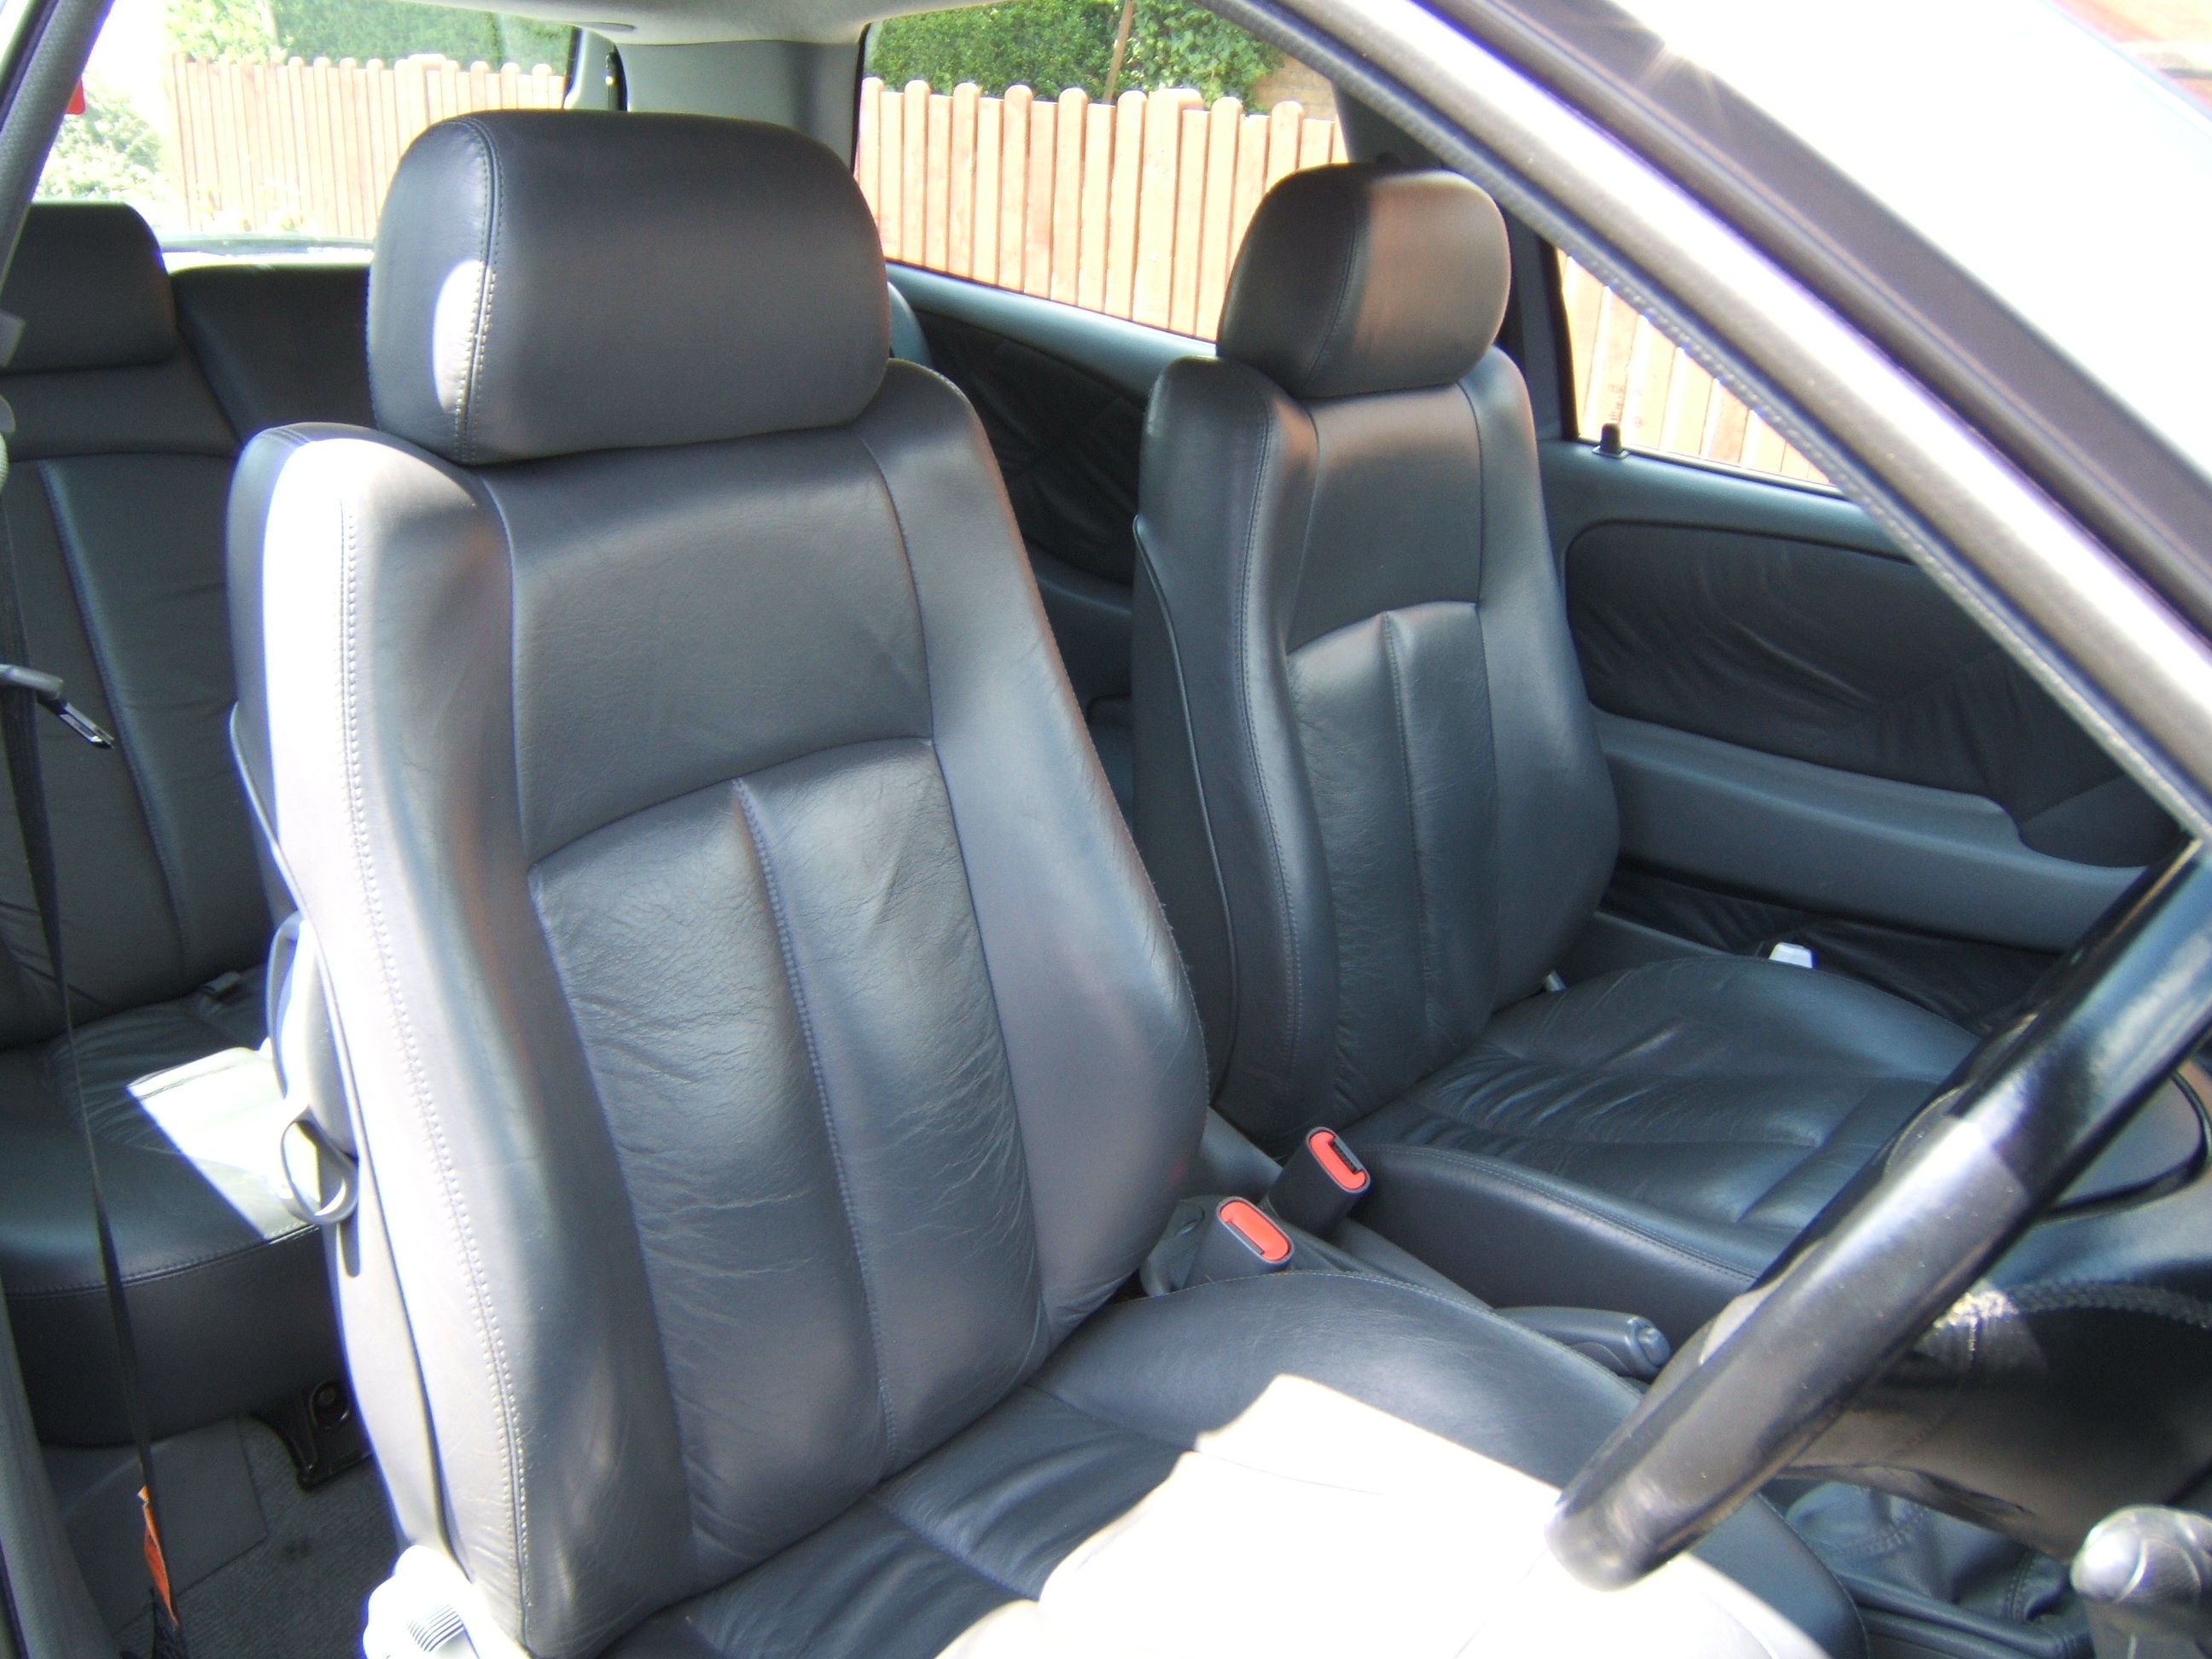
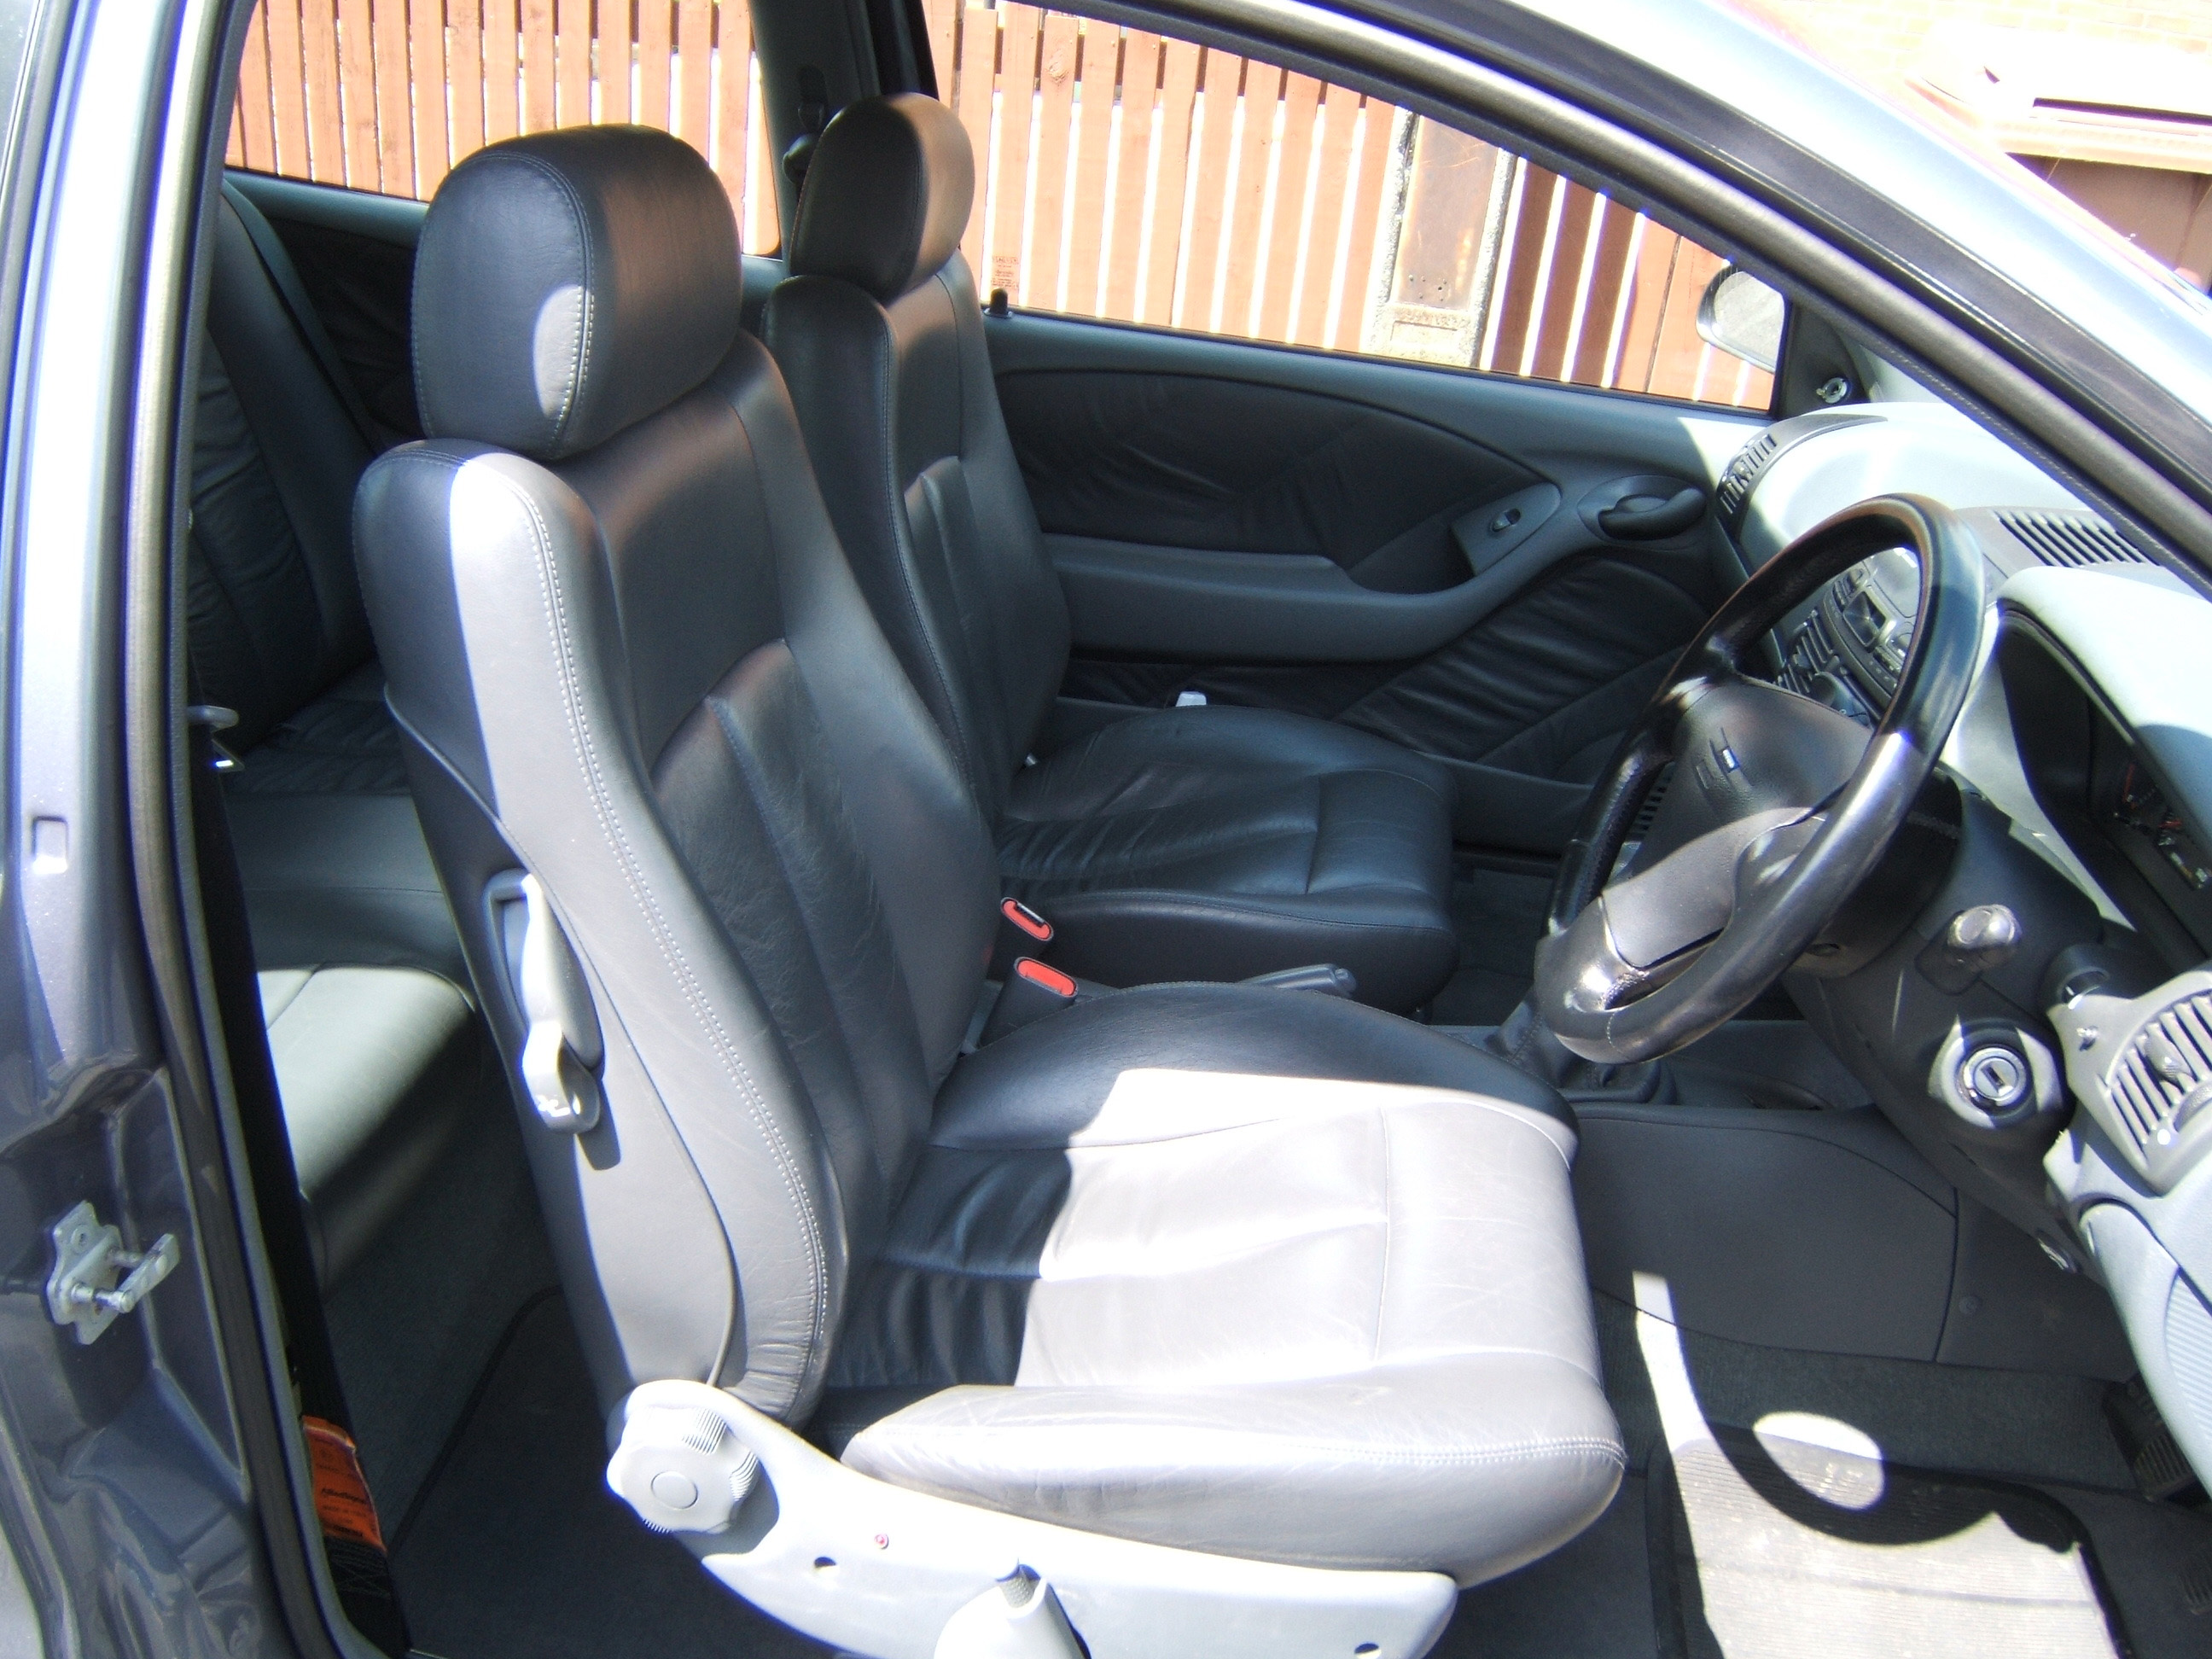
-Full Leather Interior
Goal
My goal is to make the Bravo look neet tidy and modern using Fiat original parts as much as possible. Hopefully making it stand out as one of the best looking Bravos ever.
Main Images (Click for Larger Images)


More Images


Detail and History
When changing her car my aunt decided to give her Fiat Bravo to my sister since my sister was taking driving lessons. After 5 tests and 5 fails she gave up. So the Bravo was SORNed and dumped in the garden for a whole year. Id make the argument it should be at least started once a week but that never happened.
On the day I passed my test I bought it for £300. 1.Because I though it was ok 2.It would get the damn thing out of the garden.
It had steel wheels with two flat front tyres though they all had good tread. Just before it was SORNed it had a new exhaust. There was a dent in the passenger wing that I still haven’t sorted yet. This happened when my aunt owned the car. She claimed the car was a cursed accident magnet because that wing had been hit twice before while it was parked. The interior was mint and had never been smoked in. The car had only done around 35000 miles and had almost never seen a motorway in its life. I thought the car would have lots of life left.
All it needed was a battery charge and new non-return valve on the washer jets, started first time and passed its MOT first time with no advisories.
There where a lot of rattles which all turned out to be related to the alarm that was installed and the passenger wing that had been repainted once before. In both jobs nothing had been re-tightened properly.
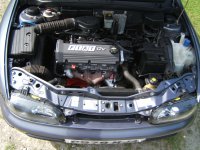
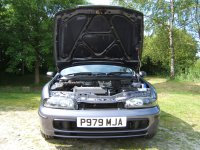
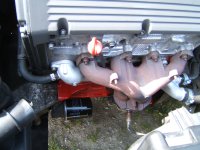
Engine
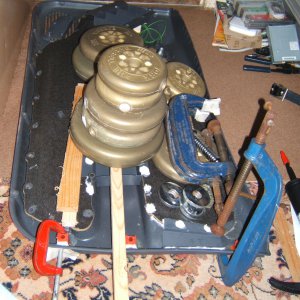
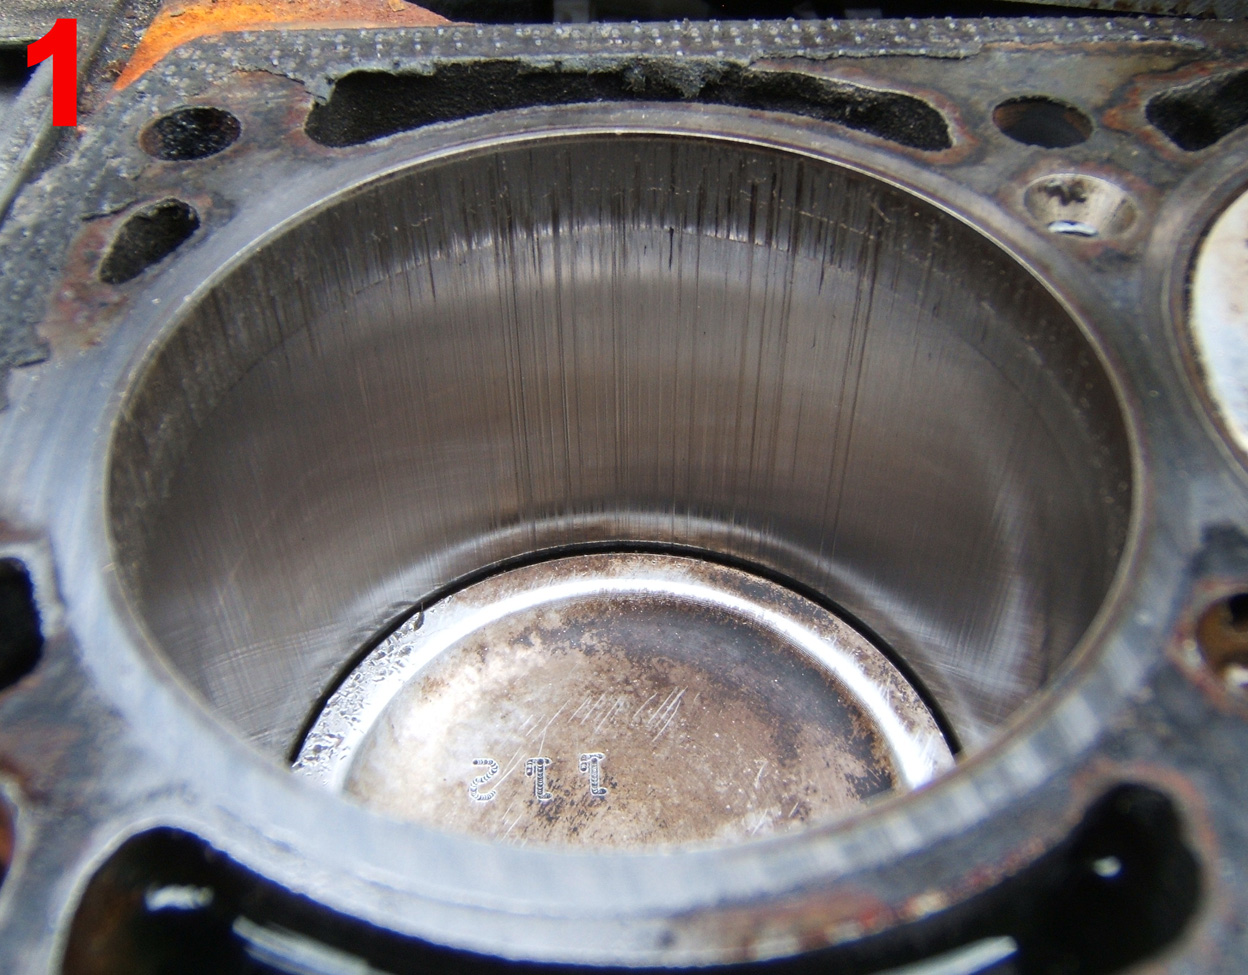
The only thing I really did to my engine was a minor service and fitted a K&N panel filter. Both made massive difference to performance. Then one day the engine started spewing blue smoke on start-up and eventually started misfiring. Something serious was afoot. I felt brave and decided to figure it out for myself, expecting a valve oil seal or head gasket problem I was shocked to see my bores where utterly trashed. Though the head looked ok.

My car was due for a major service anyway so I thought why not rebuild it myself, It wouldn’t cost too much and id have a very nice 1.4 12v engine in the end.


Parts Replaced
Cambelt
Cam Tensioner
Aux Belt
Aux Tensioner
Oil Seleina
Antifreeze Parflu
Lapped valves
Valve stem oil seals
Waterpump
Spark Plugs
Ignition Leads
Valeo Clutch Kit with thrust bearing
Sump Resealed
crank oil seal
inlet/exhaust/water rail/Thermostat/Rockercover gaskets
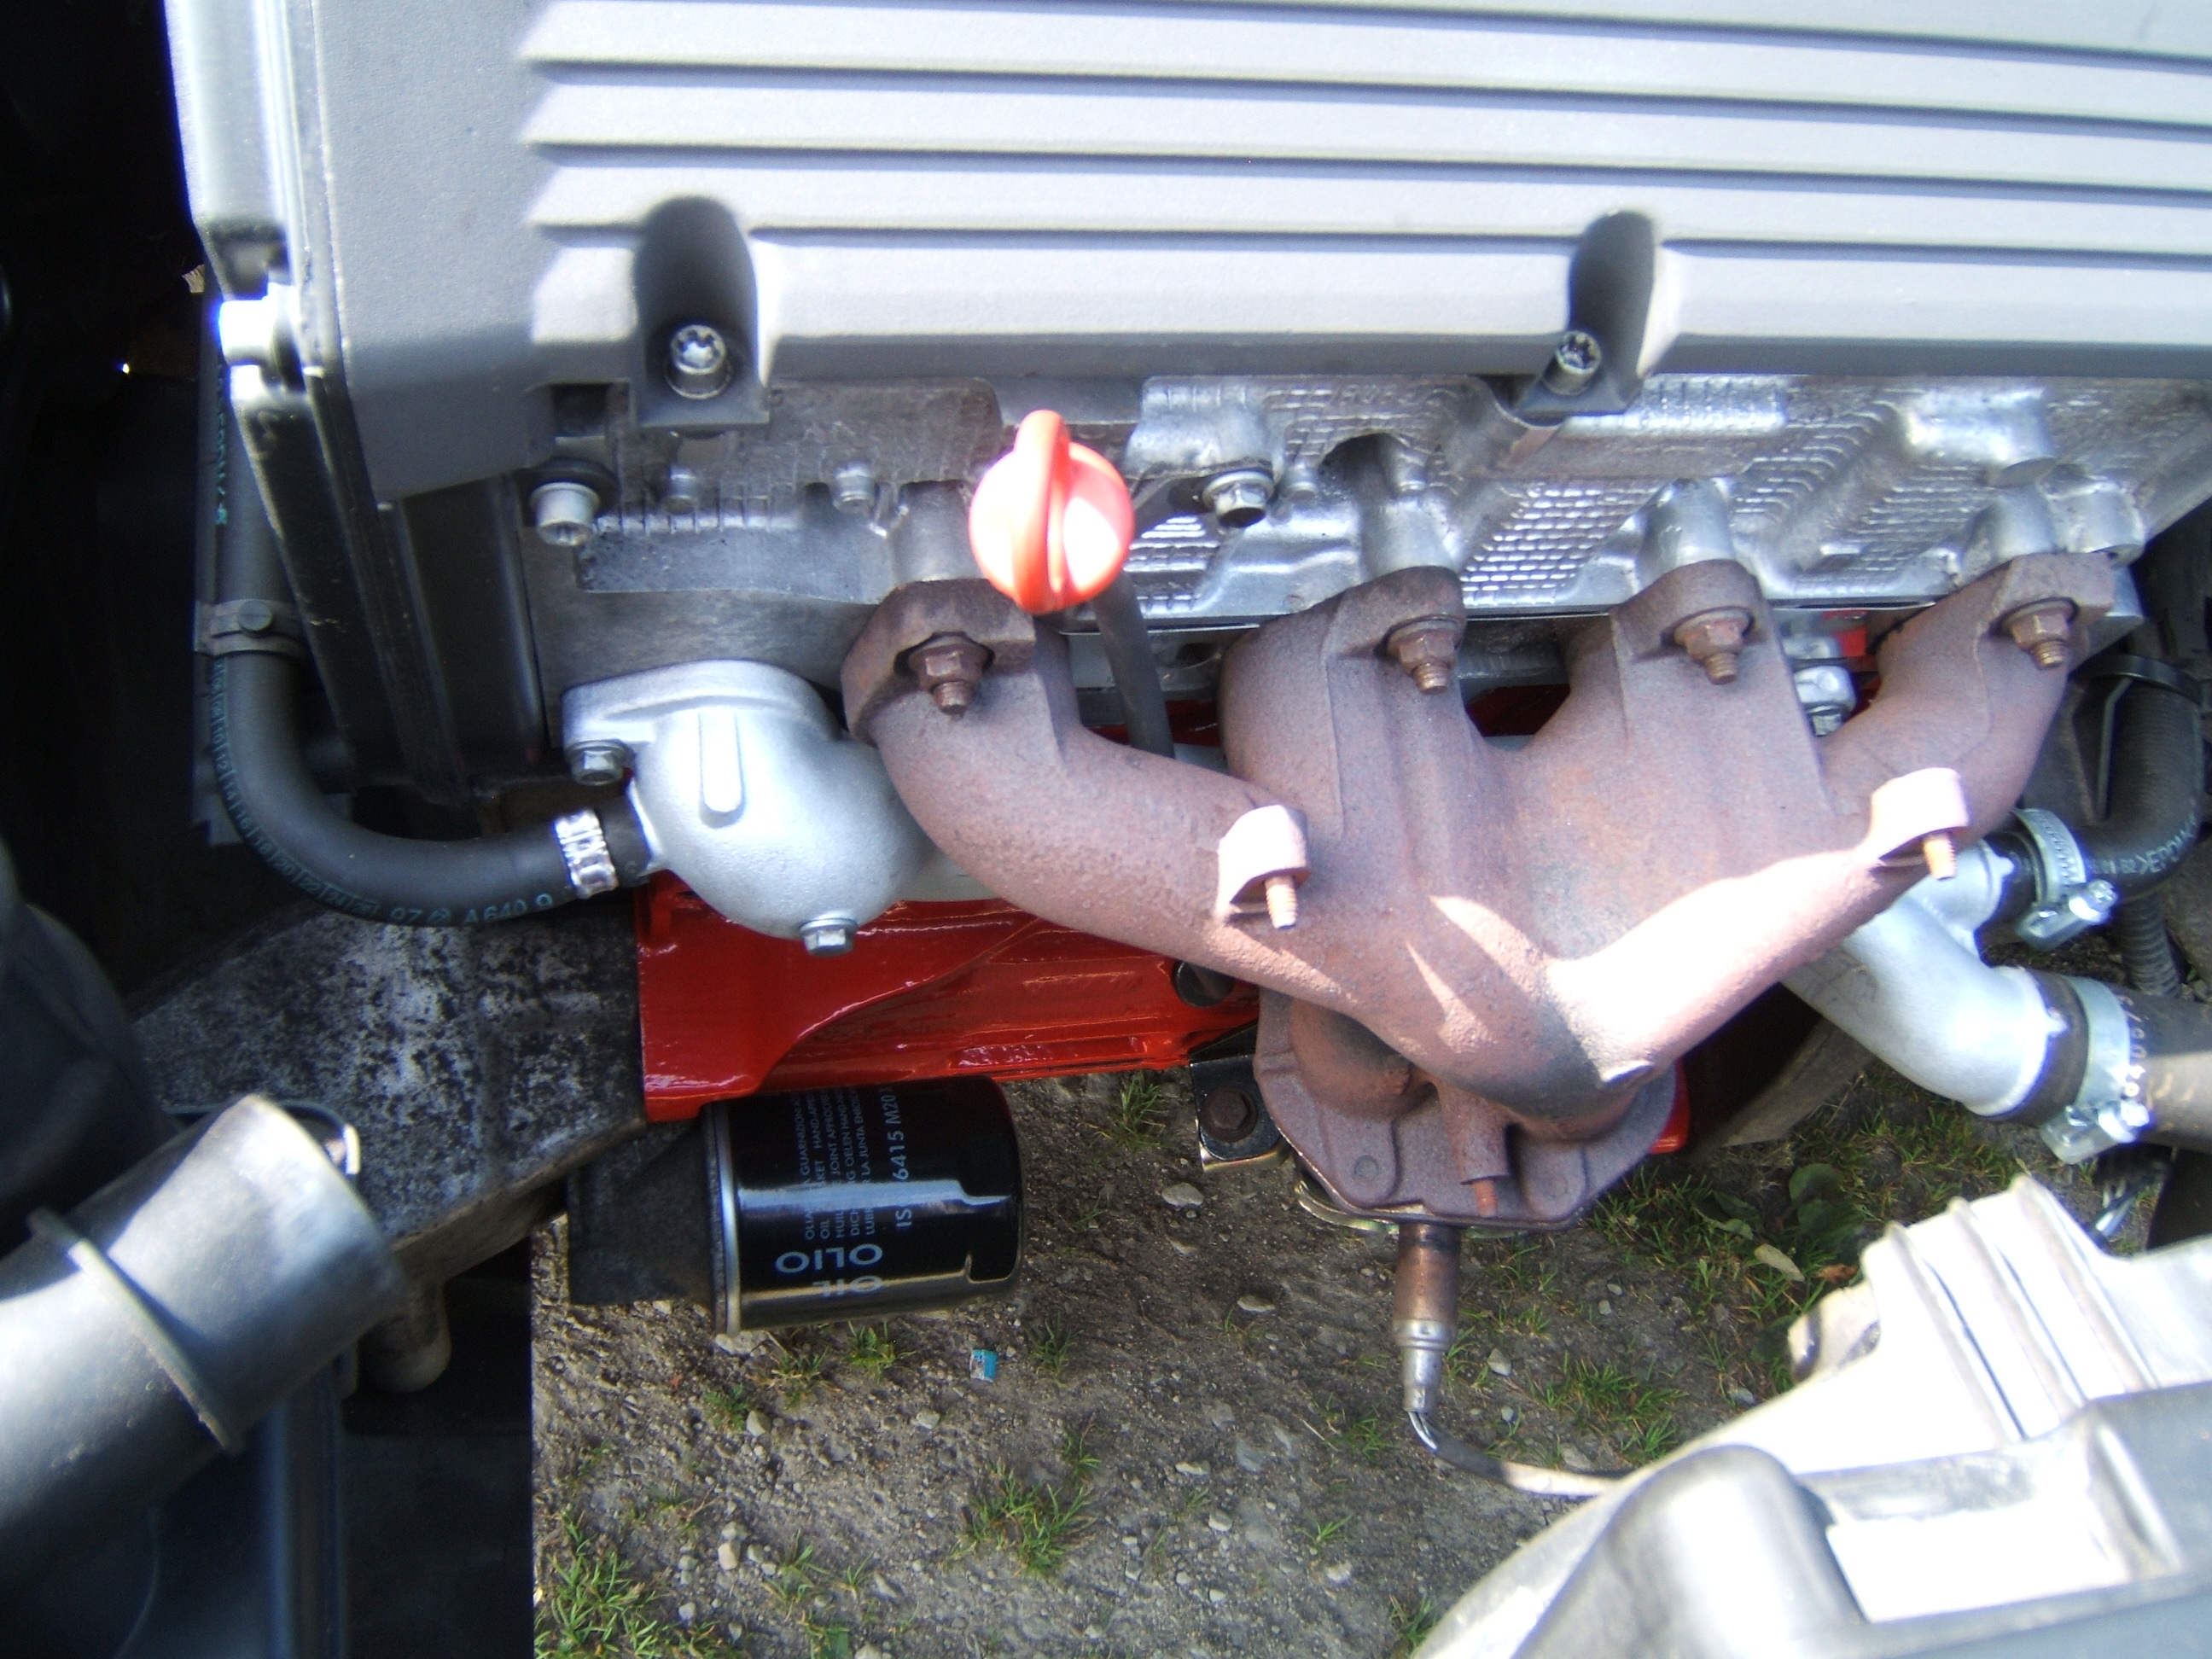
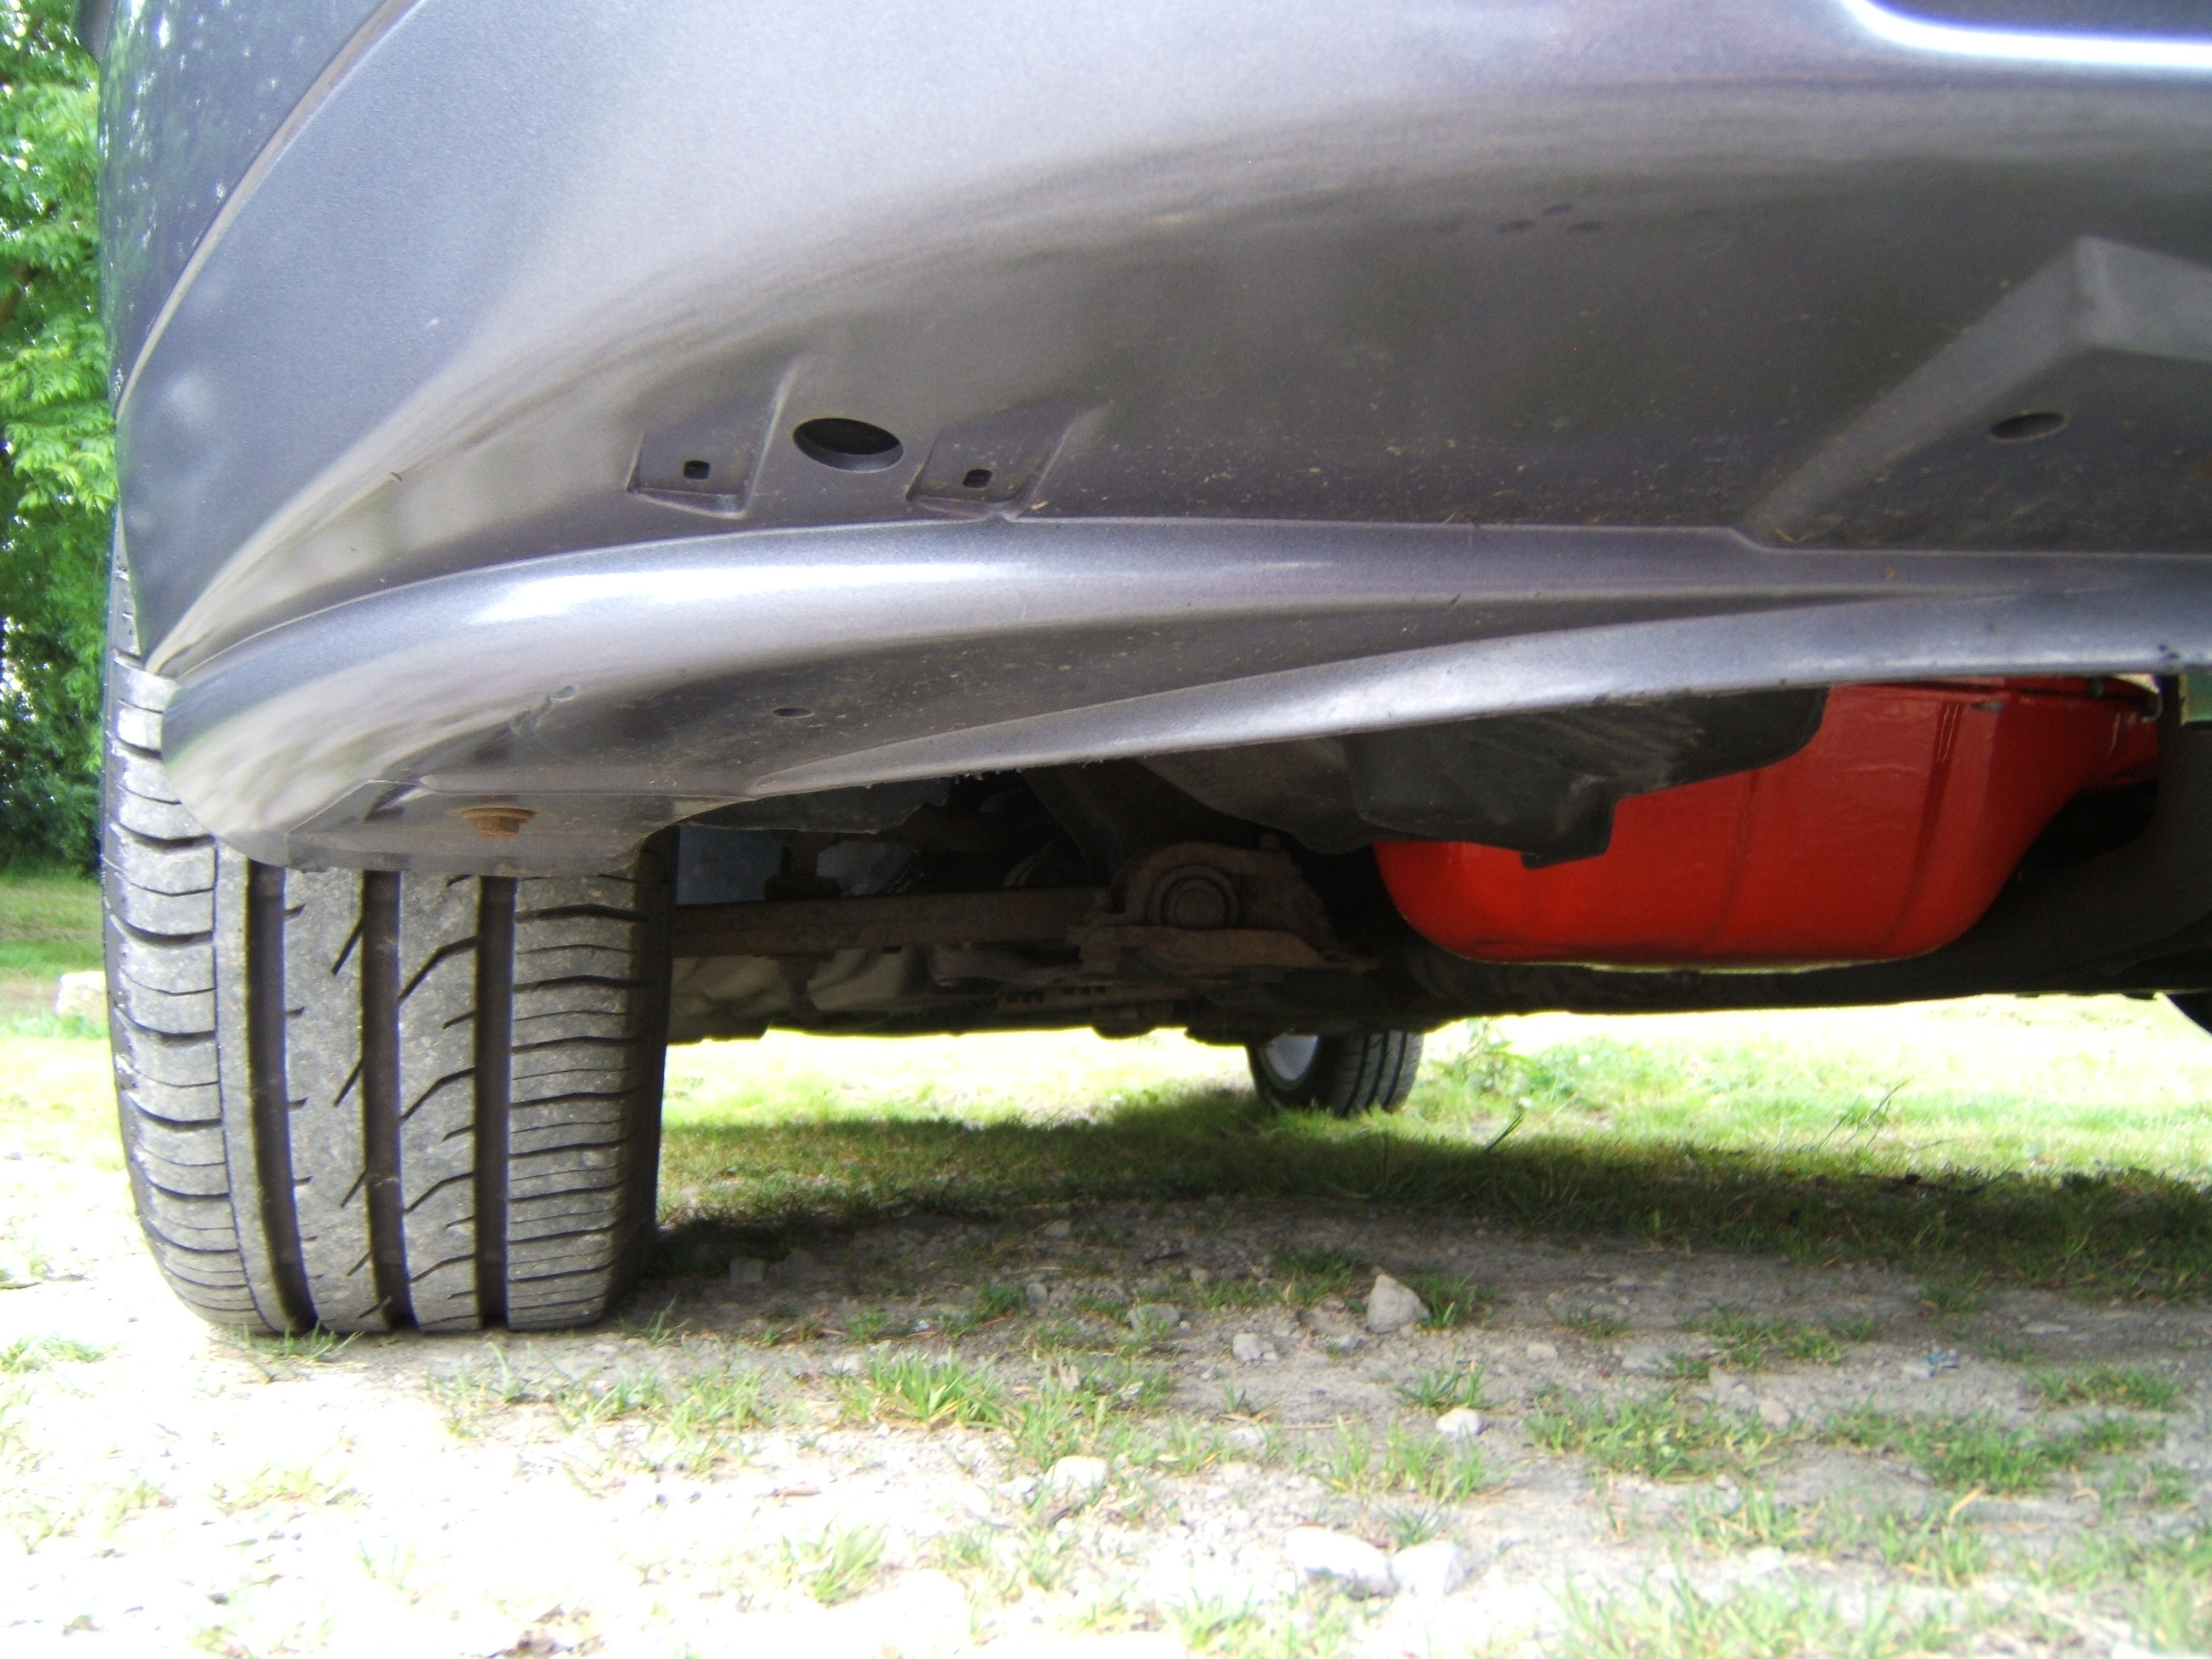
Painted engine and sump red!
Painted Rocker cover Black and Silver.
The total rebuild cost was around £600.
Engine Rebuild Thread: https://www.fiatforum.com/bravo-brava/187402-fixing-my-1-4-bravo-engine-misfire.html
I intend to fit an oil catch tank into the oil breather system.
Alloys
I decided I wanted my alloys to be PCD 4x98, 15” (185/55/R15) or 16” (195/45/R16) and as close to my original rolling radius as possible. This was my short list;

Eventually I got the Fiat 500 15” sport alloys for £320 with as new factory fitted Continental Contact Premium 2’s (185/55/R15, 6J, ET35, PCD 4x98, Centre Bore 58.1) I was very happy Id found quality wheels at a bargain price. As far as I know im the only person with these alloys on a Bravo.
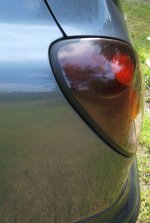
Rear Lights
Every time I looked at the rear lights the annoyed and perplexed me. Why are they not symmetrical? I decided to buy a left hand drive right side cluster. Eventually I got one from Germany that ended up not so water tight, then another from France. I may rewire them so they both light up as reverse but for now the fog has a red bulb in. Passed an MOT with them fitted.
I painted the lip round the clusters matt black as jug had. It looks much nicer and hides the mould that grows inside the cluster. I used 2000gritt sand paper and rubbing compound to polish the scratched out of the clusters.

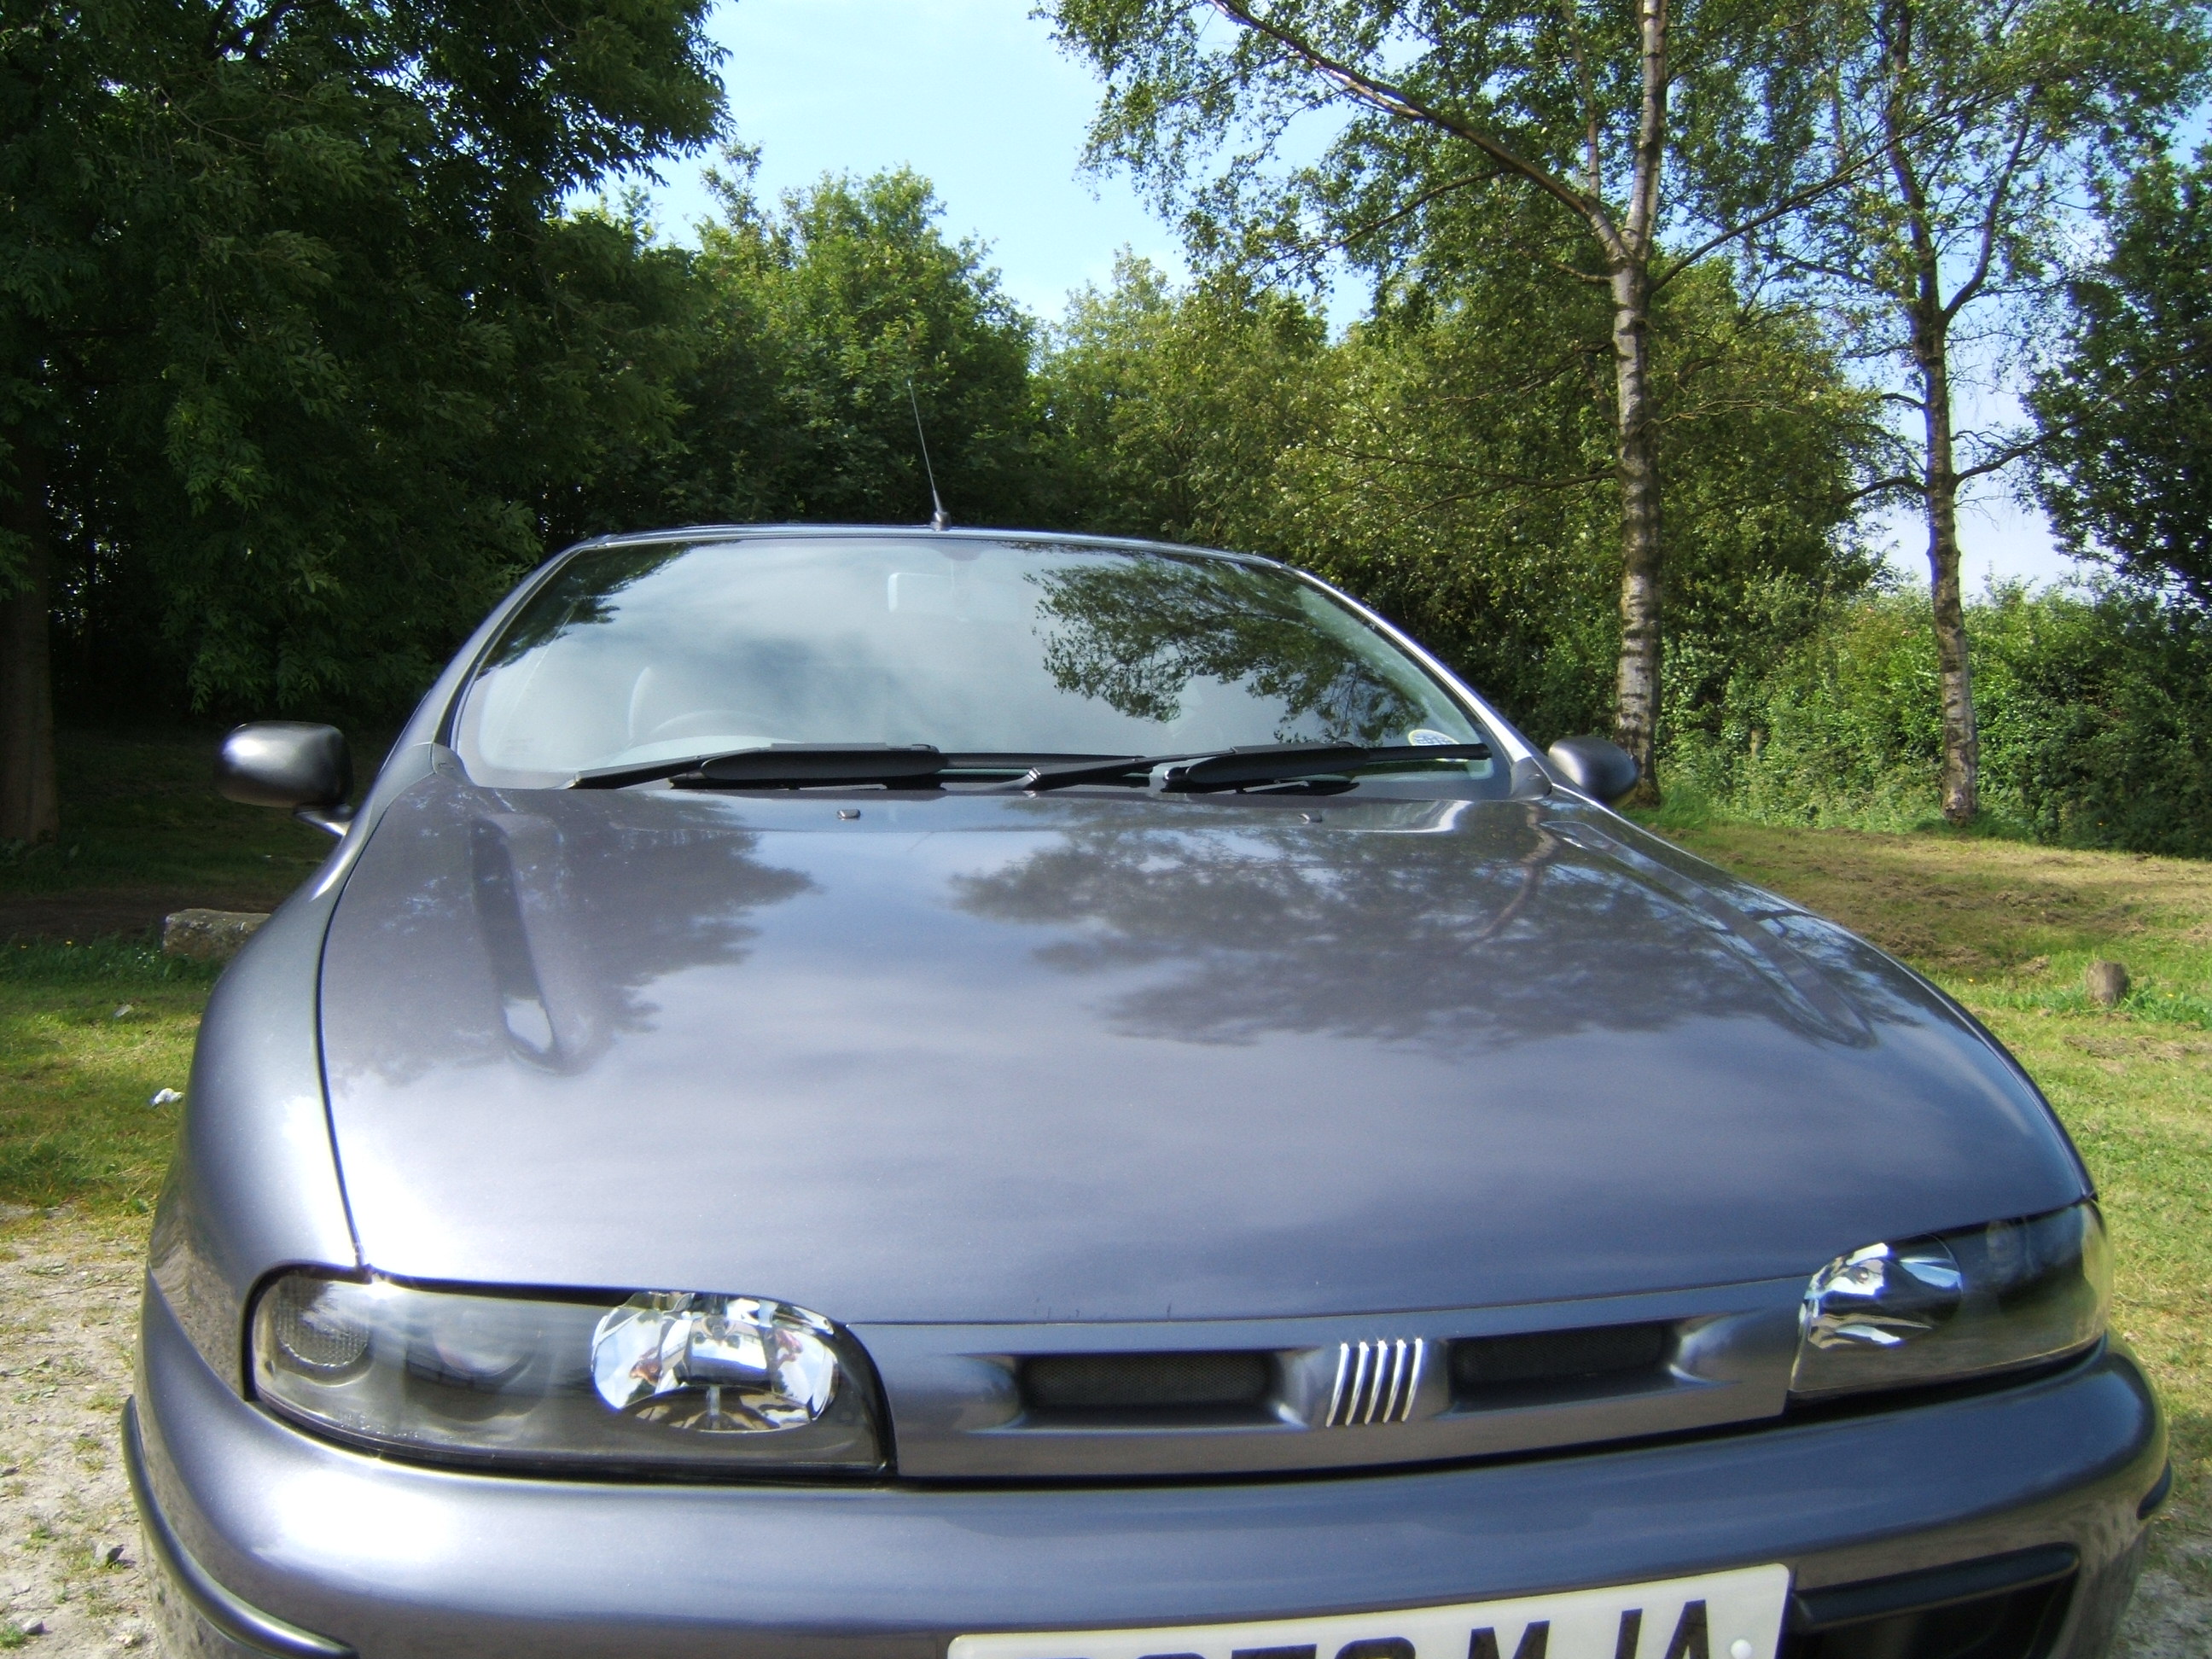
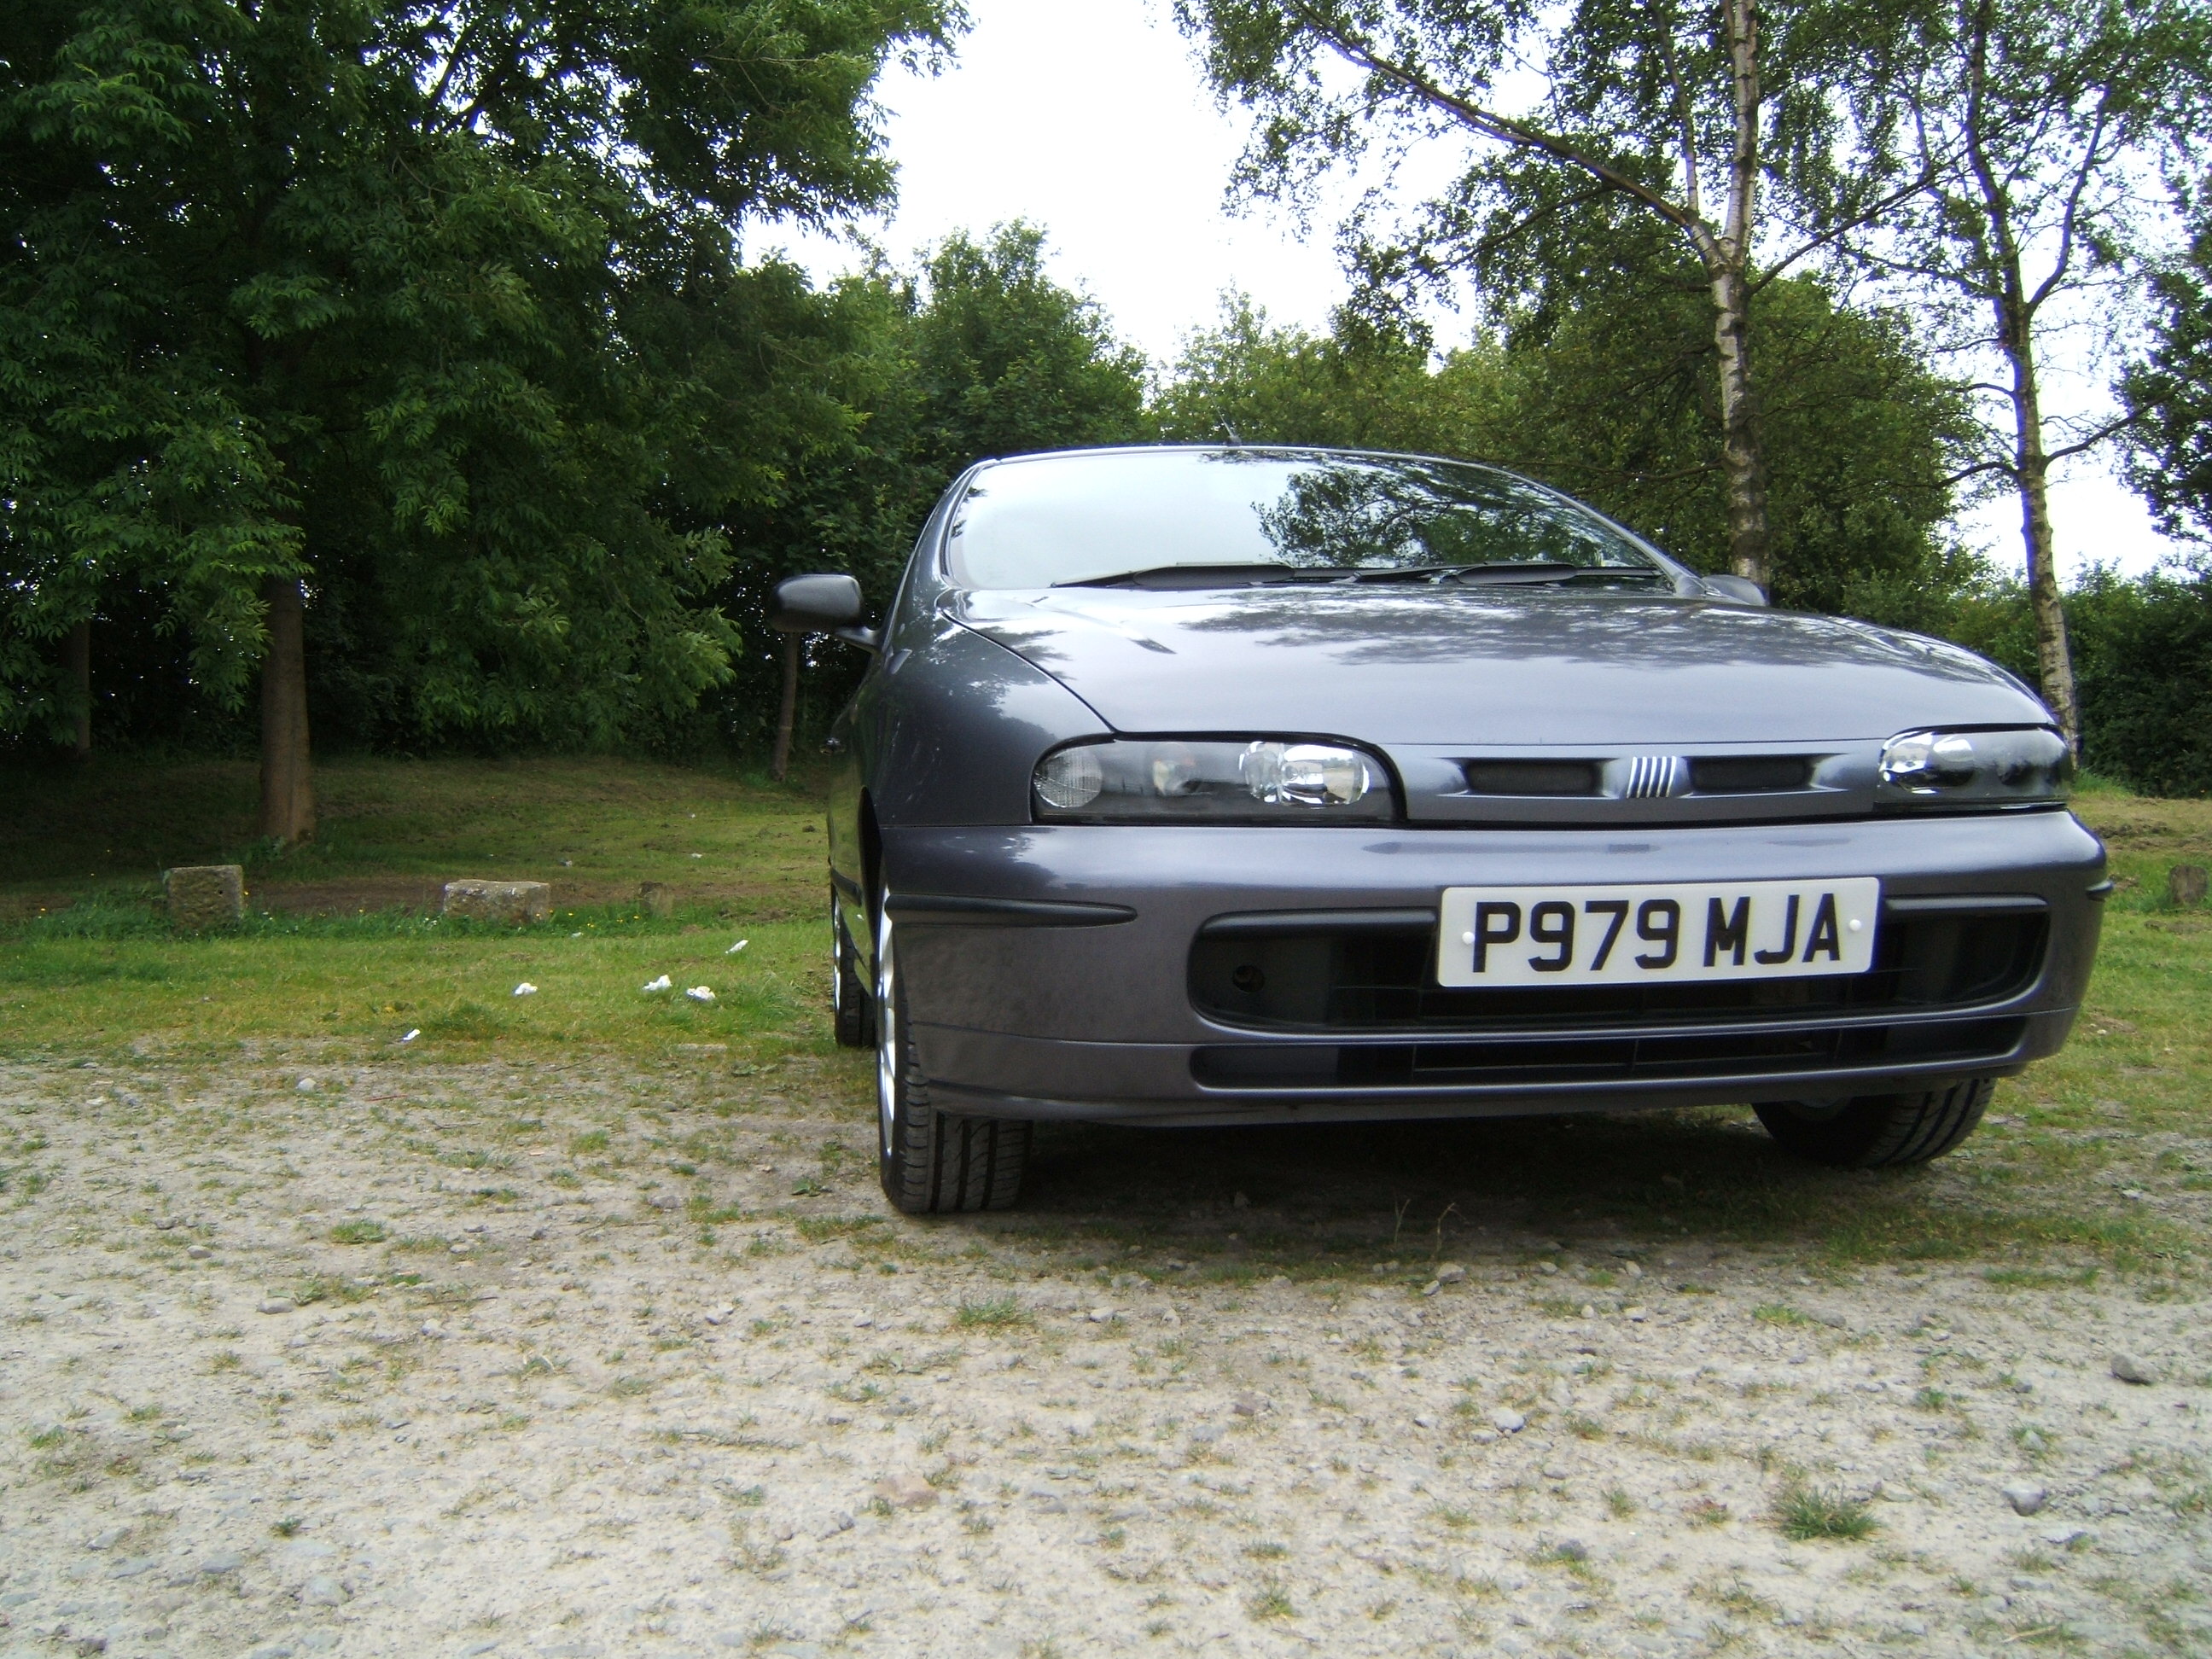
Front Lights
For a while I was quite content with the standard lights then I noticed one was slightly different than the other. The passenger lense had been replaced. It wasn’t symmetrical and something had to be done I decided to fit Marea Poly elliptical Head Lights but I really didn’t want to cut or plug stealers into my original loom. I decided to modify the lights instead. This developed Into a new guide. I was really proud of this modification Its nice to be able to just plug the lights in and unplug them when needed.
See: https://www.fiatforum.com/bravo-bra...-headlights-bravo-without-modifying-loom.html
The alternative and original guide: http://www.fiatboo.co.uk/photogal/guidepics/FiatMareaPolyEllipticalHeadlightConversion.pdf
I have also fitted Osram H1 Night breakers and chrome indicator bulbs. These lights are far superior to the originals.
Side repeaters
I went for black/smoked repeaters as my car is developing a black and grey theme. They are manufactured by In.Pro. They are high quality and look fab.
Door handles
My original rubber handles where falling to bits. Ive upgraded to plastic marea handles painted in a metallic black. In the future I may colour code them or repaint them.
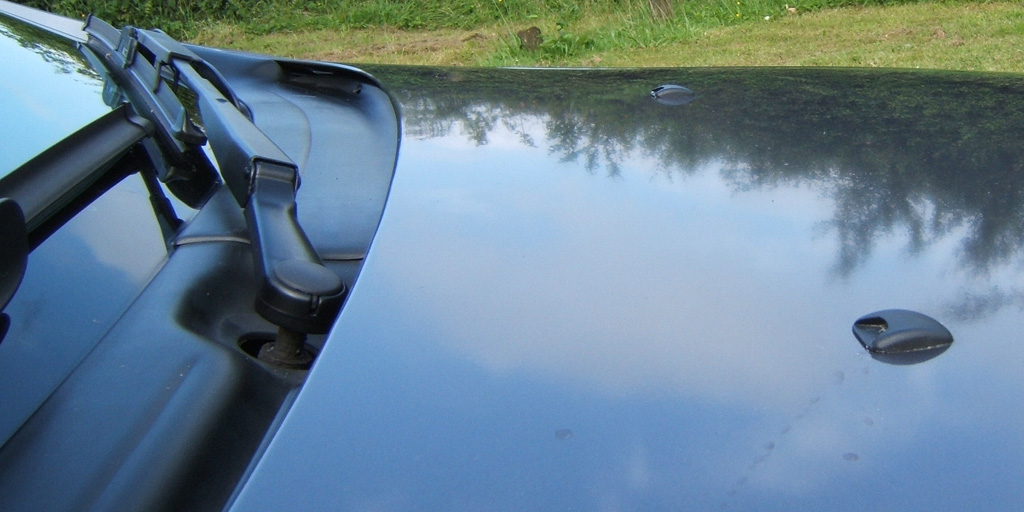
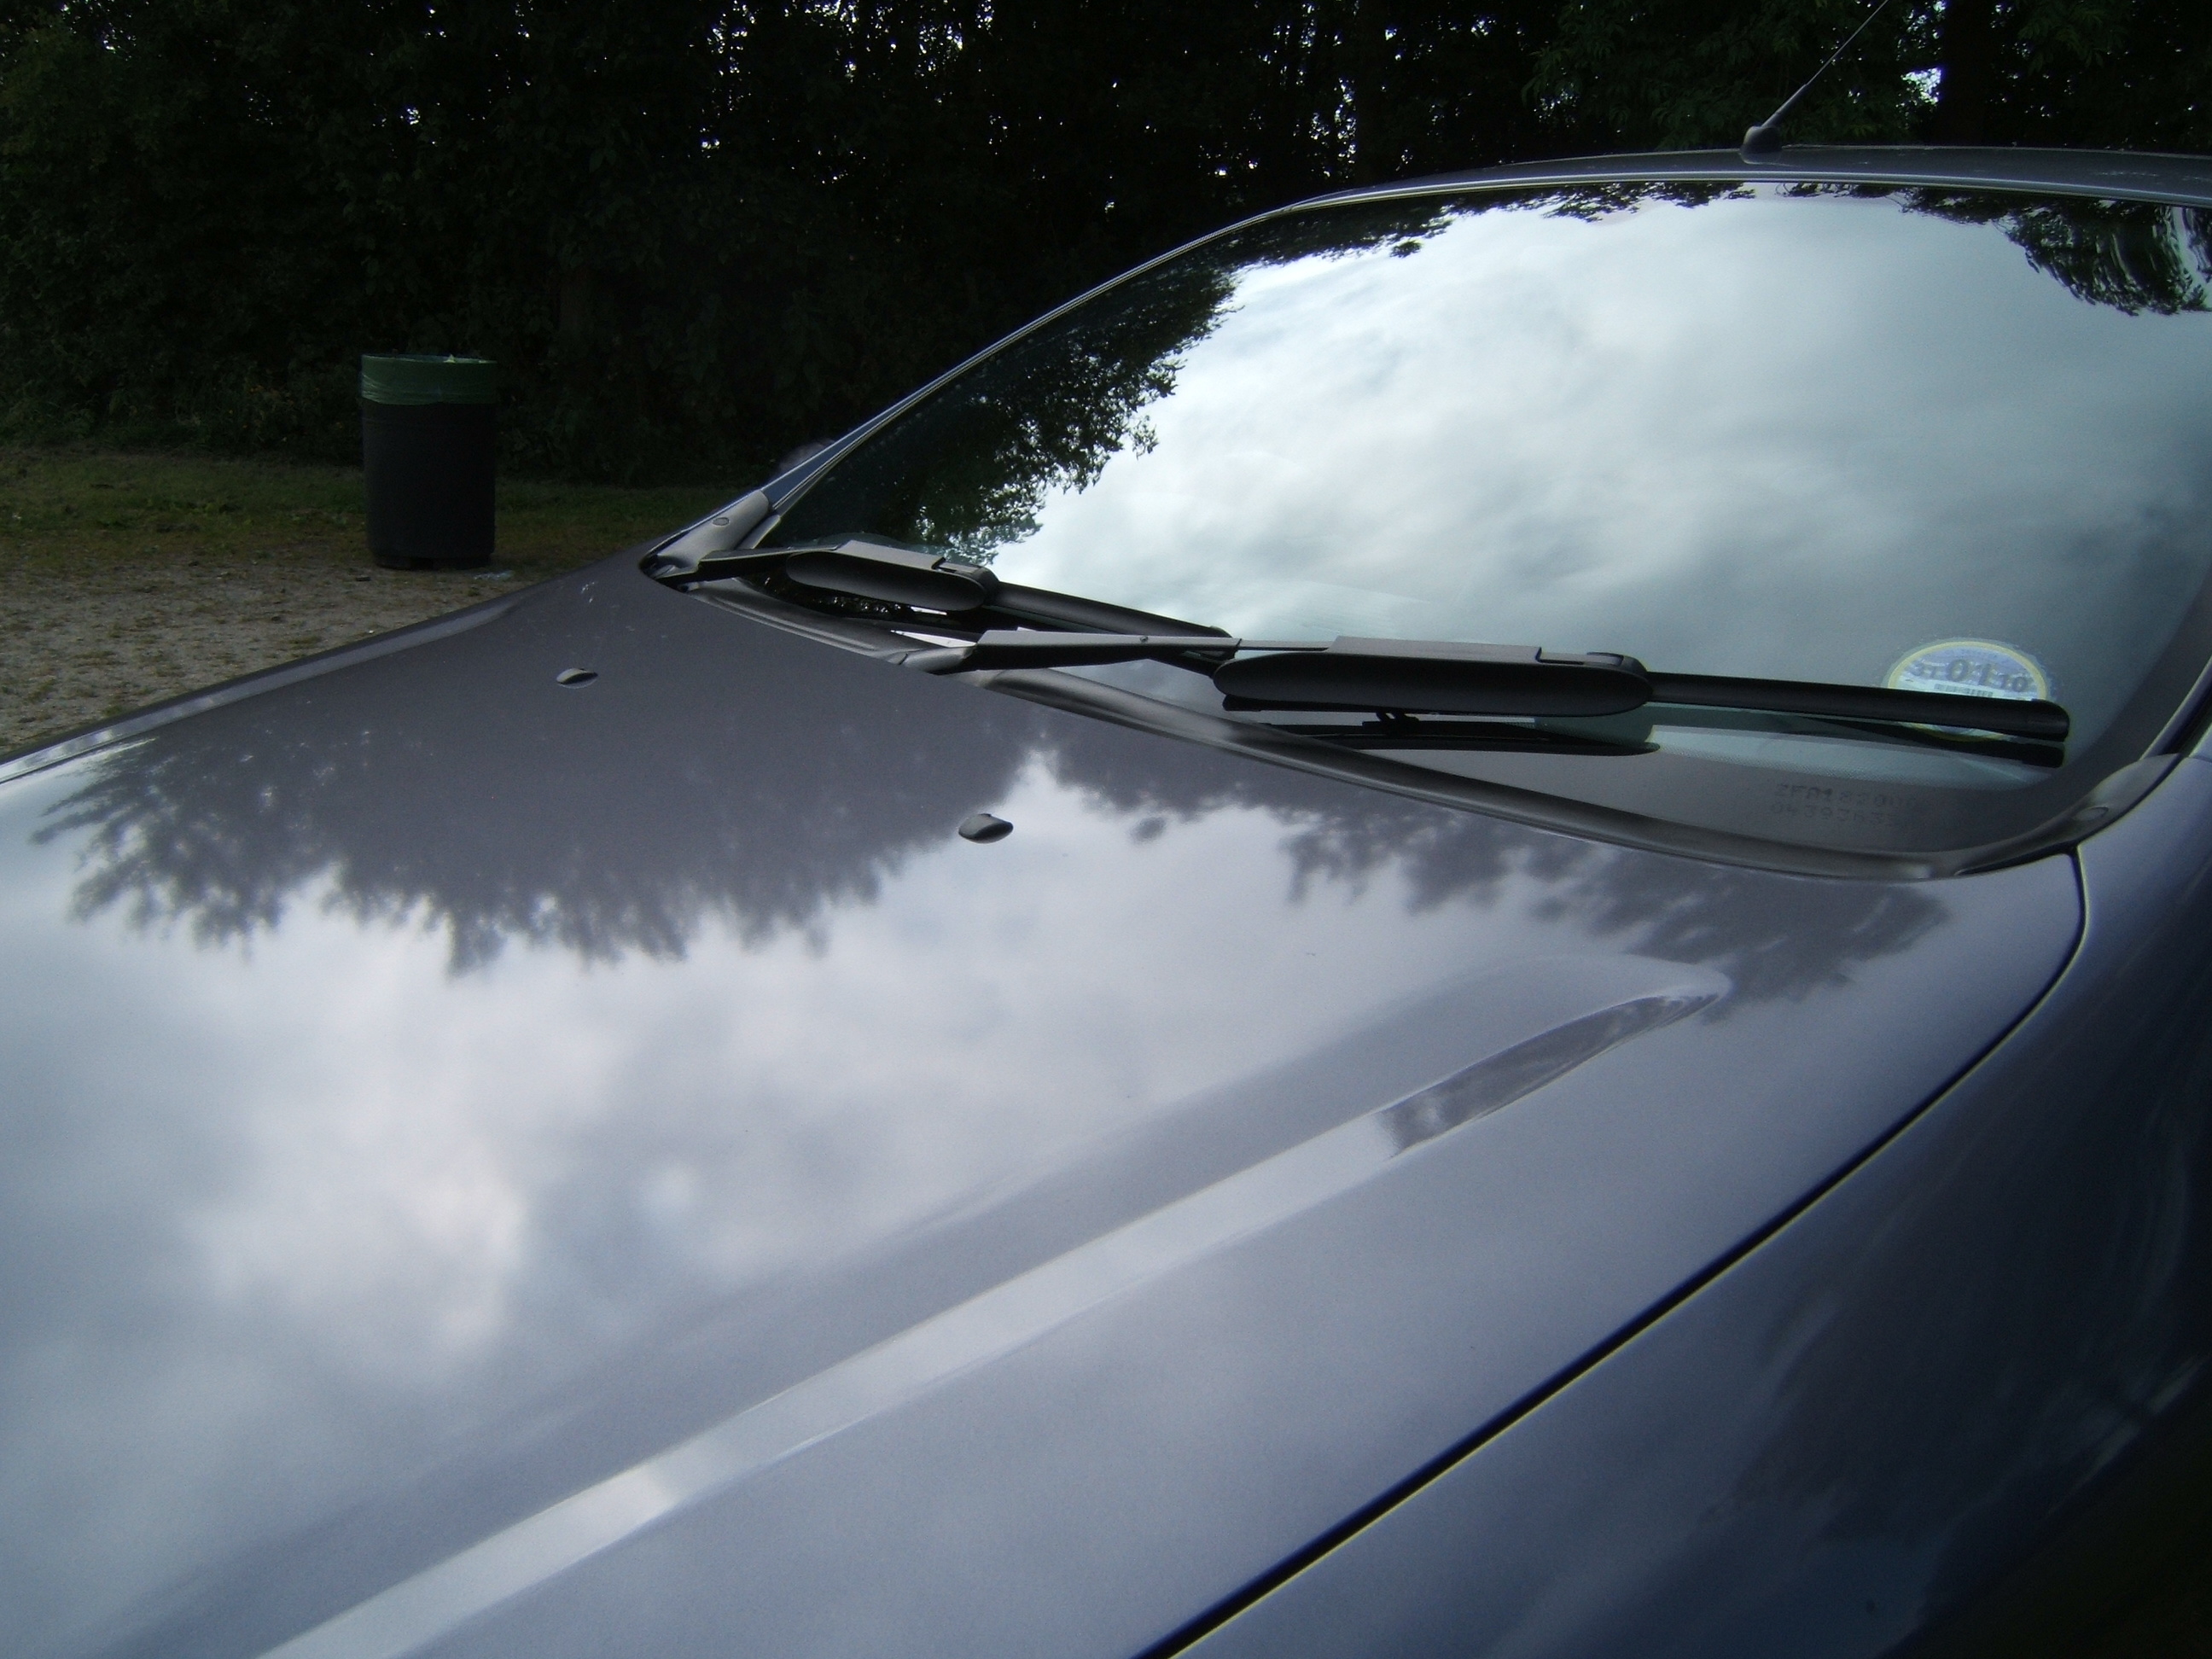
Wipers/Washer jets
My washer jets where so naff. Looking at a new 2007 Bravo I noticed they looked similar. I took a gamble and bought the 2007 washer jets from my local Fiat. With a bit of tweaking they fit perfectly look 10x better and work 10x better.
See the guide: https://www.fiatforum.com/bravo-bra...ist-washer-jets-your-classic-bravo-marea.html
My washer motor has two outlets, one must go to the rear glass but ive never seen it work. Presumably it leaked inside my car somewhere. I used a T-piece to connect both those outlets to my windscreen washer jets, eliminating the dodgy/pointless rear jet.
I fitted Bosch Aero Twin retro wiper blades. Then I refurbished my arms and fitted a HGT wind deflector to the drivers side. The paint cracked I think because my primer was different than the topcoat. Im working on a new set, the main arm has a HGT wind deflector and I have modified the passenger to take a wind deflector as well. This time im using red oxide primer and semi gloss black topcoat both Holts.
My rear wiper is a quality Valeo part I found in a scrap yard.
Paint
My paint code sticker found on the boot lid was wrong, the code was for a Mk2 Brava. My car is a Mk1 Bravo. This caused me to waste almost a year looking for a passenger wing.
My code is actually 623/A Metallic Degas Grey. It was discontinued in the first few years of Bravo production making it a rare colour.
Thread for paint code info: https://www.fiatforum.com/bravo-brava/175043-paint-code-name.html
Fixing My door Card
My passenger door card was broken beyond use. I had two problems trying to fix it: 1. A card with matching fabric was proving hard to find and 2.Other patterns where horrific 3.The nicer plane door cards are also very hard to find. (See wanted section at the bottom)
There was only one way forward to buy door card take my insert out and fit it to the replacement.
I tested a few different glues. No More Nails was the best. Make sure the surfaces you are gluing are clean, especially plastics because they are normally covered in silicon from the factory mould. I sanded and cleaned the plastic.
Be patient. Give the glue plenty of time to stick, and use clamps to hold it tight.
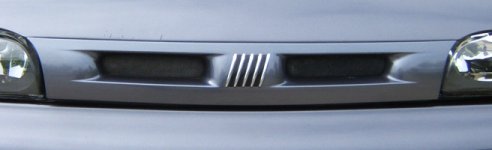
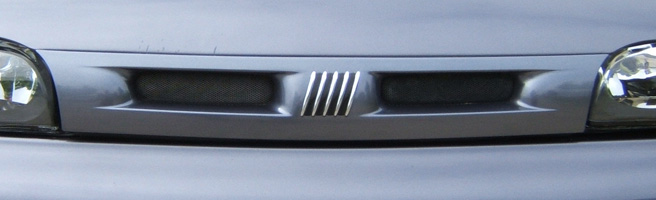
Grill/Boot
For a while I wanted a Mk2 Grill but actually the Mk1 Grill is the best looking I think. All the Bravo Brava and Marea grills suffer from braking clips at the edges, I fixed this with double sided number plate tape.
I painted the badge detail semi gloss black and left the chrome alone. I also painted the mesh semi-gloss black.

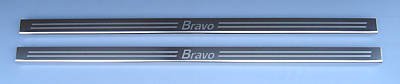
Sill Kick Plates
I have some nice sill kick plated to fit. They are made by Lockwood and are stainless steel. A very nice part and only cost £12.45.
I have not fitted them yet because I need to clean and paint some rust along the bottom of the sills. The rust is common, every bravo door I open has it. I realised it is caused by a rubber strip that runs down the bottom of the doors. They trap dirt and ram it into the paint. I have tried cleaning the rubber but it did not help. I decided to remove those strips. Just waiting for my colour code of paint to arrive. Im not bothered about a perfect match because ill do a perfectly straight line of paint but id like it to be close.

Interior Parts
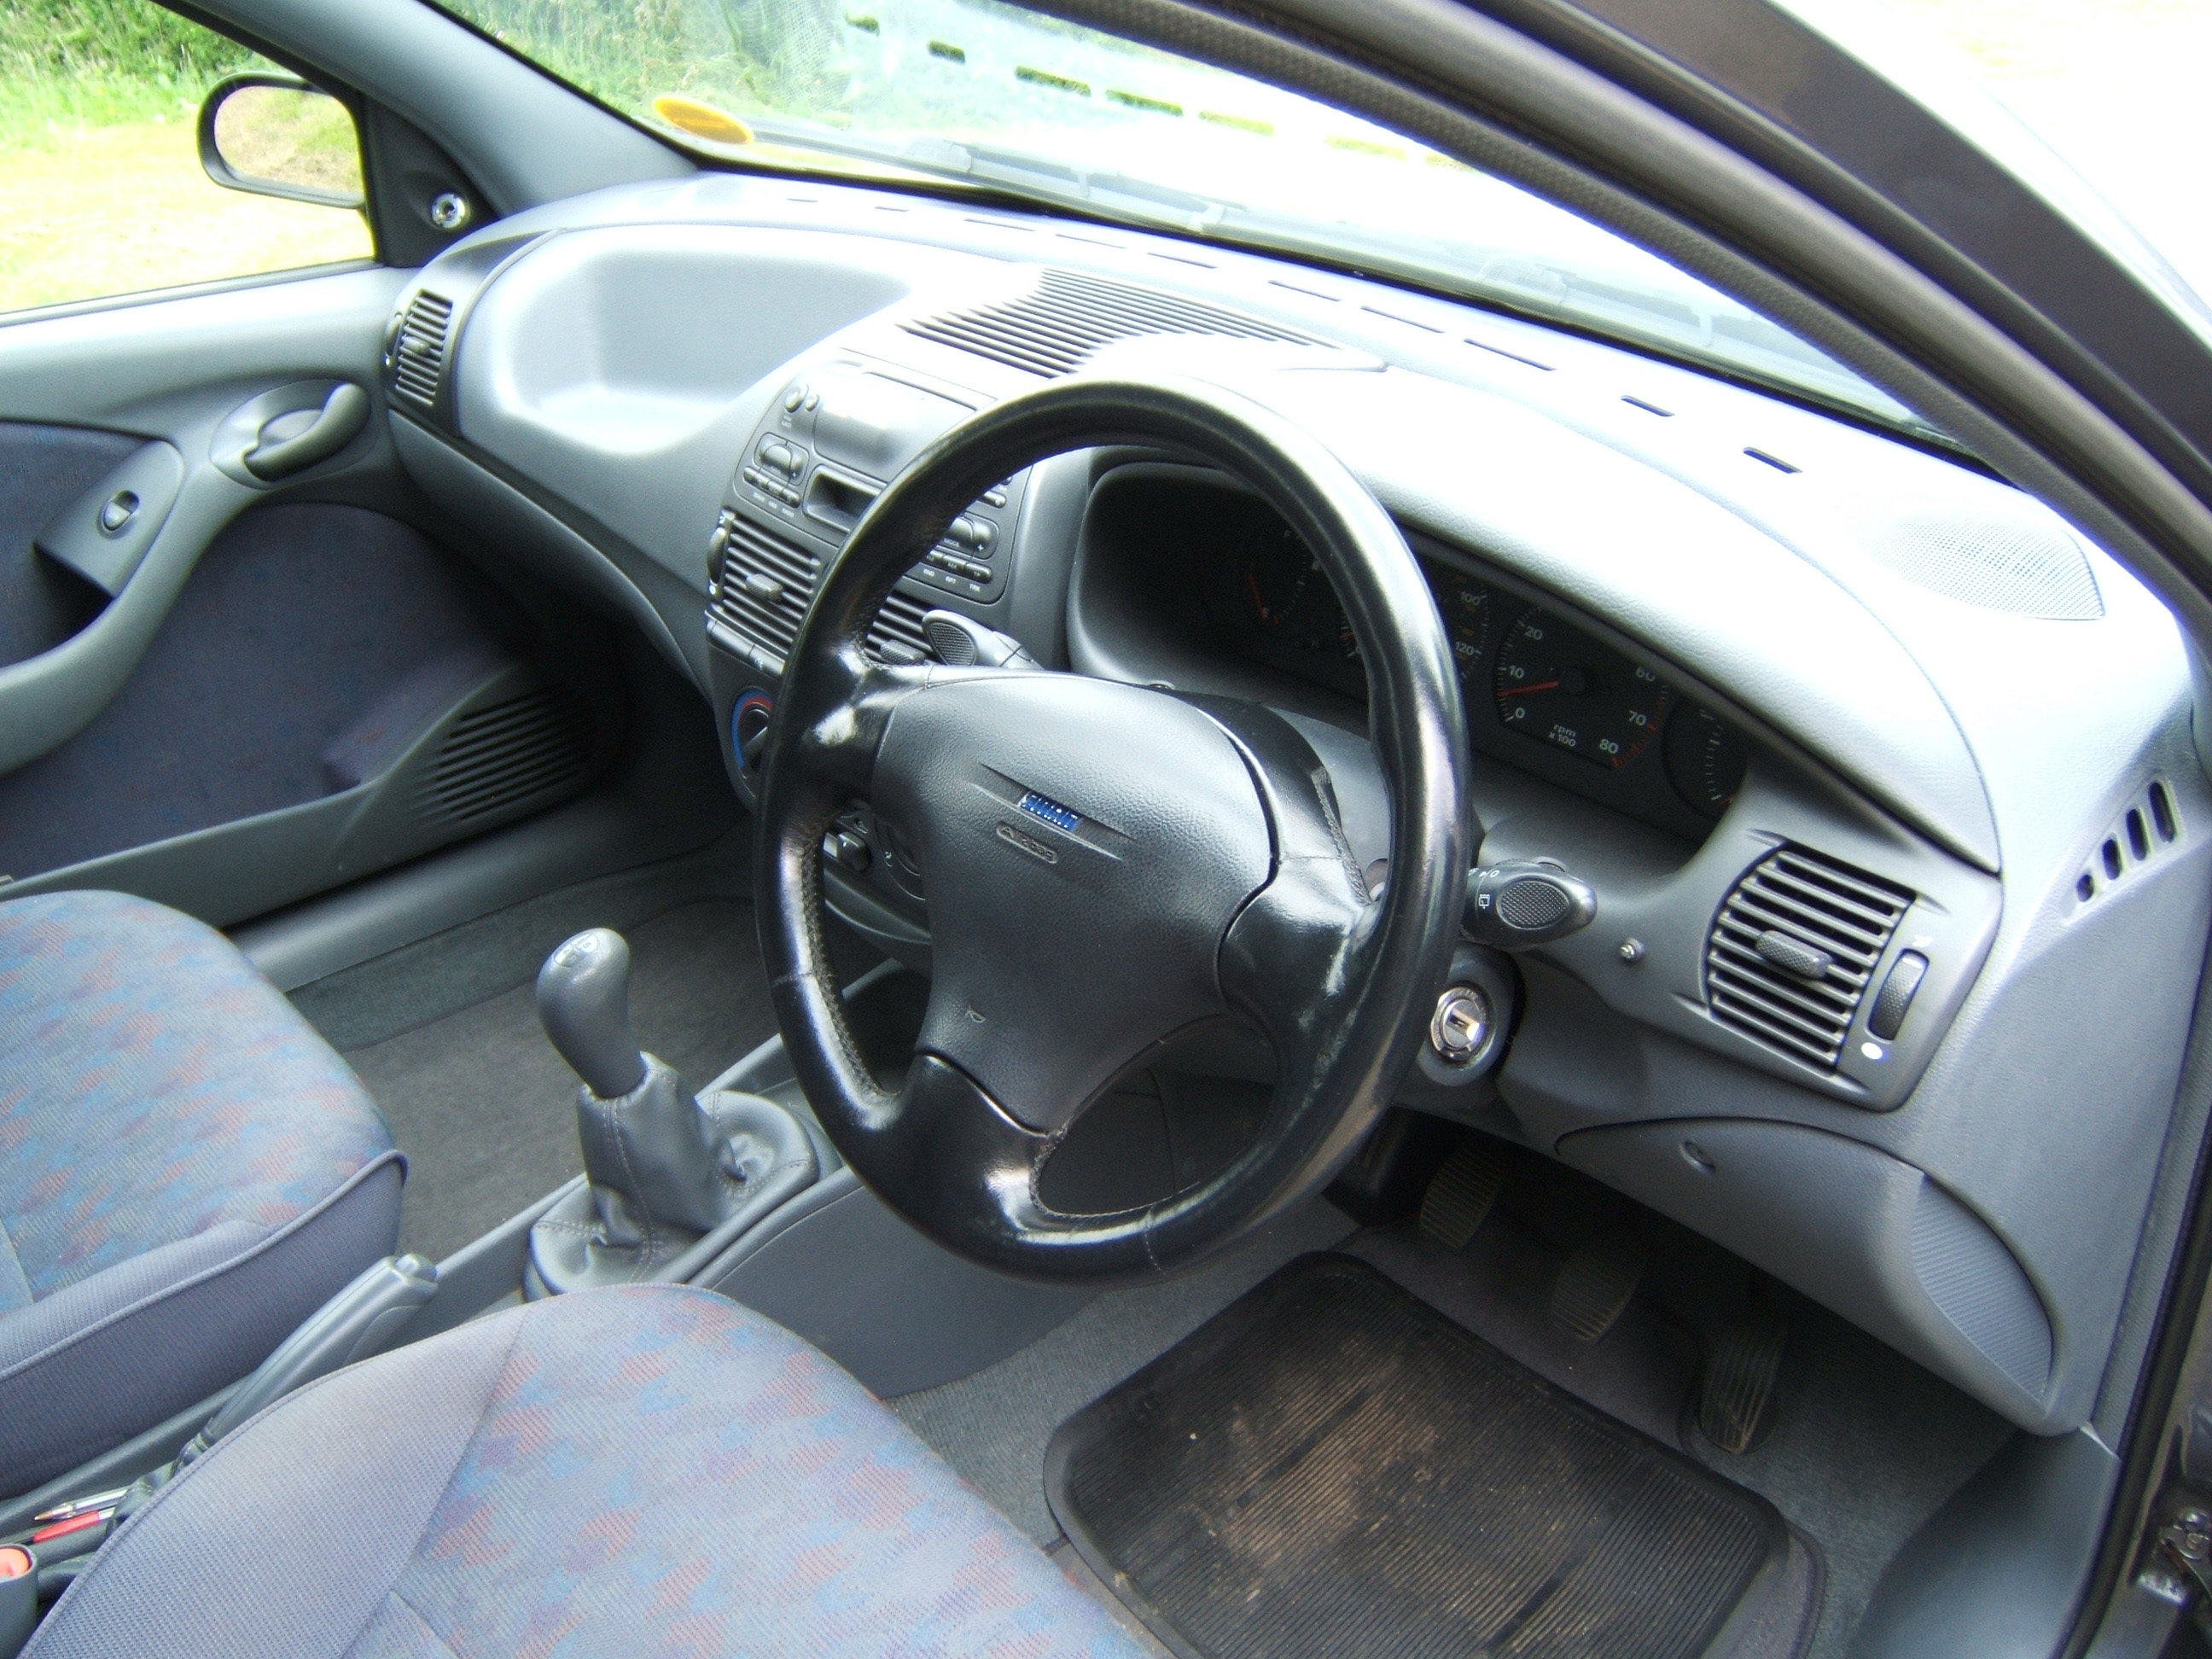
Fitted a HGT Leather Steering wheel. This is very nice, makes my car smell expensive and feels lovely.
The passenger vent was another symmetry mystery, the divers vent was black the centre console was black yet the passenger vent was grey ??? A black Mk2 vent fixed this

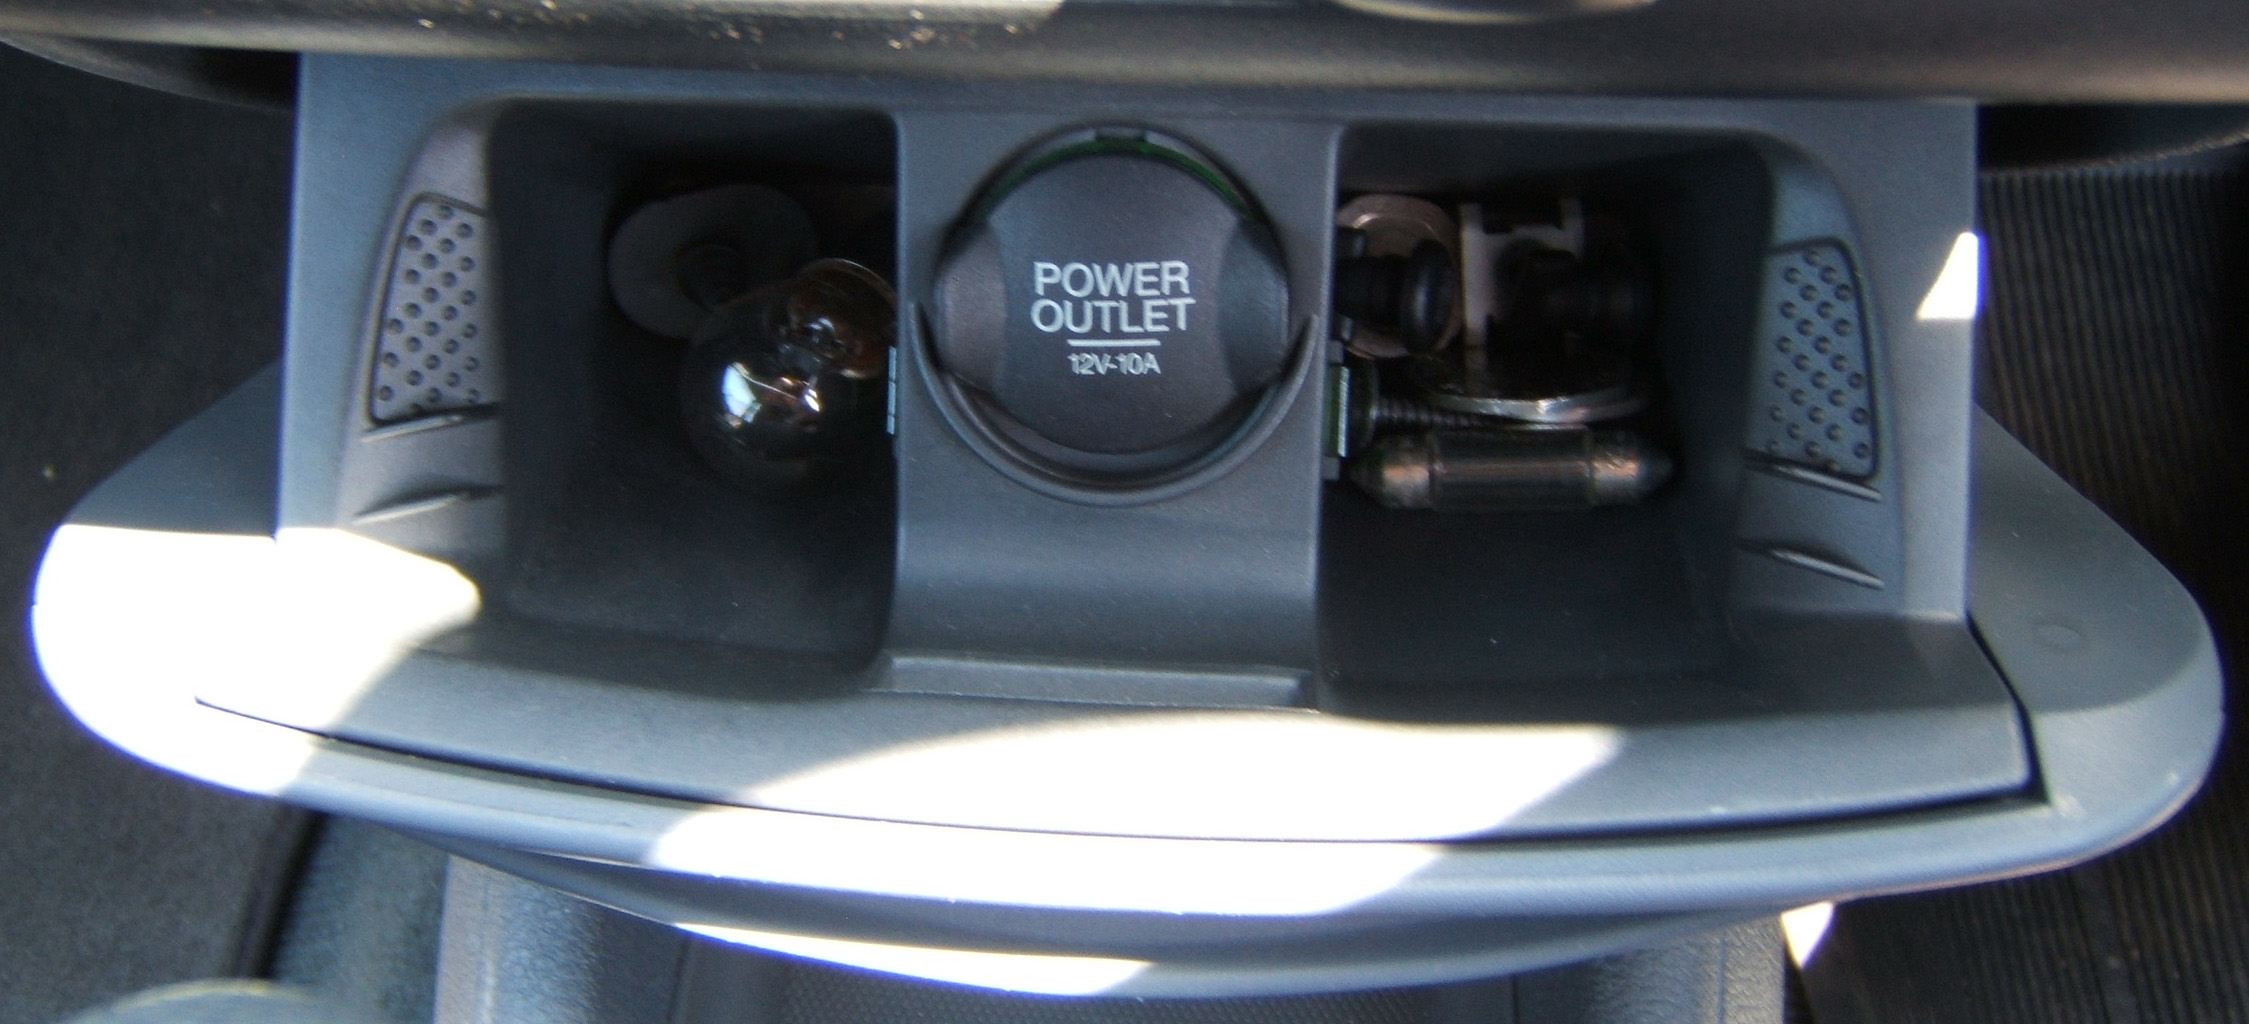
I found a 12volt Cap that replaces the cigarette lighter In a Ford at the scrap yard.
I fitted a vinyl hand brake gaiter from a mk2. I had to glue extensions to one tab to make it fit tight.

I managed to find full leather interior from a Mk1 40000 mile HGT
Audio
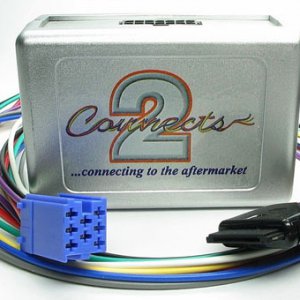
I really liked the original Head Unit so decided an iPod connection to this would be the best option. An iPod to cassette cable or FM transmitter would not be good enough. Eventually I found a small device that makes the Head unit think the iPod is a CD-Changer. Perfect! It charges the Ipod I can control the music throught the head unit or iPod.
The connects2 CTAFAIPOD007 iPod adapter is fixed inside the dashboard
The iPod cable is in my glove box I only touch it if I want to take it out and add more songs.
Links
My Garage: https://www.fiatforum.com/garage_vehicle.php?do=view_vehicle&id=8
My Engine Rebuild Thread: https://www.fiatforum.com/bravo-brava/187402-fixing-my-1-4-bravo-engine-misfire.html
My gallery: https://www.fiatforum.com/gallery/showgallery.php?ppuser=42268&cat=500
Jugs Thread: https://www.fiatforum.com/members-motors/107534-bravo-1-8hlx.html
Please comment, and don’t hold back be honest
Cheers
Adrian
Fiat Bravo 1.4 12v 1997 Degas Grey
Specification
-Engine is a 1.4 12v 80Bhp (I rebuilt myself)
-Colour 623/A Metallic Degas Grey
-Original Trim Level SX: Sunroof, Electric Windows, Central Locking, Manual Mirrors.
Mods/Extras
-Wheels from Fiat 500 '15" Sport Alloys'
-Continental Contact Premium 2 Tyre’s (185/55/R15)
-Marea plastic door handles
-European rear right cluster for extra symmetry PN:7779097
-Fiat Marea Poly Elliptical Headlights With modified wiring
-Black In-Pro Side repeaters
-Ipod/cd changer tricker interface to OEM stereo
-Main Wiper wind deflector (Fiat original)
-Passenger Wiper wind deflector (Modified/Fiat original)
-Bosch Aero Twin Wipers
-Front Mud Flaps (Fiat original)
-Rear mud flaps (Fiat original)
-Refurbished wing mirror mounts
-Leather Steering Wheel from HGT
-Vinyl Handbrake Gaiter
-Bravo 2007 Mist Washer Jets
-Rebuilt Engine Myself
-painted Engine sump and rocker cover
-New totally plane number plates
-Bravo 2007 Dash Badge on Boot
-De-badged Wings
-Painted Front Badge detail Black
-K&N Panel Filter
-Shaped Grey Floor Mats
-Remote Central Locking
-Mk2 Passenger air vent Black
-Cap that reads 12V rather than a lighter
-Full Leather Interior
Goal
My goal is to make the Bravo look neet tidy and modern using Fiat original parts as much as possible. Hopefully making it stand out as one of the best looking Bravos ever.
Main Images (Click for Larger Images)


More Images


Detail and History
When changing her car my aunt decided to give her Fiat Bravo to my sister since my sister was taking driving lessons. After 5 tests and 5 fails she gave up. So the Bravo was SORNed and dumped in the garden for a whole year. Id make the argument it should be at least started once a week but that never happened.
On the day I passed my test I bought it for £300. 1.Because I though it was ok 2.It would get the damn thing out of the garden.
It had steel wheels with two flat front tyres though they all had good tread. Just before it was SORNed it had a new exhaust. There was a dent in the passenger wing that I still haven’t sorted yet. This happened when my aunt owned the car. She claimed the car was a cursed accident magnet because that wing had been hit twice before while it was parked. The interior was mint and had never been smoked in. The car had only done around 35000 miles and had almost never seen a motorway in its life. I thought the car would have lots of life left.
All it needed was a battery charge and new non-return valve on the washer jets, started first time and passed its MOT first time with no advisories.
There where a lot of rattles which all turned out to be related to the alarm that was installed and the passenger wing that had been repainted once before. In both jobs nothing had been re-tightened properly.
Engine
The only thing I really did to my engine was a minor service and fitted a K&N panel filter. Both made massive difference to performance. Then one day the engine started spewing blue smoke on start-up and eventually started misfiring. Something serious was afoot. I felt brave and decided to figure it out for myself, expecting a valve oil seal or head gasket problem I was shocked to see my bores where utterly trashed. Though the head looked ok.
My car was due for a major service anyway so I thought why not rebuild it myself, It wouldn’t cost too much and id have a very nice 1.4 12v engine in the end.


Parts Replaced
Cambelt
Cam Tensioner
Aux Belt
Aux Tensioner
Oil Seleina
Antifreeze Parflu
Lapped valves
Valve stem oil seals
Waterpump
Spark Plugs
Ignition Leads
Valeo Clutch Kit with thrust bearing
Sump Resealed
crank oil seal
inlet/exhaust/water rail/Thermostat/Rockercover gaskets
Painted engine and sump red!
Painted Rocker cover Black and Silver.
The total rebuild cost was around £600.
Engine Rebuild Thread: https://www.fiatforum.com/bravo-brava/187402-fixing-my-1-4-bravo-engine-misfire.html
I intend to fit an oil catch tank into the oil breather system.
Alloys
I decided I wanted my alloys to be PCD 4x98, 15” (185/55/R15) or 16” (195/45/R16) and as close to my original rolling radius as possible. This was my short list;
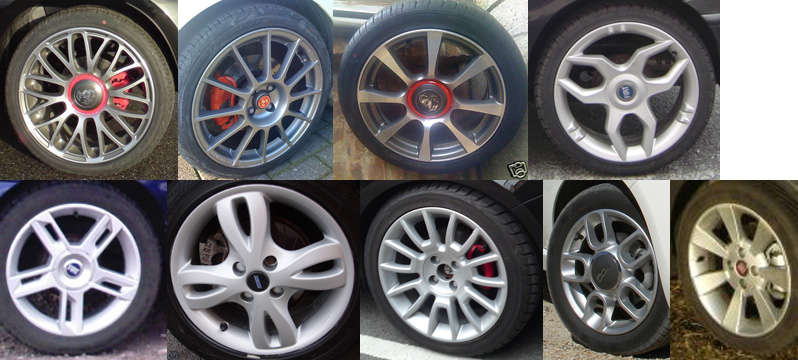
Eventually I got the Fiat 500 15” sport alloys for £320 with as new factory fitted Continental Contact Premium 2’s (185/55/R15, 6J, ET35, PCD 4x98, Centre Bore 58.1) I was very happy Id found quality wheels at a bargain price. As far as I know im the only person with these alloys on a Bravo.

Rear Lights
Every time I looked at the rear lights the annoyed and perplexed me. Why are they not symmetrical? I decided to buy a left hand drive right side cluster. Eventually I got one from Germany that ended up not so water tight, then another from France. I may rewire them so they both light up as reverse but for now the fog has a red bulb in. Passed an MOT with them fitted.
I painted the lip round the clusters matt black as jug had. It looks much nicer and hides the mould that grows inside the cluster. I used 2000gritt sand paper and rubbing compound to polish the scratched out of the clusters.
Front Lights
For a while I was quite content with the standard lights then I noticed one was slightly different than the other. The passenger lense had been replaced. It wasn’t symmetrical and something had to be done
I decided to fit Marea Poly elliptical Head Lights but I really didn’t want to cut or plug stealers into my original loom. I decided to modify the lights instead. This developed Into a new guide. I was really proud of this modification Its nice to be able to just plug the lights in and unplug them when needed.See: https://www.fiatforum.com/bravo-bra...-headlights-bravo-without-modifying-loom.html
The alternative and original guide: http://www.fiatboo.co.uk/photogal/guidepics/FiatMareaPolyEllipticalHeadlightConversion.pdf
I have also fitted Osram H1 Night breakers and chrome indicator bulbs. These lights are far superior to the originals.
Side repeaters
I went for black/smoked repeaters as my car is developing a black and grey theme. They are manufactured by In.Pro. They are high quality and look fab.

Door handles
My original rubber handles where falling to bits. Ive upgraded to plastic marea handles painted in a metallic black. In the future I may colour code them or repaint them.
Wipers/Washer jets
My washer jets where so naff. Looking at a new 2007 Bravo I noticed they looked similar. I took a gamble and bought the 2007 washer jets from my local Fiat. With a bit of tweaking they fit perfectly look 10x better and work 10x better.
See the guide: https://www.fiatforum.com/bravo-bra...ist-washer-jets-your-classic-bravo-marea.html
My washer motor has two outlets, one must go to the rear glass but ive never seen it work. Presumably it leaked inside my car somewhere. I used a T-piece to connect both those outlets to my windscreen washer jets, eliminating the dodgy/pointless rear jet.
I fitted Bosch Aero Twin retro wiper blades. Then I refurbished my arms and fitted a HGT wind deflector to the drivers side. The paint cracked I think because my primer was different than the topcoat. Im working on a new set, the main arm has a HGT wind deflector and I have modified the passenger to take a wind deflector as well. This time im using red oxide primer and semi gloss black topcoat both Holts.
My rear wiper is a quality Valeo part I found in a scrap yard.


Paint
My paint code sticker found on the boot lid was wrong, the code was for a Mk2 Brava. My car is a Mk1 Bravo. This caused me to waste almost a year looking for a passenger wing.
My code is actually 623/A Metallic Degas Grey. It was discontinued in the first few years of Bravo production making it a rare colour.
Thread for paint code info: https://www.fiatforum.com/bravo-brava/175043-paint-code-name.html
Fixing My door Card
My passenger door card was broken beyond use. I had two problems trying to fix it: 1. A card with matching fabric was proving hard to find and 2.Other patterns where horrific 3.The nicer plane door cards are also very hard to find. (See wanted section at the bottom)
There was only one way forward to buy door card take my insert out and fit it to the replacement.
I tested a few different glues. No More Nails was the best. Make sure the surfaces you are gluing are clean, especially plastics because they are normally covered in silicon from the factory mould. I sanded and cleaned the plastic.
Be patient. Give the glue plenty of time to stick, and use clamps to hold it tight.

Grill/Boot
For a while I wanted a Mk2 Grill but actually the Mk1 Grill is the best looking I think. All the Bravo Brava and Marea grills suffer from braking clips at the edges, I fixed this with double sided number plate tape.
I painted the badge detail semi gloss black and left the chrome alone. I also painted the mesh semi-gloss black.
Sill Kick Plates
I have some nice sill kick plated to fit. They are made by Lockwood and are stainless steel. A very nice part and only cost £12.45.
I have not fitted them yet because I need to clean and paint some rust along the bottom of the sills. The rust is common, every bravo door I open has it. I realised it is caused by a rubber strip that runs down the bottom of the doors. They trap dirt and ram it into the paint. I have tried cleaning the rubber but it did not help. I decided to remove those strips. Just waiting for my colour code of paint to arrive. Im not bothered about a perfect match because ill do a perfectly straight line of paint but id like it to be close.
Interior Parts
Fitted a HGT Leather Steering wheel. This is very nice, makes my car smell expensive and feels lovely.
The passenger vent was another symmetry mystery, the divers vent was black the centre console was black yet the passenger vent was grey ??? A black Mk2 vent fixed this
I found a 12volt Cap that replaces the cigarette lighter In a Ford at the scrap yard.

I fitted a vinyl hand brake gaiter from a mk2. I had to glue extensions to one tab to make it fit tight.

I managed to find full leather interior from a Mk1 40000 mile HGT


Audio
I really liked the original Head Unit so decided an iPod connection to this would be the best option. An iPod to cassette cable or FM transmitter would not be good enough. Eventually I found a small device that makes the Head unit think the iPod is a CD-Changer. Perfect! It charges the Ipod I can control the music throught the head unit or iPod.
The connects2 CTAFAIPOD007 iPod adapter is fixed inside the dashboard

The iPod cable is in my glove box I only touch it if I want to take it out and add more songs.
Links
My Garage: https://www.fiatforum.com/garage_vehicle.php?do=view_vehicle&id=8
My Engine Rebuild Thread: https://www.fiatforum.com/bravo-brava/187402-fixing-my-1-4-bravo-engine-misfire.html
My gallery: https://www.fiatforum.com/gallery/showgallery.php?ppuser=42268&cat=500
Jugs Thread: https://www.fiatforum.com/members-motors/107534-bravo-1-8hlx.html
Please comment, and don’t hold back be honest
Cheers
Adrian