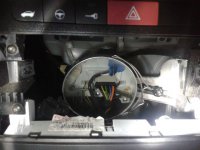
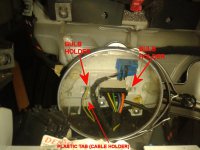
This is a fairly easy task to complete, just be carefully of the sharp metals behind dashboard.
Tools needed:
Various Screwdrivers, Flats, posi's and Torx bits.
Ratchet bar
Pliers
The bulbs are here ....http://www.ebay.co.uk/itm/150561034...WNX:IT&_trksid=p3984.m1439.l2649#ht_683wt_905
Right..Lets get started
1. Firstly Remove your Radio and cage, mine is an aftermarket stereo so if yours isn't, use radio keys or short screwdrivers to pull out the stereo, and unplu the connectors on the back.
2. Once that's removed, Remove the cage by unscrewing the screws and bending the tabs out of the slots ( only if its aftermarket stereo).
3. Pull the fascia off and reveal the two screws to remove the console with the warning lights, door locks, etc. Once the screws are out, just give a little pull out and place on top of dashboard.
[mod edit/ addition ] Once you get to this point there is no need to remove the front of the heater control unit risking snapping off the clips they are very fragile, simply feel down the back for the 2 wires that go to the back of the heater
(get a make up mirror and a torch and have a look turn the side lights on if half lights up you will then see it lit up in the mirror and then you will know what your looking for) pull the bulb holder out the back of the heater control unit then change the bulb [/mod edit]
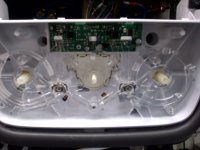
4. Remove the heater control fascia by working around the clips, pulling them slowly and carefully as they can break easy. Once thats out, you can now see the bulbs in question.
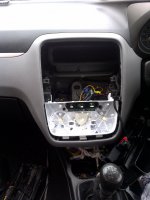
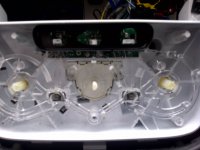
4b.I removed the small plastic frame that outlines the heater controls then removed the bulbs using pliers. Place the new bulbs in the slots and work back put everything back together.
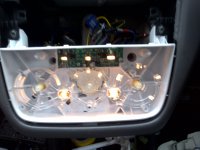
5. Once finished, the bulbs should light up correctly and you can have happy motoring again.
Tools needed:
Various Screwdrivers, Flats, posi's and Torx bits.
Ratchet bar
Pliers
The bulbs are here ....http://www.ebay.co.uk/itm/150561034...WNX:IT&_trksid=p3984.m1439.l2649#ht_683wt_905
Right..Lets get started
1. Firstly Remove your Radio and cage, mine is an aftermarket stereo so if yours isn't, use radio keys or short screwdrivers to pull out the stereo, and unplu the connectors on the back.
2. Once that's removed, Remove the cage by unscrewing the screws and bending the tabs out of the slots ( only if its aftermarket stereo).
3. Pull the fascia off and reveal the two screws to remove the console with the warning lights, door locks, etc. Once the screws are out, just give a little pull out and place on top of dashboard.
[mod edit/ addition ] Once you get to this point there is no need to remove the front of the heater control unit risking snapping off the clips they are very fragile, simply feel down the back for the 2 wires that go to the back of the heater
(get a make up mirror and a torch and have a look turn the side lights on if half lights up you will then see it lit up in the mirror and then you will know what your looking for) pull the bulb holder out the back of the heater control unit then change the bulb [/mod edit]
4. Remove the heater control fascia by working around the clips, pulling them slowly and carefully as they can break easy. Once thats out, you can now see the bulbs in question.


4b.I removed the small plastic frame that outlines the heater controls then removed the bulbs using pliers. Place the new bulbs in the slots and work back put everything back together.


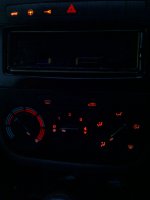
5. Once finished, the bulbs should light up correctly and you can have happy motoring again.


