First of all, what you will need is:
Blaupunkt THb200A (http://www.bluespot.co.uk/stock/spkr0_2.asp)
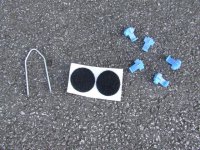
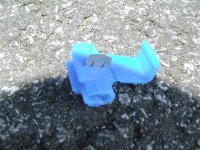
5 x electrical wire connectors (clip type as shown in picture).
Head unit removal key.
4 x circular velcro tabs.
1 x 2 metres of positive amp wire
1 x inline amp fuse
1 x distribution block (http://www.caraudiodirect.co.uk/stinger-sdb1-p-1468.html?cadid=a8d174bc78c57dd4ac5d50740310dd18)
All available from Halfords

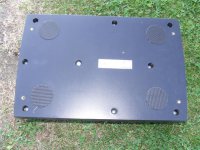
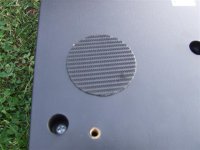
On the rear side of the amp, place one "spikey" velcro tab in each corner as shown in the pictures.
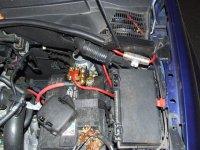
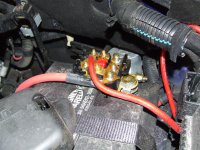
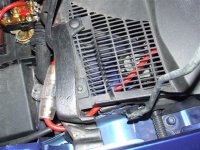
Next stage is to connect the positive amp wire to the battery after feeding it through the bulkhead. Cut approx half a metre off the amp wire then connect the inline fuse to each end of the wire, but take the fuse out of the holder. Then open the bonnet and remove the black plastic at the rear of the bonnet and the bottom of the windscreen. To do this, remove the black rubber which holds the plastic in place and undo the screws. The plastic will then slide down off the windscreen. Behind this is a large rubber gromit. This is where the amp wire will need to go through. I pushed a flat headed screwdriver through the gromit creating a small slit. Then i pushed the amp wire through the gromit. If you look from the passenger footwell, up behind the glovebox, you will see the wire you have just fed through. You can now connect the other end of the amp wire to the battery as the fuse is not in the holder, or this can be left til the end.
Inside the car, connect the end of the amp wire into the distribution block at the rear of the glove box.
Place the Blaupunkt amp under the seat of your choice (in my car it's under the passenger seat - which my girlfriend likes )
)
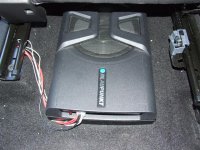
Connect the high-level input lead to the amp. Now fead the wires under the seat rail and along to the front of the car placing them under the side trim. This can be taken off by undoing the screws as shown in the picture.
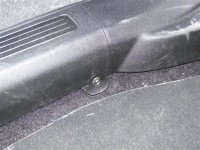
The wire then needs feeding up to the bottom of the glove box behind the trim. The wires can then be taken across under the glove box in the direction of the centre console. Keep the two red power cables at the left hand side of the glovebox as these need connecting to the distribution block as shown.
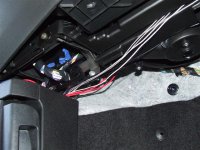
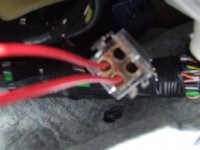
Remove the head unit using the radio keys. Now feed the remaining 5 cables from the glovebox to the back of the head unit. These five cables now need connecting to the correct head unit cables. Place the black ground cable into the clip connector and then to the black cable of the head unit. The remaining four cables now need connecting using the clip connectors to the relevant head unit speaker cables (sorry i cant remember which colour to which colour and cannot see this) but i have connected mine to the rear speaker cables. ( I understand this is not clear, so get in touch if you need help!)
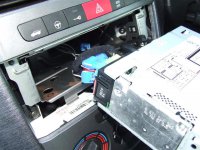
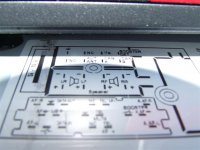
Notice this amp does not have a remote cable as it automatically switches on when it receives signal, then switches off after a minute of no signal.
Insert the fuse into the inline holder, switch your head unit on and you should get a green light on the amp and some bass!

The next few pictures show the amp in place. This cannot be seen from outside the car so thieves don't know it's there!
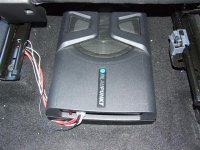
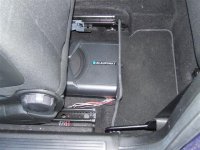
Sorry the guide is not too clear, but really is quite easy. It took me approx an hour to fit. Feel free to ask any questions and i will answer them the best i can and add them into this guide for others.
Blaupunkt THb200A (http://www.bluespot.co.uk/stock/spkr0_2.asp)
5 x electrical wire connectors (clip type as shown in picture).
Head unit removal key.
4 x circular velcro tabs.
1 x 2 metres of positive amp wire
1 x inline amp fuse
1 x distribution block (http://www.caraudiodirect.co.uk/stinger-sdb1-p-1468.html?cadid=a8d174bc78c57dd4ac5d50740310dd18)
All available from Halfords


On the rear side of the amp, place one "spikey" velcro tab in each corner as shown in the pictures.


Next stage is to connect the positive amp wire to the battery after feeding it through the bulkhead. Cut approx half a metre off the amp wire then connect the inline fuse to each end of the wire, but take the fuse out of the holder. Then open the bonnet and remove the black plastic at the rear of the bonnet and the bottom of the windscreen. To do this, remove the black rubber which holds the plastic in place and undo the screws. The plastic will then slide down off the windscreen. Behind this is a large rubber gromit. This is where the amp wire will need to go through. I pushed a flat headed screwdriver through the gromit creating a small slit. Then i pushed the amp wire through the gromit. If you look from the passenger footwell, up behind the glovebox, you will see the wire you have just fed through. You can now connect the other end of the amp wire to the battery as the fuse is not in the holder, or this can be left til the end.


Inside the car, connect the end of the amp wire into the distribution block at the rear of the glove box.
Place the Blaupunkt amp under the seat of your choice (in my car it's under the passenger seat - which my girlfriend likes

Connect the high-level input lead to the amp. Now fead the wires under the seat rail and along to the front of the car placing them under the side trim. This can be taken off by undoing the screws as shown in the picture.

The wire then needs feeding up to the bottom of the glove box behind the trim. The wires can then be taken across under the glove box in the direction of the centre console. Keep the two red power cables at the left hand side of the glovebox as these need connecting to the distribution block as shown.


Remove the head unit using the radio keys. Now feed the remaining 5 cables from the glovebox to the back of the head unit. These five cables now need connecting to the correct head unit cables. Place the black ground cable into the clip connector and then to the black cable of the head unit. The remaining four cables now need connecting using the clip connectors to the relevant head unit speaker cables (sorry i cant remember which colour to which colour and cannot see this) but i have connected mine to the rear speaker cables. ( I understand this is not clear, so get in touch if you need help!)


Notice this amp does not have a remote cable as it automatically switches on when it receives signal, then switches off after a minute of no signal.
Insert the fuse into the inline holder, switch your head unit on and you should get a green light on the amp and some bass!

The next few pictures show the amp in place. This cannot be seen from outside the car so thieves don't know it's there!


Sorry the guide is not too clear, but really is quite easy. It took me approx an hour to fit. Feel free to ask any questions and i will answer them the best i can and add them into this guide for others.

