

Firstly, make sure to crack the seal on the wheel bolts.
Handbrake on and put the engine in gear. Using the appropriate tool, ensure all the bolts securing the wheel have been released.
Secondly, jack up the car and support on an axle stand or similar appropriate device.
Thirdly, remove the wheel bolts and place to one side, remove the wheel to expose the brake disc and caliper.
With the wheel removed, you will see two studs attached to the central portion of the disc. these need to be removed and the studs placed to one side (12mm socket).
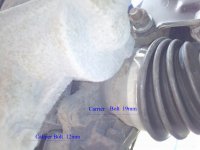
To remove the disc, the caliper carrier first needs to be removed. To make this easier (and for ease of replacing the pads) the caliper first needs to be released.

The caliper is held in place in the carrier by two small bolts (12mm socket), release the top bolt and completely remove the bottom bolt.
Using a sturdy flat-blade screwdriver or similar, gently prise the head of the piston away from the brake disc - alternatively, the caliper can be prised up and out of the carrier although the piston will need compressing in order to accommodate the new pads. This can be done using a suitable tool such as a G-clamp (there are also specialist tools as well). Ensure you do this slowly so as not to cause undue stress in the master cylinder. Also, the pressure in the brake fluid reservoir will need to be released.
With the caliper released, remove the two bolts holding the carrier and place the whole thing out of the way (I made an 'S' hook out of a piece of garden wire to suspend the brake parts on the coil whilst I dealt with the disc.
The hardest part...
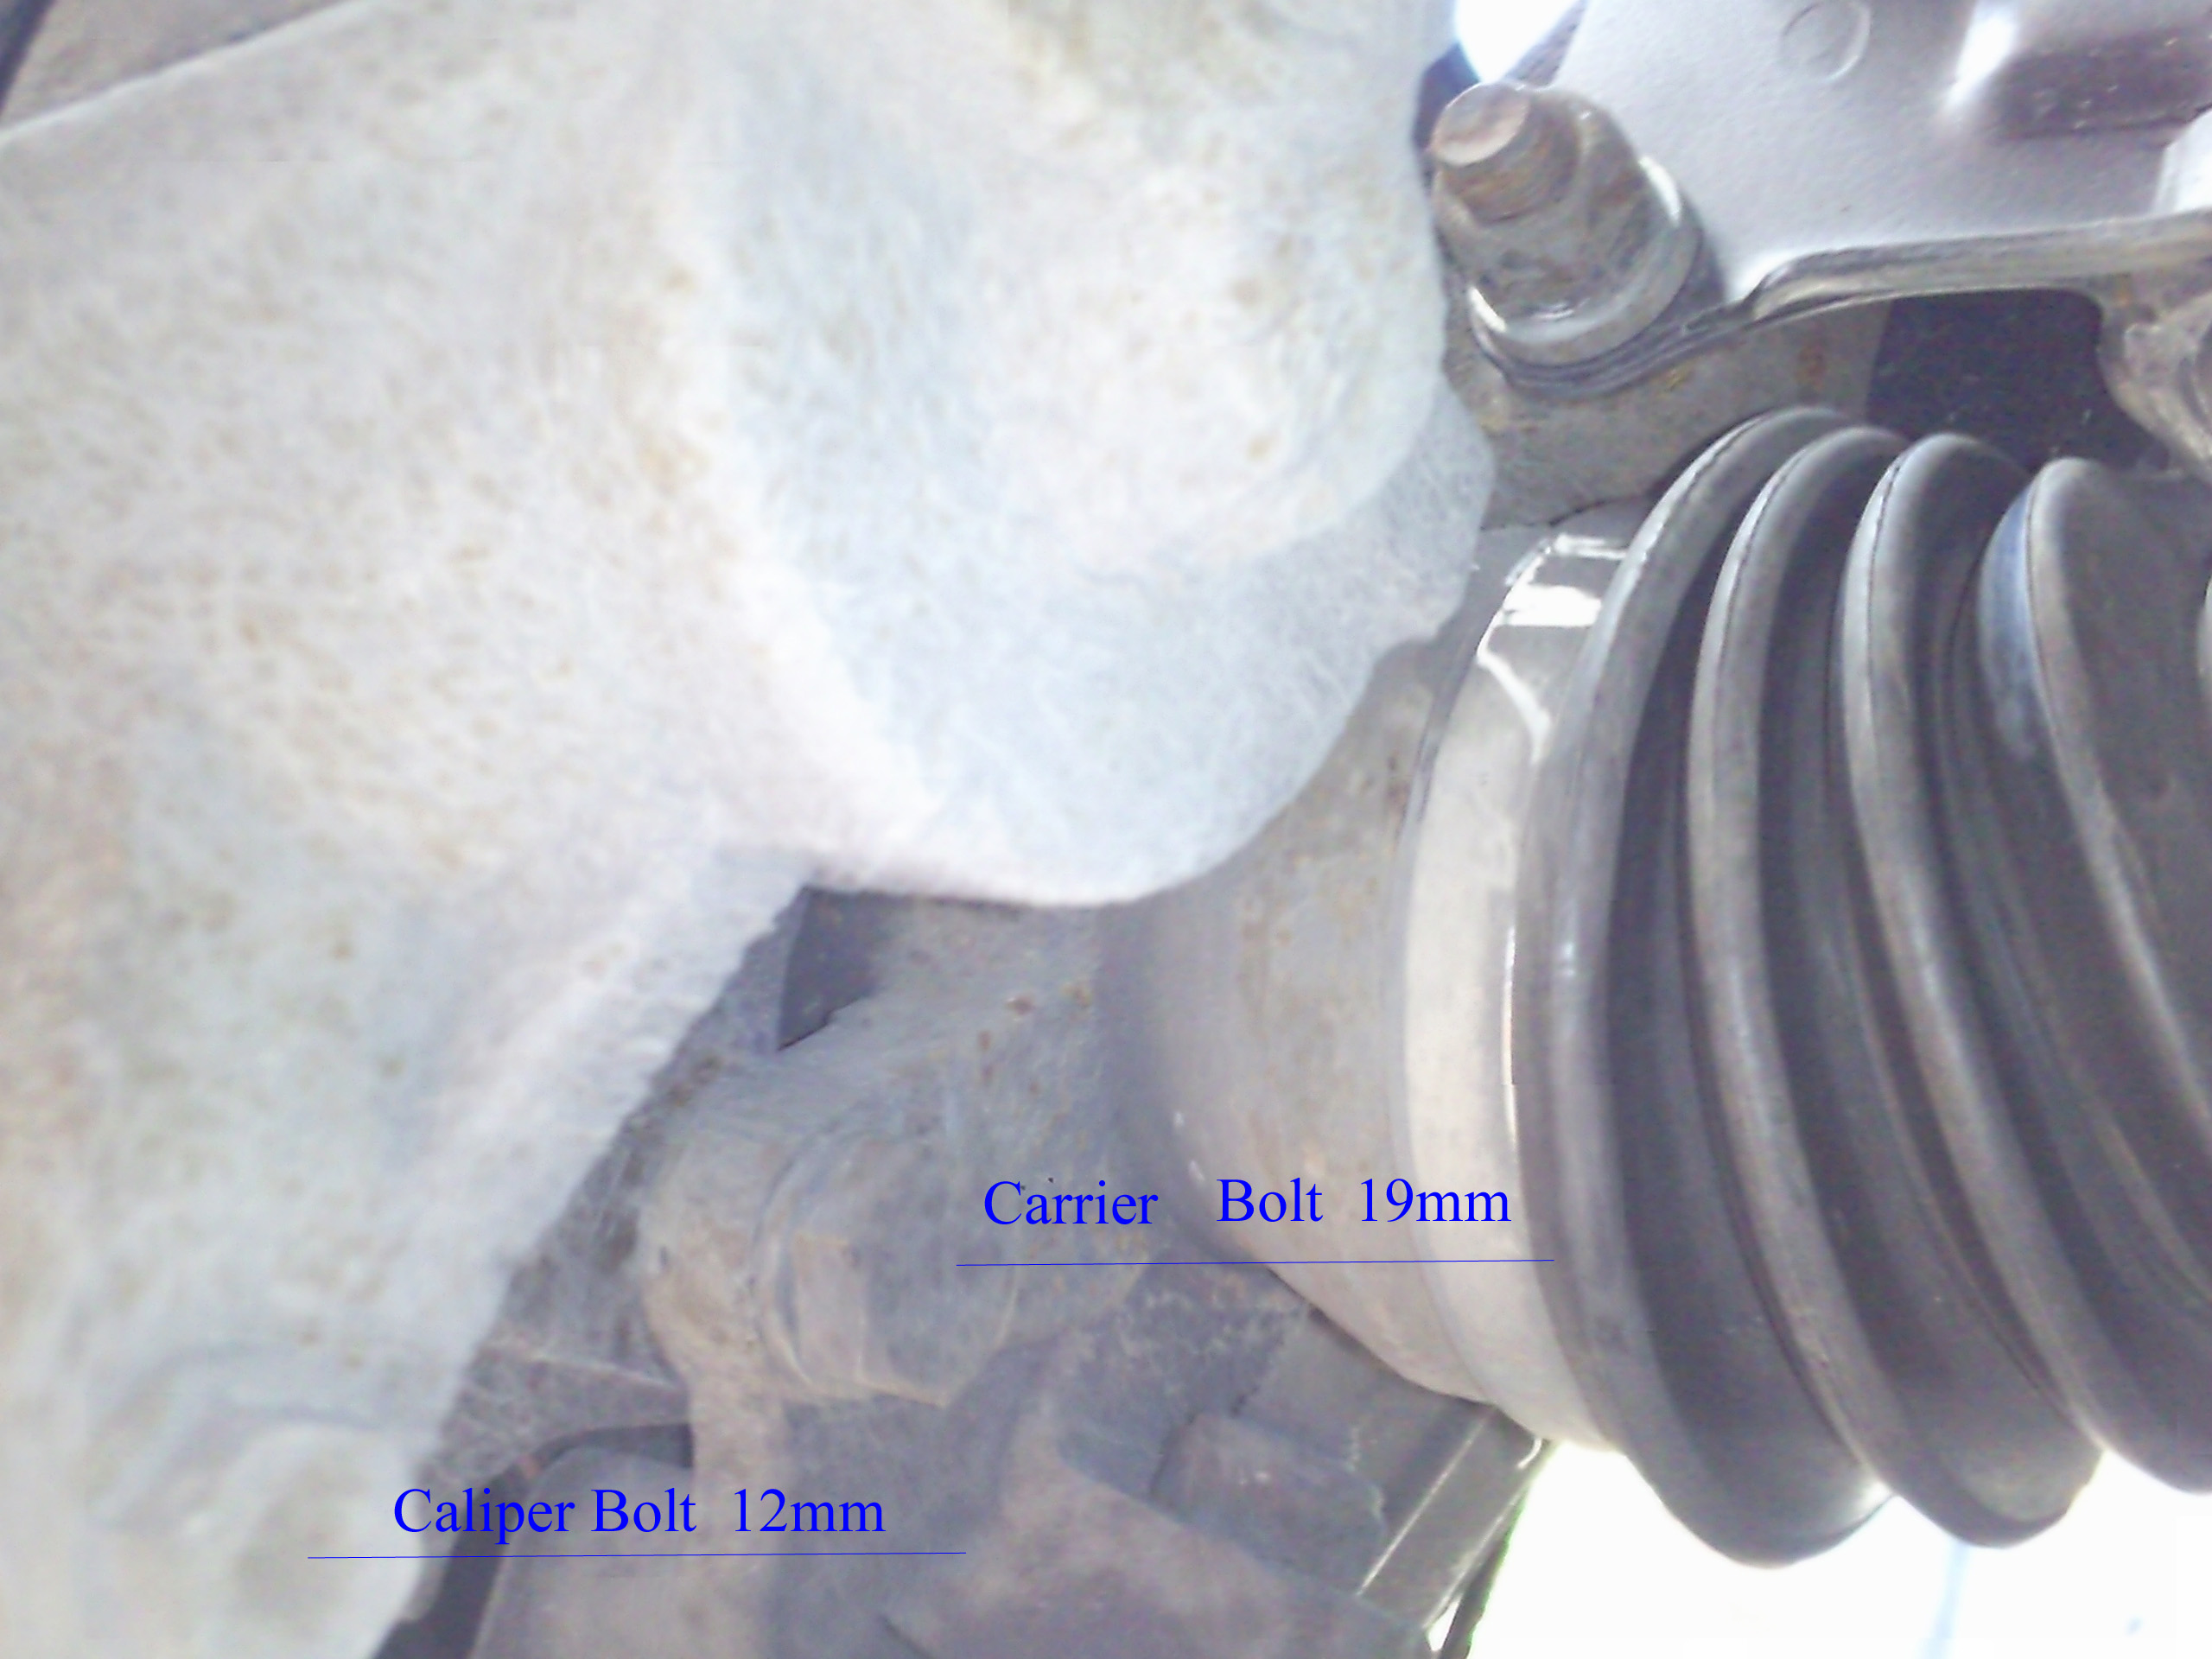
Remove the disc. This can take some persuasion as years of rust will have firmly fixed the disc to the hub. A few good, sharp taps with a lump hammer was enough to loosen the disc (at this point you will realise the benefit of supporting the car on an axle stand as well as the jack !)
Note the Four larger threaded holes for the wheel bolts and the two smaller holes for the studs.
Note also the holes for the carrier's bolts.
Installing the new disc is simply a matter of putting the disc on the hub and fitting the two studs - ensuring they are tightened to the correct torque.
Next, the brake carrier needs to be refitted, the threaded holes of the carrier go in front of the holes on the hub, Insert both bolts and make them finger tight for now. If the piston does need pushing back in, you can do this by placing an old pad over the piston and compressing it using a G-clamp (do this slowly so as not to damage the master cylinder etc).
With the carrier in place, install the new pads and swing the caliper back down into place. If you released the pressure in the reservoir earlier, the piston should have stayed in the closed position.
Insert the lower caliper bolt & ensure both caliper bolts are finger tight before finally tightening the larger carrier bolts then the caliper bolts to the correct torque.

Finally, replace the wheel, installing opposite bolts to centralise the wheel, nip them up hand tight before removing the axle stand and lowering the car onto the tyre and tighten the wheel bolts to the specified torque.
With both sides completed, run the engine and test the brake pedal. The first stroke will take the pedal to the floor, this is simply to adjust the caliper to the new pad/disc, the pedal should now feel firm and only travel a short distance.
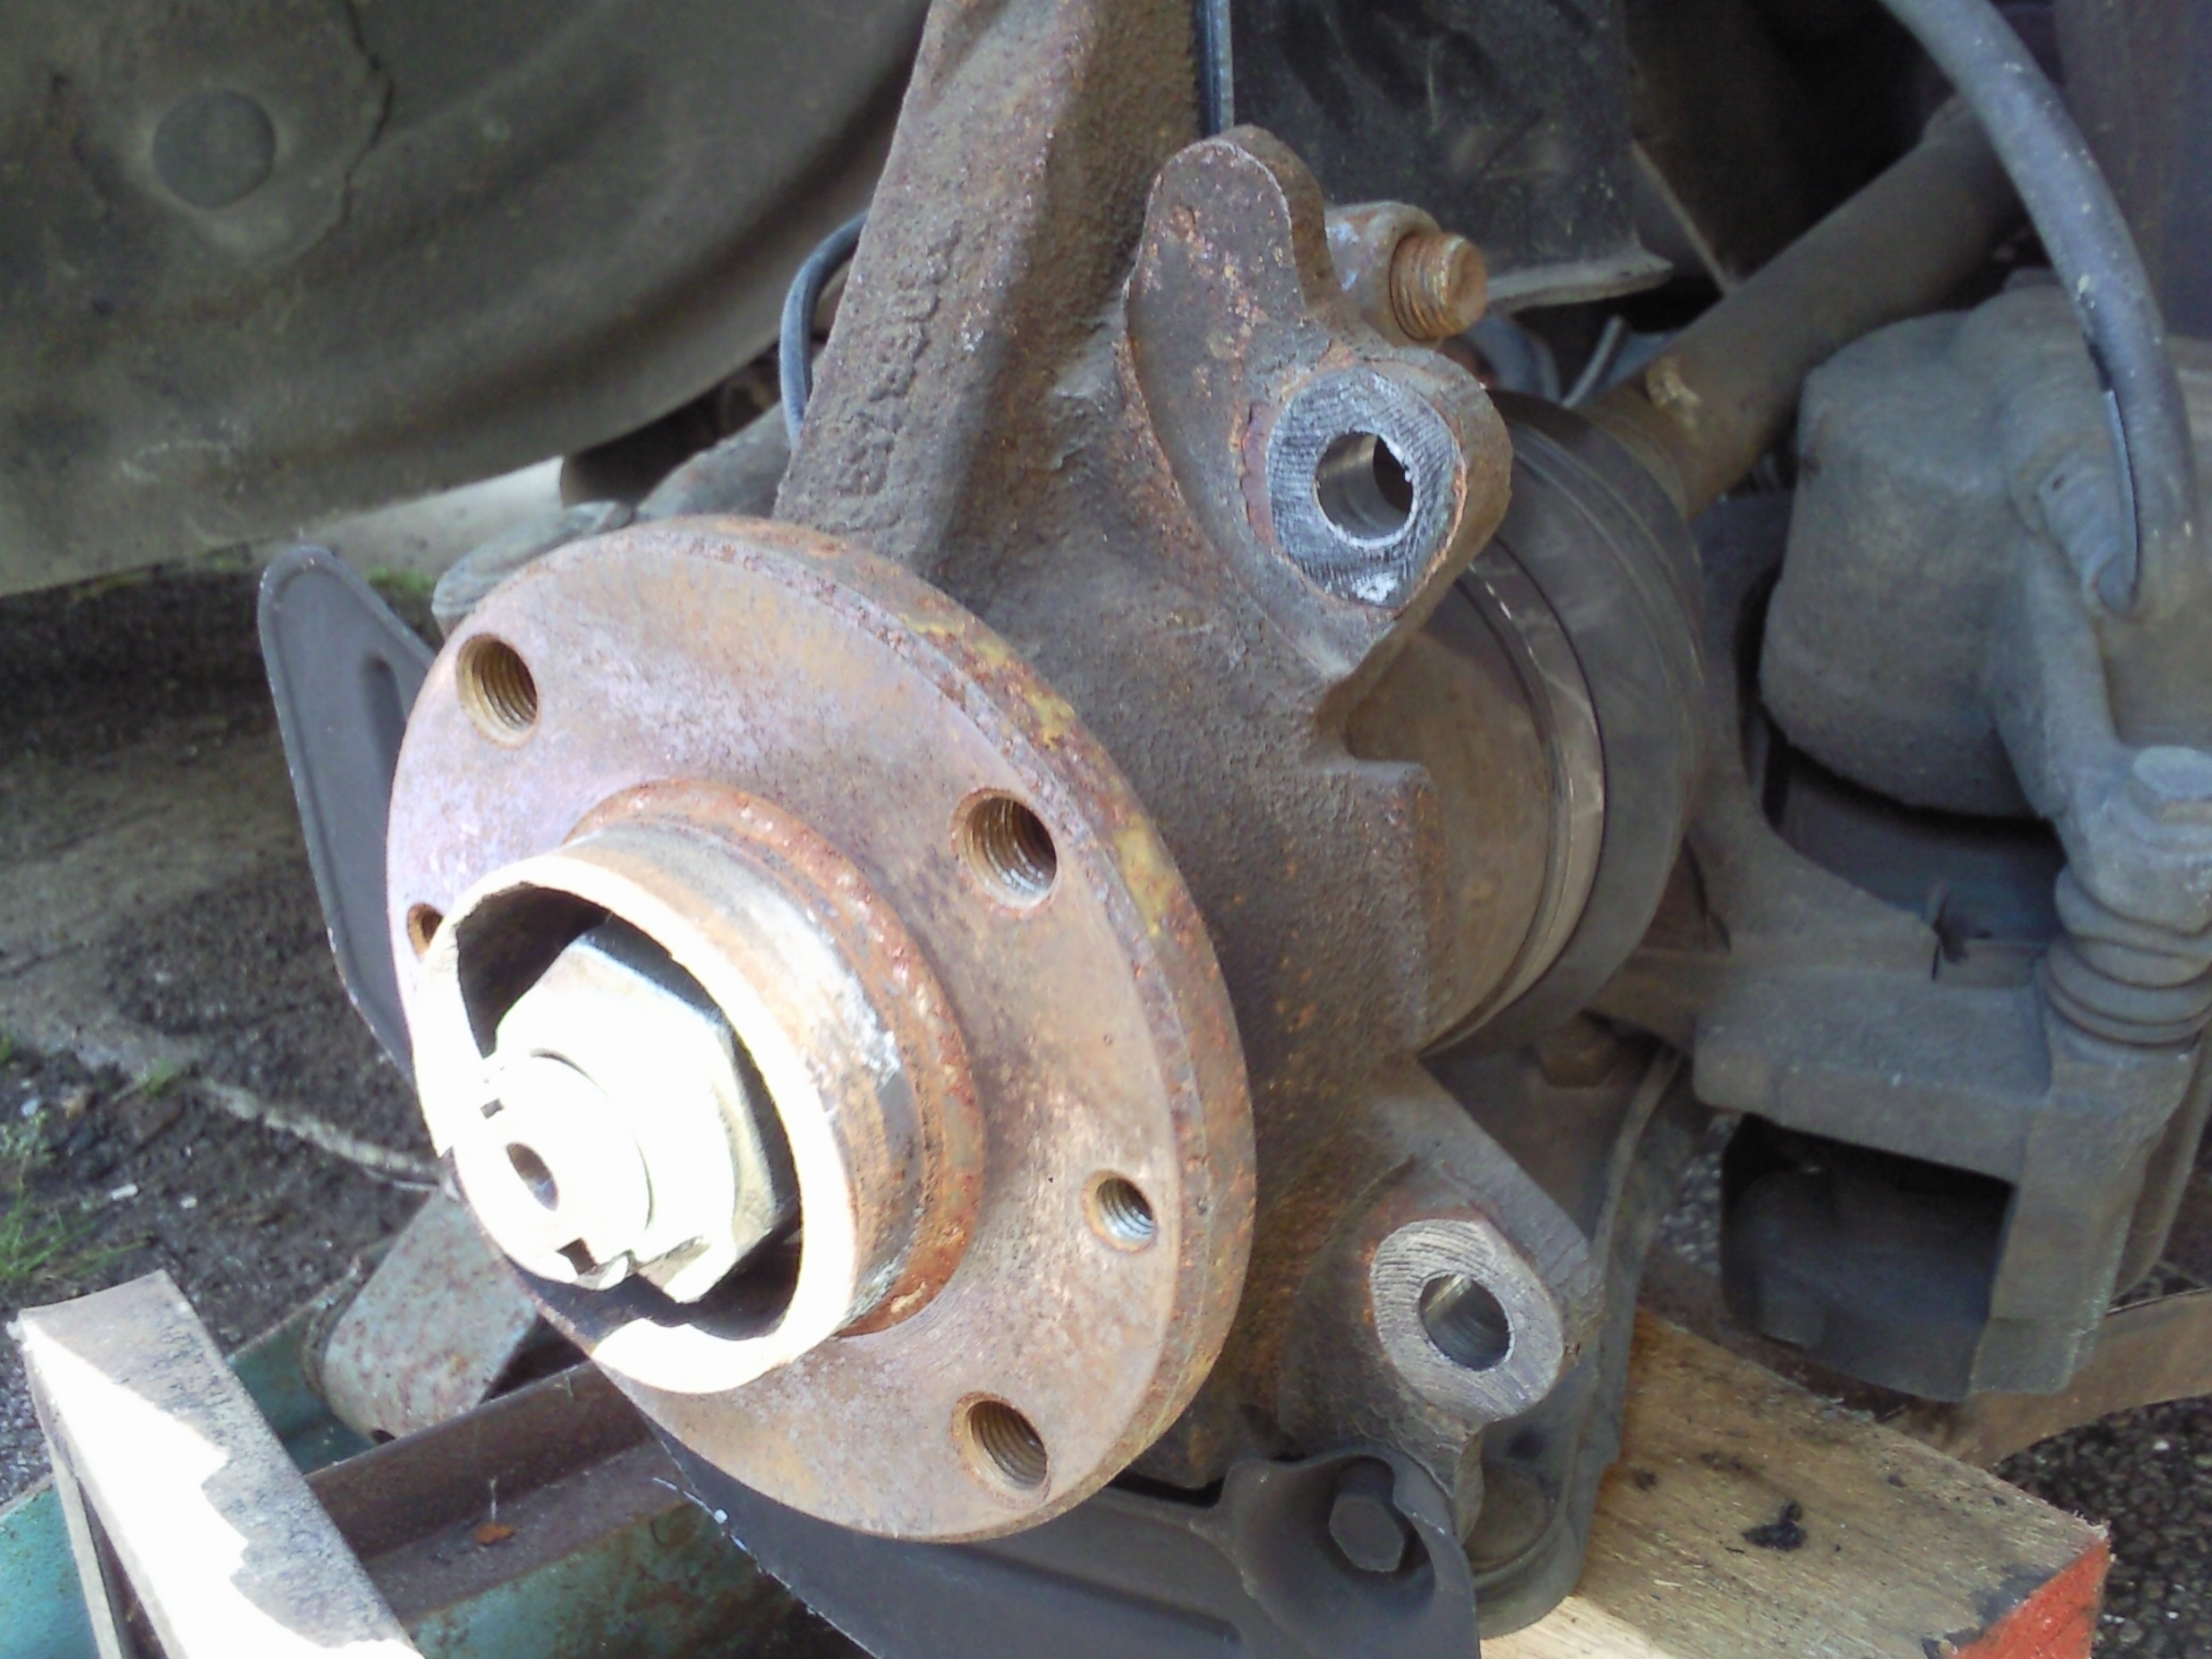
My old pad compared to the new pad. Although there is still quite a lot of 'meat' left on these pads, about a quarter of this pad is sat in a groove in my disc !
Handbrake on and put the engine in gear. Using the appropriate tool, ensure all the bolts securing the wheel have been released.
Secondly, jack up the car and support on an axle stand or similar appropriate device.
Thirdly, remove the wheel bolts and place to one side, remove the wheel to expose the brake disc and caliper.
With the wheel removed, you will see two studs attached to the central portion of the disc. these need to be removed and the studs placed to one side (12mm socket).
To remove the disc, the caliper carrier first needs to be removed. To make this easier (and for ease of replacing the pads) the caliper first needs to be released.
The caliper is held in place in the carrier by two small bolts (12mm socket), release the top bolt and completely remove the bottom bolt.
Using a sturdy flat-blade screwdriver or similar, gently prise the head of the piston away from the brake disc - alternatively, the caliper can be prised up and out of the carrier although the piston will need compressing in order to accommodate the new pads. This can be done using a suitable tool such as a G-clamp (there are also specialist tools as well). Ensure you do this slowly so as not to cause undue stress in the master cylinder. Also, the pressure in the brake fluid reservoir will need to be released.
With the caliper released, remove the two bolts holding the carrier and place the whole thing out of the way (I made an 'S' hook out of a piece of garden wire to suspend the brake parts on the coil whilst I dealt with the disc.
The hardest part...
Remove the disc. This can take some persuasion as years of rust will have firmly fixed the disc to the hub. A few good, sharp taps with a lump hammer was enough to loosen the disc (at this point you will realise the benefit of supporting the car on an axle stand as well as the jack !)
Note the Four larger threaded holes for the wheel bolts and the two smaller holes for the studs.
Note also the holes for the carrier's bolts.
Installing the new disc is simply a matter of putting the disc on the hub and fitting the two studs - ensuring they are tightened to the correct torque.
Next, the brake carrier needs to be refitted, the threaded holes of the carrier go in front of the holes on the hub, Insert both bolts and make them finger tight for now. If the piston does need pushing back in, you can do this by placing an old pad over the piston and compressing it using a G-clamp (do this slowly so as not to damage the master cylinder etc).
With the carrier in place, install the new pads and swing the caliper back down into place. If you released the pressure in the reservoir earlier, the piston should have stayed in the closed position.
Insert the lower caliper bolt & ensure both caliper bolts are finger tight before finally tightening the larger carrier bolts then the caliper bolts to the correct torque.
Finally, replace the wheel, installing opposite bolts to centralise the wheel, nip them up hand tight before removing the axle stand and lowering the car onto the tyre and tighten the wheel bolts to the specified torque.
With both sides completed, run the engine and test the brake pedal. The first stroke will take the pedal to the floor, this is simply to adjust the caliper to the new pad/disc, the pedal should now feel firm and only travel a short distance.
My old pad compared to the new pad. Although there is still quite a lot of 'meat' left on these pads, about a quarter of this pad is sat in a groove in my disc !
