Technical Leaking coolant

Currently reading:
Technical Leaking coolant

O!, ye of little faith! I'm sure the Spirit of Easter (the Bunny, of course) is gonna come through for me and my B :)
 
Hopefully tomorrow...was a bit too tired today :(

The first pic's the heating unit; the two thingies sticking out are parts of the radiator.
The second pic's where the radiator goes into the engine compartement.
Third pic is what my B looked like when I left for home. Still a long way to go :yuck:

A tip: If you happen to do this to your car - remember to take a note of which cable goes where. The same applies for screws :idea:
 

Attachments

  • - CIMG3443.JPG
    - CIMG3443.JPG
    196.1 KB · Views: 180
  • - CIMG3444.JPG
    - CIMG3444.JPG
    201.2 KB · Views: 151
  • - CIMG3457.JPG
    - CIMG3457.JPG
    187.7 KB · Views: 167
Excellent Job, it does look messy.

I know you are starting to put it back together but now may be the time to remove the floormat & dry it out as it holds LOTS of water you can also check if there is any corrosion to fix as a result. I understand that you are probably desperate to put it back but just seems a waste since all the stuff is already out.
 
Alan, do you mean under the 'cover' which is under the the floormats? :eek:
 
Yes, there is a small cover on the mat to read the Vin No, open that and feel the bottom of the rubber mat for damp, if it's remotely wet or damp at that location then there will be lots of water retained by the mat which also has a built in sound proofing that acts like a sponge.
 
I'll have a look-see for dampness when I feel I'm on top of things...:eek:

Got a little work done today - not too much, though, as my brother who works in the garage and lets me borrow it (as long as he's there himself :confused:) was on a binge yesterday, and hence didn't feel like spending too much time there...:cry:

Anyhow, a few pics today too:

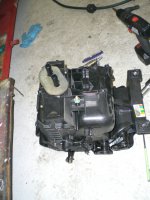
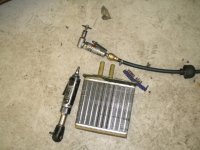
First one's the knackered radiator, and the omni-potent angle grinder :D

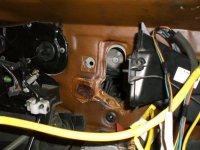
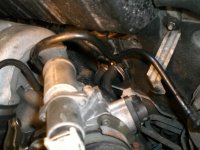
Second pic's where the radiator's connected in the engine. Actually there's only three nuts holding it in place, not four as I wrote the day before yesterday. Terribly narrow space to work in, that...:mad:

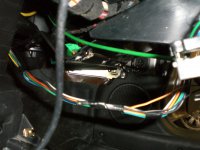
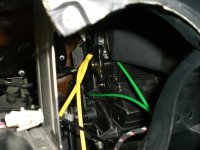
Third pic's of the heater unit taken through where the speedo would have been. The green wires regulate the airflow, temperature etc. I've got some slight problems with getting the topmost one to behave; I can't get the right knob (airflow) to get to its leftmost position :bang:. The yellow cables are for the airbags and pretensioners.

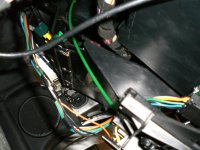
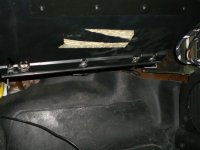
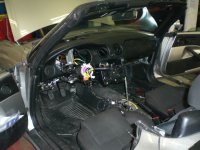
Fourth pic's a bad one taken from underneath the steering wheel towards the right footwell.

Fifth is the same as above.
 

Attachments

  • - CIMG3544.JPG
    - CIMG3544.JPG
    188.4 KB · Views: 85
  • - CIMG3543.JPG
    - CIMG3543.JPG
    195.6 KB · Views: 101
  • - CIMG3542.JPG
    - CIMG3542.JPG
    174.8 KB · Views: 119
  • - CIMG3527.JPG
    - CIMG3527.JPG
    187 KB · Views: 134
  • - CIMG3526.JPG
    - CIMG3526.JPG
    198 KB · Views: 173
Two more:

First is the right footwell where I had to use the angle grinder to cut the pop nails with. I've replaced them with the three screws which you see there now.

Second one is what it looked like when I left for home today. Starting to look like a car again :)

Btw., does anybody know why the B has two aerial cables?!?
 

Attachments

  • - CIMG3545.JPG
    - CIMG3545.JPG
    175.4 KB · Views: 123
  • - CIMG6666.JPG
    - CIMG6666.JPG
    198.2 KB · Views: 108
Good luck, doc - you're gonna need it. Think I'll pass on the £50, though ;) . If I'll never have to do it again, it'll be too soon.

Soon done with mine; just a few screws left on the centre console, reattaching gear knob, bleeding the coolant, reattaching the battery, watching airbags go off, and car not starting. Fingers crossed :yum:
 
Luckily I didn't set up a cam; connected the battery and everything worked :woot: No warning lights blinking, all electric components working, and last but not least the heater's working. :woot: :woot: :woot: :woot:
 
Back
Top