

You are using an out of date browser. It may not display this or other websites correctly.
You should upgrade or use an alternative browser.
You should upgrade or use an alternative browser.
General Introduction and my new 1969 500L
- Thread starter Katie B
- Start date
Currently reading:
General Introduction and my new 1969 500L
Hi all,
It's been a while since we last posted but we've been busy...
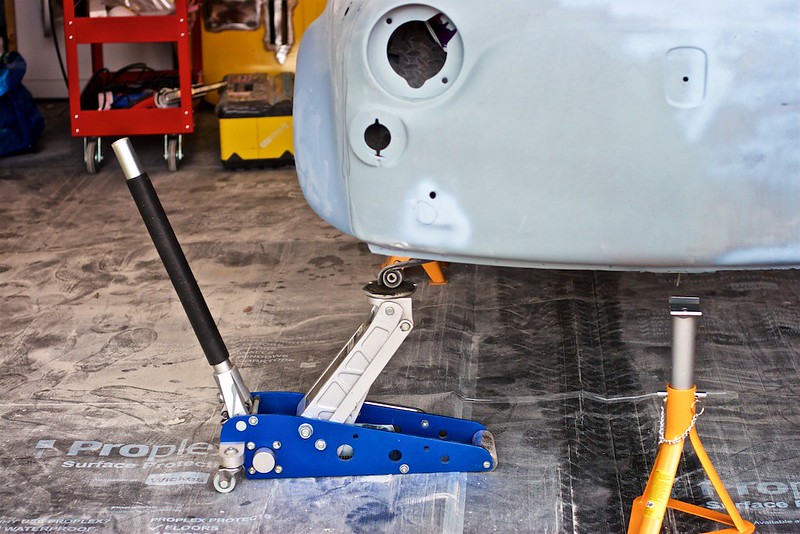
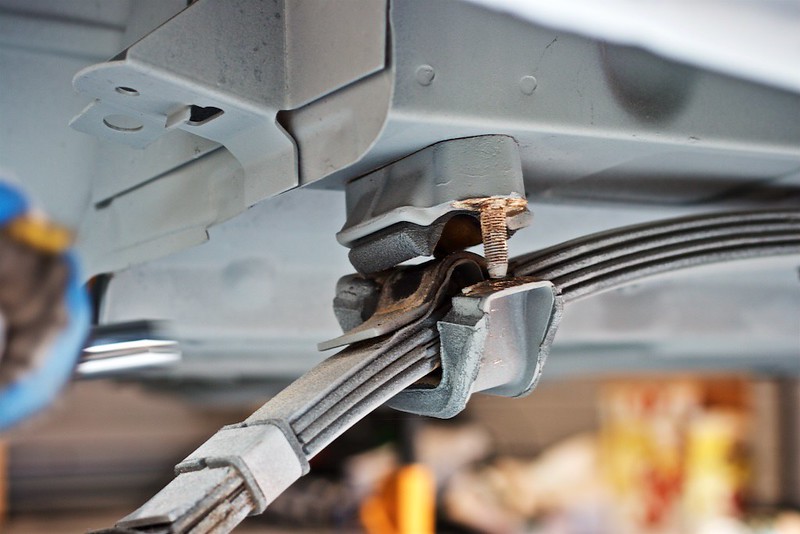
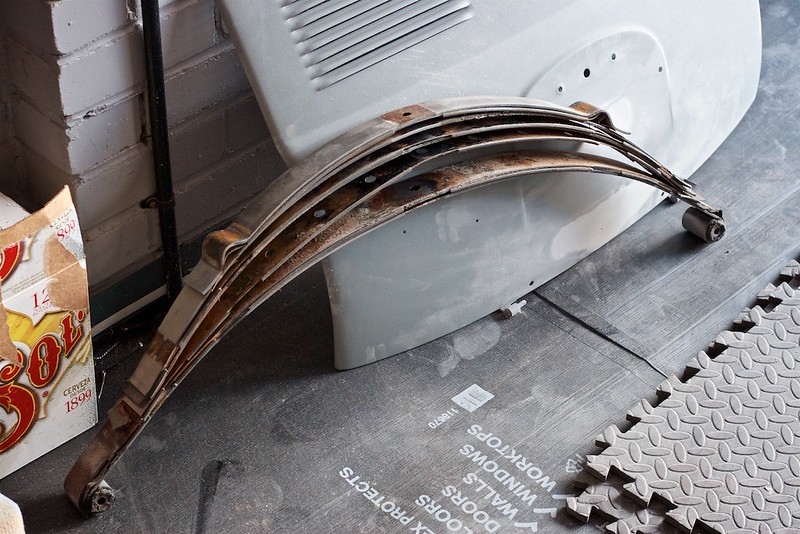
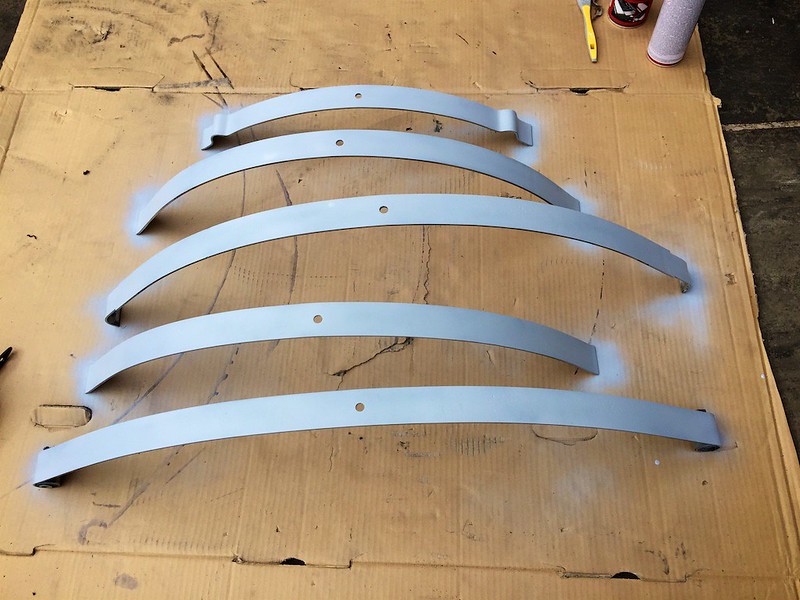
The leaf spring came off fairly easily (thanks to all for the advice!) once the front end was loaded up with some gravel and compost

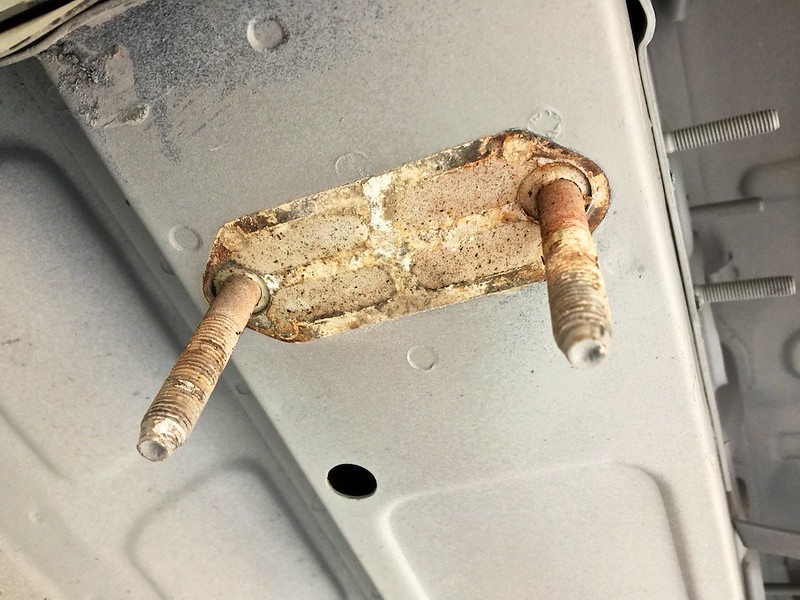
Mounts cleaned up and given a coat of etch primer
Good job they came off as they were hiding a fair amount of rust and gunk
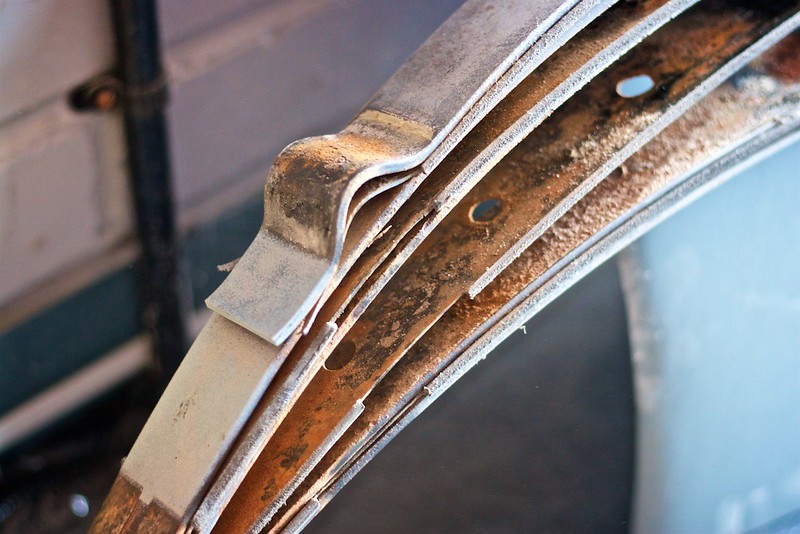
Rust removed prior to treating the pitted areas
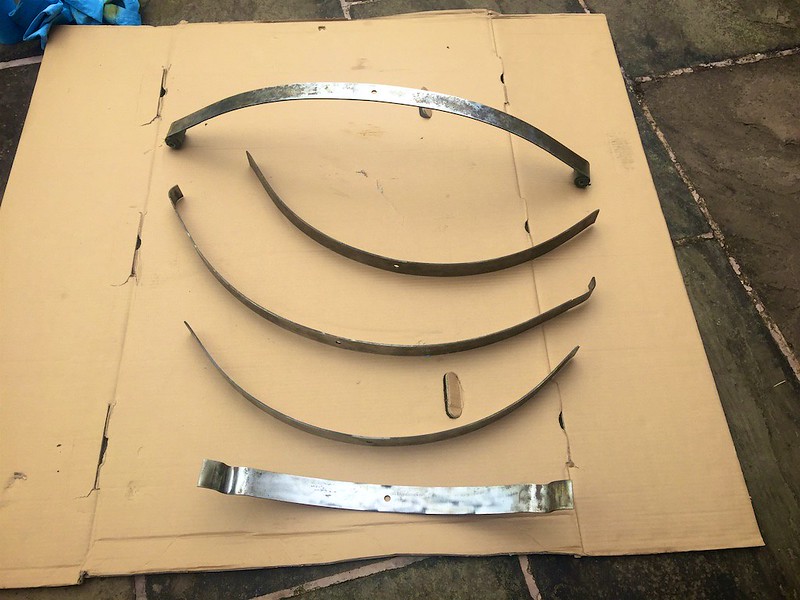
Primed in acid etch
Finished in black ready for reassembly
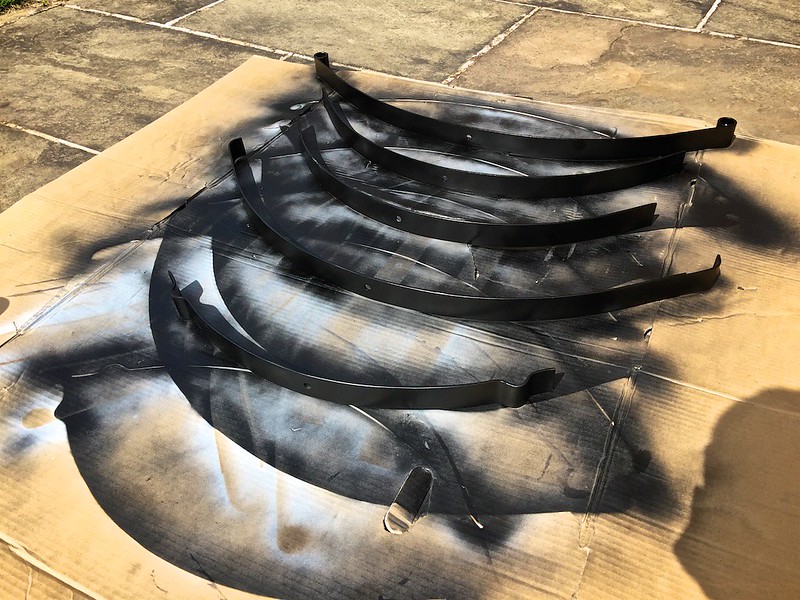
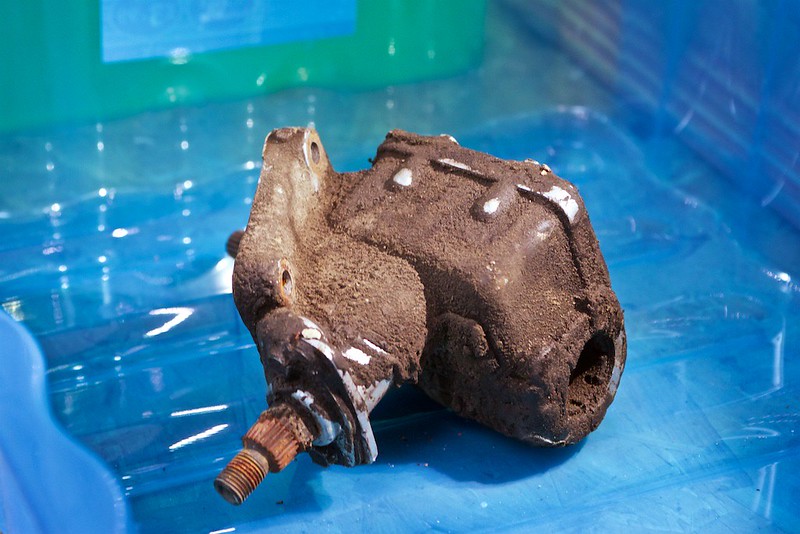
Next up: steering box
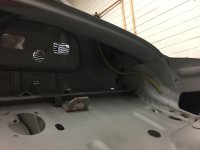
This is how it came off the car. Lots of dirt and grease to remove. The loose dirt was removed with a wire brush before being soaked in degreaser. Soapy water was then used to remove the remaining grease before a further wipe down with degreaser.
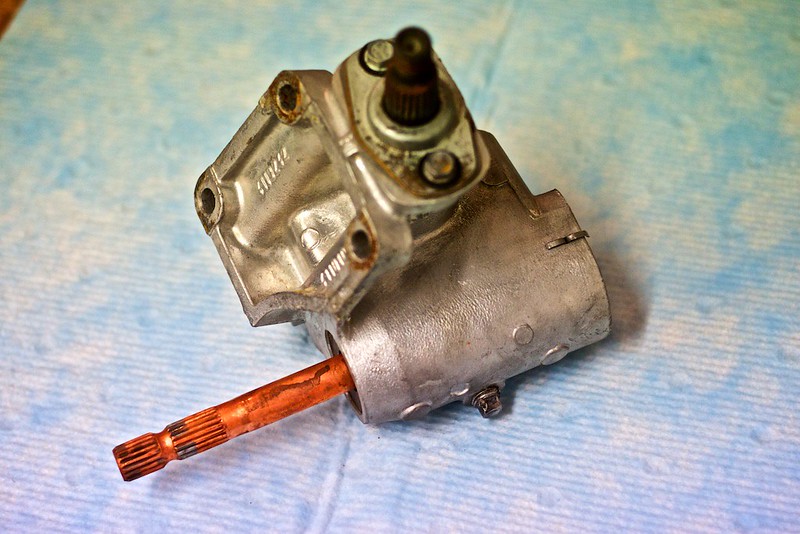
It was then disassembled, masked off and given a coat of paint. Inside it was nice and clean, a bit of sludge but no metallic particles.
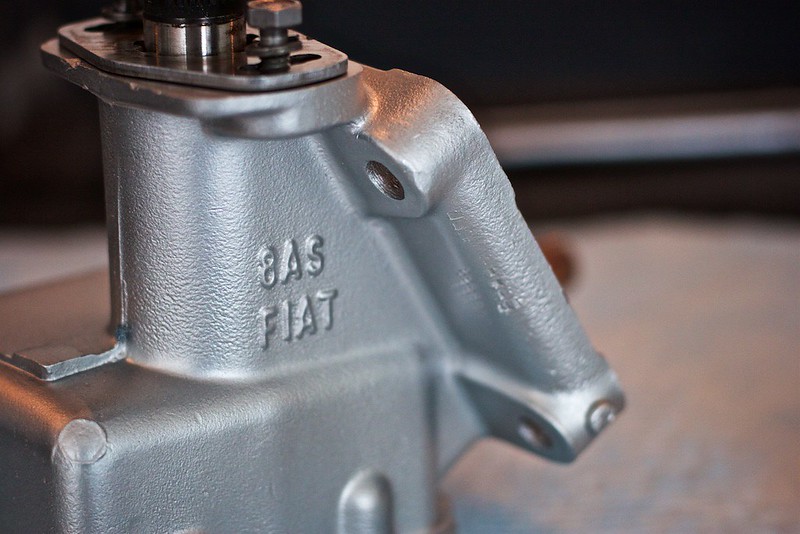
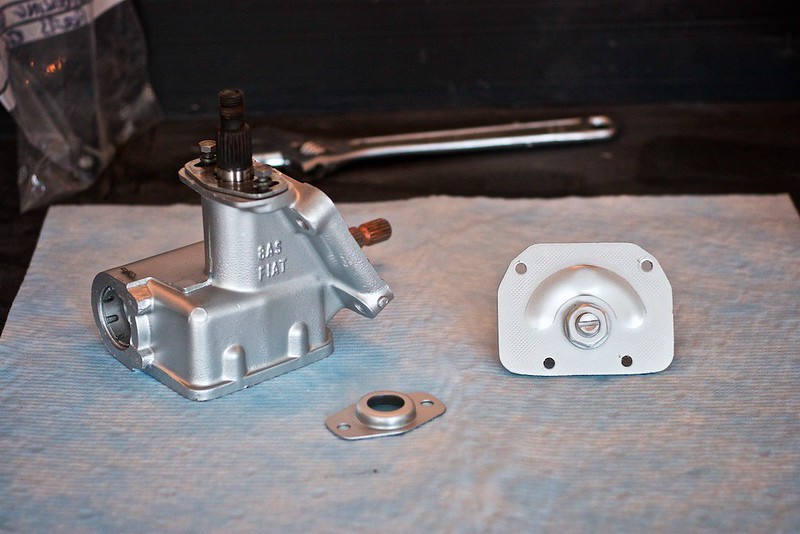
All ready for new gaskets and seals and reassembly. It will be filled with the recommended SAE90 EP and high temp bearing grease mix that is mentioned in various posts.
Heating system next...
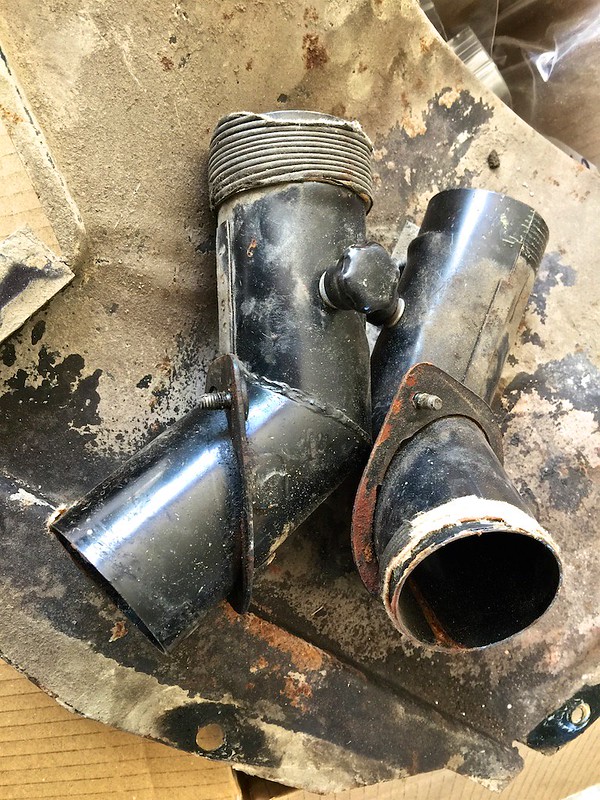
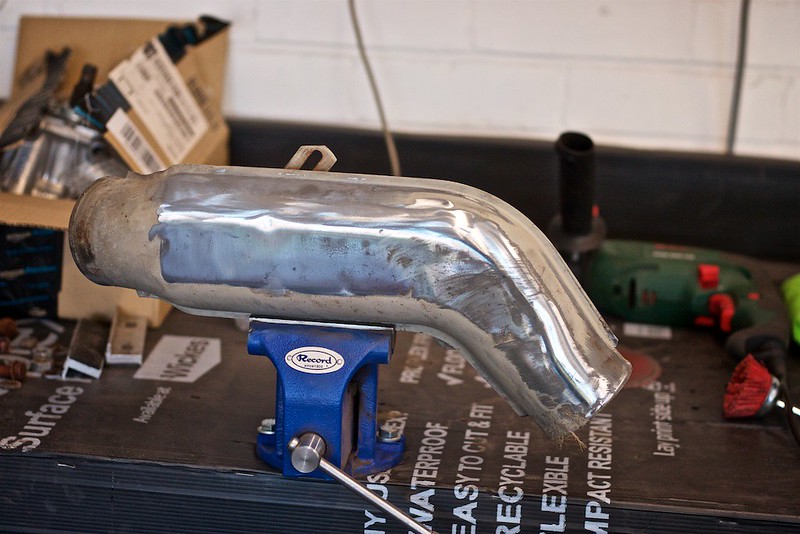
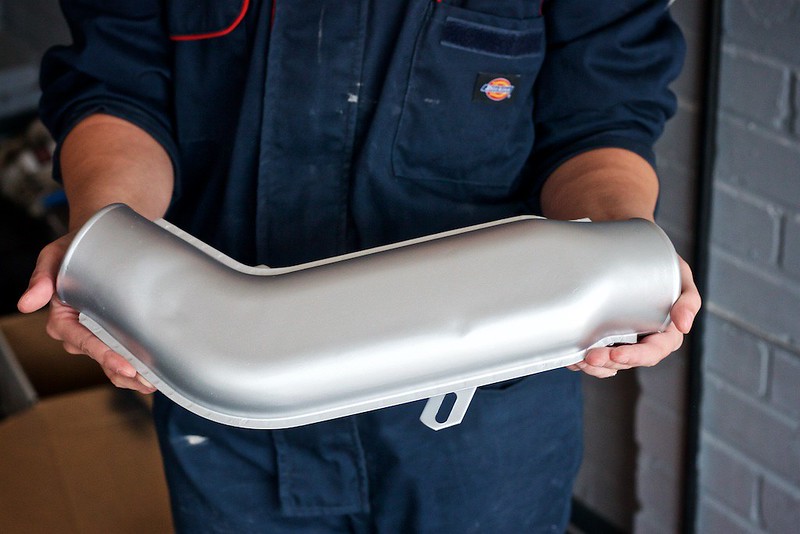
There was a lot of dirt attached to the heat transfer tube which was removed with a wire brush before a wire wheel drill attachment did the rest. There was some rust hiding under the paint so all the paint was removed completely before a coat of etch and then high temp silver paint.
Same for the air vents, although these had a week long vinegar bath first.
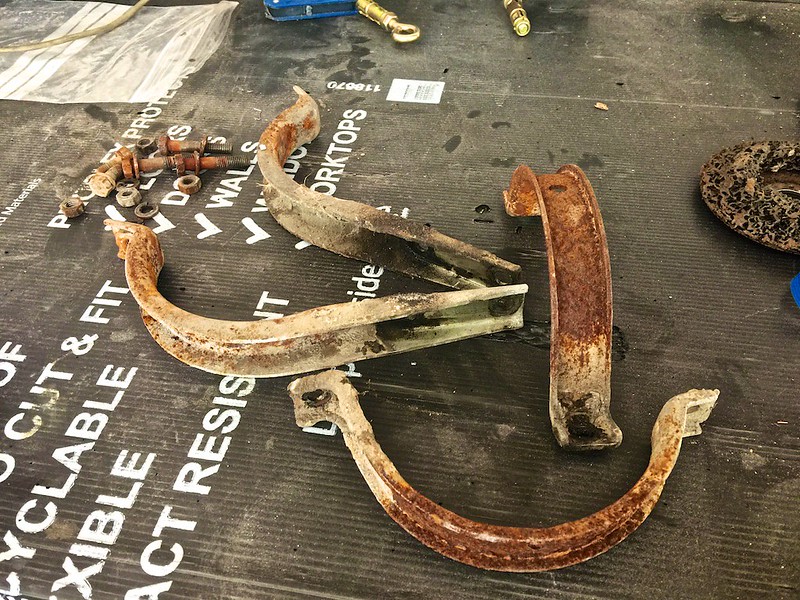
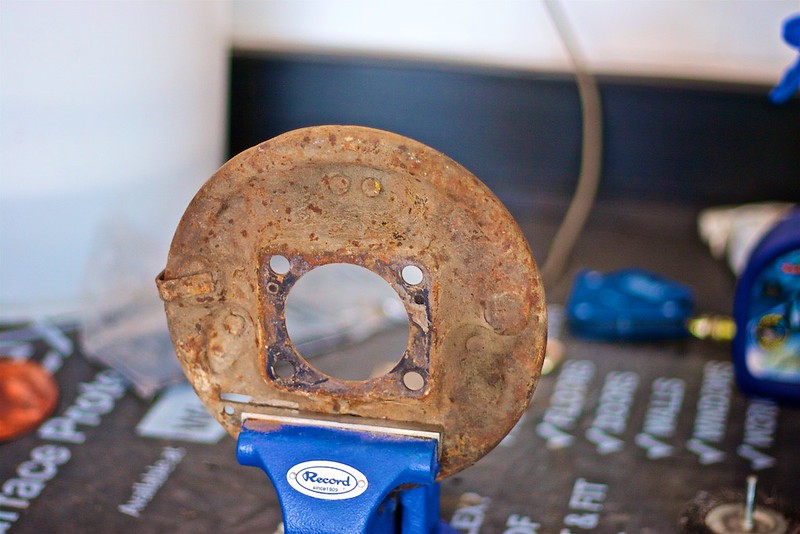
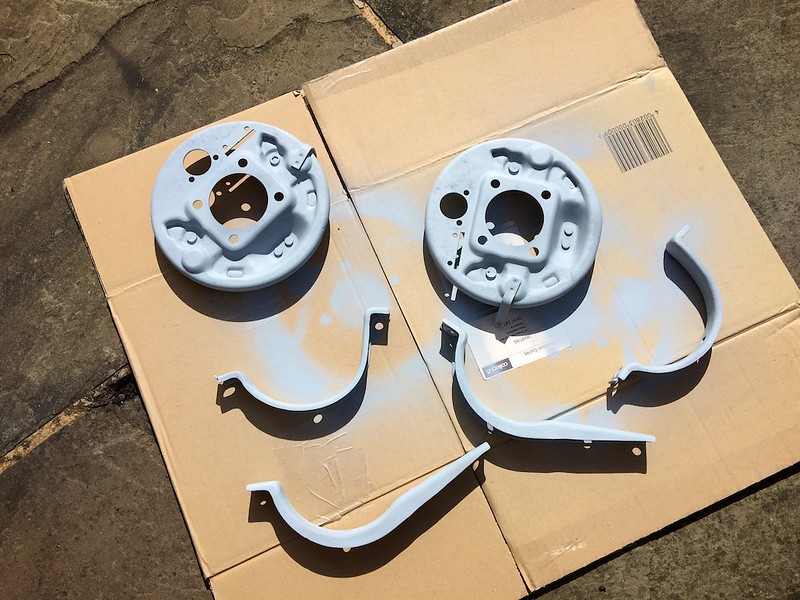
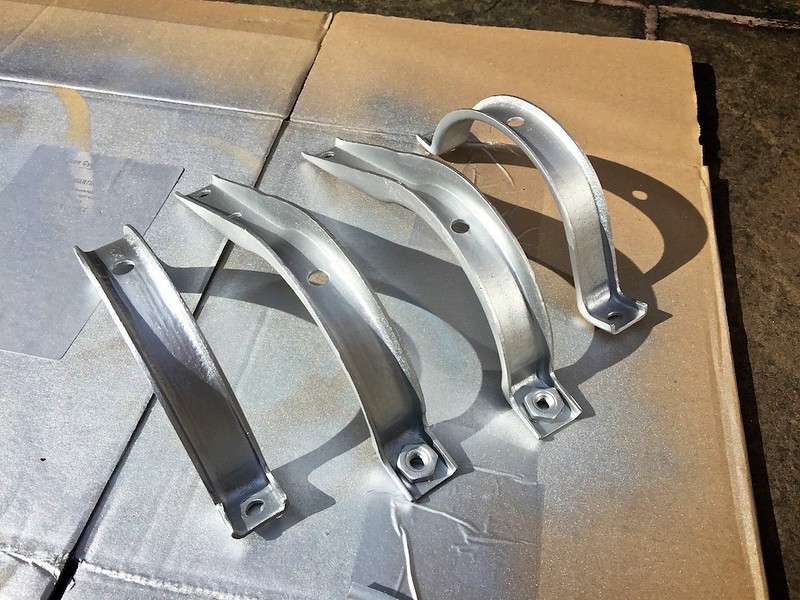
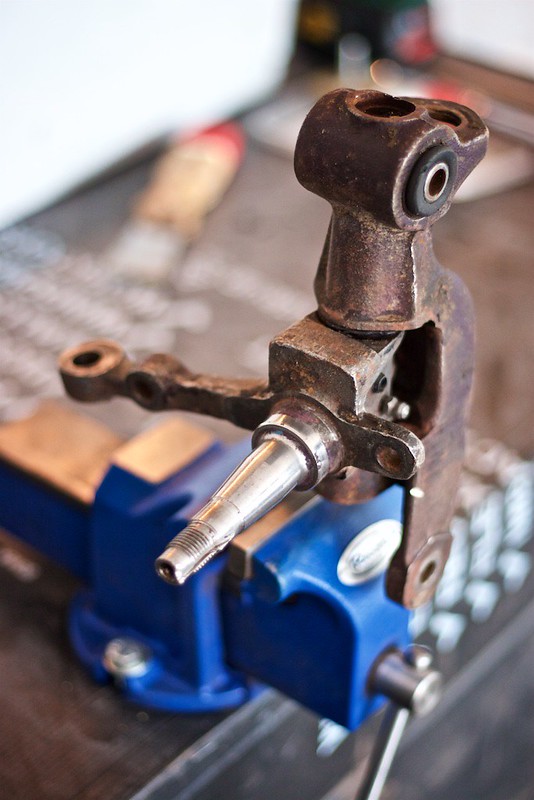
A few other parts have also been refurbished including the exhaust brackets, brake back plates and king pins. The king pins have had a cosmetic refurb and will be sent away for a mechanical rebuild.
While Ric has mainly been busy refurbing parts I've been working away at the body and have done lots of sanding. I'm starting to get the hang of it I think.
In other news...my new (refurbished) engine is on the way!
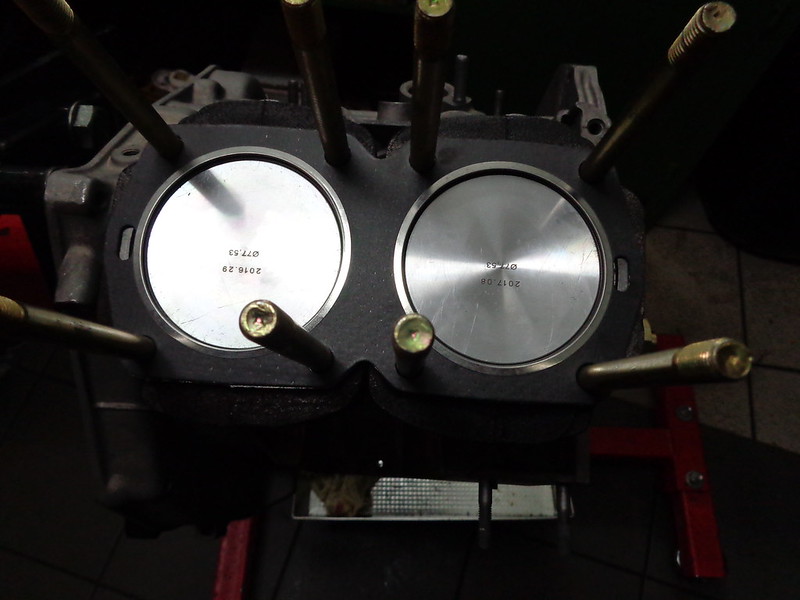
Very excited!
It's been a while since we last posted but we've been busy...
The leaf spring came off fairly easily (thanks to all for the advice!) once the front end was loaded up with some gravel and compost
Mounts cleaned up and given a coat of etch primer
Good job they came off as they were hiding a fair amount of rust and gunk
Rust removed prior to treating the pitted areas
Primed in acid etch
Finished in black ready for reassembly
Next up: steering box
This is how it came off the car. Lots of dirt and grease to remove. The loose dirt was removed with a wire brush before being soaked in degreaser. Soapy water was then used to remove the remaining grease before a further wipe down with degreaser.
It was then disassembled, masked off and given a coat of paint. Inside it was nice and clean, a bit of sludge but no metallic particles.
All ready for new gaskets and seals and reassembly. It will be filled with the recommended SAE90 EP and high temp bearing grease mix that is mentioned in various posts.
Heating system next...
There was a lot of dirt attached to the heat transfer tube which was removed with a wire brush before a wire wheel drill attachment did the rest. There was some rust hiding under the paint so all the paint was removed completely before a coat of etch and then high temp silver paint.
Same for the air vents, although these had a week long vinegar bath first.
A few other parts have also been refurbished including the exhaust brackets, brake back plates and king pins. The king pins have had a cosmetic refurb and will be sent away for a mechanical rebuild.
While Ric has mainly been busy refurbing parts I've been working away at the body and have done lots of sanding. I'm starting to get the hang of it I think.
In other news...my new (refurbished) engine is on the way!
Very excited!
Last edited:
This is so beautiful to see a classic being nurtured back to such incredible condition.
Looks just amazing, I love the detail and effort going into restoring even the smallest stud. Would love to do the same to mine one day!
Looks just amazing, I love the detail and effort going into restoring even the smallest stud. Would love to do the same to mine one day!
thepuddlejumper
Member
Stunning work, can't wait to see it finished.
Ralph
Ralph
Hi Katie,
Great work as usual!
I bet you're glad you removed the front spring now!
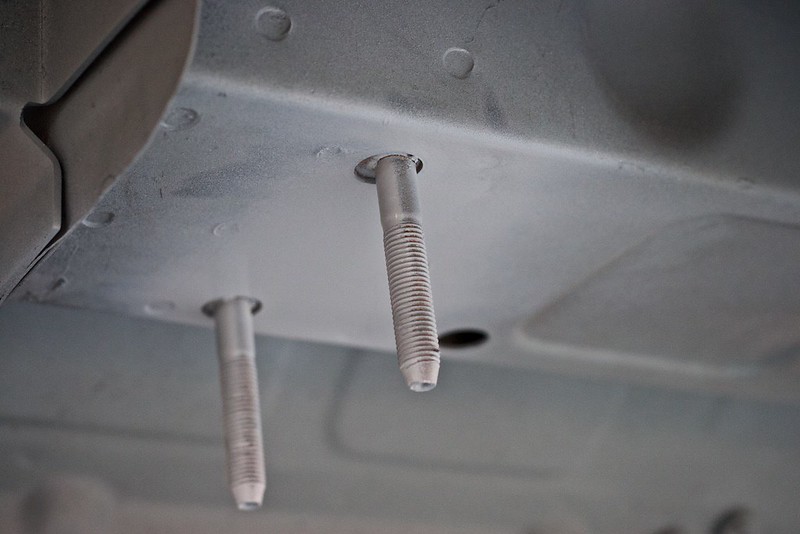
Are you replacing the spring metalastic bushes at each end?
The old ones are in situ when the spring leaves were in primer but seem? to be absent when shown in black.
Beautiful and thorough job on the engine.
Have you any plans to apply some kind of finish to the little exhaust manifolds?
These are one area that imho let down a great engine rebuild. Some people have a ceramic coating applied.
In the past I used a type of heat resistant paint which actually lasted. (unfortunately can't recall the brand, probably obsolete/banned by now!). Maybe you could zinc plate them? but I'm not sure about safety re zinc plating and a surface that will become very hot.
You're making great progress on the bodywork. Don't forget that 'guide-coats' are your friend and trial fit all fittings such as rear lamps as a final check before final painting.
This is going to be one stupendous 500!!! :worship:
Regards,
Al.
Great work as usual!
I bet you're glad you removed the front spring now!
Are you replacing the spring metalastic bushes at each end?
The old ones are in situ when the spring leaves were in primer but seem? to be absent when shown in black.
Beautiful and thorough job on the engine.
Have you any plans to apply some kind of finish to the little exhaust manifolds?
These are one area that imho let down a great engine rebuild. Some people have a ceramic coating applied.
In the past I used a type of heat resistant paint which actually lasted. (unfortunately can't recall the brand, probably obsolete/banned by now!). Maybe you could zinc plate them? but I'm not sure about safety re zinc plating and a surface that will become very hot.
You're making great progress on the bodywork. Don't forget that 'guide-coats' are your friend and trial fit all fittings such as rear lamps as a final check before final painting.
This is going to be one stupendous 500!!! :worship:
Regards,
Al.
Hi Katie,
Great work as usual!
I bet you're glad you removed the front spring now!
Are you replacing the spring metalastic bushes at each end?
The old ones are in situ when the spring leaves were in primer but seem? to be absent when shown in black.
Beautiful and thorough job on the engine.
Have you any plans to apply some kind of finish to the little exhaust manifolds?
These are one area that imho let down a great engine rebuild. Some people have a ceramic coating applied.
In the past I used a type of heat resistant paint which actually lasted. (unfortunately can't recall the brand, probably obsolete/banned by now!). Maybe you could zinc plate them? but I'm not sure about safety re zinc plating and a surface that will become very hot.
You're making great progress on the bodywork. Don't forget that 'guide-coats' are your friend and trial fit all fittings such as rear lamps as a final check before final painting.
This is going to be one stupendous 500!!! :worship:
Regards,
Al.
Hi Al,
Yes very glad we removed the spring. The bushes were present in the pic with the primer as we had to source a long enough threaded rod to press them out with.
The engine is currently on its way to me. I haven't seen it yet but the manifolds and any other bracketry etc that isn't up to scratch will be removed and coated prior to installation. The manifold will prob get a coat of the high temp silver that we have used in other areas, it gives a great finish and is very durable.
Good work.
You might want to give worm gear steering box oil a try, rather than ep90 in the steering box.
http://www.opieoils.co.uk/p-69302-millers-oils-vintage-worm-steering-box-oil.aspx
Cheers, Steve
You might want to give worm gear steering box oil a try, rather than ep90 in the steering box.
http://www.opieoils.co.uk/p-69302-millers-oils-vintage-worm-steering-box-oil.aspx
Cheers, Steve
Great work you two!
I'm glad to see your garage floor has finally got some dust and dirt on it.
Made me feel like I was looking at a formula one workshop rather than a restoration garage.
Everything is looking really good. I'm impressed with your keen eye for detail, especially all your re-plating work. Hopefully it lasts better than some of the new parts you can buy now.
I really must have a go at that for my D.
Keep going, the final stages of the bodywork can be quite tedious, but really worth making sure its right before having that shiny expensive paint applied.
Will you be spraying the car in your garage? or are you getting someone to do it for you?
Although I have refinished many a vehicle in my time and thoroughly enjoyed it, I opted to finish the filler work myself, etch prime it and then pass it over to someone with a spray booth and someone who sprays everyday. I didn't want to run the risk of cocking it up!
Great work you two!
I'm glad to see your garage floor has finally got some dust and dirt on it.
Made me feel like I was looking at a formula one workshop rather than a restoration garage.
Everything is looking really good. I'm impressed with your keen eye for detail, especially all your re-plating work. Hopefully it lasts better than some of the new parts you can buy now.
I really must have a go at that for my D.
Keep going, the final stages of the bodywork can be quite tedious, but really worth making sure its right before having that shiny expensive paint applied.
Will you be spraying the car in your garage? or are you getting someone to do it for you?
Although I have refinished many a vehicle in my time and thoroughly enjoyed it, I opted to finish the filler work myself, etch prime it and then pass it over to someone with a spray booth and someone who sprays everyday. I didn't want to run the risk of cocking it up!
Hi Sean,
Thanks
I can assure you the garage looks like that every weekend but we try and keep on top of it and clear up afterwards so that it can still be used for other things.
Ric will be spraying the car in our garage when the bodywork is finished. I think we'll wait until spring next year now though as by the time the bodywork is finished it will likely to too cold and humid for spraying.
Cheers,
Katie
Hi everyone!
The weather finally warmed up enough after what feels like an eternity at below ten degrees to get in the garage and continue the work on my little fiat. :slayer:
1st of all we thought it would be good to demonstrate the way I am de-rusting and refurbishing the steel fasteners/brackets etc.
The first step is to the brush the loose dirt off the item to be cleaned and dunk it in some vinegar.
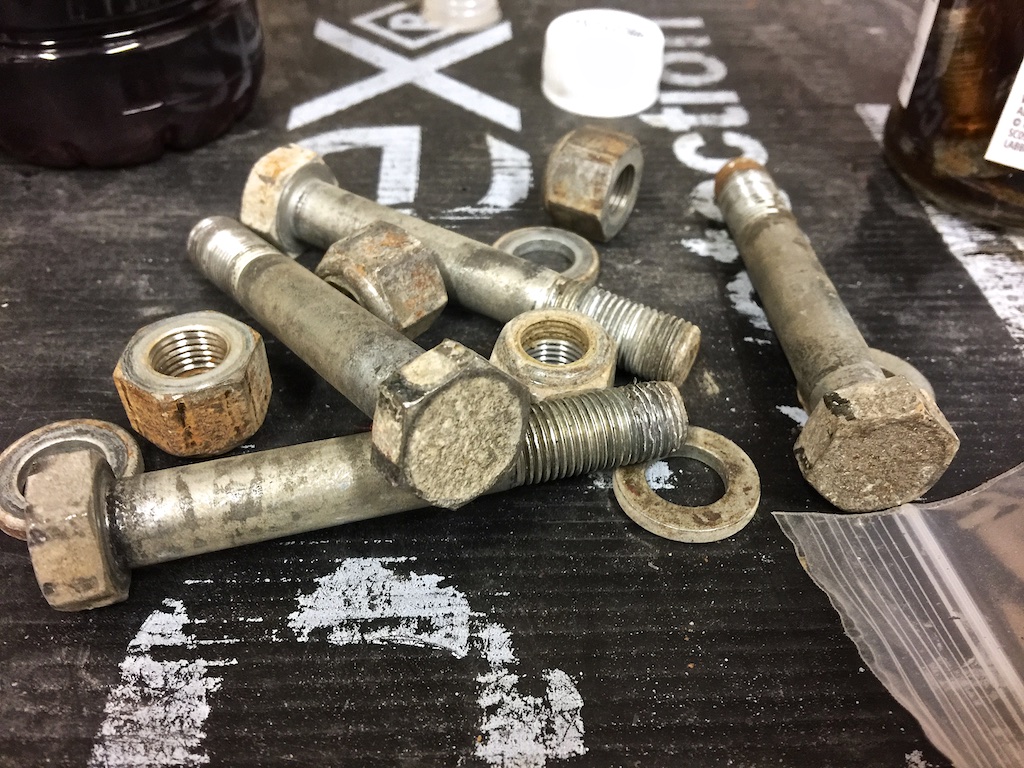
It’s important to leave the lid off or ajar for the 1st day or two, as there are some bubbles produced as you can see.
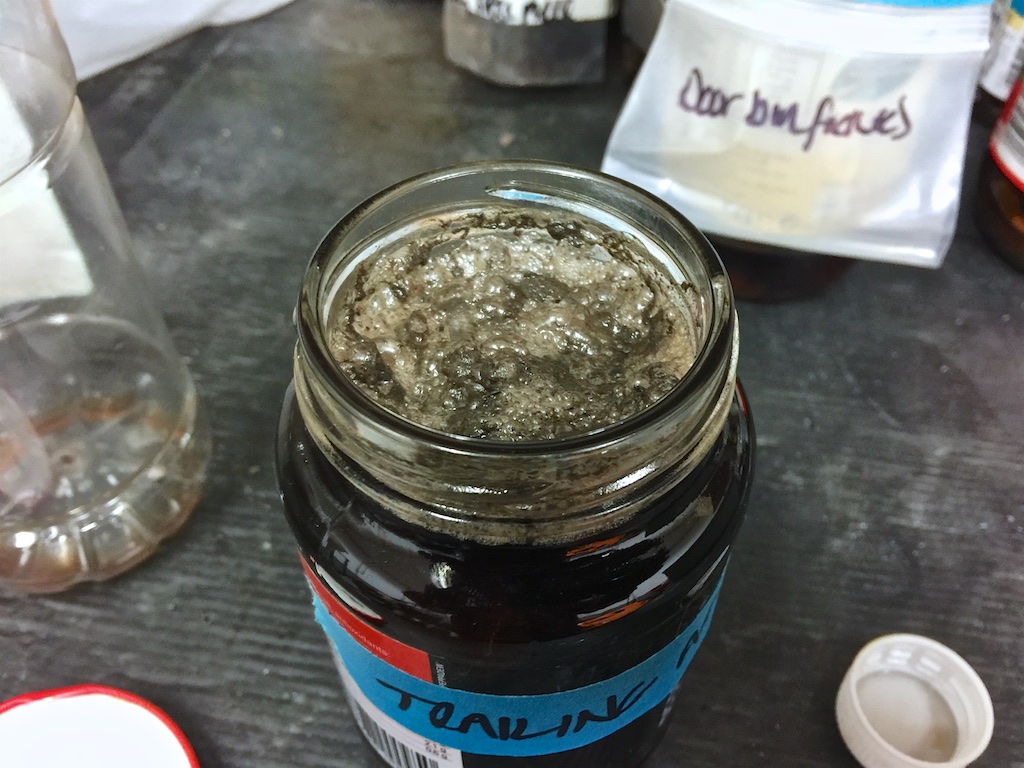
The length of the pickling process will vary depending on the level of corrosion. These ones took 4 days.
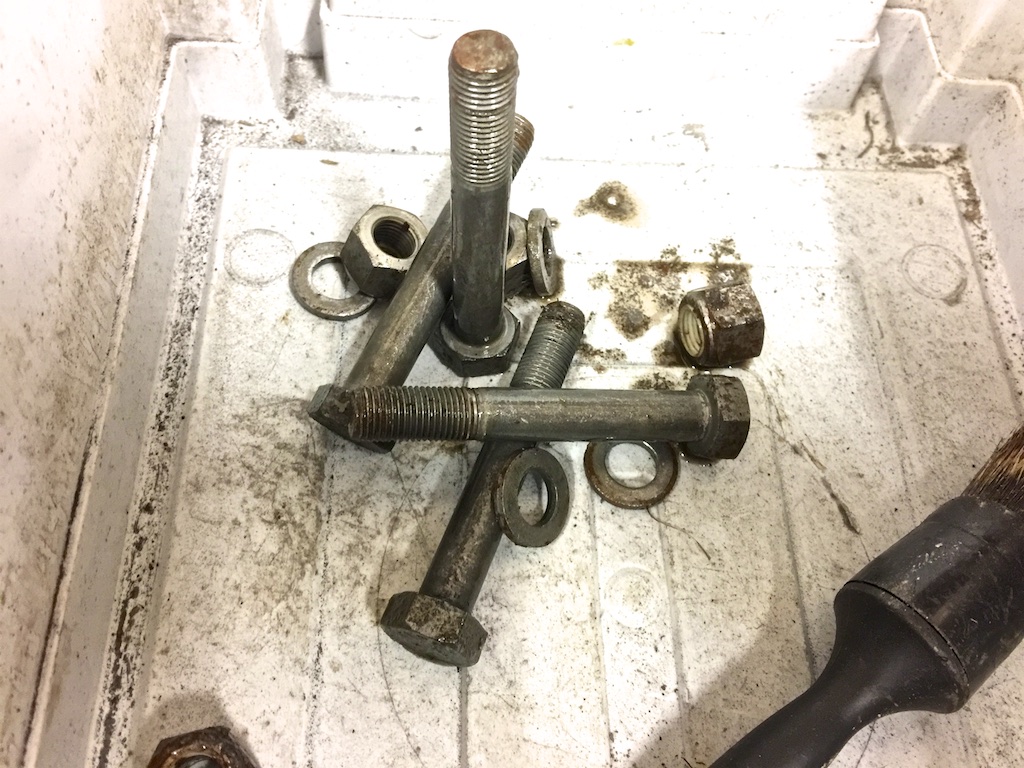
Then using some hot soapy water we set to scrubbing and rubbing with these to remove the dull grey finish that has appeared. This is removed easily.

Once clean thoroughly dry. We then bag them up in a fresh gripseal bag and add just a little light oil to keep the surface rust away until then can be plated.
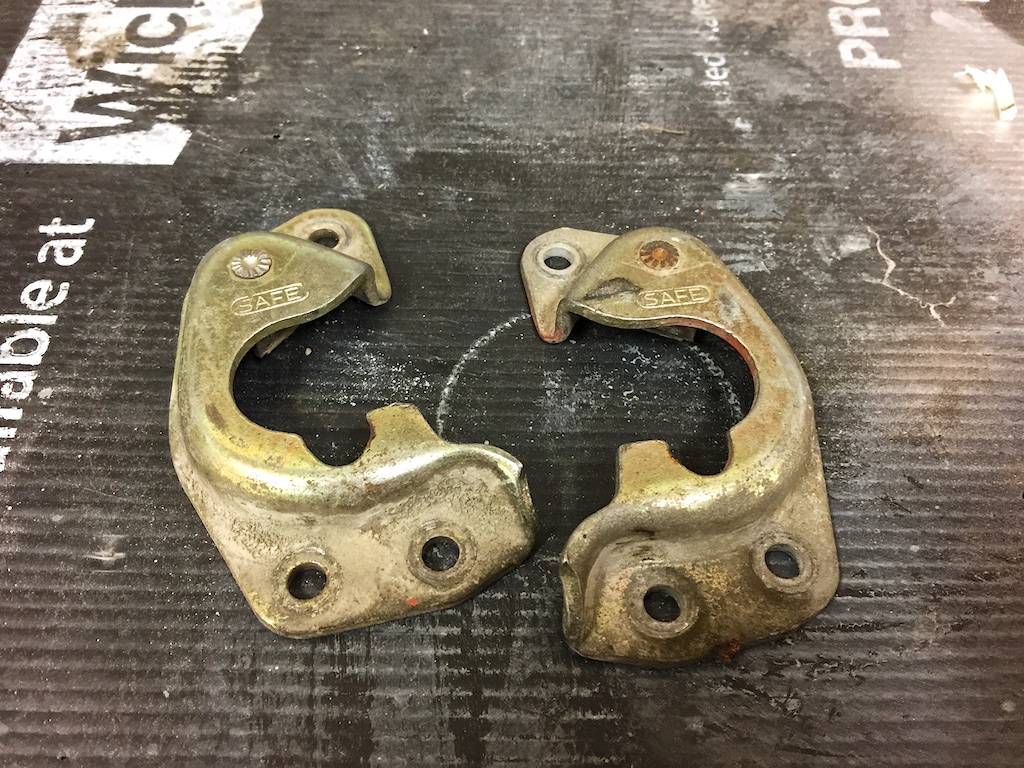
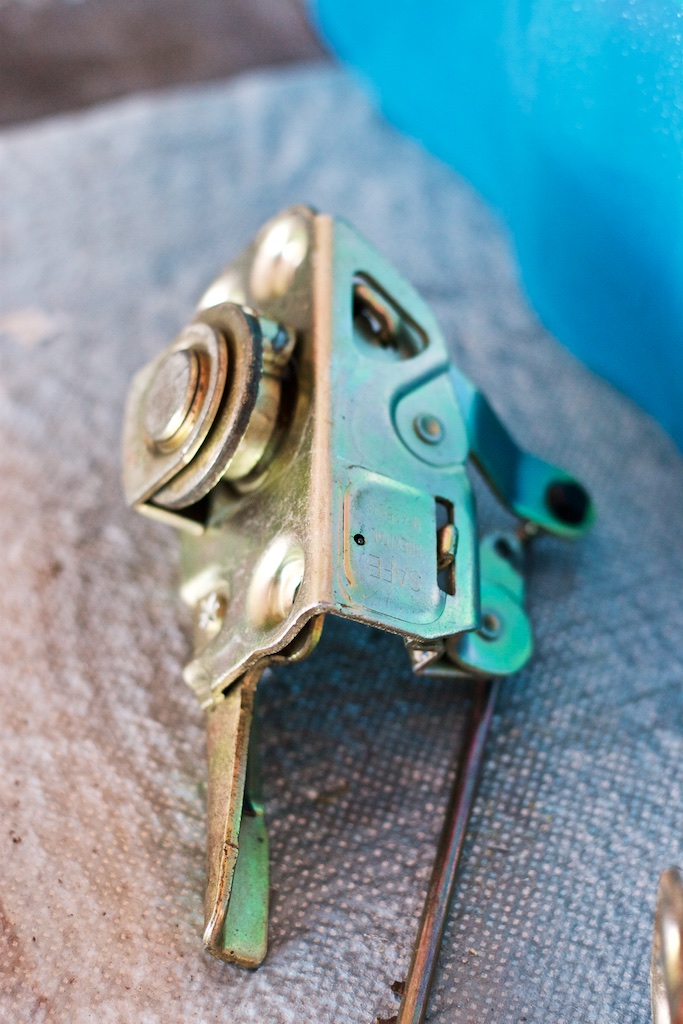
For example, this weekend we’ve done the door striker/catches:
From this:
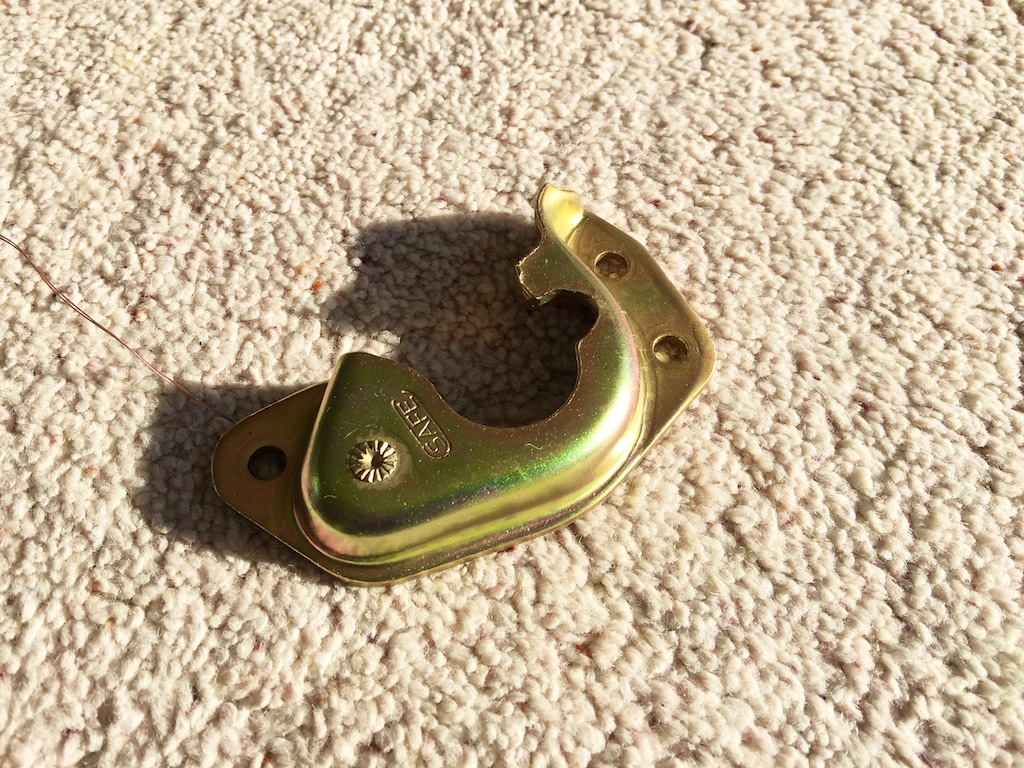
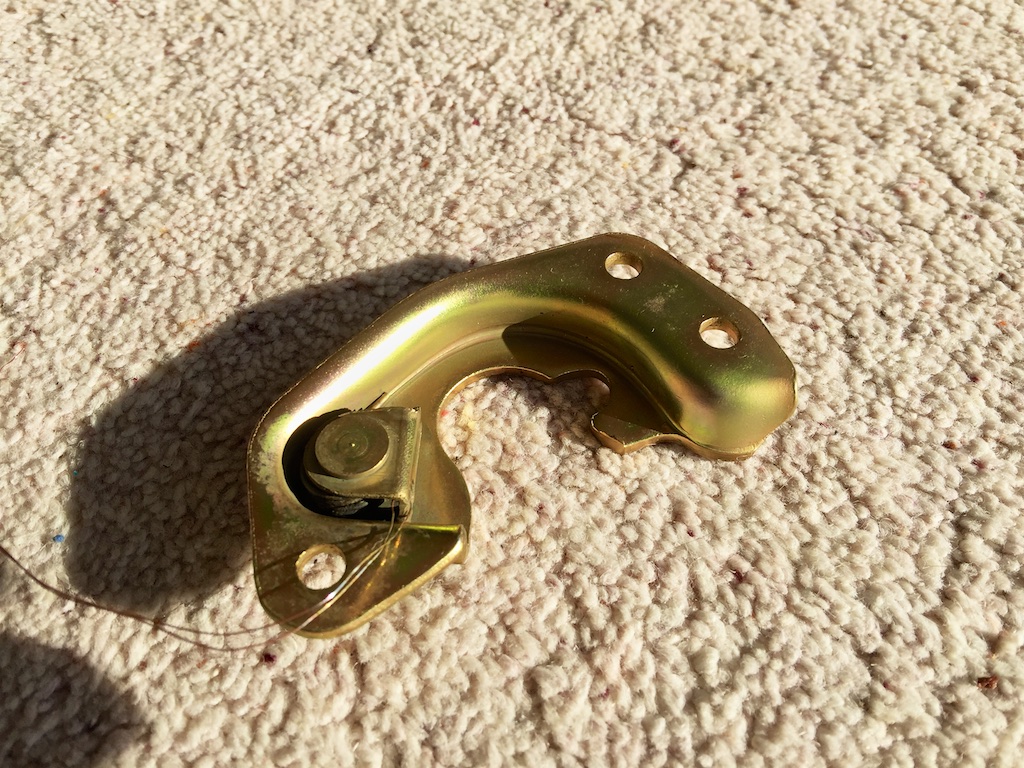
To this:
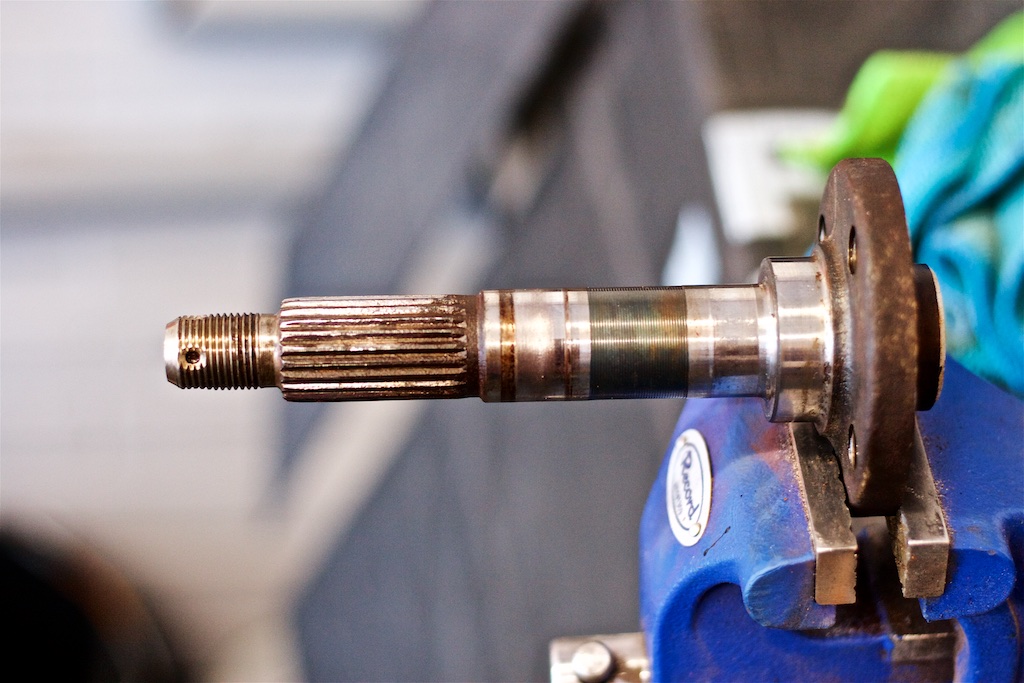
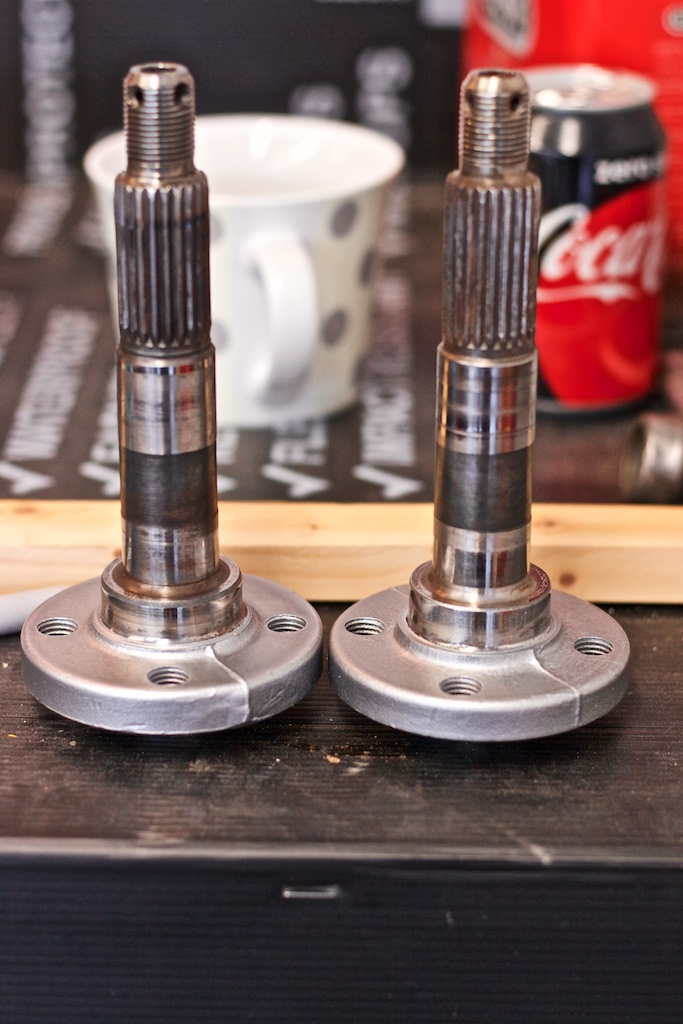
We also cleaned up the hub driveshafts, these were covered in horrible old waxy and dirty grease
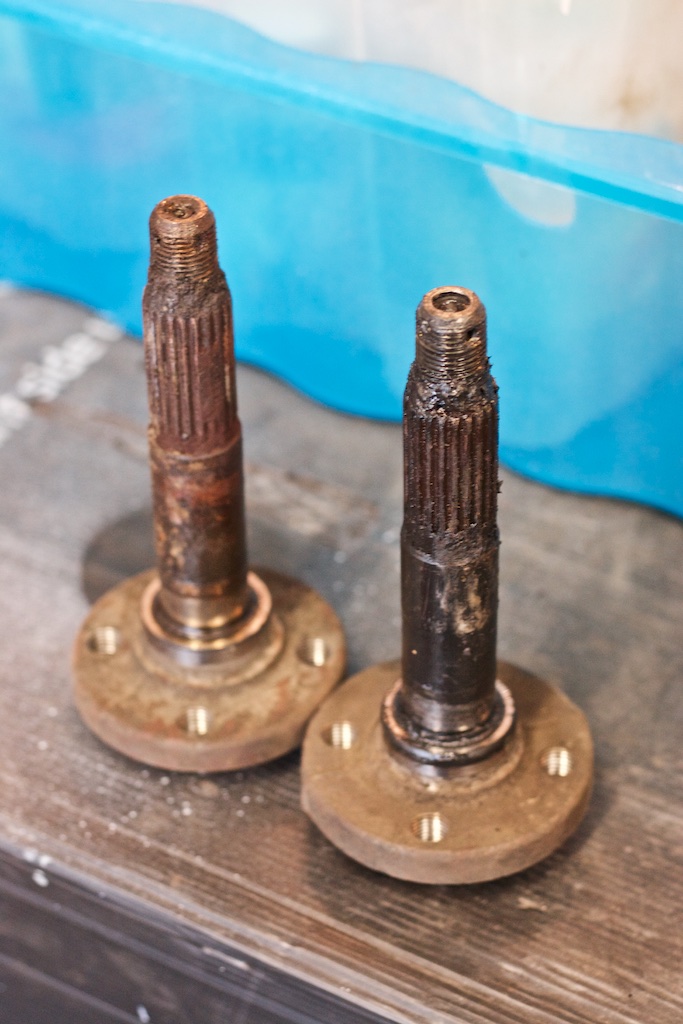
After a lot of scrubbing and cleaning, we went over these with a poly wheel to gently remove the rust.
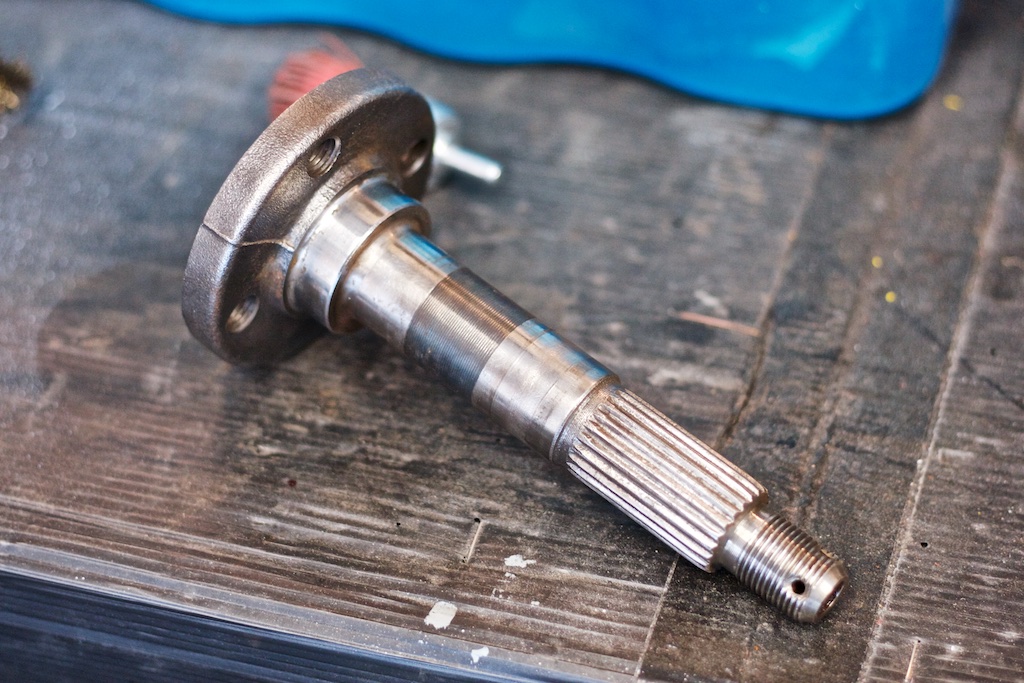
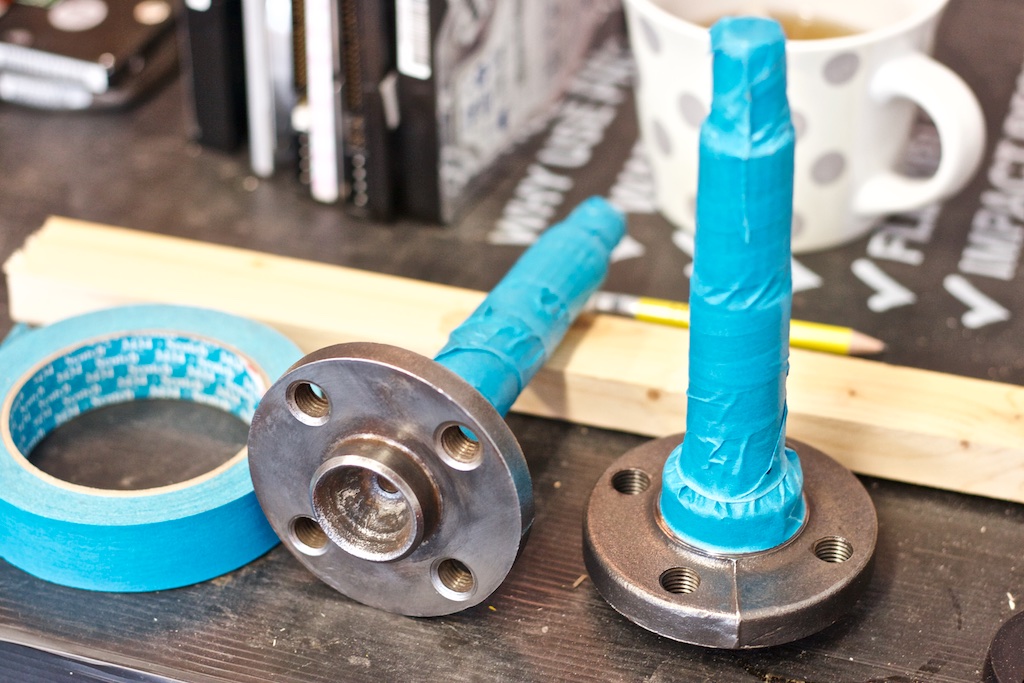
An old scrap hub made a good base from spraying and also masked the hub flange.
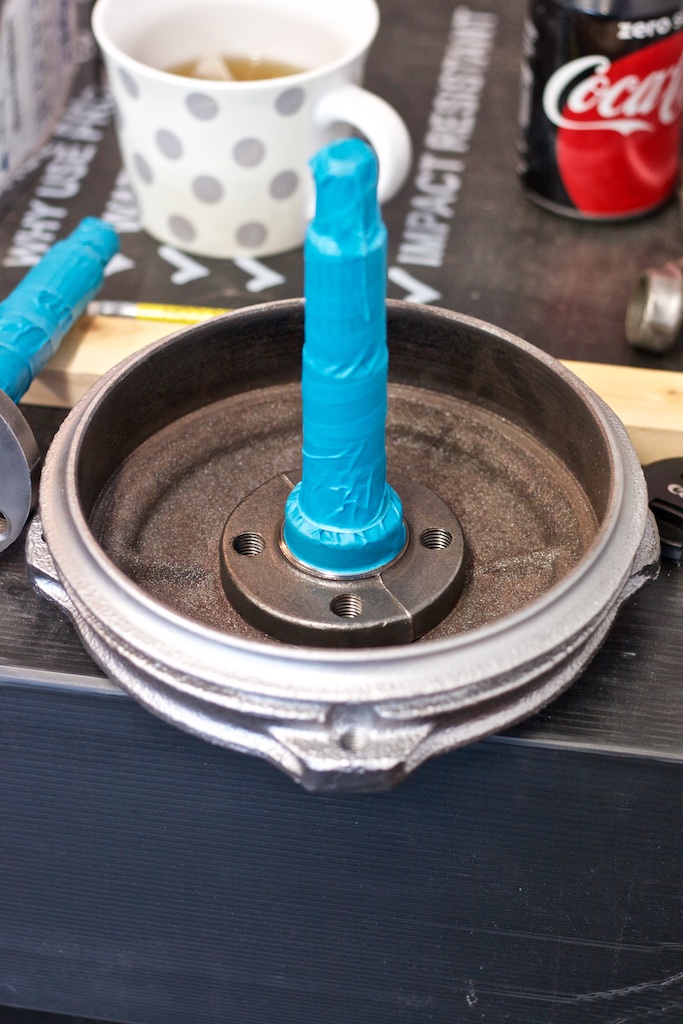
All painted up and finished.
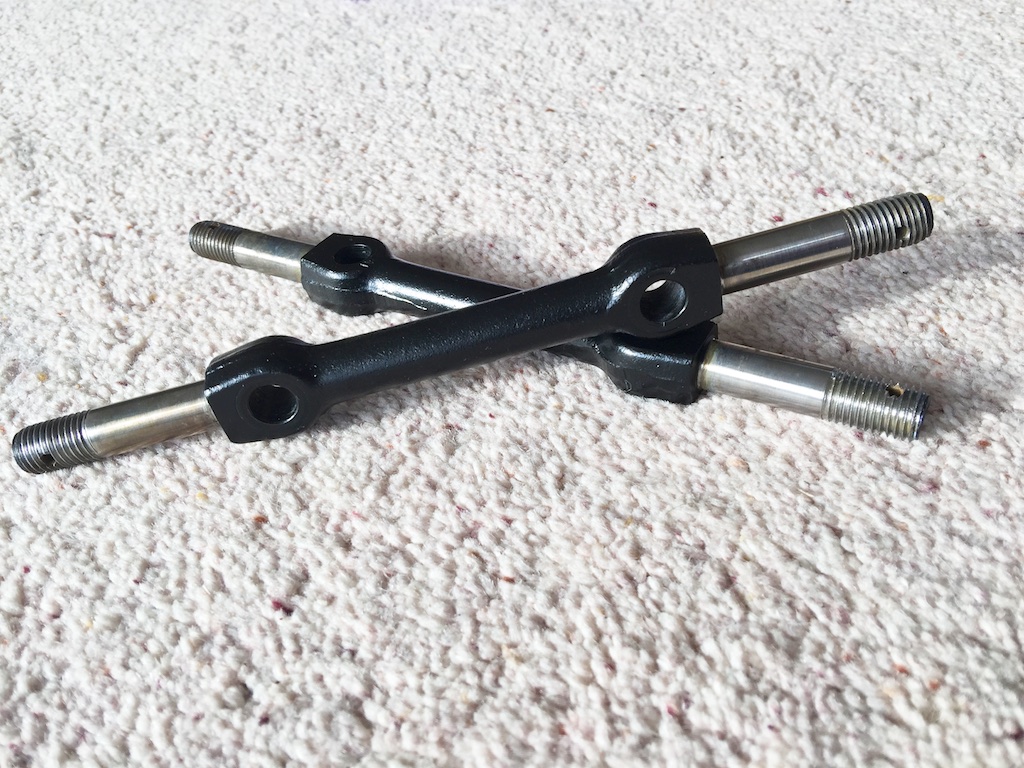
We also set about refurbishing the rod that connects the front upper a-arms to the body. They were pretty grotty.
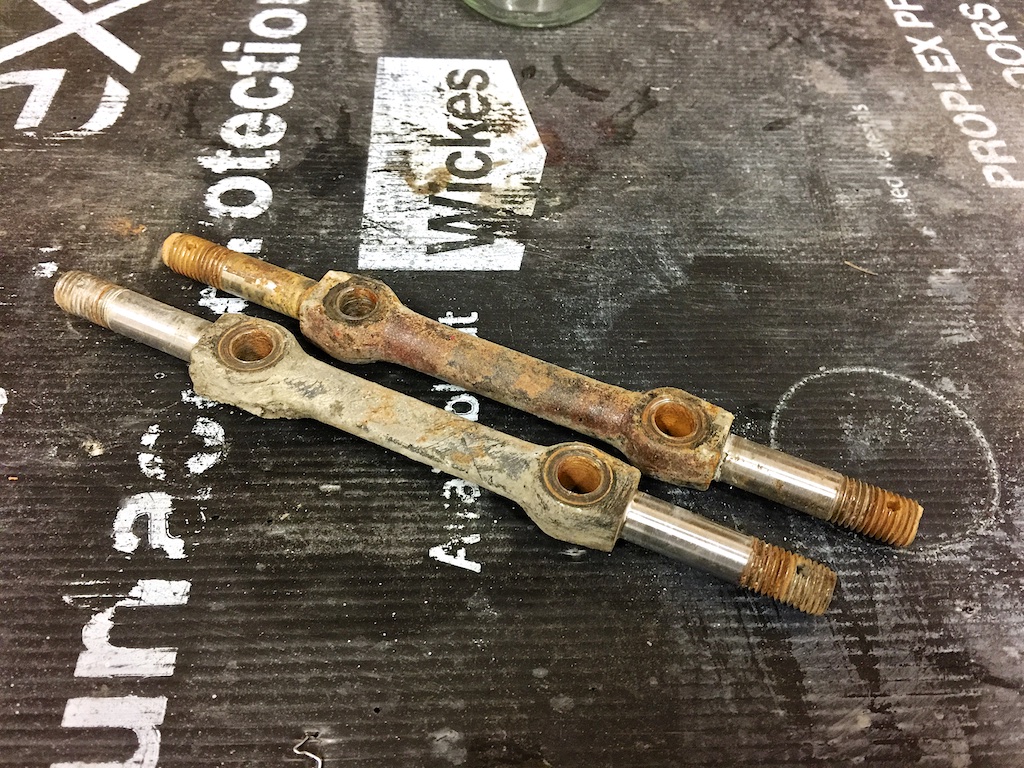
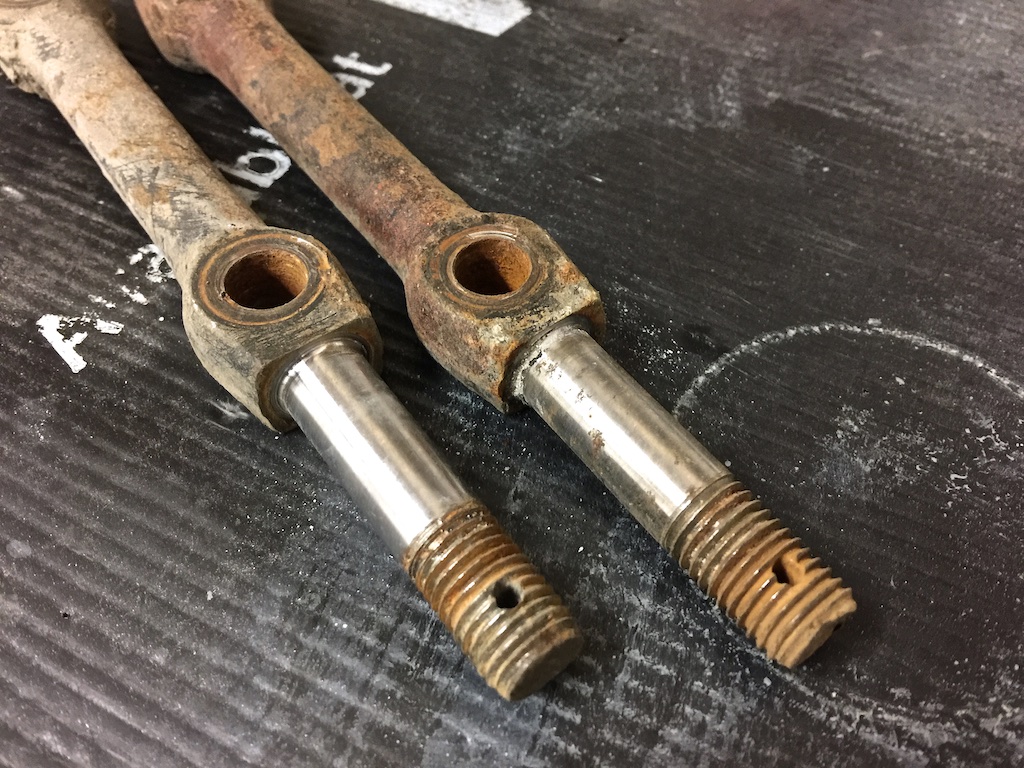
Once the surface rust has been ground off.

And painted.
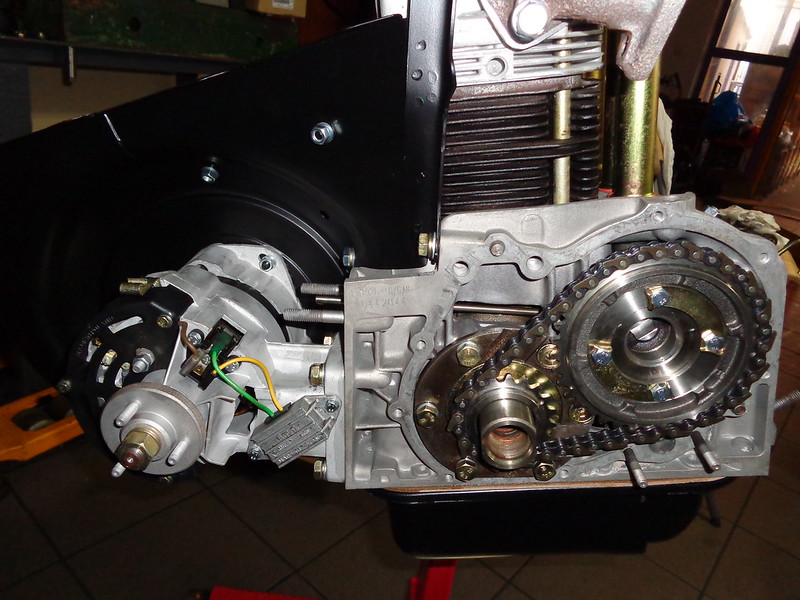
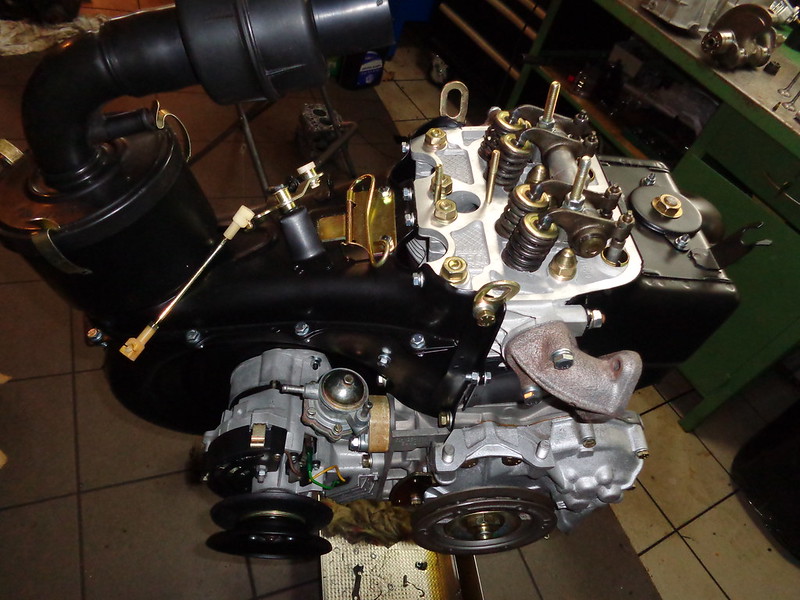
We also decided to remove and paint the exhaust manifolds from my new engine, they were the only rusty parts on an otherwise great looking object!
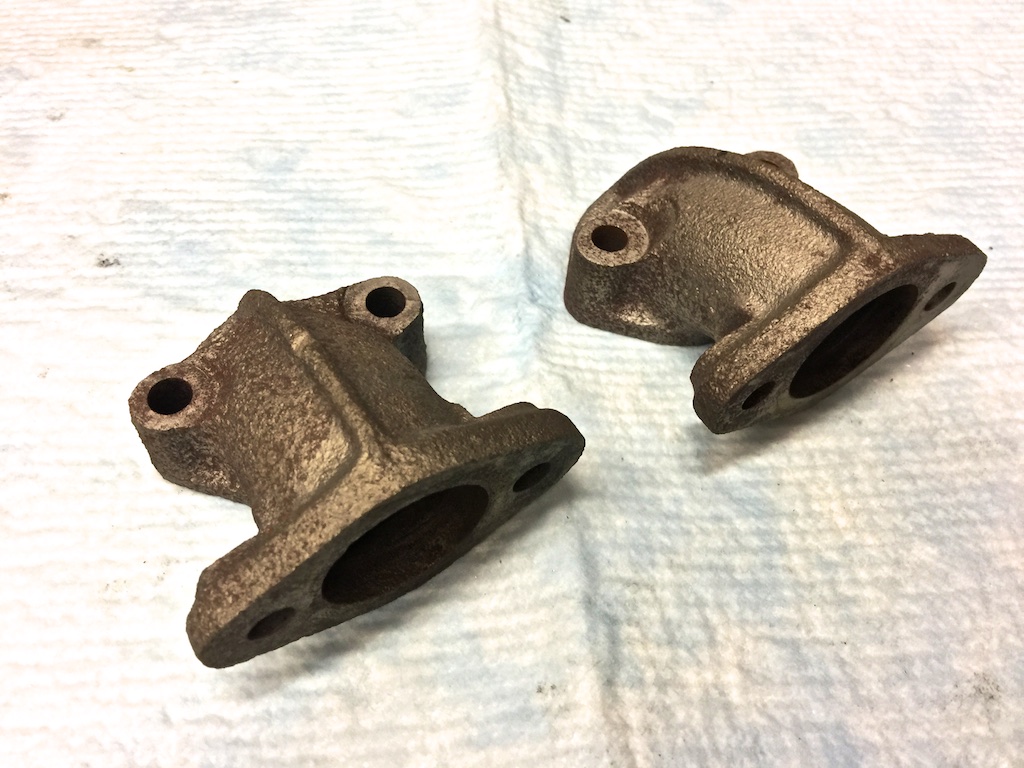
Once degreased and painted with high temperature silver paint they look much better

And finally fitted to the engine

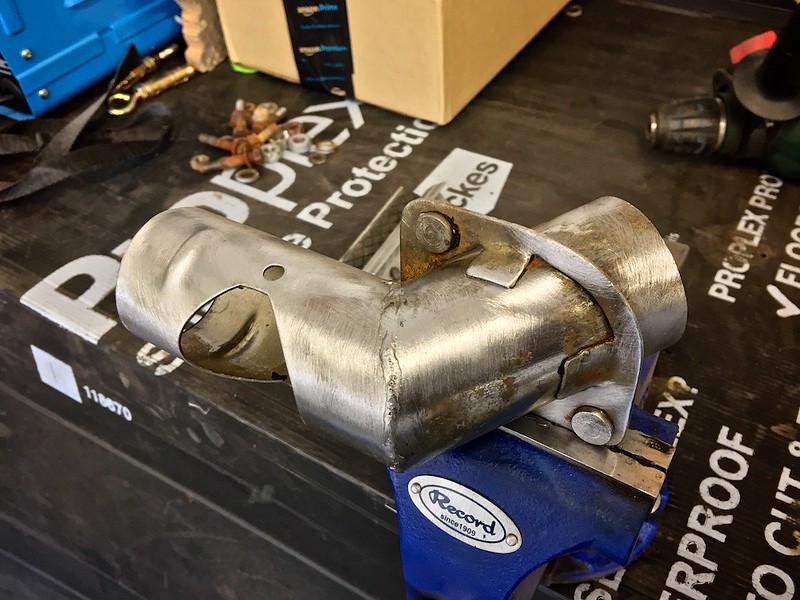
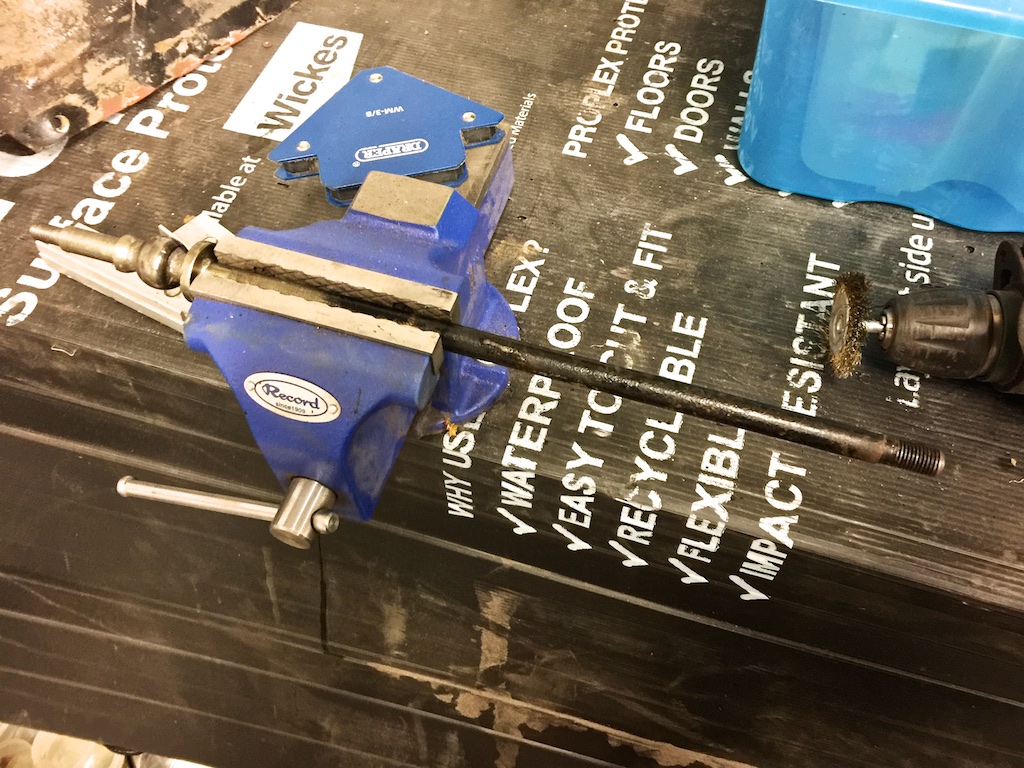
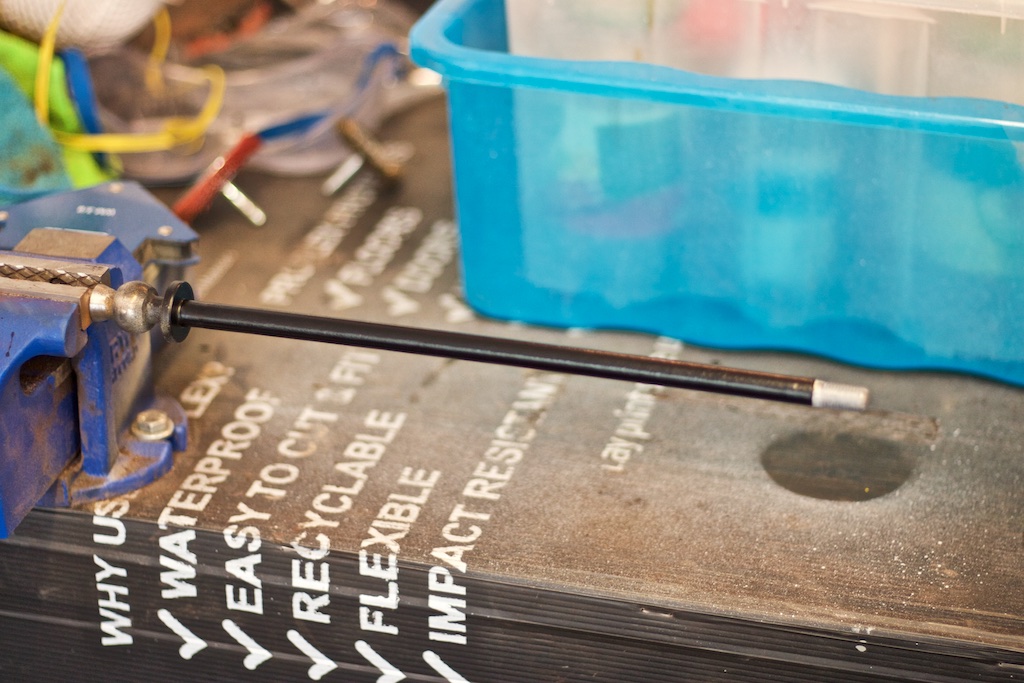
We also sorted out the gearstick. The paint was badly corroded and pitted, and it was also bent!
The 1st step was to straighten it in the vice, then grind it off with a wire brush.
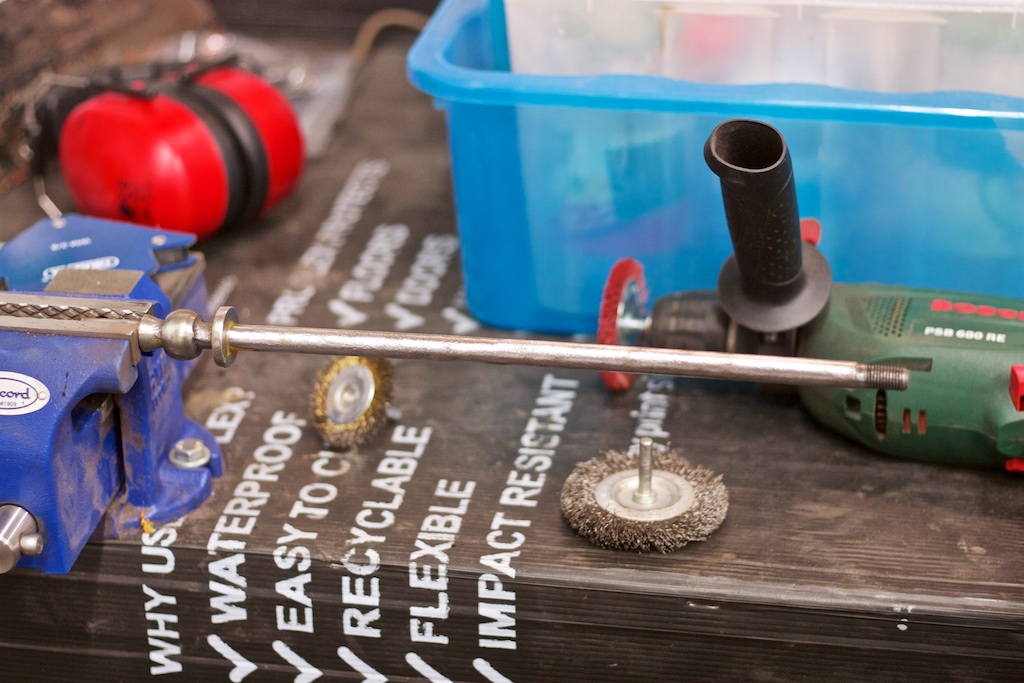
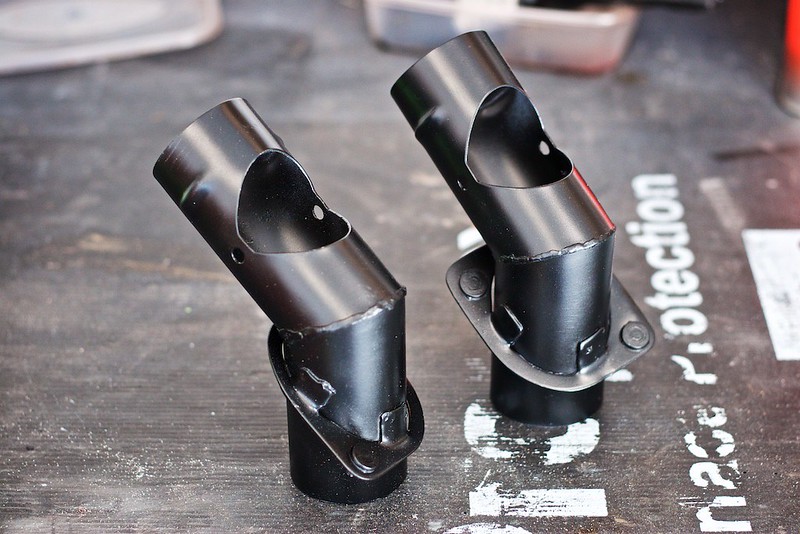
Then a quick degrease and a coat of high acid etch. Then a coat of high build primer, and a rub back to fill the pits left by the rust.We repeated this a few times until the surface was smooth.
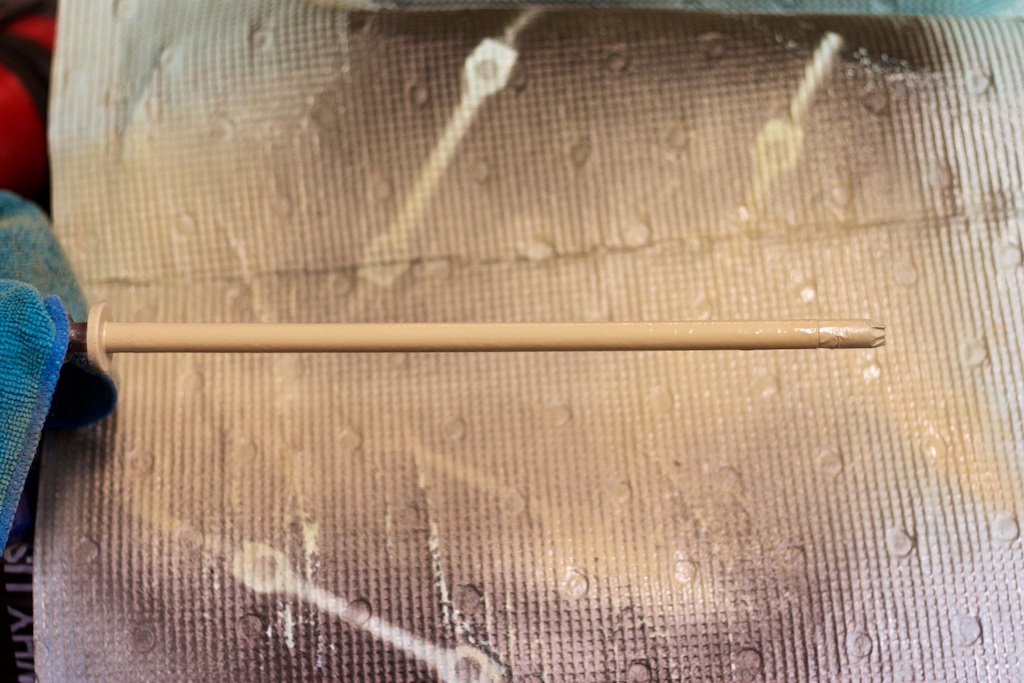
Then a couple of coats of satin black.
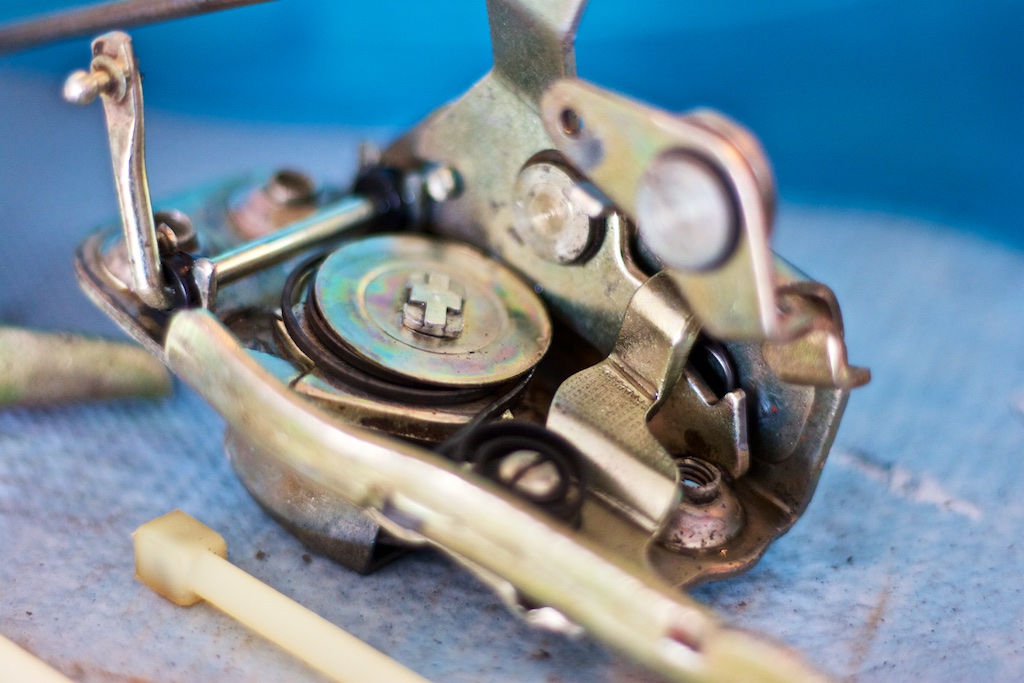
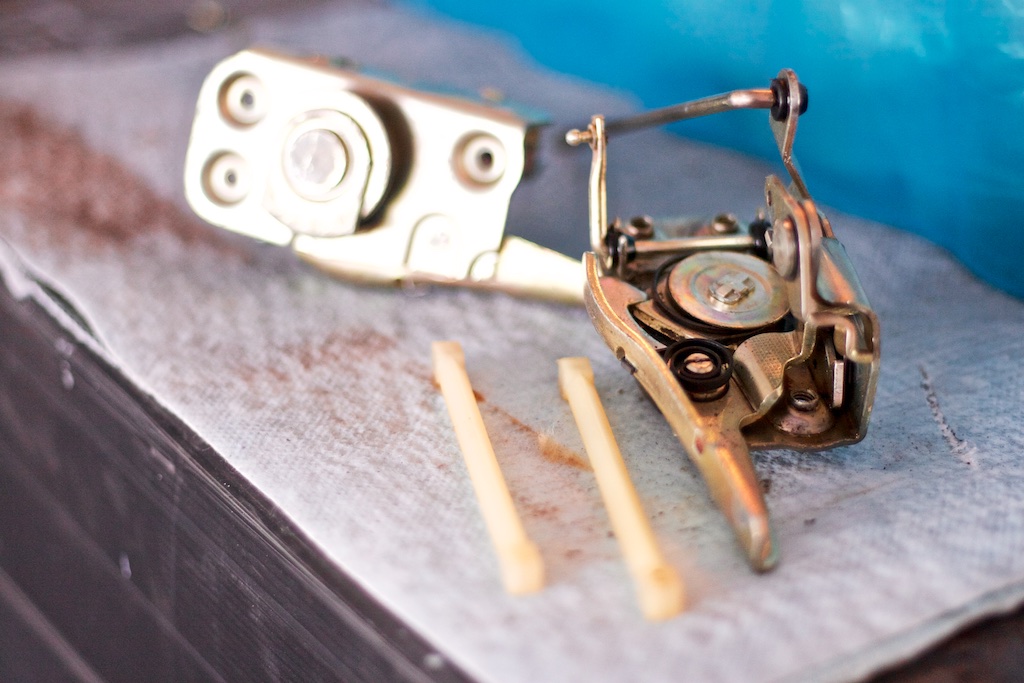
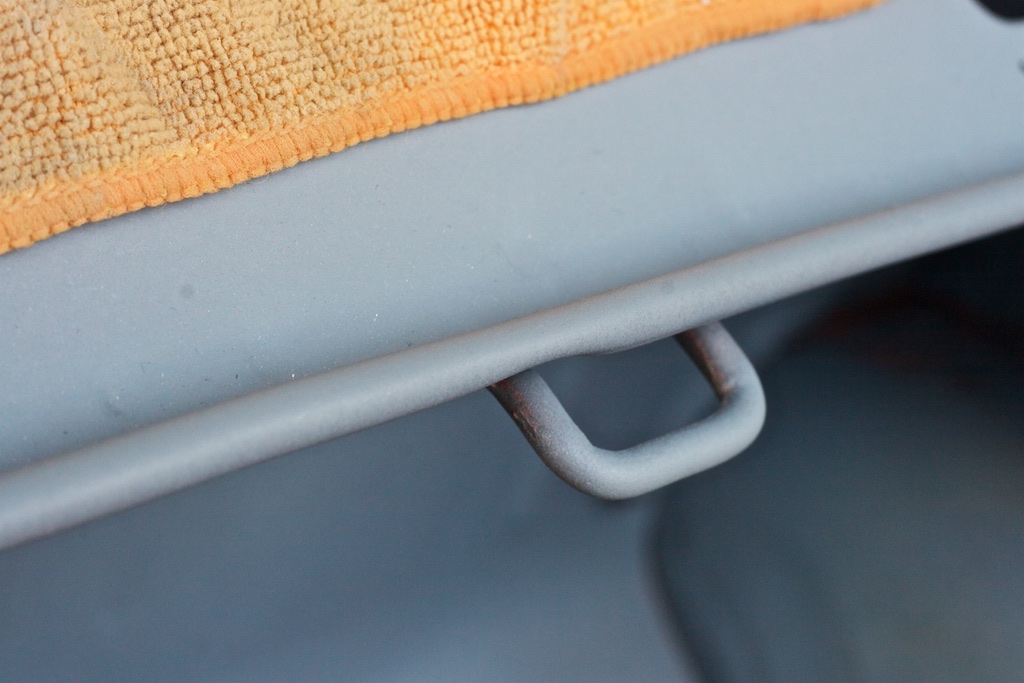
Next up was the door mechanisms. Whilst appearing to be in great working order, these were covered in old dirty grease and quite a bit of overspray – nothing my brushes and some degreaser can’t handle!
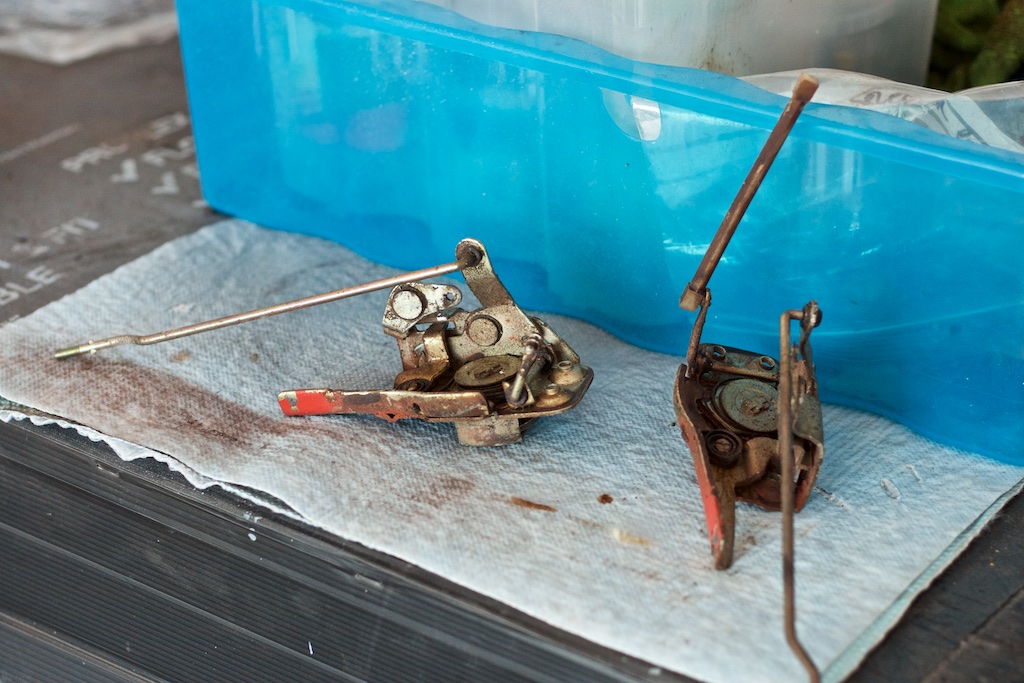
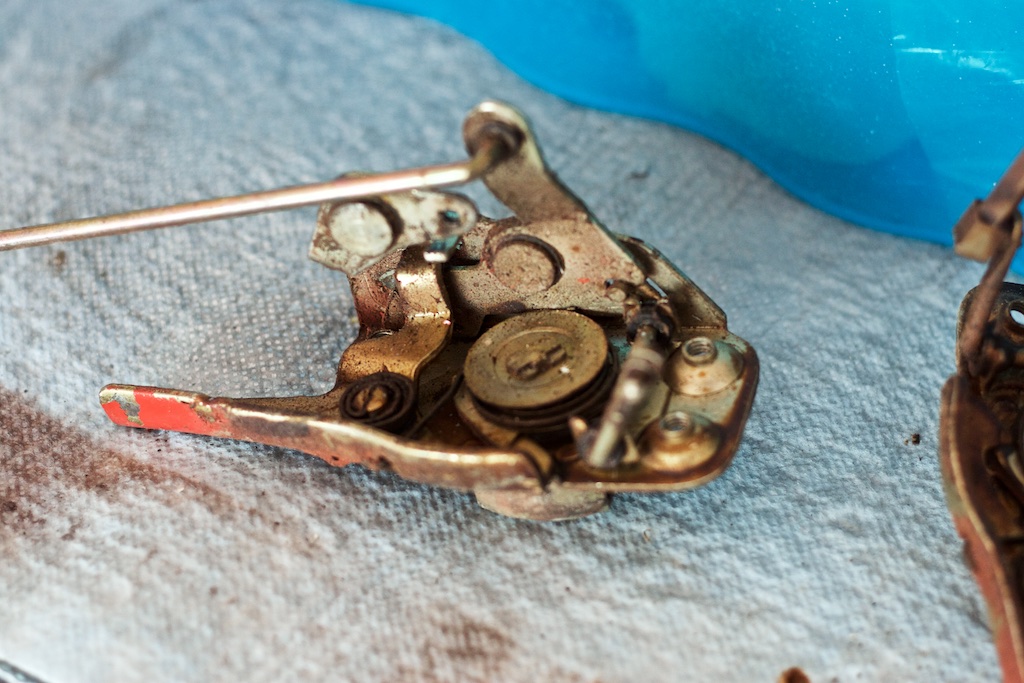
Some scrubbing later…
Also, the work on the body continues…
The roof is beginning to look like a roof again
Still working our way around the rear of the car at this point.

Also we have been working our way around the body finding little dinks and dings in the panel edges, and straightening them out.
For example:
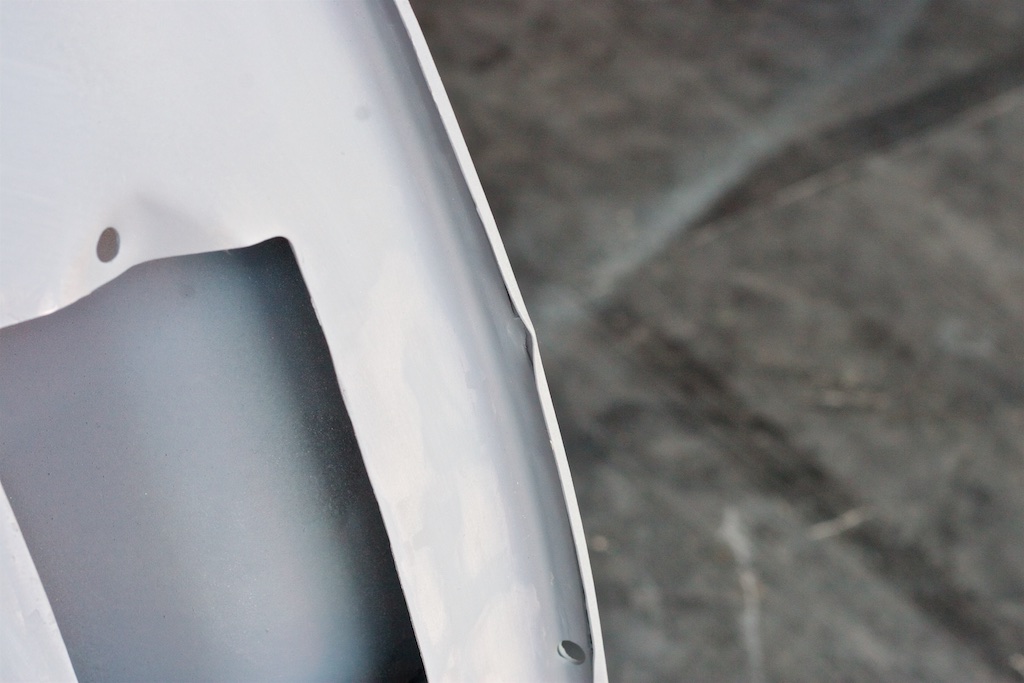
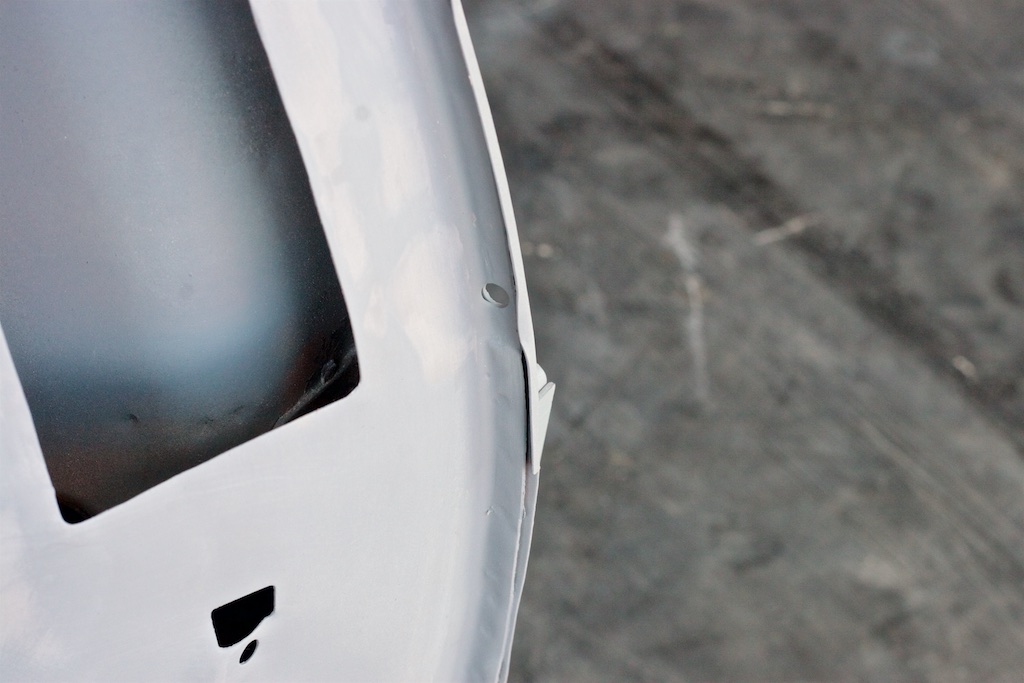
After using some pliers and a small body working hammer:
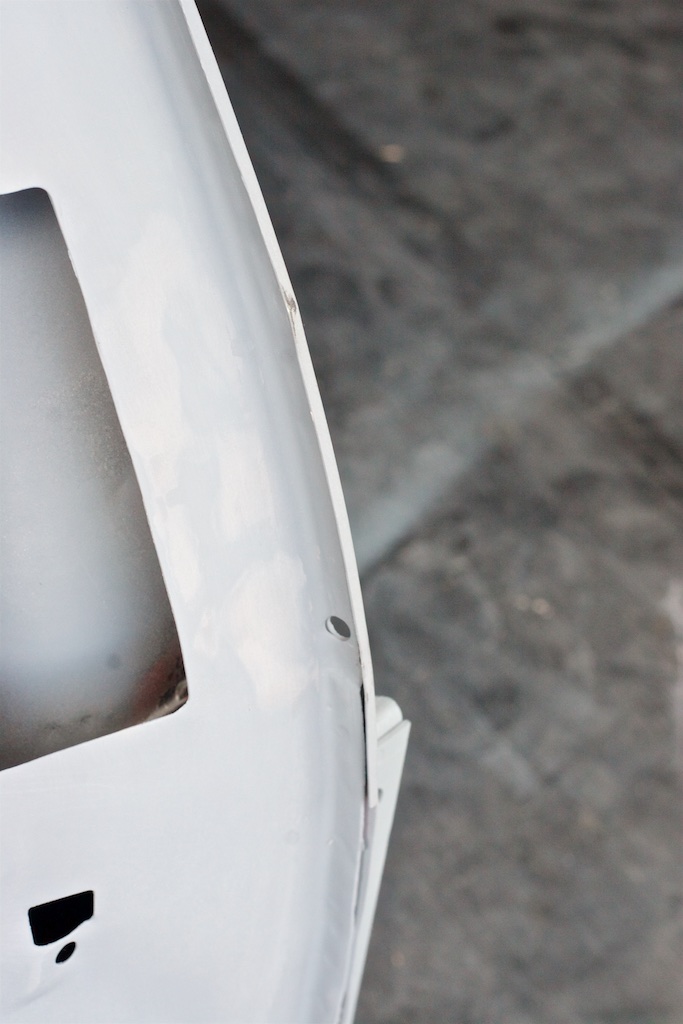
A little ding below the engine lid catch
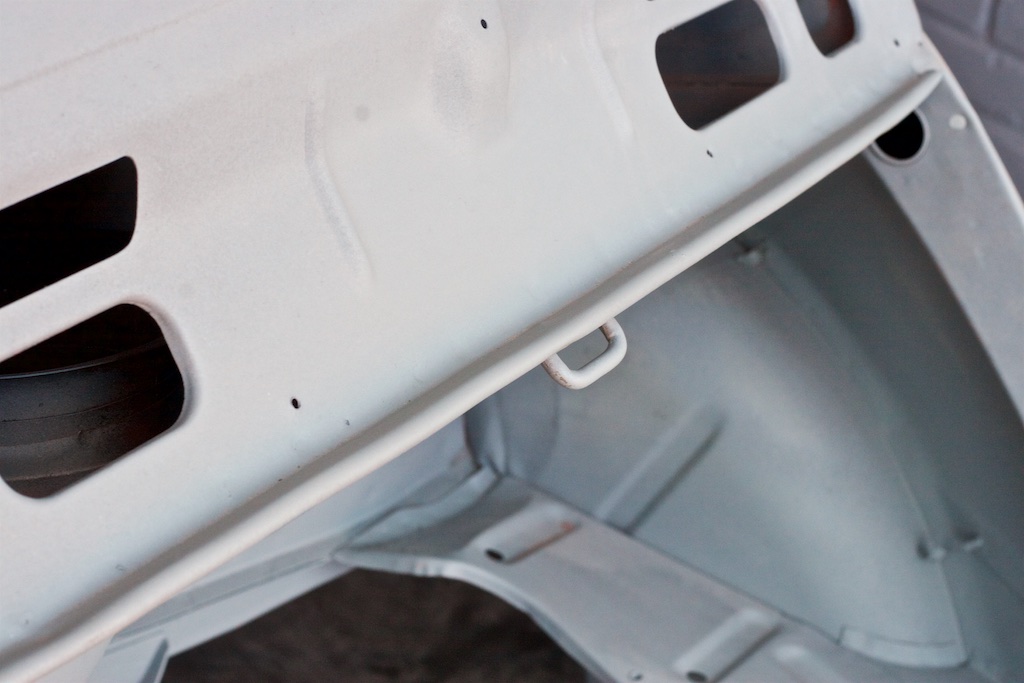
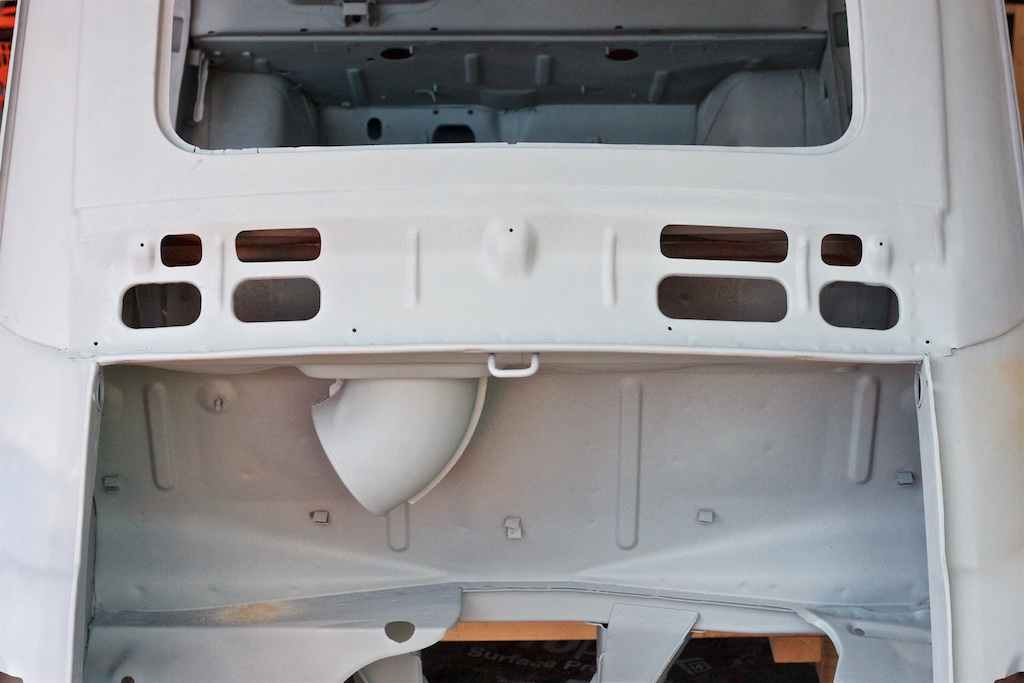
So now the top edge of the engine lid aperture has gone from this:
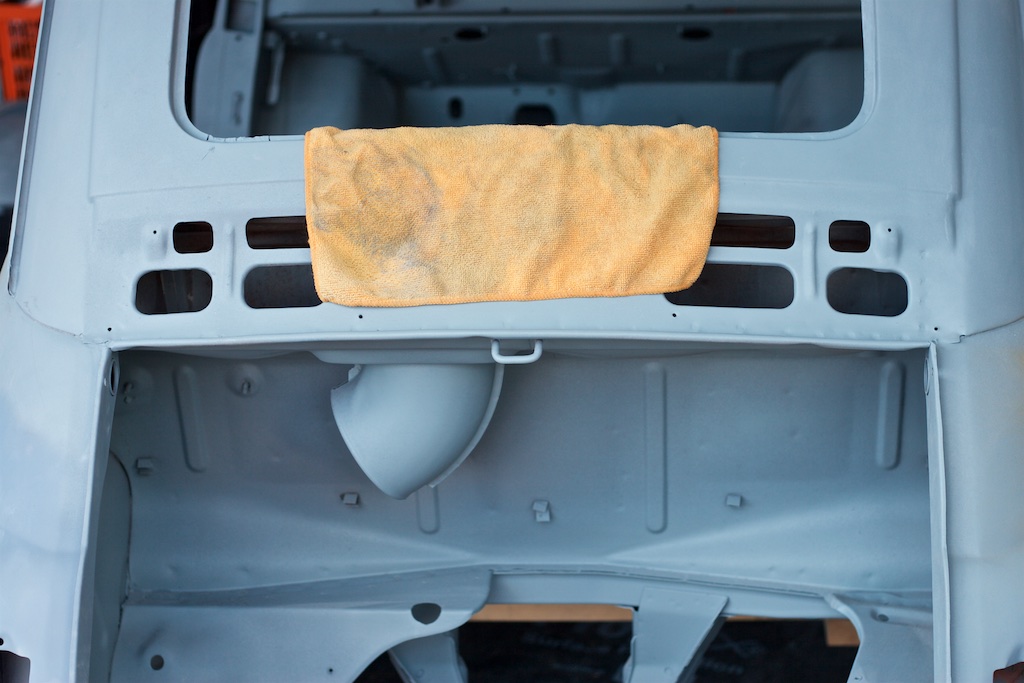
To this – a small improvement but we are hoping that all these little details will add up. There are still some marks in the paint that will be cleared up later.
More to come soon!
The weather finally warmed up enough after what feels like an eternity at below ten degrees to get in the garage and continue the work on my little fiat. :slayer:
1st of all we thought it would be good to demonstrate the way I am de-rusting and refurbishing the steel fasteners/brackets etc.
The first step is to the brush the loose dirt off the item to be cleaned and dunk it in some vinegar.
It’s important to leave the lid off or ajar for the 1st day or two, as there are some bubbles produced as you can see.
The length of the pickling process will vary depending on the level of corrosion. These ones took 4 days.
Then using some hot soapy water we set to scrubbing and rubbing with these to remove the dull grey finish that has appeared. This is removed easily.
Once clean thoroughly dry. We then bag them up in a fresh gripseal bag and add just a little light oil to keep the surface rust away until then can be plated.
For example, this weekend we’ve done the door striker/catches:
From this:
To this:
We also cleaned up the hub driveshafts, these were covered in horrible old waxy and dirty grease
After a lot of scrubbing and cleaning, we went over these with a poly wheel to gently remove the rust.
An old scrap hub made a good base from spraying and also masked the hub flange.
All painted up and finished.
We also set about refurbishing the rod that connects the front upper a-arms to the body. They were pretty grotty.
Once the surface rust has been ground off.
And painted.
We also decided to remove and paint the exhaust manifolds from my new engine, they were the only rusty parts on an otherwise great looking object!
Once degreased and painted with high temperature silver paint they look much better
And finally fitted to the engine
We also sorted out the gearstick. The paint was badly corroded and pitted, and it was also bent!
The 1st step was to straighten it in the vice, then grind it off with a wire brush.
Then a quick degrease and a coat of high acid etch. Then a coat of high build primer, and a rub back to fill the pits left by the rust.We repeated this a few times until the surface was smooth.
Then a couple of coats of satin black.
Next up was the door mechanisms. Whilst appearing to be in great working order, these were covered in old dirty grease and quite a bit of overspray – nothing my brushes and some degreaser can’t handle!
Some scrubbing later…
Also, the work on the body continues…
The roof is beginning to look like a roof again
Still working our way around the rear of the car at this point.
Also we have been working our way around the body finding little dinks and dings in the panel edges, and straightening them out.
For example:
After using some pliers and a small body working hammer:
A little ding below the engine lid catch
So now the top edge of the engine lid aperture has gone from this:
To this – a small improvement but we are hoping that all these little details will add up. There are still some marks in the paint that will be cleared up later.
More to come soon!
IanEmery
Established member
A remarkable level of detail in your work. This is going to be a stunning car when you’ve finished, can’t wait to see it all done.
Hello all!
It’s been a while since our last post (I can’t believe it’s nearly 2 years though!) Progress on the bodywork has been slow going and I have to admit, at times I’ve been a little demotivated by the lack of progress.
I have managed to get 90% of the bodywork to where I’m happy, but there is one panel that I cannot get right, despite many frustrating attempts. It pains me to have to say it, but I’ve had to admit defeat. I have reached the end of my skills and decided to employ a professional to finish the job. I could have kept at it for another few months but the rear quarter panel wouldn’t have been up to the standard of the rest of the car and, I can’t stand the thought of another summer without it, so I think it’s the right decision to have an expert finish it off (using metal work skills rather than filler) and get it built back up for summer.
It’s an unanticipated and significant cost, but with so many hours already poured into it, I feel like it’s the right thing to do. The shop doing the work will also seam seal and paint the car for me in 2k, rather than cellulose which I was planning to use, which will give the car a more modern, durable finish.
In the meantime I have finally decided on a paint colour and also made the decision to have the interior professionally retrimmed. The original vinyl seats cleaned up ok, but remained a little bit sticky and have clearly deteriorated with age, and they also don’t fit the “OEM+” aesthetic I’m going for with this build.
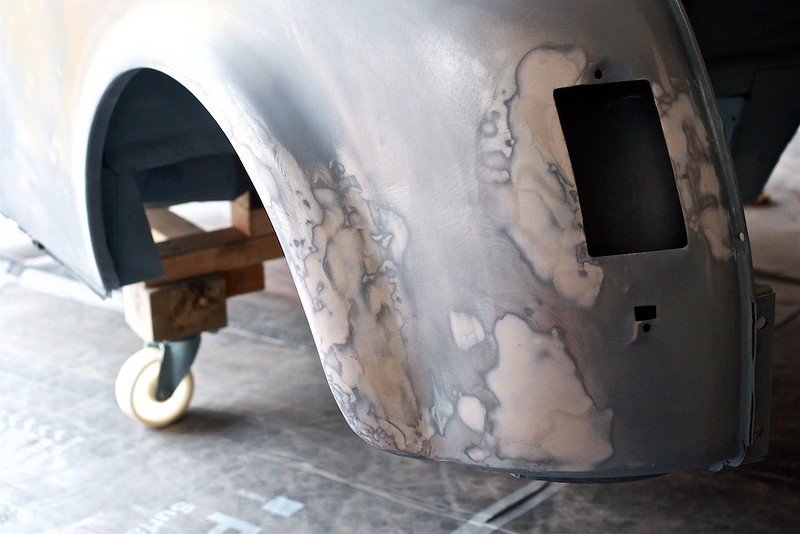
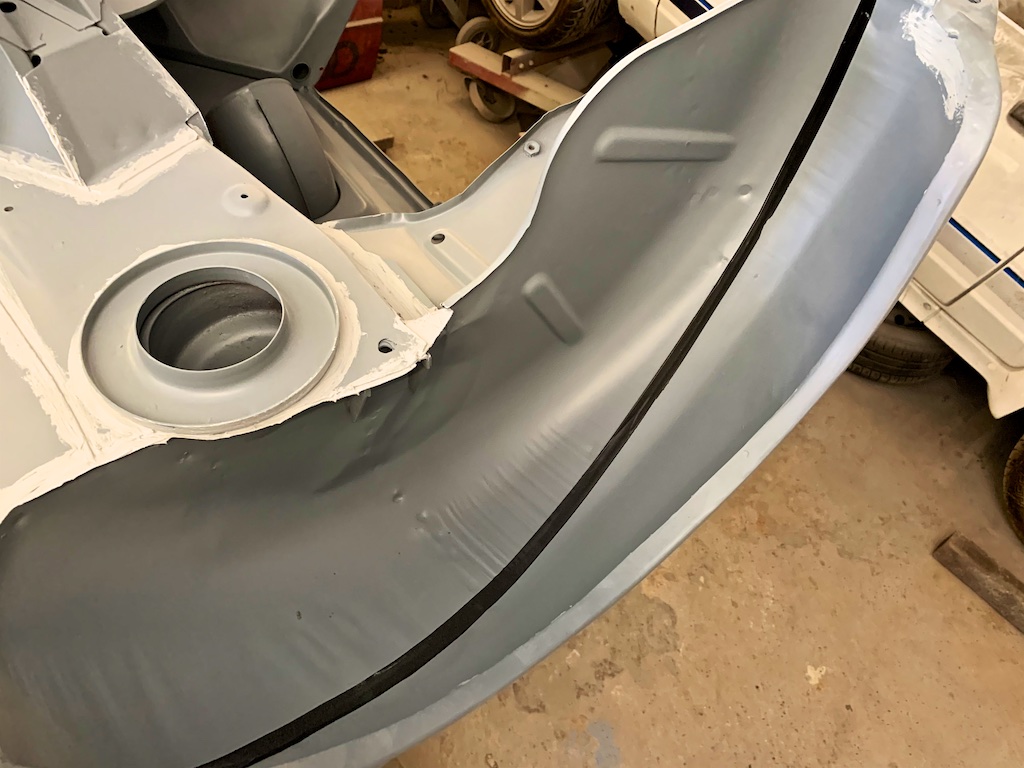
Here is a final shot of the state the bodywork got to at home. It looks pretty good in the photos but the rear right quarter panel was very difficult to reshape, particularly the swage line and wheel arch area.


And here he is in the body shop. The owners are very excited to work on my little fiat and have invited me down to view progress whenever I like, and even to join in and learn the skills that I’m currently missing!

They set to work quickly!


They removed some areas of filler and did some more comprehensive metalwork.

Although I’m disappointed in myself that I couldn’t complete the body to my satisfaction by myself, it was gratifying to be told that the work I had done was of good quality!

Discussing seam sealing strategy!

Their work is very neat.
And here he is having the front and rear compartments primered on March 21st 2020...can you guess what happens next?

Unfortunately, due to the COVID-19 outbreak, Buzz is self-isolating in his very own lockdown.
We aren’t sure when the garage will be open again, we will just have to be patient! More to follow soon.
It’s been a while since our last post (I can’t believe it’s nearly 2 years though!) Progress on the bodywork has been slow going and I have to admit, at times I’ve been a little demotivated by the lack of progress.
I have managed to get 90% of the bodywork to where I’m happy, but there is one panel that I cannot get right, despite many frustrating attempts. It pains me to have to say it, but I’ve had to admit defeat. I have reached the end of my skills and decided to employ a professional to finish the job. I could have kept at it for another few months but the rear quarter panel wouldn’t have been up to the standard of the rest of the car and, I can’t stand the thought of another summer without it, so I think it’s the right decision to have an expert finish it off (using metal work skills rather than filler) and get it built back up for summer.
It’s an unanticipated and significant cost, but with so many hours already poured into it, I feel like it’s the right thing to do. The shop doing the work will also seam seal and paint the car for me in 2k, rather than cellulose which I was planning to use, which will give the car a more modern, durable finish.
In the meantime I have finally decided on a paint colour and also made the decision to have the interior professionally retrimmed. The original vinyl seats cleaned up ok, but remained a little bit sticky and have clearly deteriorated with age, and they also don’t fit the “OEM+” aesthetic I’m going for with this build.
Here is a final shot of the state the bodywork got to at home. It looks pretty good in the photos but the rear right quarter panel was very difficult to reshape, particularly the swage line and wheel arch area.
And here he is in the body shop. The owners are very excited to work on my little fiat and have invited me down to view progress whenever I like, and even to join in and learn the skills that I’m currently missing!
They set to work quickly!
They removed some areas of filler and did some more comprehensive metalwork.
Although I’m disappointed in myself that I couldn’t complete the body to my satisfaction by myself, it was gratifying to be told that the work I had done was of good quality!
Discussing seam sealing strategy!
Their work is very neat.
And here he is having the front and rear compartments primered on March 21st 2020...can you guess what happens next?
Unfortunately, due to the COVID-19 outbreak, Buzz is self-isolating in his very own lockdown.
We aren’t sure when the garage will be open again, we will just have to be patient! More to follow soon.
lazylobster
Established member
Loved following your thread. So what colour are you going for? Although I see a bright yellow in the last pic, is this the colour the whole car wil be finished in?
R
R
Loved following your thread. So what colour are you going for? Although I see a bright yellow in the last pic, is this the colour the whole car wil be finished in?
R
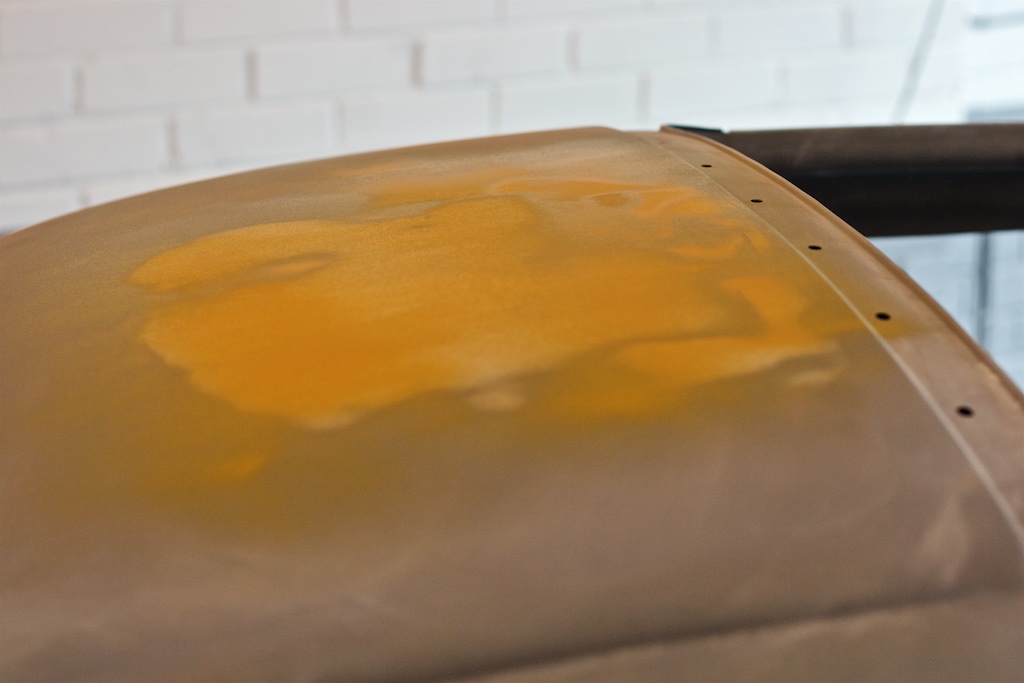
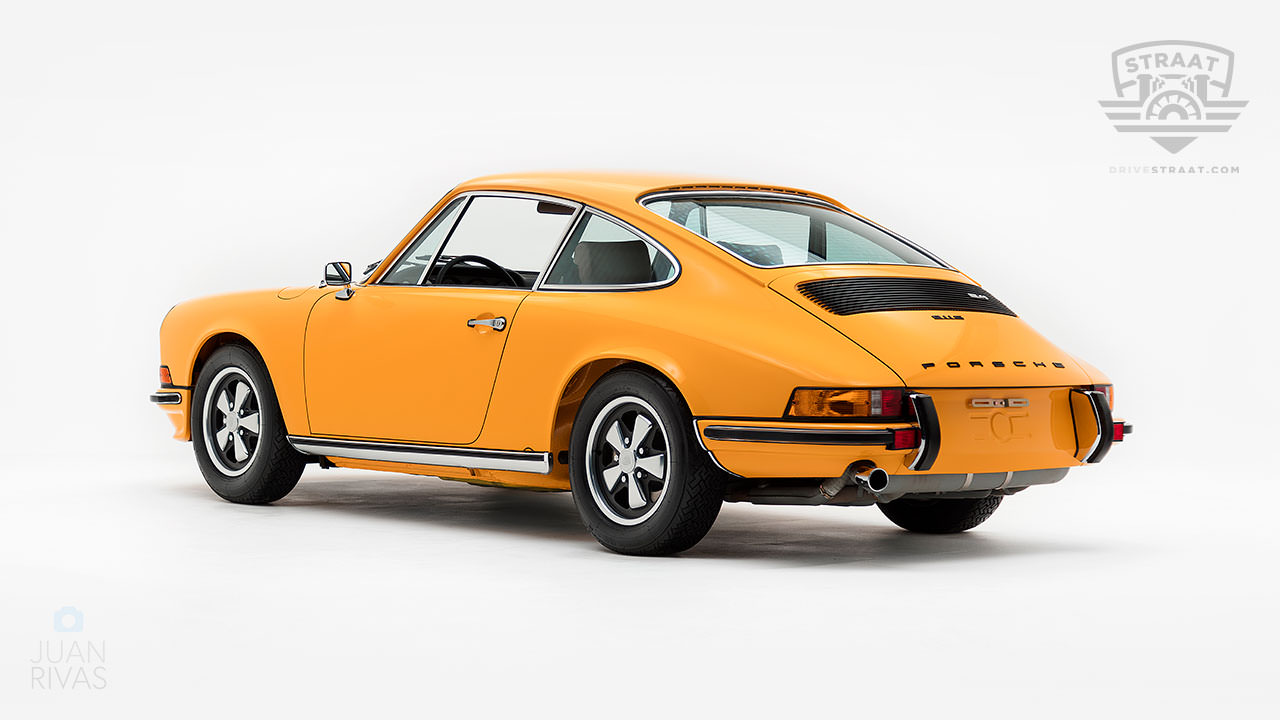
The colour will be Porsche Signal Yellow from 1960s/1970s like the pic below. I agonised for ages before deciding. I wanted more of a sunset yellow and couldn’t find a Fiat colour that was perfect so chose my other favourite air-cooled manufacturer. The colour you see in the pic above is a primer.
lazylobster
Established member
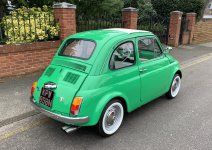
Understood. When I restored Val, the hardest part was which external colour to go for. I wanted green and spent hours researching various colours. When I had decided, I brought sample (touch up) and painted them onto fresh piece of scrap metal. Then looked at in all light conditions I could.
In the end we found the "one". I'm not ashamed to say it's a Porsche colour as well. So you are in good company!
R
In the end we found the "one". I'm not ashamed to say it's a Porsche colour as well. So you are in good company!
R
hodgy18
Established member
- Joined
- Apr 27, 2017
- Messages
- 158
- Points
- 156
The Porsche colour is pretty much like mine. I've been debating over the last couple of weeks whether to fit a syncho box and to get the underside rubbed down and wax oiled. Been working so still haven't the time to do big jobs.
Your project is looking excellent - good luck!
Your project is looking excellent - good luck!
the hobbler
Distinguished member
- Joined
- Jul 25, 2012
- Messages
- 4,083
- Points
- 1,013
Superb effort Katie---major progress from when I first met you and looked over your car. Will be good to see it around at some of the local shows, of which we have quite a few up here in the North.
lazylobster
Established member
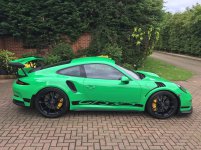
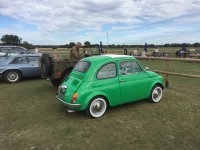
Aah awesome! Would that be Viper Green? I think my local paint shop got bored of me ordering samples. I must have tried 10 different ones. Very happy with my choice now though, it was worth the trouble
Hi and no, not Viper or even Signal green, it's got the rather fetching title of "grün 2D8" as seen on the sexy GTRS models. Which, if anyone would like to buy for me, I would be very grateful
The paint looks different in different light conditions.Few pics as below.
R
Attachments

Last edited: