

You are using an out of date browser. It may not display this or other websites correctly.
You should upgrade or use an alternative browser.
You should upgrade or use an alternative browser.
Technical HI Need help with wiring 500 L
- Thread starter phoenix1
- Start date
Currently reading:
Technical HI Need help with wiring 500 L
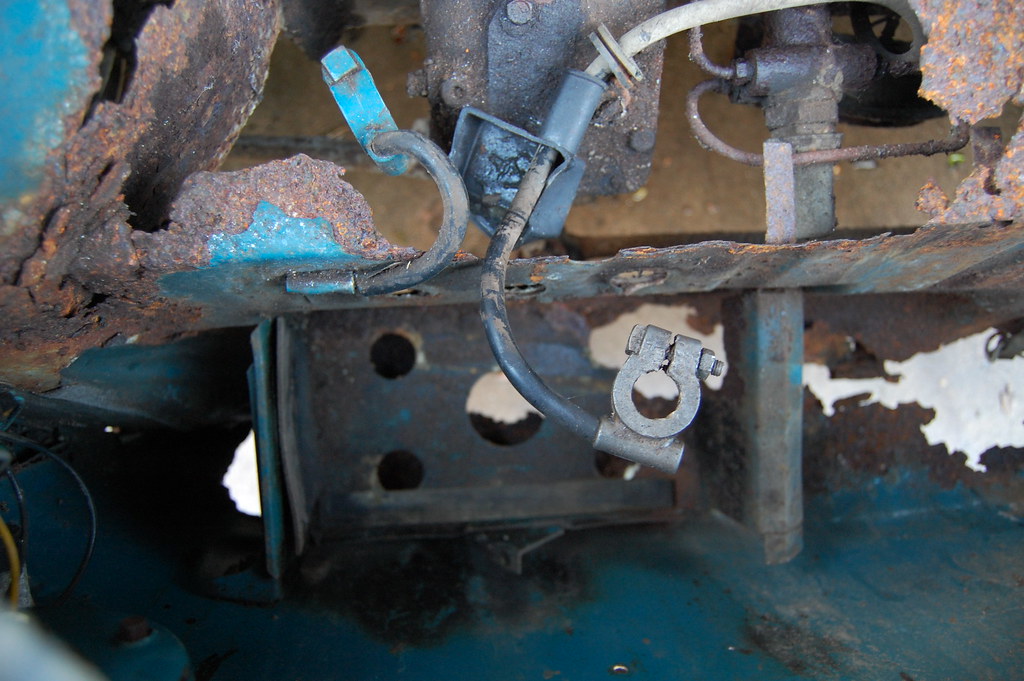
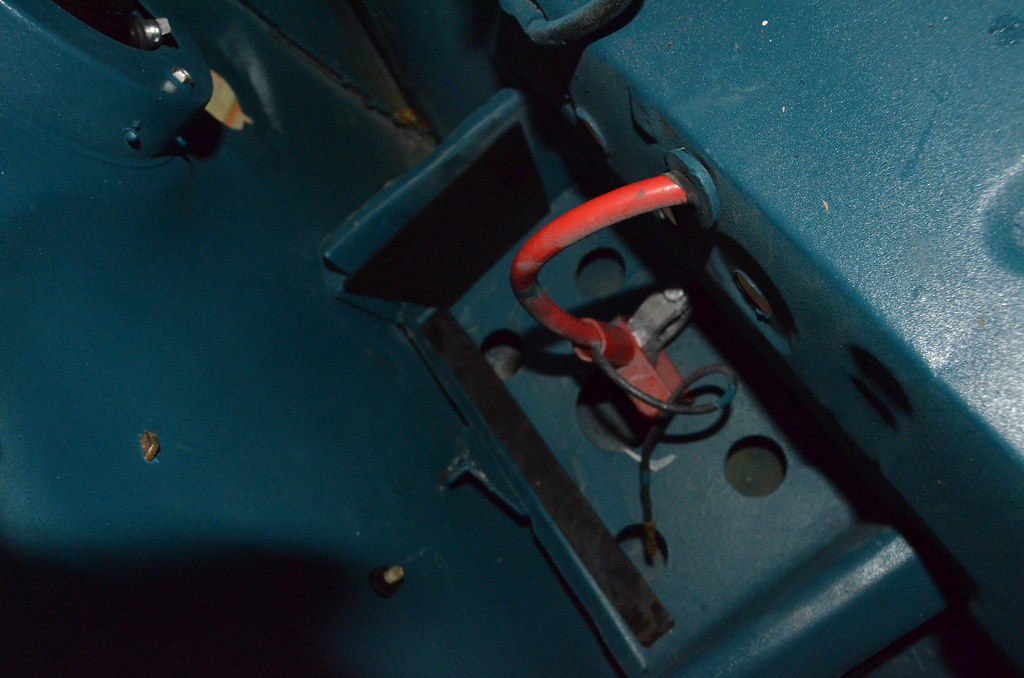
The positive terminal did originally have a rectangular cover. The boot-liner mat gives additional protection. I found the most dodgy item is the retaining clamp. I modified the way it fitted to avoid accidental shorting out the battery.
 DSC_6121 by Peter Thompson, on Flickr
 BRA_6282 by Peter Thompson, on Flickr
DSC_6121 by Peter Thompson, on FlickrBRA_6282 by Peter Thompson, on FlickrHi I have now put fluid in all new brakes (shoes, master cylinder, cylinders, lines etc) and I find the pedal consistently low.It stays the same even after pumping or leaving for a day or two . The only thing I can think of is the shoes need adjusting.Rather than do it manually ,How long would it take by just driving .It has to go for an MOT so they need to be right.(Will take it the long way round )
I had the same problem but it did work out after a lot of driving. My oft-repeated theory is that the new brake pull-off springs are too powerful and overcome the friction adjusters. I would take the long route to the MOT over several days.
AndrewHarvey
Established member
- Joined
- Jan 17, 2015
- Messages
- 1,471
- Points
- 290
They reckon on several drives in reverse followed by hard braking sets the adjustment up...
Hi guys. I can't see another connection ,could it be the terminal marked B+.
While I was looking for this I found ' Made in Poland ' on the plastic alternator
cover
Also does anyone know of an easy way to get the bottom channel and rubber insert
on the drivers door drop glasses.
Re: fitting bottom channel and rubber to door glasses. When I worked at a Fiat mechanic, we sometimes used a drop of petrol (gasoline) as a 'lubricant'
Idea was, this then evaporated leaving the channel securely in place. Iirc, we used to position the rubber strip on the door glass and press the metal channel over the rubber, I know this sounds illogical to some but it worked with a drop of petrol (gasoline).
Some people fit them dry, some use water/soapy water solution/rubber lubricant/WD40(!) spray. To each his own. All I can say is our method never failed...
Al.
Last edited:
Hi I have just started for the first time in the car and the red charging dash light does
not go out.I have checked and it is charging (13.5 v ) It is a 650cc engine with alternator.I thought I had followed the instructions on this forum ,but obviously must have made a mistake. Any thoughts ?
not go out.I have checked and it is charging (13.5 v ) It is a 650cc engine with alternator.I thought I had followed the instructions on this forum ,but obviously must have made a mistake. Any thoughts ?
Hi I have just started for the first time in the car and the red charging dash light does
not go out.I have checked and it is charging (13.5 v ) It is a 650cc engine with alternator.I thought I had followed the instructions on this forum ,but obviously must have made a mistake. Any thoughts ?
Measure the voltage either side of the bulb to earth, they should be virtually the same i.e. 13.5v in your case. It suggests that one side is at 0v, if so you know will which side is causing the problem and can trace it back to its origin.
Tony
Has anyone an actual photo of an alternator wiring. (rather than a diagram ) I must have the warning light wire connected to the wrong terminal as it wont go out.When checking voltage at the alternator it is 12v from the dash light and 0v on the alternator an does not change when started.
Has anyone an actual photo of an alternator wiring. (rather than a diagram ) I must have the warning light wire connected to the wrong terminal as it wont go out.When checking voltage at the alternator it is 12v from the dash light and 0v on the alternator an does not change when started.
If you have the same alternator as mine it's the spade connector in the middle below the green wire. Check it first though just to be safe and make sure it has 12v's on it. When converting from a Dynamo the original green wire to the warning light would have been terminated on the voltage regulator. So you need to extend that down to the alternator.
Attachments

Paolo66
Established member
- Joined
- Feb 6, 2013
- Messages
- 1,004
- Points
- 235
Check out my electrical photos here
https://goo.gl/photos/SpLzSc2P4htba6n38
https://goo.gl/photos/SpLzSc2P4htba6n38
Hi,
I don't have a photo as it is my son who has the 500.Also the description below is generic as I don't know what Alternator/Regulator set up you have.
The ignition Warning Light (IWL) has two functions.
It provides an indication that the battery is not being charged fully by the alternator.
It also energises the field coils when you first turn the ignition on. One side of the field coil is earthed. When you turn on the ignition, battery voltage is fed to one side of the IWL. The other side passes through the field coil (which has a low resistance) to earth so the IWL lights up and the field coil is energised and produces a magnetic field.
When the motor fires up and spins the alternator it starts producing its own output (usually between 13.2 and 14.4 volts) and this then feeds the field coil so it is self energising. Because the alternator output is producing the same voltage as the battery the IWL goes out but at tickover the alternator may only throw out about 11 to 12v so the IWL usually flickers or produces a dim glow.
If the IWL is on all the time then either the other side of the IWL to the ignition switch side is connected to an earth, not the field coils or the output coils or output diodes are faulty so the alternator is not producing an output voltage.
Make sure the non ignition side of the IWL is connected to the IWL terminal on the alternator and not the -ve (earth) , F or B terminals.
Never disconnect the battery when the engine is running as the alternator can produce a high output voltage.
Hope the above is not too confusing
Richard
Just a small question, should the wheel nuts be used without washers (plain or spring).
The suppliers web sights I have looked do not list them with the nuts.
Also what have you good people on here used as a battery cover.
Thanks
The suppliers web sights I have looked do not list them with the nuts.
Also what have you good people on here used as a battery cover.
Thanks
What a BL??DY pain those door stays are.The only way I found was
to feed from inside the door and use mole grips to locate the spring
and touch up the paint when finished .If anybody has a better way let me
know.P.s. I now have spring washers on my wheel bolts
to feed from inside the door and use mole grips to locate the spring
and touch up the paint when finished .If anybody has a better way let me
know.P.s. I now have spring washers on my wheel bolts
Last edited:
AndrewHarvey
Established member
- Joined
- Jan 17, 2015
- Messages
- 1,471
- Points
- 290
Pulled mine together and fitted cable ties to keep them together - cut them off when fitting
Hi has anyone any experience with a right hand drive steering box on a 1972 l.
I need to renew the worm gear as I have about 2 inch of play at the wheel.
Looking at buying a new one it would probably be better converting to rack
and pinion as the cost would be nearly the same.
I need to renew the worm gear as I have about 2 inch of play at the wheel.
Looking at buying a new one it would probably be better converting to rack
and pinion as the cost would be nearly the same.
AndrewHarvey
Established member
- Joined
- Jan 17, 2015
- Messages
- 1,471
- Points
- 290
You can adjust the play in them.....I'm carrying out a rack conversion later ..... it's either paying an expert or struggling yourself.....either way not for the faint hearted
Yes I have tried adjusting but by the time I get most of the play out
it is to stiff in places.Maybe the spindle is slightly bent ,also even after renewing
gaskets and seals the darn thing still leaks oil on my garage floor.I suppose it
will have to come out again.
it is to stiff in places.Maybe the spindle is slightly bent ,also even after renewing
gaskets and seals the darn thing still leaks oil on my garage floor.I suppose it
will have to come out again.
AndrewHarvey
Established member
- Joined
- Jan 17, 2015
- Messages
- 1,471
- Points
- 290
They all leak...it's proof they have oil in them.....
I bought a rack conversion kit. It was supplied with bolt on brackets - but the London based expert insists on welding them in position. Then drill new hole for an offset column.
You then have to remove the 500 steering column as the 126 is different - so new steering wheel also
I'd say it was a 8/10 complexity for home mechanic or £1100 and transport car to London
Last edited:
Similar threads
- Replies
- 1
- Views
- 169