Technical 650 Engine Rebuild

Currently reading:
Technical 650 Engine Rebuild

I'm sure I won't be disappointed with the 123 but now I wonder if I was a bit hasty as I could have picked up a used distributor fairly cheaply.

I'm waiting for delivery of a thread repair kit so that I can complete this project. Unfortunately it appears that I have fallen for one of those Ebay sellers who states they are in the UK but actually deliver from China.(n)

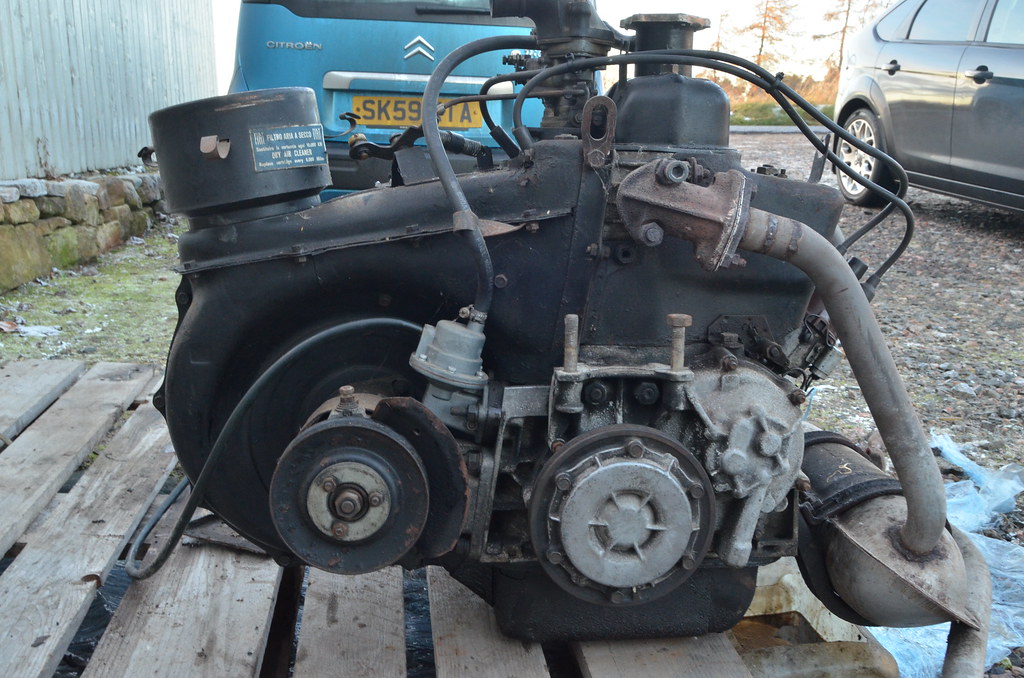
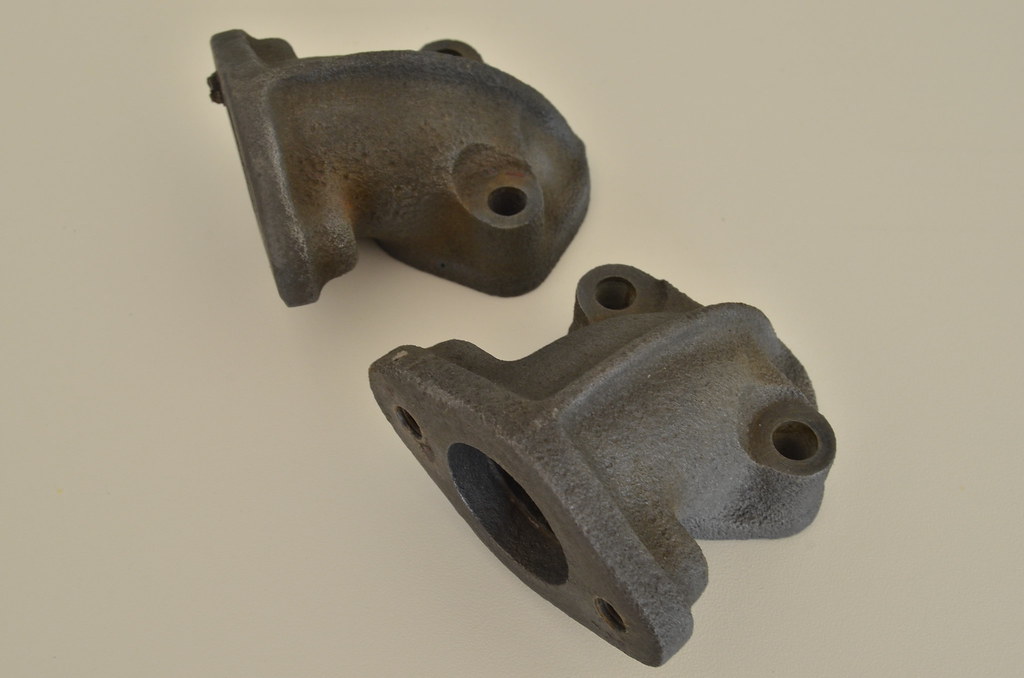
I was derusting some smaller pieces such as the engine lifting brackets, so I dumped the old exhaust elbows in the acid. I know these things can be bought cheaply but they are originals and look pretty good now in bare metal. Now I'll have to splash out on some high-temperature paint.:bang:

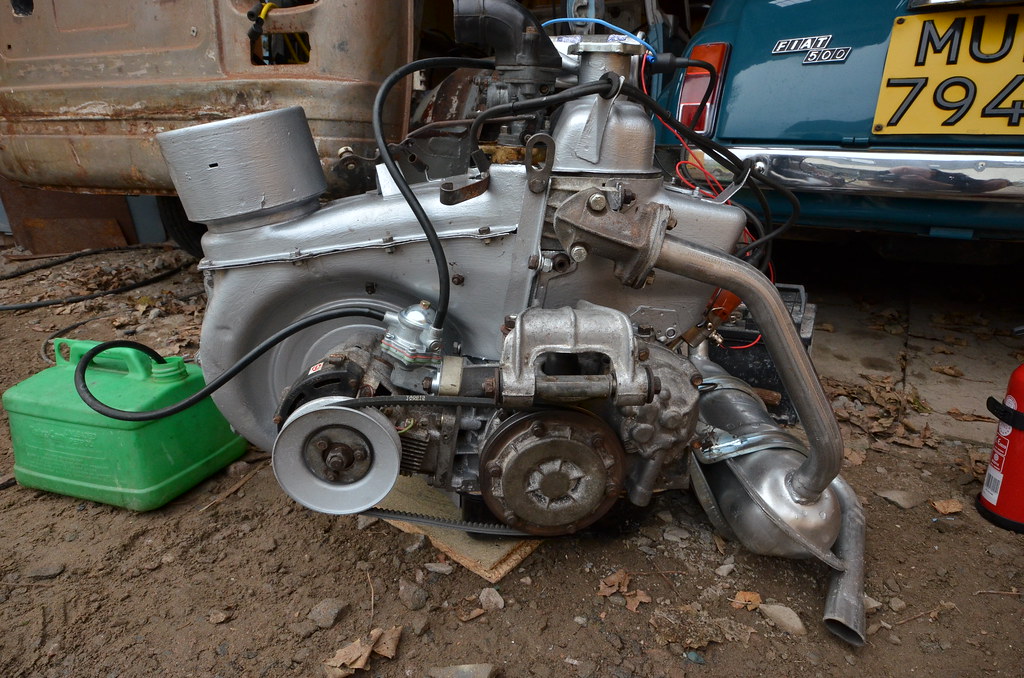
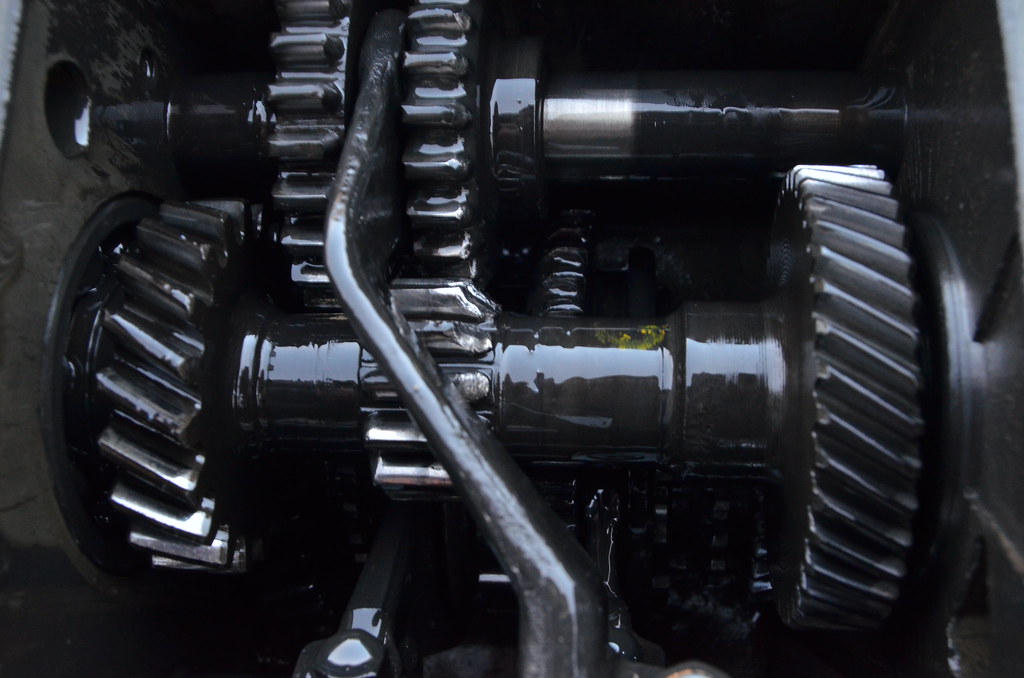
I need to reassemble the dynamo,to put the cowling back together and fit the exhaust and then I can get the thing going. with spark plugs fitted it certainly has good compression so I think it's going to be a good'un.

MAL_2200 by Peter Thompson, on Flickr
 
Peter;
The best thread repair system I have found for threads in Aluminium are the MEMFAST 'self tapping steel inserts' As far as I can see, they are almost identical to the Abarth ones that we used at Radbourne Racing. MEMFAST can supply these in a number of sizes, and once you have made the (very) easily to make fitting tool, they are a doddle---you just have to be able to drill straight!
thumb.gif
smile.gif
 
Peter;
The best thread repair system I have found for threads in Aluminium are the MEMFAST 'self tapping steel inserts'

I just looked at those and they do seem more straightforward than the usual "Helicoil"-types of thing. I might dabble with them but I am a bit concerned that you need to go up a couple of drill sizes in order to tap them.
 
Peter;
For 8mm stud/bolt size you need an 11mm drill and for the 10mm stud/bolt size you need a 13mm drill. Would you like me to pop a couple of the smaller size into the post to you for you to try out? They really are very simple to use.
thumb.gif
smile.gif
 
Thank-you for yet another of your many kind offers Tom.(y)
Please don't go to that trouble , especially as I am expecting the thread insert kit to be delivered on Monday. But having enlightened me about Memfast I am going to take a more thorough look at the website and I am certain that I will be using some of their products in the future and will report back when I do.:)
 
The Helicoil-type insert kit finally arrived and I am sort-of pleased that I chose them. Should they ever fail I will still have enough metal in the cylinder-head to use "Memfast" inserts, ( acronym for Make-Ends-Meet....what a great name for a company(y))
The Memfast are quite shallow fittings with a threaded depth of 15mm. The stainless steel inserts are not much different.
When I measured the depth of the threaded holes on the front of the head which take the two M8 hex-headed setscrews for the exhaust elbows, this depth seemed adequate. But the new screws supplied would bottom on these blind holes before they are fully tight. The threaded holes for the rear elbow, which are undamaged, go much deeper. I assume that the front ones must have snapped in the past and have been only partly drilled out.
So I am unhappy with the current situation where I am going to trim the fixing setscrews for the front manifold which leaves a reduced threaded area of contact. I think it will be OK as it is claimed that the stainless inserts have a stronger grip in the aluminium than the original fixings had.
Although I may buy longer inserts and do the job properly.:bang:
On top of this I also have the issue that the exhaust pipe doesn't fit inside the elbows, which I have asked about in a separate post. But I'm getting nearer to firing this thing up.:)
 
The head-into-manifold bolts were always a pain in the bum--even from new. Once the bolts have been in for a fair time, they tended to bring some of the head thread out with them. My solution is to make up studs with the appropriate threads at each end. The end that goes into the head is made just long enough that when you tighten it, it locks onto the head. The outer thread is made long enough that you can use 2 PLAIN nuts on it--one nut to tighten and one nut to 'lock' the tightening nut. Yes, this makes for a more tedious removal of the exhaust, but it does mean that (with a bit of luck) you never have to repair the head again (and it is almost impossible to do a 2nd repair). Under no circumstances should the manifold be drilled out to accept bigger (10mm) bolts/studs--the wall of the manifold alongside the bolt/stud becomes too thin if you do.
thumb.gif
smile.gif
 
Thanks for that Tom; I meant to "tag" you on that one anyway.
I had just got a refund for my "Helicoil" and had an order setup with Memfast when the long awaited package plopped through the letterbox unexpectedly.
I had bad memories of this aspect of the engine and hence I left the ones on my 500 well alone as they were nicely secured. I have even had experience of this on a 126 cabriolet that I persuaded Sheila that we should hire on Samos many years ago. We spent three days driving round with tissue-paper in our ears rather than have the company exchange it for a modern car when the elbow came loose on one side...what a racket!
petercar by Peter Thompson, on Flickr
I had considered using studs and you describe a good way to do it. It just means that you can't remove the exhaust and elbows as one piece, but if you're replacing the exhaust it wouldn't matter anyway.
I did some laborious filing down on the outer circumference of the exhaust pipe ends and I now have an almost interference fit. With the use of a skim of exhaust putty on the gaskets I'm hoping for a good seal and that I won't need to do any work in that area for a long time.
 
I have got the thing back together and bolted it onto the gearbox. So I gave it a few turns to prime the oil and petrol and setup the 123 distributor. But it's behaving like my 500 did at first and is not very eager to go. Something's happening because the exhaust elbows are getting warm, but no real action.
With the 500 I just got the battery really well charged and then did what you shouldn't do and spun it for an eternity untill it just got warm and started.
I might get a chance tomorrow and I will use the new coil and good HT leads off Murf.
The prime suspect, apart from the simple overcoming of the inertia of a tight engine, is the carb. I am always dubuious about the float settings and mixture screw no matter how carefully I have set things up.
The 123 is ridiculously easy to setup, but the instructions are misleading and could do with a wiring diagram. It isn't 100% perfect as the fit if the cap is too tight and it's hard to work out when you have it just right.
I had to sleep on it with the 500 before it fired up...it wuld just have been nice to have it first time.:bang:
 
One thing I found with the 123 and the Bosch coil is they produce such a strong spark it actually was jumping through the two HT leads for the plugs. Where they run through the little plastic sleeve that holds them together after they leave the distributor cap and go to the cylinder head.

I couldn't work it out at first, as I had one HT lead disconnected on the cap and two spark plugs plugged in at the other end resting on the block and they were both sparking???

I thought that's impossible what's going on here? It wasn't until I separated the HT leads that the disconnected lead stopped sparking. It was then that I could actually see the spark jumping across the leads insulation.

If you have the combination of coil and 123 I have you need to invest in some Magnecor or equivalent leads for the plugs or keep them apart.
 
Last edited:
The HT leads off my 500 are pretty good quality; I was prepared to forsake originality with them as the original type fell apart in addition to the other issues with them.:eek:
The engine started first turn today and completely took me by surprise. I think that the primary thing I had wrong was that the LED in the 123 was on at the wrong point. There were two options within the range of travel that I had it at and I had the wrong one.
I know it looks a bit shabby compared to most people' efforts but the sound it makes is lovely to my ears.
MAL_3618 by Peter Thompson, on Flickr
I made a long video with commentary that will take ages to upload.
[ame]https://youtu.be/f24mG7gIGX0[/ame]

Next job...the gearbox.:D
 
Last edited:
Sounds sweet, fan belt a bit flappy but you know that already I guess from your previous post on the subject.

That Lancastrian accent is getting a bit of a Scottish twang to it, do you realise that? How do you say totally!!!:D
 
That Lancastrian accent is getting a bit of a Scottish twang to it, do you realise that? How do you say totally!!!:D

Noooooooooooooooooooooooooooooooooooooooooo!!!!!!!!!!


(there's no "A" in it....is there?)

What I notice is how obsessed I appear to be with the "sound" of it....it's an engine Peter, not a musical instrument.:D
I'm pretty well a convert to that 123 thing now and I'm going to see if it makes any difference to the 500 engine by fitting it for a while.
In the course of all this I discovered I have the 500 distributor on the wrong way round, not that it matters.
I have also ordered all the bearings etc., so that I can overhaul the alternator and give that a try after learning how to install it via Darryl, :)
Just in case you thought I wasn't selling my soul to modification sufficiently, I've also ordered a hazard-warning kit. Up here we often get traffic-controls springing up in some very dangerous places...on narrow roads, after tight bends or at the bottom of steep hills, and I have been feeling a bit exposed at the rear:eek: because I am invariably the last of the bunch to arrive at these stops and look behind me nervously awaiting the next lorry.:eek:
 
I'm pretty well a convert to that 123 thing now and I'm going to see if it makes any difference to the 500 engine by fitting it for a while.

Yep well I took a bit on convincing at first, especially because of the cost of it in the first place. "Is it really going to make that much difference?"

Luigi positively purrs now and starts so easily, I am sure you will notice a difference with the combination with the Bosch Blue coil. The engine just revs so much cleaner, no hesistation or lumpiness. It may well be why you are so obsessed with 650 engine noise, it could be down to the 123?
 
What I notice is how obsessed I appear to be with the "sound" of it....it's an engine Peter, not a musical instrument.:D

It really does sound great !
 
My stupid Ebaying finger strayed too far last week and I ended up with another engine and gearbox...well why not, the first one runs perfectly so why not acquire two more. At the back of my mind I was thinking "Spares" and mainly " Possible spare 1st gear sprockets?"
MAL_5777 by Peter Thompson, on Flickr
MAL_5773 by Peter Thompson, on Flickr
It's a good job it was cheap because of course, first is damaged although maybe not as bad as my existing synchro box. I say synchro but I am not clever enough just to see it is at a glance, but it seems to have the right number.
MAL_5774 by Peter Thompson, on Flickr
MAL_5779 by Peter Thompson, on Flickr
The engine is apparently a 594cc and has the 500-style thermostat cowling with the heater elbow in the right place for a 500. The carb seems factory blanked at the fuel return pipe. The exhaust has been heated with an acetylene torch, possibly to de-stress it when fitting but maybe to bend it around that heater elbow which also has an amateurish ding in it.
It looks good, apart from being sprayed in a mist of oil and started almost first time.
[ame]https://youtu.be/1G5VtkotT4c[/ame]
I have to rethink this because it seems a shame to split it from the box and even to use it for parts. I actually spent more than this cost getting missing parts for the 650 engine and I could have got everything from salvaging from it. I might even try a winter changeover and give this one a spin in my car for a few weeks to see how it performs and what might be wrong with it.
I am a bit puzzled about what it actually came out of and why?
 
oh another engine! how did you get that past the wife?

Easy, it just takes the place of the previous one which now moves to the back of the garage. It is an insane collecting obsession I know, but less wierd than some of the things people collect; at least it's usefl and has some life to it.(y)
Given that it must presumably have been made in the very early 70's in Italy, is is much more like the 500 engine. The details add up, and the finish, the quality of castings and bolt-heads all make it look like it would be at home in the 500 engine bay.
Murf the test-bed!:)
 
Ooh that does sound really sweet, as Sean says looks really well balanced. I guess not having the fan attached probably makes it a little be more stable as well.

Is it out of a 500R? What is it an extra 4 BHP?

From what I understand all 594cc were a synchro. Did you say you paid £150 for engine and gearbox? If so you got an absolute bargain there.(y)
 
Back
Top