Technical 650 Engine Rebuild

Currently reading:
Technical 650 Engine Rebuild

Good that's what I like to hear.:D

I used Autotek VHT paint if I remember correctly on the block, it's able to take temps up to some silly figure but as it gets pretty close to the exhaust I thought it would be better safe than sorry and having it peel off. So far it's been okay after a couple of years only peeling a bit where I didn't get all the grease out of the little nooks and crannies.

You can pick it up on eBay for about £15 for two cans.


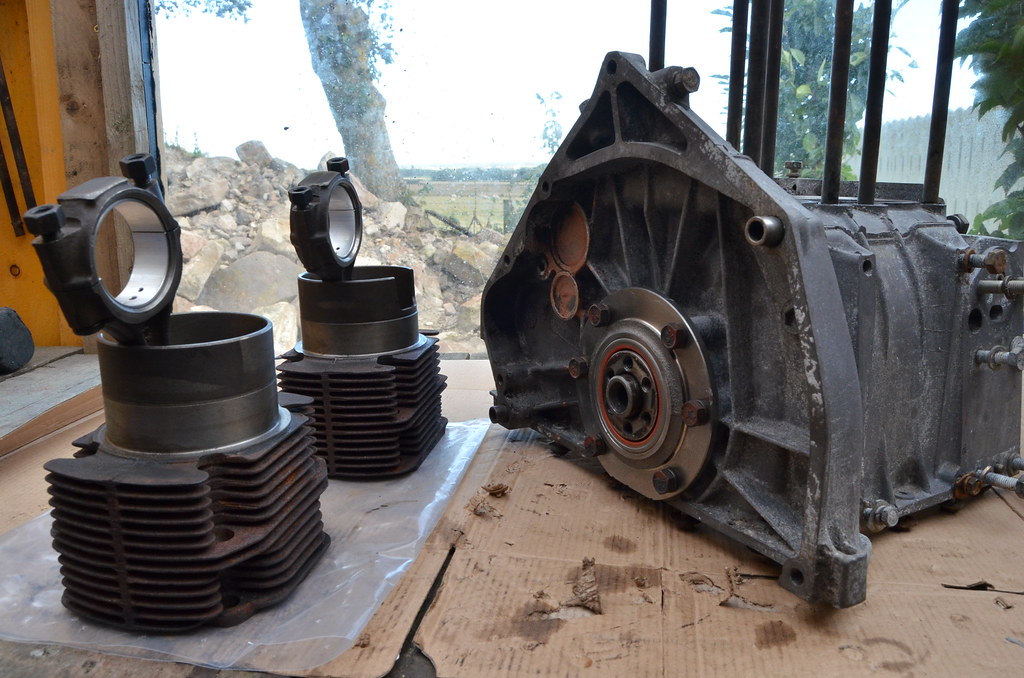
The 650 lump was in pretty good nick under the grime probably protected by all the oil leaks it had.(y)
 
I have been doing a little research (does Youtube count??) into using molasses to remove rust. Apparently a brew of 5:1 molasses and water works a treat.

Chris
 
Steel. Apparently it stinks after a while and it takes a week or so, but the inner hippy in me likes the thought of it being non toxic.

From the videos I saw it removes rust just very effectively.
 
The VHT paint works well on Ali
Not so on steel
My engine tinware went rusty after the paint was added
 
Andrew,

Interesting to know. I haven't looked at my tin work yet, but I was going to use the VHT stuff. Did you use a primer?

Chris
 
No primer deemed necessary on instructions
Adheres fine but has gone rusty
Very disappointing seeing that I painted loads of things....
 
Andrew,

Interesting to know. I haven't looked at my tin work yet, but I was going to use the VHT stuff. Did you use a primer?

Chris

Chris, I would (and will) prime the steel cowlings and I doubt VHT is needed for them.
The factory-finish may as well have been poster-paint as it didn't work well, so proper preparation, including a primer/undercoat is the key (pun intended). I think that any type of industrial paint such as tractor-enamel would work well.
The crankcase and cylinder head will need proper engine paint which usually needs no primer and cures with heat. I always thought that was by engine heat alone but there have been differing messages here.
I also thought that VHT paint was intended for exhausts and manifolds.
There are all sort of acid treatments for rust, but as far as I know, phosphoric is the only one that can create an non-reactive coating when the rust has been removed.
 
I also thought that VHT paint was intended for exhausts and manifolds.

In my distant youth we used VHT paint for the exhaust headers on racing motorbikes, which were steel, and these reached very high temperatures. We never had an instance of the paint flaking or peeling, only ever repainted when desiring a change of colour.

Ian
 
I always Plasti-Kote enamel paint on my tin work, it's heat resistant up to 121°C so no worries about heat issues. Dries really quickly as well and comes in lots of different colours if you want to be a bit adventurous.
 
I always Plasti-Kote enamel paint on my tin work, it's heat resistant up to 121°C so no worries about heat issues. Dries really quickly as well and comes in lots of different colours if you want to be a bit adventurous.

I think I will be adventurous. If this thing goes in the back of Murf I want to signal that I know it's out of place.;) Dayglo green? a "subtle" yellow?:p
FOR_5715 by Peter Thompson, on Flickr
I have finally stripped all the deep rust off.
The tank probably had about 20 litres of dip in it and this has all now turned a cloudy grey which is the rust turned to iron phosphate. The cowlings have taken on the same colour but after rinsing, a thin layer of fresh rust starts in places. The remaining black paint needs stripping and prior to painting I will wipe the bare metal with neat acid.
I've spotted that at least one of the bushes for the thermostatic flap has gone oval. A little detail, the bolts that hold the sections together don't have that nice sunken head of the 500 engine.
I've also double-checked the cylinder head between the valves after seeing an Ebay ad for a head, which said that micro-cracks there are common. It's fine.(y):) And I'm guessing that these later heads are compatible with unleaded. I can certainly clearly see the steel valve seats.
 
Last edited:
Had all my tinware powder coated - no way that's going to rust and with the vast amount of differing RAL colours you are spoilt for choice. All my gear including the Alternator wheel and dizzy exhaust cover plate cost £50 - no brainer!!

Ian.
 
I've also double-checked the cylinder head between the valves after seeing an Ebay ad for a head, which said that micro-cracks there are common. It's fine.

Greetings 500, a quick question regarding the cracks between the valves. At what point do they start to become a problem and are the valve seats compromised??

Ian.
 
At what point do they start to become a problem and are the valve seats compromised??

Ian.
A question for others to answer I think; Tom the hobbler , you there?
As for the powder-coat, that's value for money. Problem, as always, up here is the sparseness of firms to do anything like that and my keenness to do everything I can.
It will end up being tractor enamel...and it will be gaudy.:eek:
 
Hi the head has a tendency to crack between the valves
It can be easily repaired and it will be stronger after
Ali stitching is a well covered subject and will not cost more than an additional £60 when the head is machined \ valve seats replaced
 
I have only seen cracking between the valve seats on the Panda 30 head, never on the 'normal heads' I have a P30 head, and yes, it does have light cracking between the valve seats. 1 expert told me not to worry, just put 'JB Weld' if I am worried, but with so little needed I would worry about the inside of the crack being clean and the 'JB Weld' having enough 'grip' and staying put! I am about to have slightly larger (35mm) inlet valves and seats fitted, so I will get the crack sorted at the same time. As to how 'big and deep' the cracks can be before one must have them attended to, I honestly don't know. I think it has to be the old 'thumb-nail' rule---if you can feel it and get your thumb-nail in it, sort it!
banghead.gif
confused.gif
thumb.gif
 
I'm finally making a start and have few of questions about main bearings:

1.What's the difference with the ones advertised as "better quality" or "steel"? It seems very odd and the price difference is huge.
2. Bambino (whose engine rebuild hygiene puts me to shame:rolleyes:) mentions an "O"-ring rather than a gasket at the interface to the crankcase. The gasket set doesn't have the "O"-ring; does it make a difference because I think there is a recess to accept the ring? Could I use sealant instead of or in addition to the gasket?
MAL_0986 by Peter Thompson, on Flickr
3. I used threadlock on the setscrews on my 500 engine; is that necessary?

I was disappointed with the Corteco front crankshaft seal, as supplied in the kit on the 500 so I bought the silicone seals for the 650. Side by side they don't look much different apart from the obvious, but the red rubber is softer.
MAL_0987 by Peter Thompson, on Flickr
 
Peter,
if I remember correctly the large o ring is not included in all kits. But you do need it. I think it goes over the bearing housing with the gasket. Not in front of my pc at the moment so I haven't got access to any of my images.
 
I couldn't find a source for the O-ring behind the rear bearing carrier so I used the normal gasket and put my favourite sealant into the groove....it won't leak.
So the crankshaft was in place and having checked the ring clearances (slightly on the tight side TBH) I fitted them and the bearing shells.
MAL_1744 by Peter Thompson, on Flickr
The big-end bolts didn't look stretched and the nuts, which I renewed on my 500 engine, aren't aerolocks, so I re-used them using threadlock for extra peace of mind. The numbers stamped into the conrods are facing the camshaft as instructed.
MAL_1752 by Peter Thompson, on Flickr
I noticed that the big-end bolts look like there may have been a slight peening of the ends, maybe to help secure the nuts?
MAL_1747 by Peter Thompson, on Flickr
I had another issue when I realised that there is not an O-ring in the kit for fitting between the oil-pump pickup and the block. So out came the Permatex sealant again. So by the end of play I had the sump back on.
Do you like my somewhat rustic method of keeping the cylinders in place?
MAL_1749 by Peter Thompson, on Flickr
In fact my whole operation is a bit Medieval, but I am taking care...honestly.:D
 
Don't worry about being 'rustic' Peter---there must have been hundreds of these engines rebuilt in far more 'rustic' conditions than you are doing! With regard to your question of the 'high quality' bearings. I believe that the normal main crankshaft bearing 'case' is cast iron, whilst the 'high quality' bearing 'case' is steel. When the 500/126 is continually revved hard (over 6,000rpm) the crankshaft can flex--this can cause distortion and excessive wear on the crankshaft main bearings. I am led to believe that the 'high quality' (steel-case) bearings are less prone to distortion and excessive wear ----so I am told!
One little trick I learned in 'my yoof' was that when building engines up, to coat all moving/in-contact surfaces with a 50/50 mix of a thin engine oil and STP---the oil lubricates the surfaces and the STP holds the lubrication in place. Do NOT put the residue of your mix into the engine until it is well run in. And don't forget to pack the oil-pump with glycerine (or similar) prior to fitting it all together--the engine oil pressure will come up much quicker if you do this.
thumb.gif
smile.gif
 
Back
Top