Technical Throttle Cable Broke and Mystery Cable Spotted

Currently reading:
Technical Throttle Cable Broke and Mystery Cable Spotted

Giardiniera1969

New member
Joined
Mar 9, 2014
Messages
125
Points
40
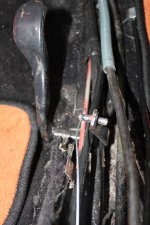
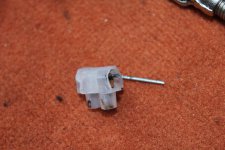
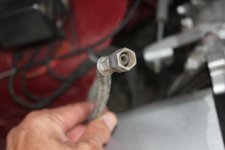
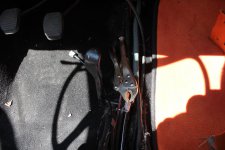
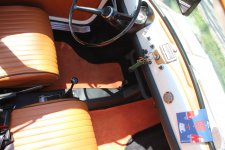
Spring is back and with it Fiat Cable Blues. I had a new issue today with the throttle control cable. I gave it gas and felt a pop and the pedal became loose. I opened the tunnel and found my throttle control cable had snapped. The guy who rebuilt this car seemed to use some weird clamp to clamp the cable through one of the holes in the gas pedal. (n) I don't think that it is correct but not too sure. I ordered a new cable today but not really too sure how it goes on. It looks like it has a grommet over the gas pedal end which makes sense vs just a piece of wire and clamp. I looked at the other posts and the pictures showed the right hand drive version. Any advice would be appreciated.

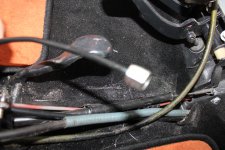
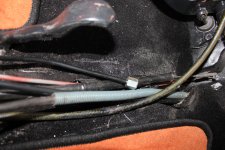
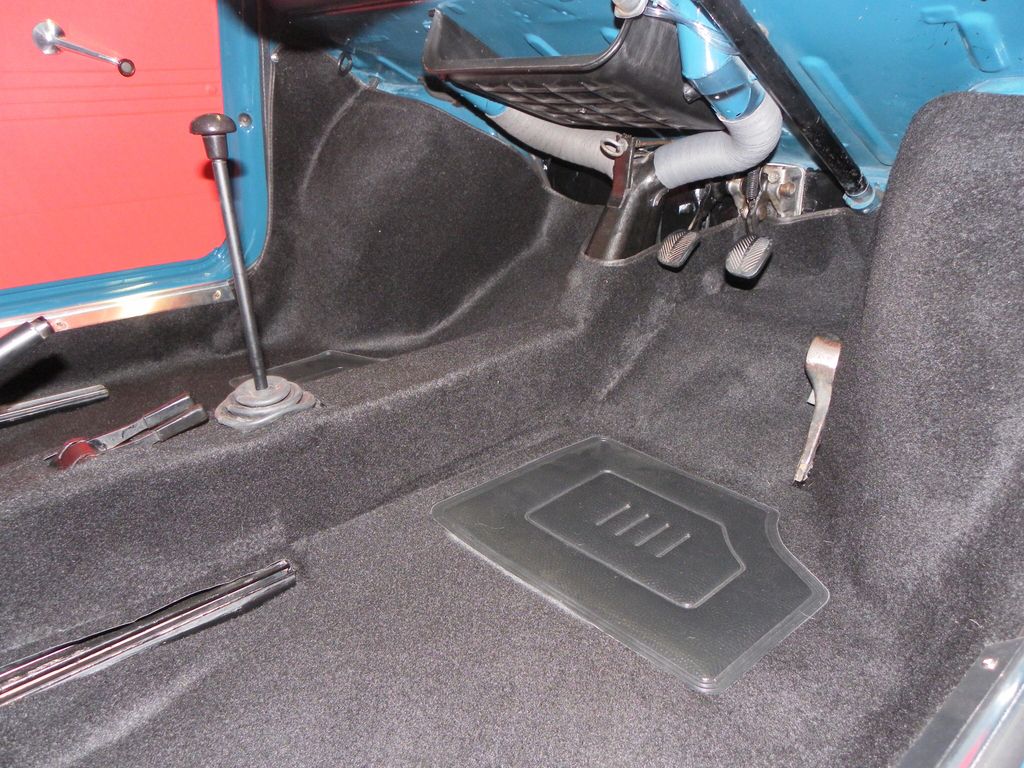
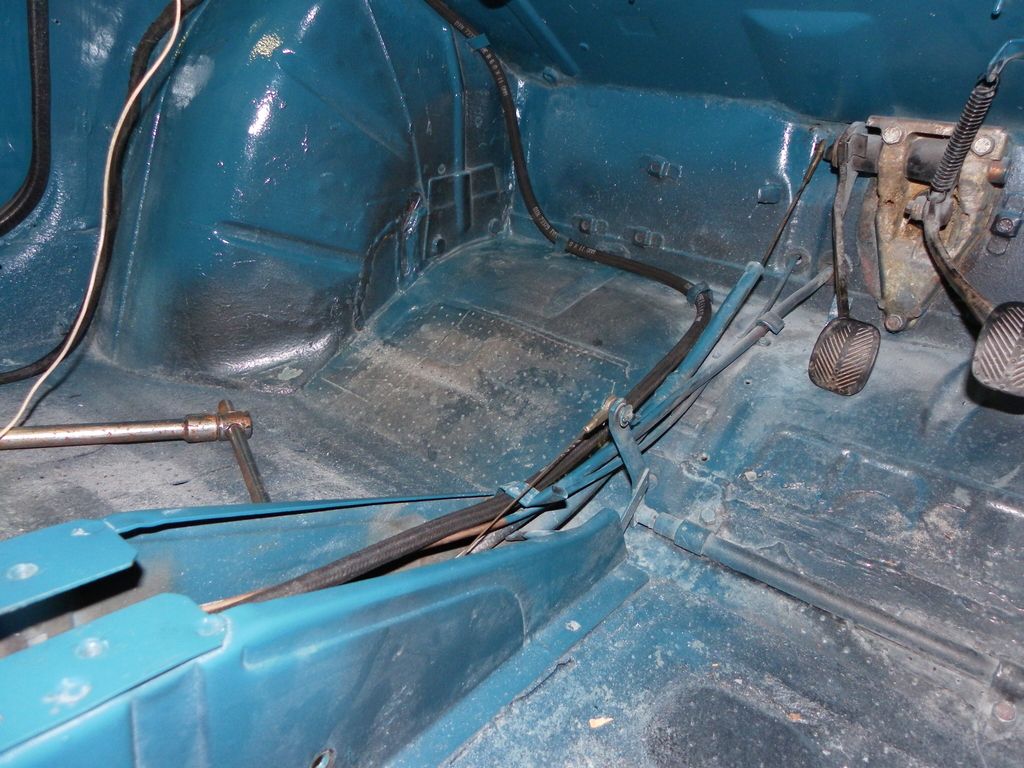
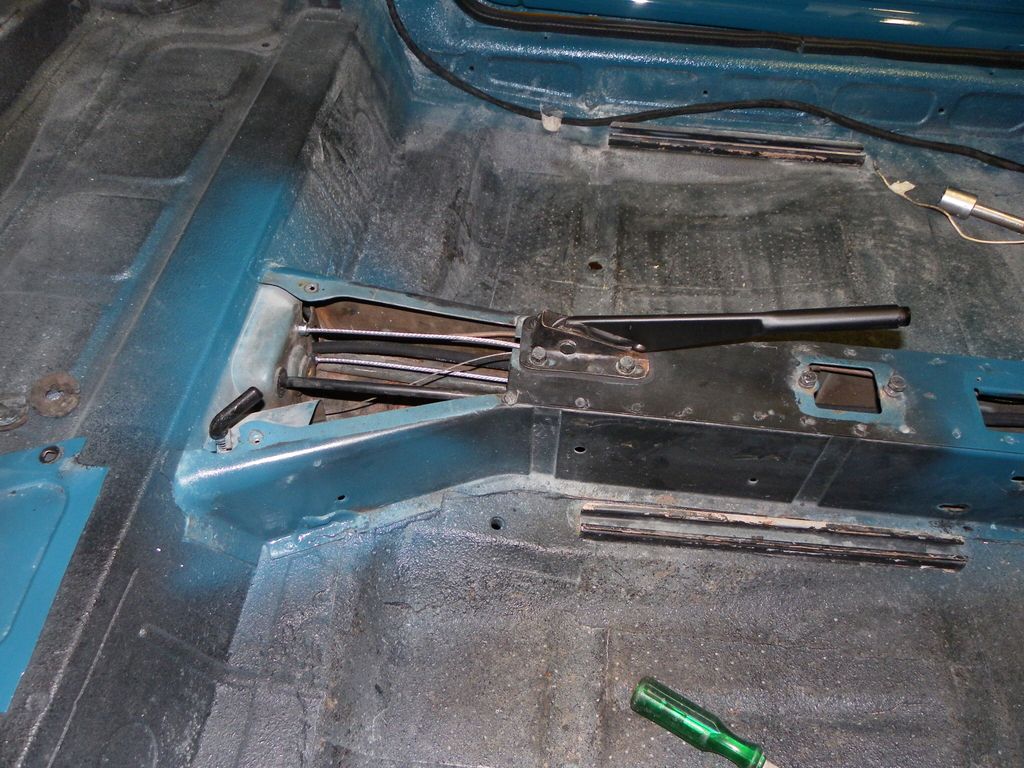
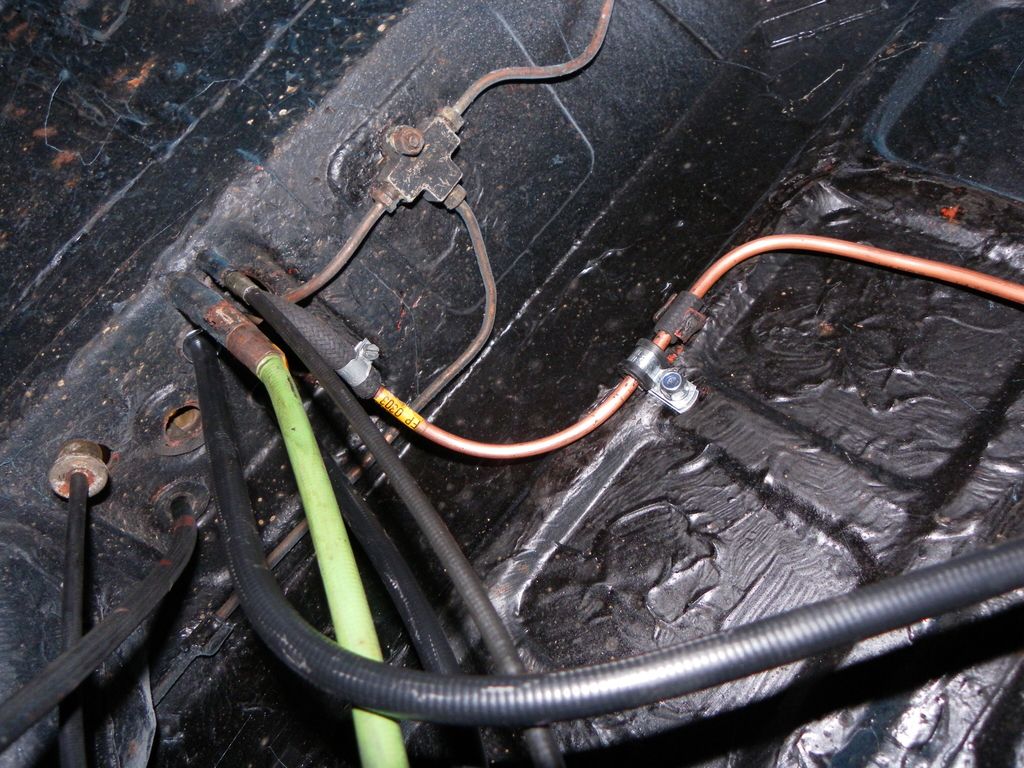
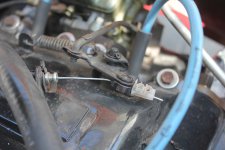
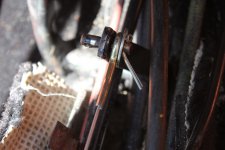
Also, I when I took off the front tunnel, I found what looks like a speedometer cable not attached to anything :confused: although my speedometer works. Seems to have the back unattached in the engine compartment as well :confused:

The first pictures are of the throttle wire and clamp, and the next ones are of the mystery cable front and rear.
 

Attachments

  • IMG_1238.jpg
    IMG_1238.jpg
    5 MB · Views: 70
  • IMG_1239.JPG
    IMG_1239.JPG
    6.5 MB · Views: 28
  • IMG_1240.JPG
    IMG_1240.JPG
    8.3 MB · Views: 32
  • IMG_1241.JPG
    IMG_1241.JPG
    7.8 MB · Views: 25
  • IMG_1242.JPG
    IMG_1242.JPG
    4.7 MB · Views: 28
In your first picture John where the cable is going through that hole in the arm. The new cable has a metal loop on the end of it that slips over the the bit where the hole is and then you need a split pin to go through the hole where the cable has been threaded through.

Tony
 
Oh and I am guessing but that other cable is probably an old oil pressure gauge pipe. Which suggest someone probably had a gauge fitted at sometime in the past?
 
Is it hard to thread the new wire through? Should I tape them together and pull or is there another method?
 
I assume the Giardiniera is similar to the saloon, in that it has the centre tunnel with all the cables running through? If so it's fairly straightforward. Pull the old one out probably best from the engine end so cut the little bent bit off that is threaded through the hole in the arm, so that it will pull through cleanly.

Where the two vents are that you open and close to either have hot air on your feet or on the screen, if you pull back the carpet there on the centre tunnel you should see that the existing cable is routed down a metal pipe that runs all the way to the rear of the car.

So when you get the new cable just pull the outer off first then feed the new cable down the pipe. Might be a good idea to squirt a bit of duck oil or WD40 beforehand just to give it a bit of lubrication. It should push through cleanly and it will reappear at the back of the car, here you refit the outer sheath and the little metal bit on the outer pushes into the pipe, then just run it up to the car and reattach.

Tony
 
Scrub that I have told you the wrong cable I have described the clutch cable.

Let me have a look for some pictures!!!!
 
Ok you need to remove the front ducting that feeds the hot air to the screen, it's held on with 6 x 10mm self tapping bolts if I remember correctly so you will need to pull the carpet back and it's probably a good idea to remove the centre plastic console.

41c467aa3155bf5a6f7fbc238d768e14_zps04ibtcl4.jpg


In this picture you can see the ducting pipe removed. I know this is a right hand drive car but it should be fairly self explanatory when you get the ducting off. I am pretty sure that the accelerator cable feeds into a pipe as I described in my other post about the clutch cable. If it doesn't you need to remove the inspection panel by the rear seats as in the last picture to thread it through. It will be pretty obvious once you get the front ducting off.

ca79a7d945d5f665ec529d0a57668be9_zpsci5zjsws.jpg


643068609799d89a9beb7958bb183289_zpsvcwcman7.jpg
 
Just found another picture it does feed into a pipe, so you won't need to remove the rear panel just feed the new cable down the pipe after removing the ducting.

Here it is where it emerges at the other end of the car, it is the black cable next to the thick green clutch cable.

013aee295a0e81ce951102a782bc3c61_zps9xy5ljwv.jpg
 
Thanks, very helpful. One question unrelated: In the first photo between the two front ducts there is a screw or lever with what looks like a pull ring. My car has the hole that this lever goes into on the lower duct, but I don't have this ring looking thing. What is it?
 
Yes as Damian says it the cruise control or hand throttle cable. I don't think I would use it as a cruise control though as there is no way to switch off when driving other than to reach down and push it back in. I use it when I have first started the engine up and turned the choke off just to give it a bit higher revs while it is warming up and static.

http://webshop.fiat500126.com/katalog/artikelinfo/779/throttle_hand_lever_assembly

Axel Gerstl sell it but you need the clip that holds the cable in the hole which I cant see if they have it on their website but Van der Laan seem to have the clip and the cable.

https://www.fiat500vdlaan.nl/en/webshop.php?CategoryID=31
 
Ok, I always wondered what went there. I think I will have to install that while I am at it! If you have a picture of how the bottom fits onto the pedal, I would appreciate it!
 
Went to take a photo and of course it would mean removing the ducting which I don't really want to do.

The hand throttle cable simply loops onto the opposite side of where the accelerator cable goes. In your first picture where your existing cable is threaded through the split pin hole. On the opposite side of that is another lug sticking out with a split pin hole. The cable simply loops over that then you need to get a washer and a split pin to prevent it coming off.

On the cable outer there is a metal bracket with a screw hole in it, this bolts on to the floor using one of the self tapping bolts that hold the ducting in place. Once you have it in place on the ducting top it will be clear.

Tony
 
Looked through my photos but nothing shows it well. I have attached two photos from the parts diagrams I have. Hope they help

Damian
page14.jpg

page15.jpg
 
I wanted to post detailed pictures on how to do this, but it was so easy to do, I just took a couple of photos.

The first photo shows how I rigged it just to be able to get back to the house. The second is this white clip that he had on both ends of the cable, of course the real cable I just ordered had the grommet on the end that actually fit over the peg on the pedal. The 3rd photo shows how I secured the cable and the 4th is with the cover closed :) Also, I had my local car upholster make the black leather cover to cover the tunnel.

Initially, I planned to tape the wires together or something, but it turns out it was much easier to just pull the old one out and feed the new one into the cable sleeve that was already in place.

After I fed the new wire to the back, I secured the front grommet to the pedal using a washer and a pin. I tried to use two washers, but there was just not enough clearance.

After that, I fed the wire through the throttle and secured it using a screw that I got from Axel as well as the white link that was on previously as a back up.

I had my wife hold the pedal to the floor, and then to the normal idle position and once I figured out how much exactly was needed to fully move the throttle, I tightened it down.

Took it for a test drive and realize that I now have much more power due to the fact that the throttle cable had not been adjusted properly. I was probably only getting 3/4 of the throttle with the pedal to the floor. Took the kids for Ice-cream and came back to work on a few other things
 

Attachments

  • IMG_1337.JPG
    IMG_1337.JPG
    7.1 MB · Views: 39
  • IMG_1339.JPG
    IMG_1339.JPG
    5 MB · Views: 30
  • IMG_1340.JPG
    IMG_1340.JPG
    4.6 MB · Views: 31
  • IMG_1346.JPG
    IMG_1346.JPG
    5.1 MB · Views: 29
Back
Top