Technical Dynamo brushes

Currently reading:
Technical Dynamo brushes

Joined
Mar 7, 2005
Messages
6,240
Points
1,615
Location
Nairn
I rebuilt the generator using new brushes without electrical testing it. The car is just at the end of restoration so had never been run previously. When fitted to the car it didn't give more than a very negligible output even when tested according to Matt's Dad's excellent write-up.
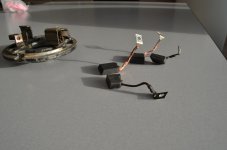
I have removed the end plate to check the brushes and compared with the half worn originals. It appears that only the very tip of the brushes has been in contact with the commutator even though they are made with a reasonable attempt at the angle they will eventually wear to.
The question is, would this be likely to seriously affect the voltage output so is it worth me sculpting them to match the curvature of the commutator?
 
Peter yes it is worth while bedding the brushes in to ensure good contact across the brush face and the commutator. A good way to do it is try and wrap some fine abrasive paper around the commutator then fit the brush so that face is resting on the paper, then spin the armature for a few minutes by hand.

Tony
 
Thanks Tony. The trouble is that I am attempting quite a bodge operation by leaving the dynamo on the car whilst having taken off the end plate. It can be done (ie. putting the brushes back) and I can see how, but I will have to bed them against a round tube or similar. UKDave suggested using the old ones which might be worth it as it would at least eliminate this as a cause of the problem.
Even though I have "flashed" the dynamo I still have a nagging doubt that it might need remagnetising.
 
I spotted a posting on the Fiat 500 Club forum from way back by someone called Brian Rylance. I believe he has passed away but has left a really useful legacy in the form of lots of good advice.
http://www.fiat500club.org.uk/clubchat/viewtopic.php?f=4&t=4353&hilit=dynamo+brushes

I adapted his technique and was able to refit the brushes, without taking the dynamo off the engine.
BRA_8007.JPG
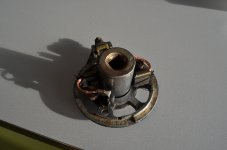
1. It's easy to take the end plate off and then I used a socket which was about the same circumference as the commutator, wrapped it in a piece of fine sandpaper and then turned the end plate with sprung brushes around it until they had the correct profile.
BRA_8008.JPG
2. Then wedged the brushes in place using thin strips of card, long enough to leave a tail that I could pull out later.
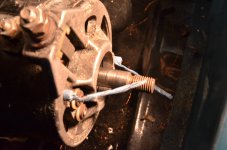
3. The tricky bit; I wrapped some masking tape around the ends of the two long bolts and formed a tail that could be threaded through their holes in the end plate.
BRA_8012.JPG
4. Then it's possible to push the plate over the shaft whilst guiding the bolts and taking care that the brushes clear the commutator.
5. At the halfway phase the cardboard packers have to be carefully removed, the plate has to be pushed home, the masking tape extracted and then the washers and nuts delicately refitted to the bolts.

You can see that when the bearing removed itself I left it out to give me a bit more free play.

I still don't know if the dynamo will now work, I have the pulley to refit, but pain though it was this was easier than taking the whole thing off.

PS. IT DID!!! :)
 
Last edited:
Back
Top