Well done Sean, and thanks for proving that it works ")


I can see your dilemma Peter.
As you don't have a jig to keep it all in place (I am just in the planning stage to build one) you will need to be very logical and careful before going to mad.
First off I would advise you have 4 wheels & tyres the same size and preferably the same tread depth, check pressures are the same.
then on a flat floor area you can check the ride height either side. You may need to chock the body to adjust the height both sides until even.
Removing the engine first is a good idea as it removes a lot of weight from the vehicle that will help the shell from moving.
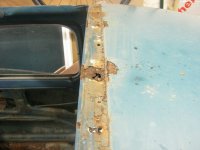
No depending on what is left of your car, you can in theory remove the inner & outer sill without causing any structural damage to the car. I did this on the ground and as long as you don't jack it up it will not move much.
I removed the outer sill leaving as much of the 1/4 panel in tact until the inner sill was back in. This will keep the rear end and rear floor in position as the rear floor pan is usually thicker metal, it also has reinforcer plates on the area at the front. The inner B pillar is best left in tact as this prevents the rear floor from dropping.
Leave what you have of the floor where it is for now. if it is attached at the front and rear it will help stop the back and front of the car moving and therefore keep the wheel base where it should be.
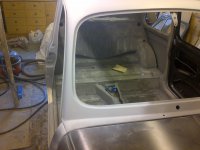
I started mine very carefully and eventually found with the sills (one side only) removed, I fitted the door back on and nothing had moved. If you really are unsure you can weld a brace or 2 from the A post to the B post, and even cross braces across the door aperture. ie roof to sills.
Just don't jack the car up, work on a flat floor, chock the wheels front and back, and remember measure twice before welding anything in place.
Even with the sills removed and the door hung in its aperture, you will find you can actually change the gaps slightly by pushing/pulling the A post by hand. Just make sure everything is clamped in place and lines up before tacking things in place.
Sean, when you had your car's bodywork stripped down and the rear wings cut out and before you started to weld in all those pieces that connect the inner sills at the rear, how did you stop the car folding or what did you do to stop the shell twisting or sagging?
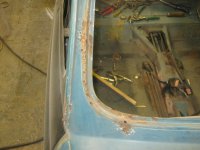
This heap I bought would need all those bits replacing and although the door sits nicely in the frame it does sag where the A post is sitting in thin air.
I am just wondering how I would keep the rear suspension mountings at the correct height and aligmment.
If I was mad enough to really jack it up I suspect that the floor under the seats would fold. You can see it start to move upwards.