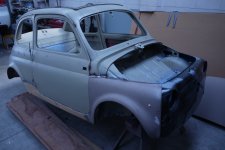
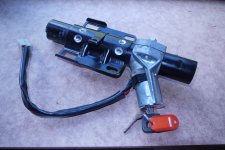
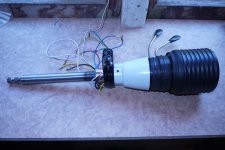
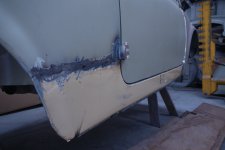
fiat before 1.jpg

500 (Classic) 1963 'D' resto with 126

Introduction

Hi all, I have learned a huge amount from threads on this site, so now my own resto is underway I thought I should start my own thread. I don't guarantee I can add an insight, but hopefully I can offer some inspiration!

I've never restored a car before, but have done a few old vespas and recently completed a nut and bolt restoration on an old moto guzzi, so am pretty confident I can have fun with this car and hopefully do a good job.

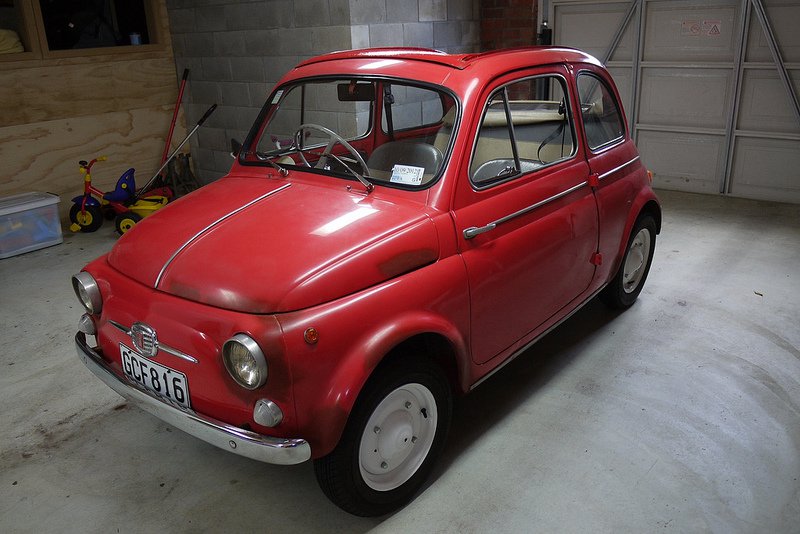
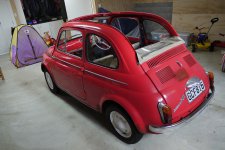
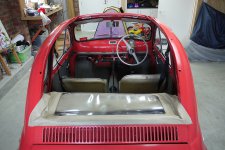
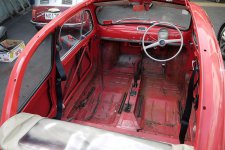
I bought the car in about October last year through an online auction. It was in a different city so I didn't view it first. A friend had a quick look and I took a bit of a leap of faith. I's a 1963 D model, which has had the rear roof unbolted to make it a "Transformable" of sorts. The existing roof just used the standard roof frame and some extra cross bars. You had to fold it back by hand but it worked well enough. The car ran well and I had a blast driving around for 3 months of summer.

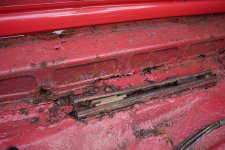
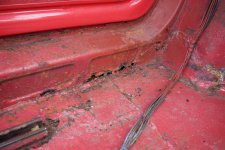
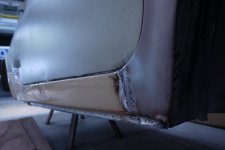
It was pretty obvious the car had rust but I ignored this while I had fun. Earlier this year the car failed its warrant of fitness test so it was time to go and see my mate Dan, who's a panel beater, and figure how bad the rust really was. The pics here show some of what was in the sills and floor. The car had a "makeover" in about 1990, and was probably quite god then, but 22 more years on the road and the rust had slowly done its job. Front panel, battery ray, drivers door, floor, inner and outer sills all needed replacing...

Faced with either a full resto or a trip to the dump I decided to save the car. And so the learning curve stated! I'll post up soon with some pics on whee the panel work has got to so far, some details of the fiat 126 donor I found and some of the work I've done on the rest of the car while the panel gets done.

Cheers Roger
Hi Roger;
I have been following your restoration with great interest, especially the engine tuning part. I recently purchased a 1971 500L with a very good body and a 595 engine already fitted. I have also purchased a 650cc '126' engine (and 'Bis' gearbox) which I will slowly convert into a '695' whilst I run the car with its present engine as the 595 is a good, strong engine. I have found that the '126 owners club' forum is a very good site for engine tuning information; a site recently added has been put on by 'BLITZ RACING' They used to make small buggies powered by 126 engines and have a lot of experience tuning these engines--a site worth looking at. Meanwhile, keep up the good work, I shall continue to follow it.:):)
 
Hi Roger;
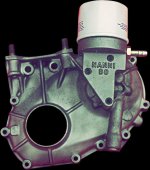
Done a bit of checking since my last message---reference your problem regarding an engine oil cooler. Check out the 'Nanni Ricambi' web-site; in the 'engine cooling' section, it shows a complete kit for oil-cooler and screw-on oil filter. The problem I am told is trying to get them to communicate with you! If you look on the 'U-tube' site:- u-tube fiat abarth part 1.5--- it shows how they uprated their engine (with the Nanni oil-filter kit)--if you go to the beggining of part 7 of the same series, it shows how they installed the oil cooler---under the o/s/r of the car with a very neatly fabricated air scoop. Re my last note, the 'Blitz Racing' tuning information is in the 'engine tuning' section of the 126 owners club forum--hope all this helps:)
 
Thanks Tom, I tried buying an oil cooler from Nanni Ricambi but it didn't work out. The website was easy to use, but there is no online payment system, so I guess you're just supposed to wait for them to calculate the cost and send you an email. I think it has been about 2 months since I placed the order, but I have heard nothing from them.

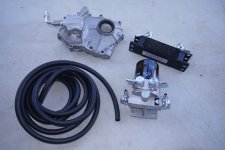
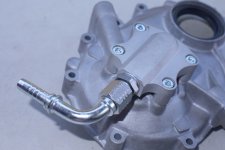
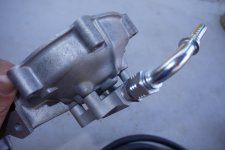
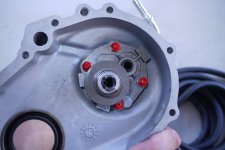
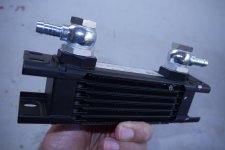
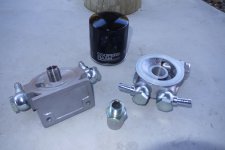
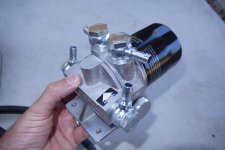
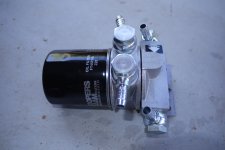
Meanwhile I have ordered and recieved an oil filter/cooler setup from another supplier. I've included a bunch of pics below. I opted for the version that has a thermosat, so the oil cooling only kicks in when needed. The filter/themostat unit is also "remote" so unlike the Nanni kit the filter can be mounted anywhere in the engine bay, rather than as a fixed item on the front of the timing cover where the oil take-off is. I'm yet to see if this is an advantage but I guess it must be good to reduce the load on the bolts which hold the oil take-off to the timing cover?

Tom, I checked out the you tube site you mentioned. Thanks for the tip. Very nice car! I notice they are doing away with the heating duct that runs from the engine to the car, and using that space to mount the oil cooler unit. I want to keep the heating, so will be mounting the cooler on the opposite side. There is heaps of room there with the whole space "inside" the left-rear swing arm available. At least that's the way it looks right now - I'll let you know how I get on! I also have plans for a scoop to drag air into the cooler - I just need to figure out a way to make sure it doen't become a scoop for stones/rabbits/manure etc etc as well!

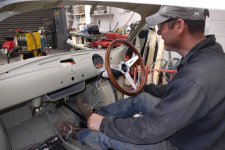
Meanwhile, work has gone well matching the steering column with the steering rack - I couldn't resist a mock "drive" of the car in the workshop! Just a shame the real thing is at least 9 months away!

Cheers Roger
 

Attachments

  • fiat 126 oil cooler 1.JPG
    fiat 126 oil cooler 1.JPG
    1.4 MB · Views: 197
  • fiat 126 oil cooler 2.JPG
    fiat 126 oil cooler 2.JPG
    1,017.7 KB · Views: 214
  • fiat 126 oil cooler 3.JPG
    fiat 126 oil cooler 3.JPG
    1 MB · Views: 188
  • fiat 126 oil cooler 4.JPG
    fiat 126 oil cooler 4.JPG
    1.2 MB · Views: 187
  • fiat 126 oil cooler 5.JPG
    fiat 126 oil cooler 5.JPG
    969.7 KB · Views: 170
  • fiat 126 steering rack conversion 1.JPG
    fiat 126 steering rack conversion 1.JPG
    1.5 MB · Views: 231
  • fiat 126 oil cooler 8.JPG
    fiat 126 oil cooler 8.JPG
    1.1 MB · Views: 159
  • fiat 126 oil cooler 7.JPG
    fiat 126 oil cooler 7.JPG
    1.1 MB · Views: 145
  • fiat 126 oil cooler 6.JPG
    fiat 126 oil cooler 6.JPG
    1.1 MB · Views: 145
Hi Roger;
I can see and understand your logic regarding having a remote oil filter--who did you buy it from in the end?--it certainly looks the dogs dangly bits! I had a good old think regarding the problem people seem to be having with the 4 ltr sumps--have a look on the relevant page--keep up the good work(y)
 
Hi guys. I bought the whole setup as a kit from axel gerstl in Germany www.fiat500126.com

The filter housing and thermostat housing are indeed made by mocal, you can buy them online at http://www.thinkauto.com/

The complete kits are not cheap, but if you add up buying the parts separately, and then having to machine a nice takeoff housing from billet alloy, then, for me at least, it was simpler to go with one made by the pro's than to fabricate myself. It frees up time to get on with stuff I Have no choice but to do on my own, like figuring the best way to get a decent looking, safe aand functional steering column to match the 126 steering rack.

Cheers Roger
 
Hi Roger- great project and looking good! would love to see some pictures of your steering column solution as I have to do the same with my Giardiniera. I have welded in a complete 126 lower bulkhead in as it was accident damaged beyond repair and would like to retain the 500 column stalk and top mount. Keep up the good work!
 
Hey Roger - if I just want to fit a proper oil filter to the engine, where do I return the oil ?

For that matter, where do you return it if you are using a cooler ?

Chris

The sandwich plate he is using has a oil feed and return for the cooler so when the plate is closed no oil flows through the cooler and then when it pops open the oil flows through the cooler, back down the pipe and through the oil filter (or is it filter and then cooler, i forget).
 
Chris,

I will let Roger be the expert, but I have looked into this and I believe you return the oil to one of the two oil passages that are blocked with allen screws. One just by the distributor or one just above and to the right of the oil pump.
John
 
Hi guys, I'll post up some more pics of the steering rack and column solution once I am sure it all works as it should. It's very straightforward really. At the moment I am just looking at how best to fabricate a "hanger" to hold the upper steering column in place. Lots of options, but I want it to look good without looking too bling. I'm trying to follow the asthetic which says "This is a budget car - how would fiat have done it?" At the moment that includes using a cut down portion of the "hanger" from the 126. I know it is possible to use the whole 126 setup, but that means having 126 incicator stalks etc and a big ugly steering lock with plastic cover. Not my taste.

As for the oil filter return Chris, it goes into the block via the gallery closest to the timing cover. If you look closely at the fiat oil flow diagrams you'll see that oil goes through the pump and is squirted out onto the end of the camshaft. The camshaft "flange" has two holes in it which match up as the cam turns with a gallery that leads down to the front of the crank, from whence it then flows through to the standard centrifugal oil "filter" and so on from there through the engine. The gallery you put the oil line return into is just the bore created when fiat have drilled into the cases to make the Cam-Crank gallery.

The modified pump has it's factory outlet blocked to force it to feed oil through the new outlet, so by using this gallery you're simply returning the oil to the point where the pump would have put it in before modification.

Phew - I hope that kinda makes sense!

Oh yeah, and the sandwhich plate I am using does indeed have a thermostat. I don't have it to hand right now, but I'm pretty sure it flows through the cooler before the filter when the thermostat is open.

Cheers Roger
 
One further question - if I use an assembly like the Nanni one (if I can ever get them to respond to my emails) will I still be able to close the engine lid or will I have to modify it so it hinges at the top ?

I like the idea of fitting a proper oil filter and with the amount of work my car will do, I probably don't need a cooler as well.

Chris
 

Attachments

  • Oil filter.jpg
    Oil filter.jpg
    60.8 KB · Views: 59
Hi Chris;
Look onto the U-Tube sites:- (1) U-tube fiat abarth 1.5 (shows Fiat 500 engine being rebuilt into an Abarth 695 engine), and (2) U-tube fiat abarth 2.0 (shows same engine being run). Both the sites clearly show that the Nanni engine mounted spin-off oil-filter clearly tucks in under the rear exhaust down-pipe, therefore the boot lid WILL shut with the filter in place. The whole series (1-8) is most interesting to follow as it shows the whole proceedure, from stock 500 to full-blown 695. Especially, look at where and how they locate the oil-cooler--beggining of episode 7:):)
 
Thanks for that - very interesting. I'd started watching a few of them when you mentioned it in one of your previous posts.

I've often thought that a proper oil filter would be an improvement for these engines and now having done a bit of research, the installation seems straightforward.

The guys in the youtube video removed the exhaust side of the tinware (doesn't fit a Panda head anyway) and fitted an oil cooler up near where my starter motor is situated - interesting.

I've emailed Nanni and placed an order so I'll see what happens next. If I go ahead with this, I'll start a new thread as I don't want to hijack Rogers' excellent rebuild story.

Chris
 
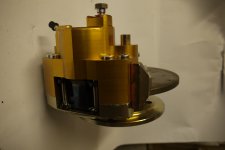
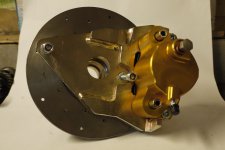
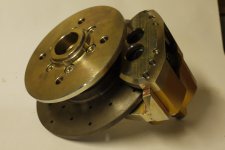
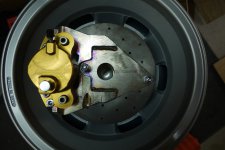
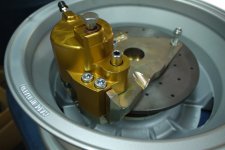
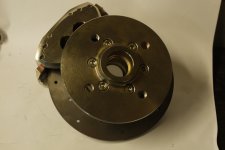
I got a bit carried away the other day and ordered up a front disc brake kit from www.fiat500126.com. I'll let the pics tell the story. They make these kits with 500 and 126 stud pattern, but both require 500 stub axels and bearings. They are also made to fit inside a 10 inch rim, so as you can see, no clearance issues at all on a 12 inch rim!
 

Attachments

  • disc brakes 3.JPG
    disc brakes 3.JPG
    1.1 MB · Views: 76
  • disc brakes 2.JPG
    disc brakes 2.JPG
    1.3 MB · Views: 84
  • disc brakes 1.JPG
    disc brakes 1.JPG
    1.2 MB · Views: 90
  • disc brakes 5.JPG
    disc brakes 5.JPG
    1.4 MB · Views: 81
  • disc brakes 6.JPG
    disc brakes 6.JPG
    1.3 MB · Views: 90
  • disc brakes 4.JPG
    disc brakes 4.JPG
    1.3 MB · Views: 73
HI all, here’s a very overdue update on my resto.

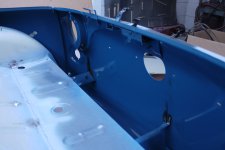
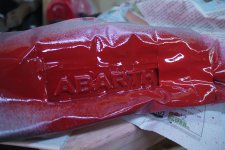
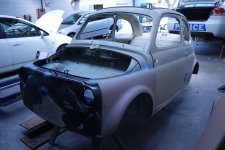
Panel work is almost done! After a year of on-and-off surgery all the main welding is done and all that’s left to do is a few small jobs and to dress all the welds properly and get out the seam sealer. The first paint has even gone on, as I opted to paint the battery tray area and around the inner front guards and the inside of the front panel before it was welded back on. No-one will ever see but we gave it a quick spray because I wanted to be sure that the paint was right in the seams of the guards. I don’t think the photos here really show the colour properly, and the bits you see will be resprayed again with the rest of the car.

There’s a whole heap of work to be done prepping the car for final paint. I’m planning to texture the whole of the bottom of the car, including inside the guards, and I’ll then paint over the texture. Then I’ll fit the suspension and wheels so the car can be rolled into the paint booth for the main paint job.
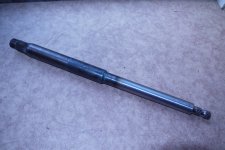
I’ve made quite a bit of progress with the steering conversion. The certifying engineer has checked and approved the welding on the steering rack brackets and a friend has made a hybrid steering column which has a 500 upper half and 126 lower half.

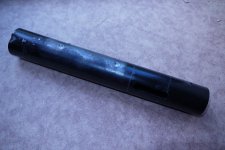
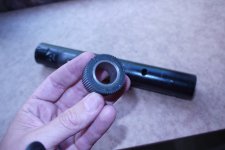
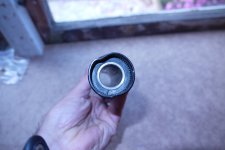
Because this shaft mounts into a universal joint it needs some extra support beyond the standard “hanger” that sits under the speedo. I’m planning to make this from a section of the original 126 support. You can see in the pics how I’ve removed the steering lock and brackets from the 126 part, leaving just a tube. I’ll next cut the tube down to about 110mm long and refit the steel and rubber bushes that hold the column. I could have just made a bracket with nylon bushes, but the 126 bushes are really good, with the rubber helping ensure the column self-centres in the support. I’ll have to then weld some tabs on the tube so it can be bolted up to the inner bulkhead above the driver knees.

Unfortunately regulations in New Zealand do not allow for non-factory welding on steering components, so things are now delayed while I have a complete replica of my hybrid shaft made up from a single piece of steel by a gear cutting specialist.

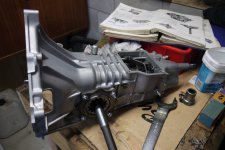
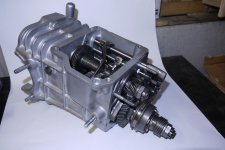
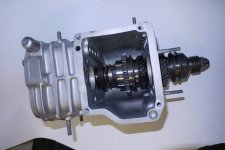
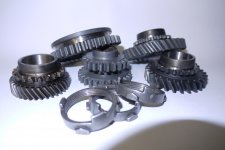
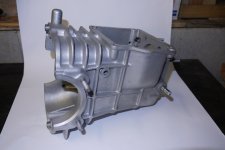
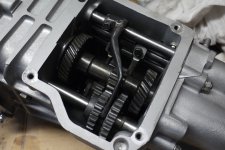
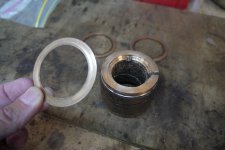
My gearbox if finally back together. I could find no-one who sold new side gear thrust washers, so the only solution was to have a friend with a lathe make some up from a lump of bronze. I just can’t believe I am the only person who’s needed to do this. The thrust washers are a wearing part so there should be more people out there needing to replace them during a gearbox rebuild?

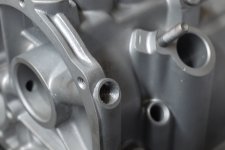
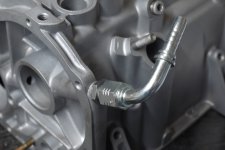
I’m moving on to the engine build over the next few weeks. I know there is a lot of interest in oil cooler setups, so I have included a couple of pics here showing where I have tapped into the oil gallery for the return feed to the engine block.

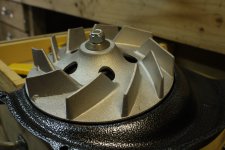
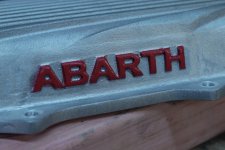
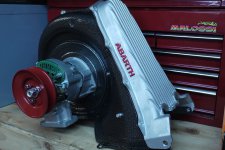
Just for fun I decided to assemble the fan cover. I used an alloy fan, as I’ve been told the welded steel originals can fly apart on tuned engines, no doubt causing mayhem in the engine bay! I wasn’t too impressed with the quality of the casting on the alloy fan, but as no-one sees it I guess it doesn’t matter much.

I think that’s it for now. I’ll take lots of pics of the engine build and try and post up here with any observations people may find useful. The engine is very much the same configuration as the one Chris built in his awesome rebuild thread, so not sure there is a lot more I can add, but again, the oil cooler installation may be of interest.

Cheers Roger
 

Attachments

  • Fiat panel 55.JPG
    Fiat panel 55.JPG
    962 KB · Views: 108
  • Fiat panel 54.JPG
    Fiat panel 54.JPG
    1.3 MB · Views: 101
  • Fiat panel 53.JPG
    Fiat panel 53.JPG
    1.1 MB · Views: 93
  • Fiat panel 52.JPG
    Fiat panel 52.JPG
    952.9 KB · Views: 95
  • Fiat panel  51.JPG
    Fiat panel 51.JPG
    1.1 MB · Views: 108
  • Fiat 126 steering in fiat 500 2.JPG
    Fiat 126 steering in fiat 500 2.JPG
    1.8 MB · Views: 88
  • Fiat 126 steering in fiat 500 6.JPG
    Fiat 126 steering in fiat 500 6.JPG
    1.7 MB · Views: 101
  • Fiat 126 steering in fiat 500 1.JPG
    Fiat 126 steering in fiat 500 1.JPG
    1.8 MB · Views: 96
  • Fiat panel 57.JPG
    Fiat panel 57.JPG
    867.5 KB · Views: 98
  • Fiat panel 56.JPG
    Fiat panel 56.JPG
    826.9 KB · Views: 101
  • Fiat 126 steering in fiat 500 3.JPG
    Fiat 126 steering in fiat 500 3.JPG
    1.8 MB · Views: 91
  • Fiat 126 steering in fiat 500 4.JPG
    Fiat 126 steering in fiat 500 4.JPG
    982.8 KB · Views: 96
  • Fiat 126 steering in fiat 500 5.JPG
    Fiat 126 steering in fiat 500 5.JPG
    980.1 KB · Views: 97
  • Fiat 126 engine case oil filter return line 1.JPG
    Fiat 126 engine case oil filter return line 1.JPG
    1 MB · Views: 101
  • Fiat 126 engine case oil filter return line 2.JPG
    Fiat 126 engine case oil filter return line 2.JPG
    1.1 MB · Views: 103
  • Fiat 126 gearbox rebuild 6.JPG
    Fiat 126 gearbox rebuild 6.JPG
    1.3 MB · Views: 91
  • Fiat 126 gearbox rebuild  5.JPG
    Fiat 126 gearbox rebuild 5.JPG
    1.2 MB · Views: 93
  • Fiat 126 gearbox rebuild 4.JPG
    Fiat 126 gearbox rebuild 4.JPG
    1.1 MB · Views: 90
  • Fiat 126 gearbox rebuild 3.JPG
    Fiat 126 gearbox rebuild 3.JPG
    977.1 KB · Views: 84
  • Fiat 126 gearbox rebuild 1.JPG
    Fiat 126 gearbox rebuild 1.JPG
    1.1 MB · Views: 82
  • Fiat 126 gearbox rebuild 7.JPG
    Fiat 126 gearbox rebuild 7.JPG
    1.6 MB · Views: 80
  • Fiat 126 gearbox rebuild 8.JPG
    Fiat 126 gearbox rebuild 8.JPG
    1.3 MB · Views: 75
  • Fiat 126 alloy fan.JPG
    Fiat 126 alloy fan.JPG
    1.7 MB · Views: 72
  • masking  4.JPG
    masking 4.JPG
    1.6 MB · Views: 87
  • masking  5.JPG
    masking 5.JPG
    1.6 MB · Views: 85
  • Fiat 126 fan assembly with abarth cover.JPG
    Fiat 126 fan assembly with abarth cover.JPG
    1.8 MB · Views: 99
Thanks Toto. I am after one of the large Abarth badges like the one on the "BBQ Fiat 500" picture you posted recently. These are larger than the normal type and are made of alloy and come in three pieces. You used to sell them on your ebay site before it seemed to close last year? If you can help please drop me a line.

Thanks Roger
 
Back
Top